It is no secret that modern technologies are developing rapidly, therefore, in order for us, their consumers, to keep pace with progress, we have to understand every little thing. Today the Internet has occupied an integral part of the life of society. To be able to set up a “connection with the world” at home, requires special knowledge.

Surely each of us, sooner or later, will face such a problem as wear and tear of a LAN cable for the Internet connection, breakage of an Ethernet connector or a shortage of network cable length. To quickly solve this problem, you will need half an hour of time, knowledge of the algorithm of actions and a minimum set of components.
If you are interested in how to crimp a cable for the Internet using a special tool – crimping or without it at all, special crimping schemes and the necessary details for this – you are welcome.
Contents
What is needed to crimp a twisted pair
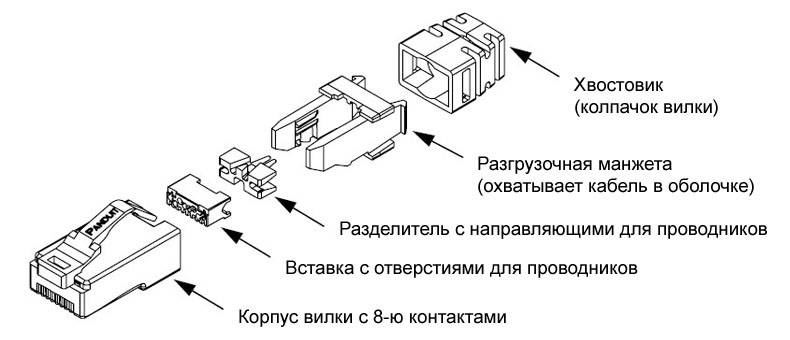
Crimping is the attachment of an eight-pin modular RJ-45 connector to a twisted pair (a network cable consisting of eight twisted pair wires). For this operation you will need:
- Internet cable.
- A couple of RJ-45 connectors. You will need one for work, however, their small price allows you to take one or more in reserve.
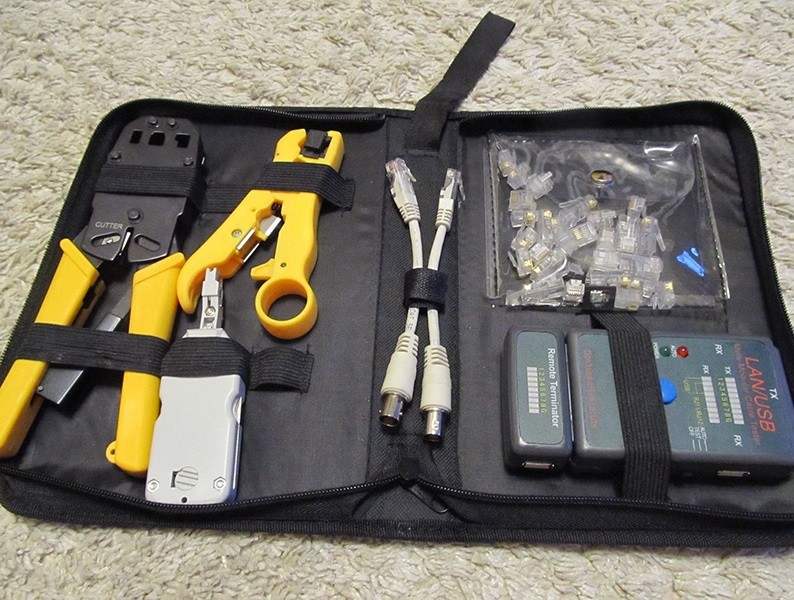
- Crimp. He is a crimper, he is also a press tongs – a special tool for significantly speeding up the crimping process.
- Insulating cap. Optional, but will help prevent subsequent bending of the wire and debris entering the RJ-45 connector.
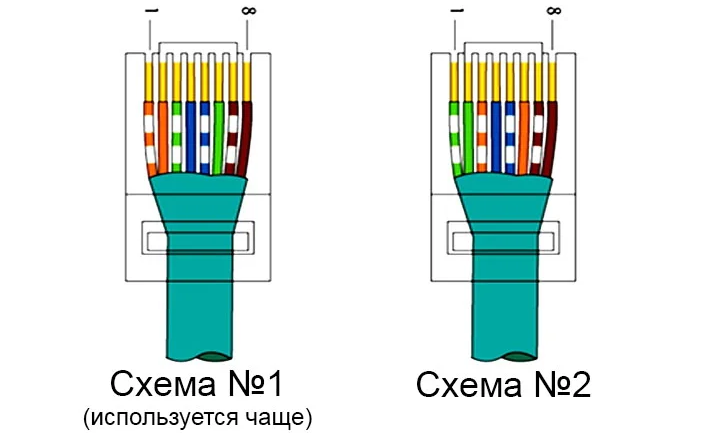
Network cable crimping schemes
Today there are two schemes for crimping a twisted pair – straight cable and crossover (crossover).
Typically the straight-through cable technique is used to connect:
- Computer and switch.
- Computer and router.
- TV and router.
- Router and switch.
Crossover cable crimping is less and less common today, since modern technology automatically detects the type of network wire and works flawlessly with both straight and crossover cables. The cross type is used to link the same type of mechanisms:
- Router and router.
- Switch and switch.
- PC and PC.
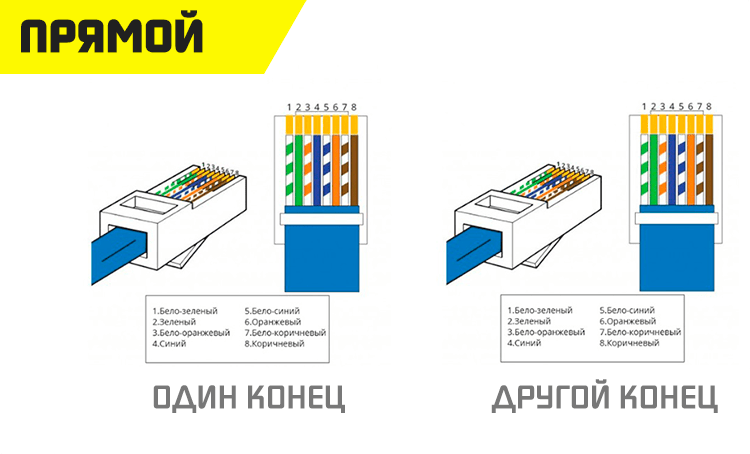
The direct construction of colored conductors at both ends of the cable looks like this:
| Left end of cable | Right end of cable |
| 1) White-orange | 1) White-orange |
| 2) Orange | 2) Orange |
| 3) White-green | 3) White-green |
| 4) Blue | 4) Blue |
| 5) White and blue | 5) White and blue |
| 6) Green | 6) Green |
| 7) White-brown (white-red) | 7) White-brown (white-red) |
| 8) Brown (red) | 8) Brown (red) |
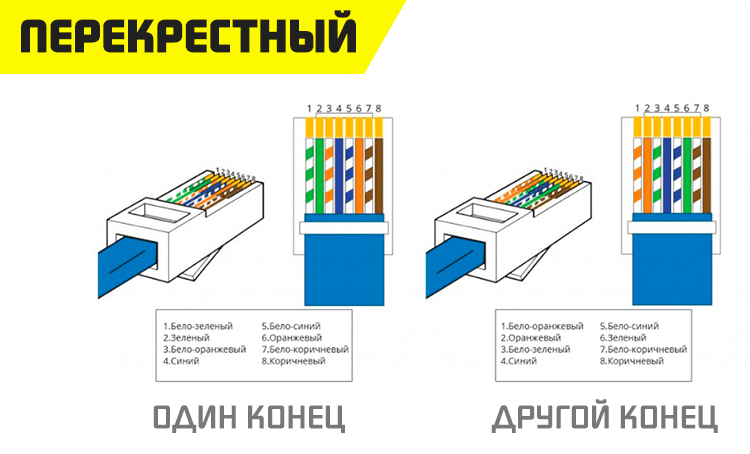
As for the crossover cable, here both ends of the twisted pair will be different, and the distribution diagram of the cores looks like this:
| Left end of cable | Right end of cable |
| 1) White-orange | 1) White-green |
| 2) Orange | 2) Green |
| 3) White-green | 3) White-orange |
| 4) Blue | 4) Blue |
| 5) White and blue | 5) White and blue |
| 6) Green | 6) Orange |
| 7) White-brown (white-red) | 7) White-brown (white-red) |
| 8) Brown (red) | 8) Brown (red) |
Crimping the connector using a crimp
Having decided on the scheme, we move on to the most important part of the whole procedure – crimping the RJ-45 connector using a special tool – crimping. The peculiarity of working with a crimper is that he significantly saves time and performs the critical part on his own.
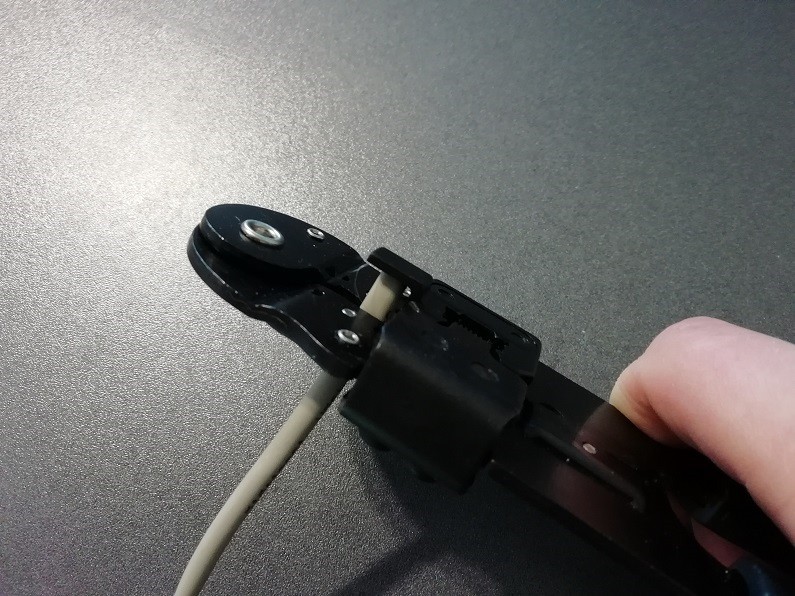
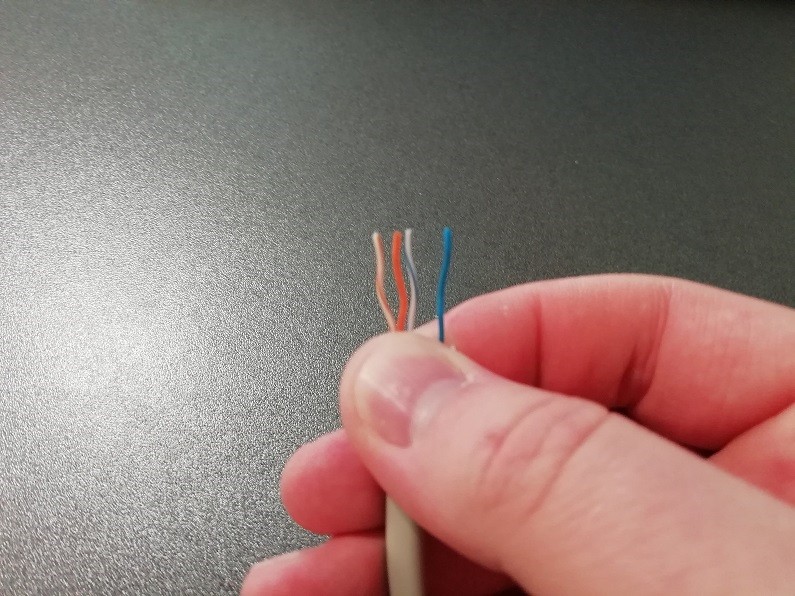
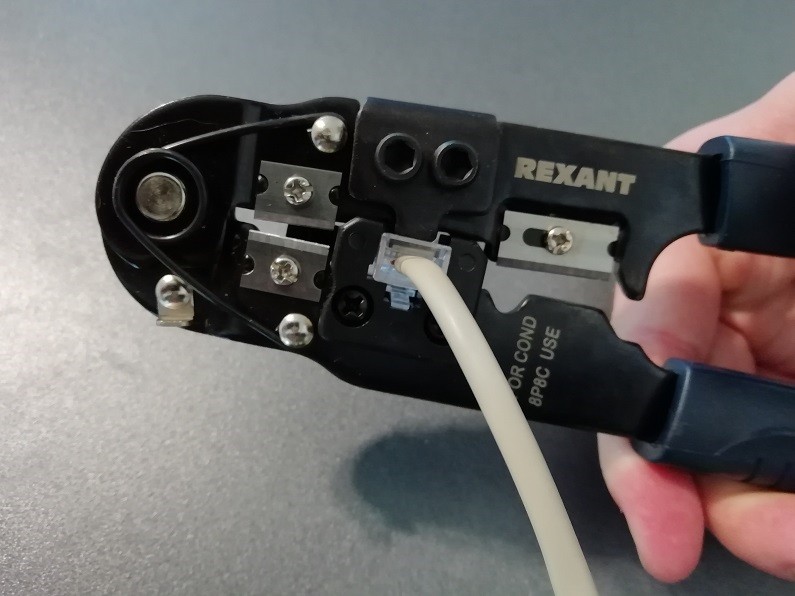
You should start work by cutting off the old connector (if there is one, it will become a model for the location of the veins). Next, you should strip the twisted pair from the insulation, stripping the colored wires so that their length matches the connector and they sit in it all the way. The outer sheath can be cleaned with a double crimping knife or a regular pocket knife. The colored veins will be twisted in pairs, so they should be disconnected, straightened and trimmed to the same length. Having arranged the wiring according to the selected scheme, we take the RJ-45 connector with the latch to the bottom. We insert the veins into it all the way so that a small part of the insulation of the Internet cable also goes into the connector. With the wires in their routing channels and the edge of the insulation under the RJ-45 clamp strip, it’s time to crimp. We place the connector with the conductors in the tool connector.There are only a couple of strokes left – we squeeze the crimper handles so that the clamp bar (contacts) of the RJ-45 plug cuts through the insulation of the cores.
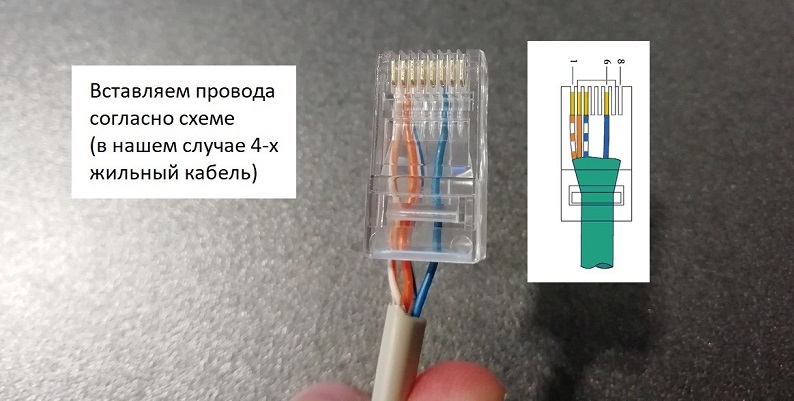
Make sure that nothing comes off or falls out. To complete the operation, we will put on an insulating cap. Everything is now ready to use!
Connector crimp without press jaws
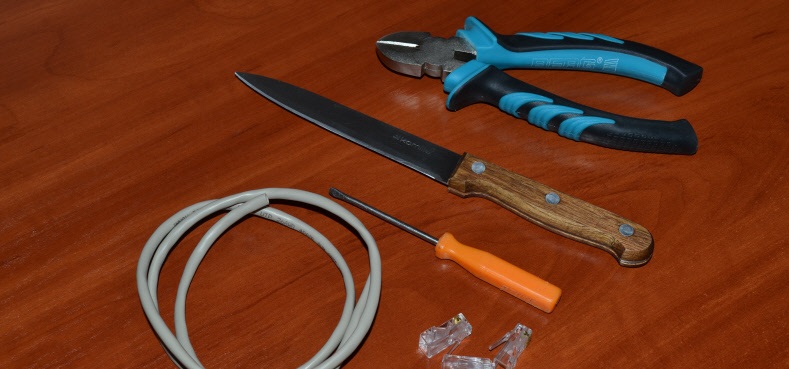
If you don’t have a tool to crimp an RJ-45 connector, don’t despair. A pair of straight arms and a simple screwdriver will do everything at the highest level. There is no need to hide the fact that work without press jaws will last much longer and there is a possibility that the first time we will not be able to crimp the wire correctly, but after trying, we will not lose anything.
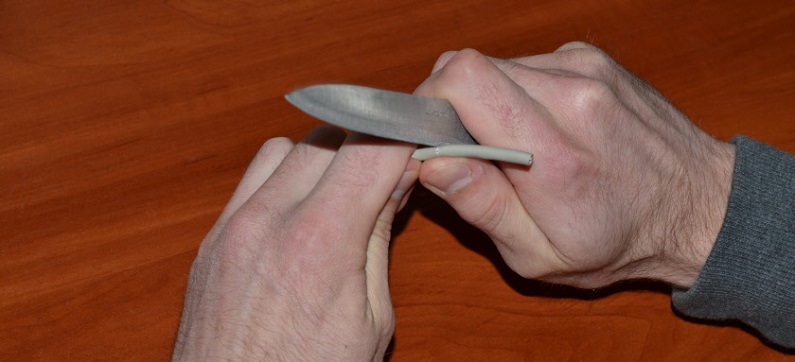
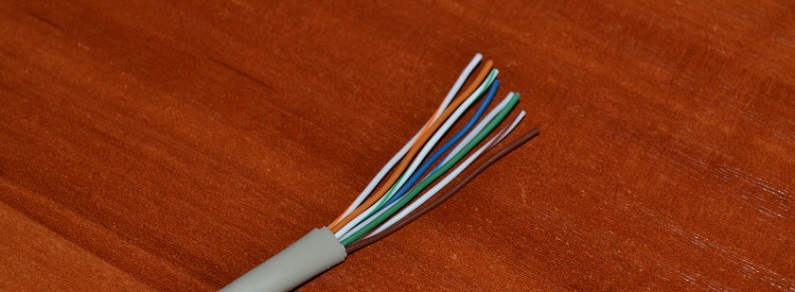
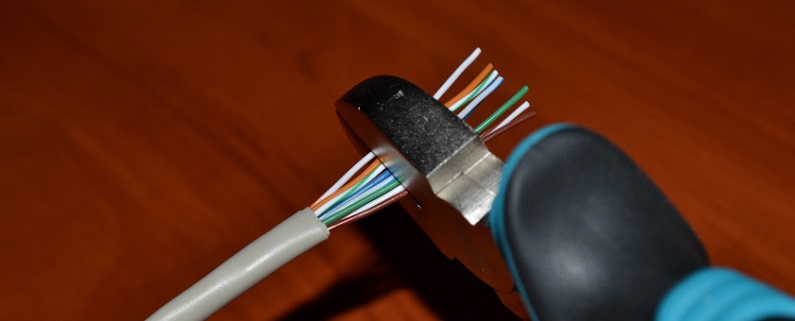
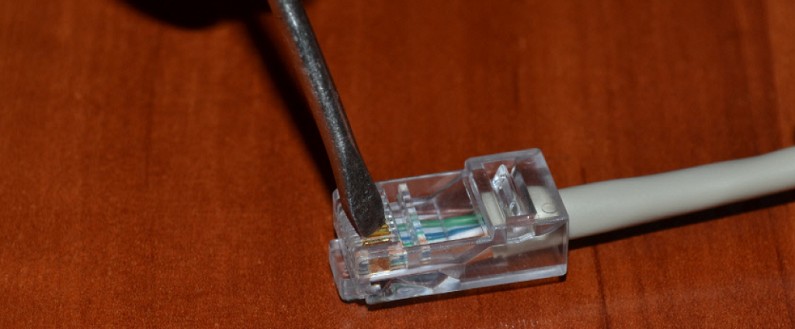
The algorithm of actions is similar to that described above: we strip the cable, check the length of the wires and the connector, align and cut the wires. Having distributed the colored wires according to the diagram, we place them inside the RJ-45 connector so that part of the twisted pair insulation falls into the connector. Here, perhaps, the most interesting begins. Make sure that the order of the wires is not disturbed and they sit tightly on the guide channels. Our next step is to press down on the connector clamping bar with a screwdriver. Half the battle is done! It remains to press the contacts of the RJ-45 connector into the insulation of the cores of the network wire. Calculating the force, one by one we push through the wires of the clamp strip and “drown” them in a braid of colored veins. If it turned out to combine the contacts of the connector and the cores of the Internet cable into a solid line, then the work was completed successfully. It’s as simple as thatwithout a specialized tool and at home, you can crimp a twisted pair with high quality.

Self-crimping connector
It is not the first year on the domestic market that there are connectors on sale that do not provide for the use of special tools for connection. Yes, you have to remove the upper braid with something and cut the wire.
A striking example of a professional self-crimping connector is Nicomax products. But their products cost several hundred rudders. Suitable for professional use, but not for home use.
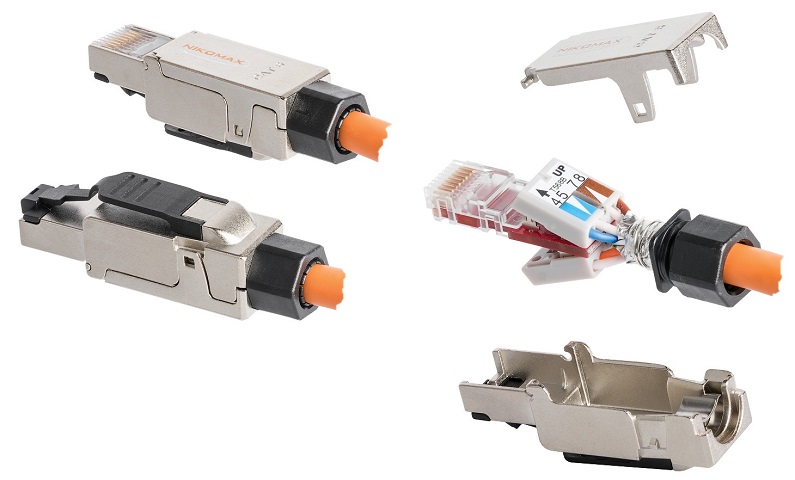
At home, you can use similar, but more budgetary solutions. For example, from the SUPR company. This is a Russian manufacturer offering its own self-crimping connectors. They are also called toolless.
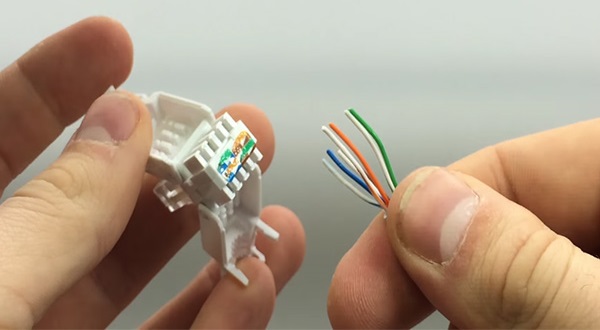
The body of such a connector consists of 2 parts. These are hinged halves. On the back side of the covers, special matrix-protrusions are made. They put wires on contacts.
In the center is the switching module. There are channels-grooves here when the wiring of the crimped cable is laid. Each side of such a module is designed for 4 wires. To make it easier for the master to work, there are even color clues here. That is, even a beginner will understand what color wiring in which channel needs to be laid. It’s really hard to make a mistake.
Also, each sash is equipped with integrated halves of protective caps. When the assembly is assembled, part of the cable is inside the connector. This provides reliable protection against possible fracture.
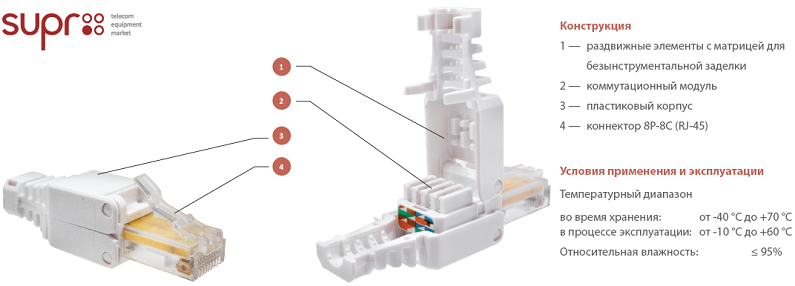
Based on the information provided, you can see that the opposite principle of crimping the Internet cable is used here. The contact feet are fixed inside the switching module. And the matrices on the lids squeeze the wiring of the legs to provide an insulation cut and reliable switching of elements.
To assemble the connector, you should adhere to the following instructions:
- strip the Internet cable of your provider from the existing braid;
- untwist twisted pairs, straighten all wiring;
- you do not need to compose a so-called package at the next stage;
- the connector covers open;
- wires do not need to be inserted, pushed through;
- they must be inserted from above into the corresponding colored grooves of the switching unit;
- since each socket has its own separate latch, after installation the wires will not jump out spontaneously;
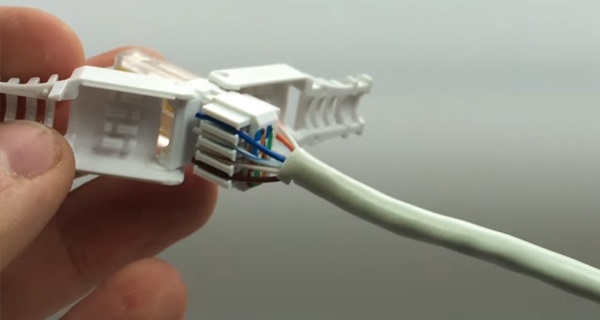
- after laying the wires, close the two halves of the case;
- press them together;
- while pressing the parts of the connector body, wait for a click;
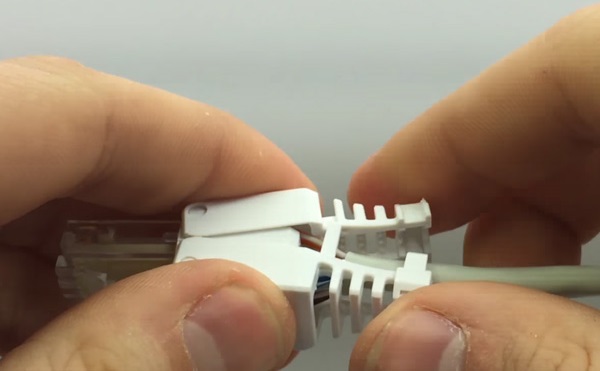
- this means that the clamp was successful, the cable is fixed;
- in this case, the matrices push the wiring to the fixed legs of the contacts.
That’s it, the connector is done, it can be checked and put into operation.
Crimp quality check
To make sure of the correctness of the work done, crimping the Internet cable in one way or another, it needs to be tested.
There are several ways to check.
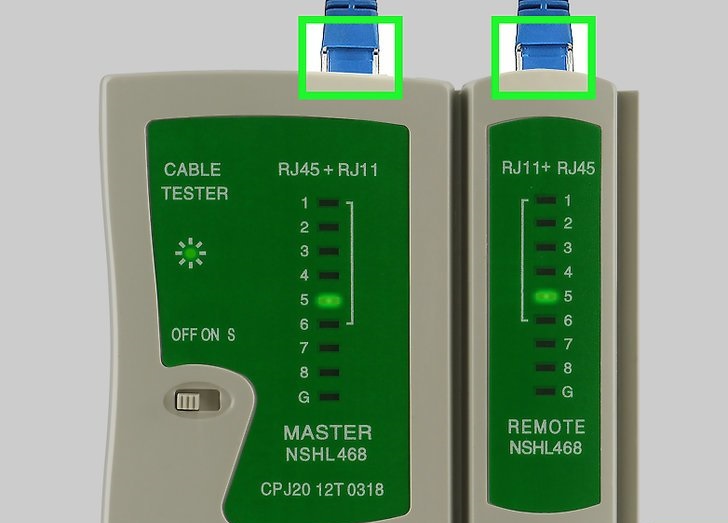
- LAN tester. Or just a cable tester. This is a professional equipment that is usually used by employees of the service center, serving customers. This tester differs in that it can interact with a large number of different connectors. Both ends of the Internet cable must be inserted into the correct connector. The indicator will then show if there is a connection between the nodes. There is nothing difficult in understanding the tester’s work. But buying it for personal use is not particularly profitable.
- Multimeter. If you are a motorist or an electrician, and you have a multimeter at your disposal, it will be an excellent assistant when checking a crimped connector. It is required to attach the multimeter probes to the ends of the cable corresponding to the color, and look at the readings of the device. In the ringing mode, communication is established between the lines. If it is, the device will show it in the form of a sound signal and the corresponding data on the display. In all pairs of the cable under test, the resistance values should be approximately the same. If the difference is large or the resistance is too high, look for an error in the work done. She is somewhere. And it will have to be corrected.
- Direct connection. The easiest way to test the crimped cable is by connecting it directly to your computer or router. If a red cross disappears from the network connection icon and a computer with a plug is displayed, then there is an Internet connection, everything should function.

As you can see, you can crimp the cable at home and restore the Internet. There is nothing complicated here.
It’s good when you have a special device at your disposal. But practice clearly shows that in many situations it is quite possible to do without it.
As you can see, crimping the power cord yourself is not difficult. I would also like to note that with the correct execution of the actions, the result of work with both press pliers and a screwdriver will be the same. Therefore, the choice of a tool for crimping a network Internet cable at home is up to you.