If you need to transfer information consisting of data of a similar format, for example, a list of phone numbers or addresses, you can use the import function that is provided in the programs of the Microsoft Office suite.

Contents
What methods exist
There are 3 main ways to convert a document:
- manual data import;
- use of special programs;
- conversion using online services.
The only difficulty the user will have to face in doing so is preserving the original formatting of the portable text. That is, no matter what method is used, you will always have to complete the conversion by making edits in an open Excel spreadsheet yourself to preserve paragraphs, indents, and spacing.
Importing data manually
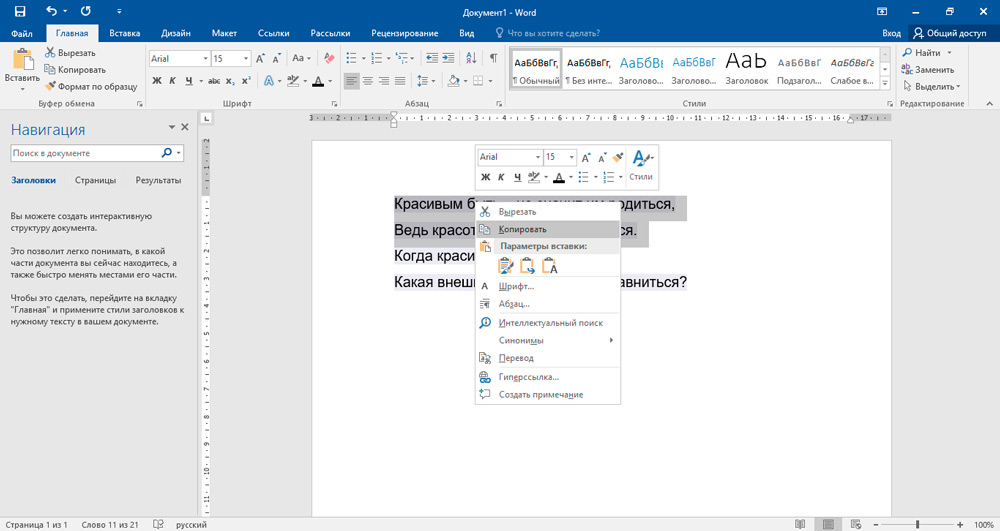
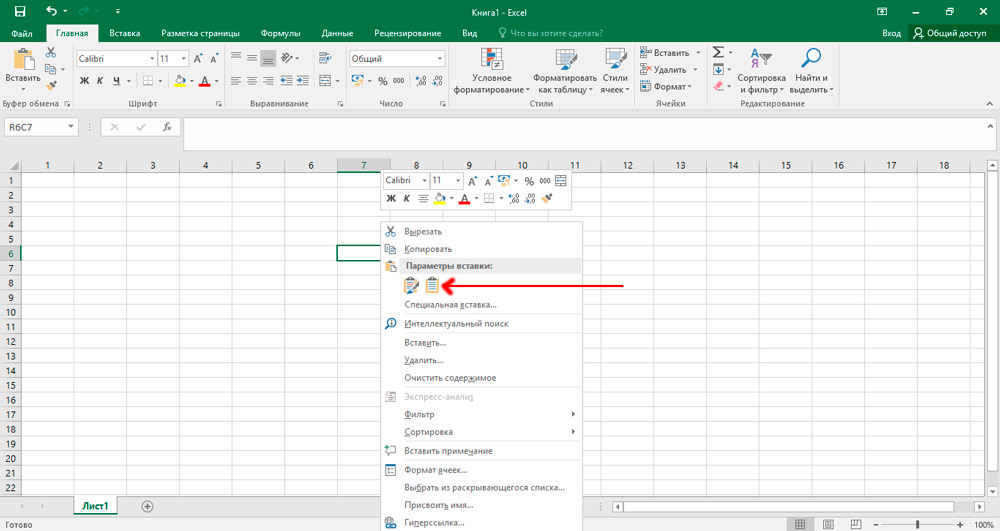
You will need to open a Word document, select a piece of text that needs to be transferred, right-click and select “Copy” (you can use the Ctrl + C combination). Next, go to the Excel document, right-click on the cell where you want to paste the text, and select “Paste Options”, then “Save Source Formatting”. In this case, most of the spacing and indentation will be preserved, as in Word. However, sometimes the formatting gets lost in this case too. Especially when using older versions of Microsoft Office (2010 or earlier).
If problems arise with this, it is recommended to enable the display of all formatting characters in the “Paragraph” tab by clicking on the corresponding icon. In a formatted list, you’ll find a paragraph mark at the end of each line or at the end of a line, and one on a blank line between items. These characters will be used by you to insert characters, which will then move to the appropriate cells. If the list uses a paragraph on a blank line between items, you must delete it, otherwise the import might fail. To do this, simultaneously hold down the Ctrl + H keys. In the window that appears, in the “Find” field, put a special character, for example, “~”. You can find the replacement paragraph symbol in the “more >>” menu by selecting the “special” item, and in it – “Paragraph mark”. If you see that there is a paragraph in the text both at the end and between the elements,select “Paragraph Mark” twice. After you have done all the steps, click on the “Replace All” button. The elements of the processed list will be combined with each other.
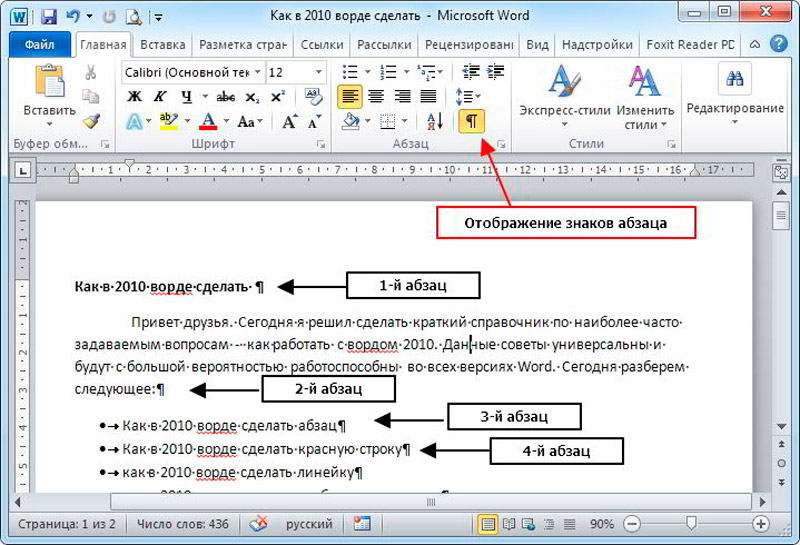
After setting up the display of inventory items in sequential lines, you need to designate specific data that will be displayed in the Excel fields. If your list on the first line contains, for example, the name or actual address, then you need to replace the remaining paragraph marks (^ p) with a comma (,). After that, they will be replaced with commas, thereby formatting specific lines into separate fields.
As you noticed, now your list looks like a continuous line, consisting of characters and letters and separated into fragments by commas. It is necessary to return this data to the view of the list. Again, open the “Find and Replace” tab, enter the previously selected character (we have it “~”) and select the paragraph mark in the “Replace with” field. Click on the “Replace All” button.
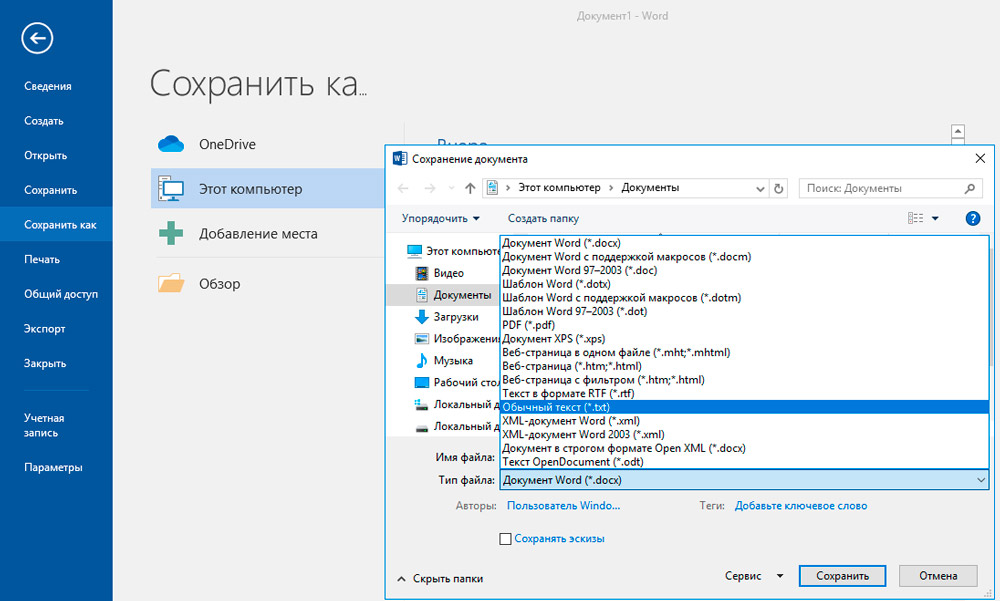
Formatting is complete and you need to save the document as a text file. It is in this format that Excel will examine and correctly place the data between the fields. In the upper left corner, open the “File” tab and select “Save As”. Select Plain Text from the File Type drop-down menu. Name your document and save it to any disk. In some cases, you may get a “Convert File” window. There is nothing to change, finish the action by clicking “OK”.
Go to Excel and in the “File” tab select “Open”. In the drop-down menu, as a rule, the option “All Excel files” is selected. You need to change this setting and select “Text Files”. Then mark your document.
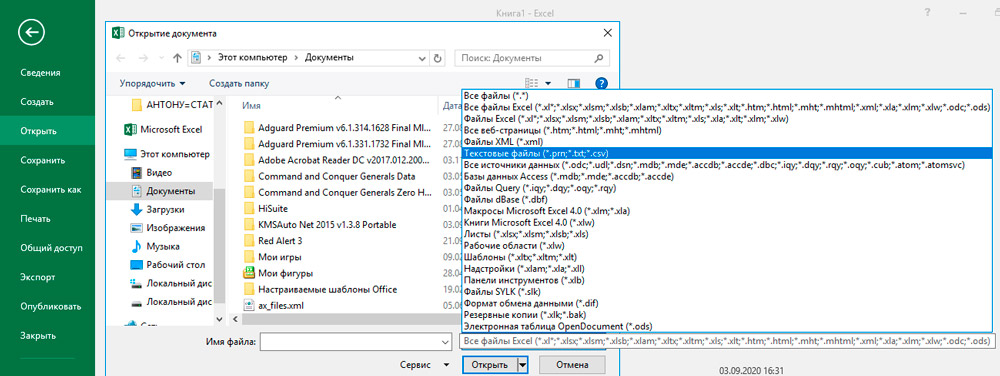
In the “Text Wizard” window that appears, go to the next page by clicking “Next”, find the “Separators field” and specify a comma there. Again press the “Next” button and then “OK”. If you did everything correctly, separate categories of your data will be in different fields. Further, if you wish, you can customize borders, fonts and fills in the table.
Application of converting applications
The most popular of these programs is Abex Excel to Word Converter. For most tasks, its free version will be enough, without registering a profile. The step-by-step transformation of the document is as follows:
- Run the program, select “Add Files”. Yes, here you can convert a whole list of files at once.
- In the “Explorer” window that opens, select the Word files that you want to convert. Then select “Open”.
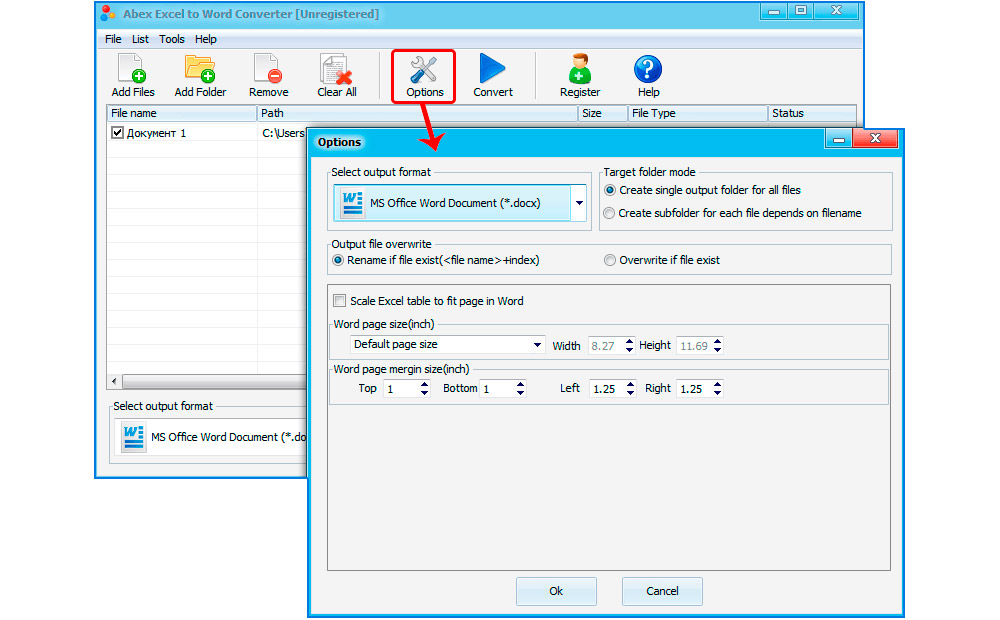
- At the bottom of the program interface, using the drop-down menu, select the type of Excel document to which you want to convert the files. .XLSX is recommended. If you want the final Excel document to open in older versions of Microsoft Office (prior to 2010), you might want to choose .XLS, but formatting issues may occur in this case (if the original Word document was created in newer versions of Office).
- Click Convert. If necessary, you can also specify the location where the converted files will be saved. This is done via the “Output Setting” button.
It is recommended that after the conversion is completed, manually open each created Excel document and check whether the data transfer has been performed correctly. Correct formatting if necessary.
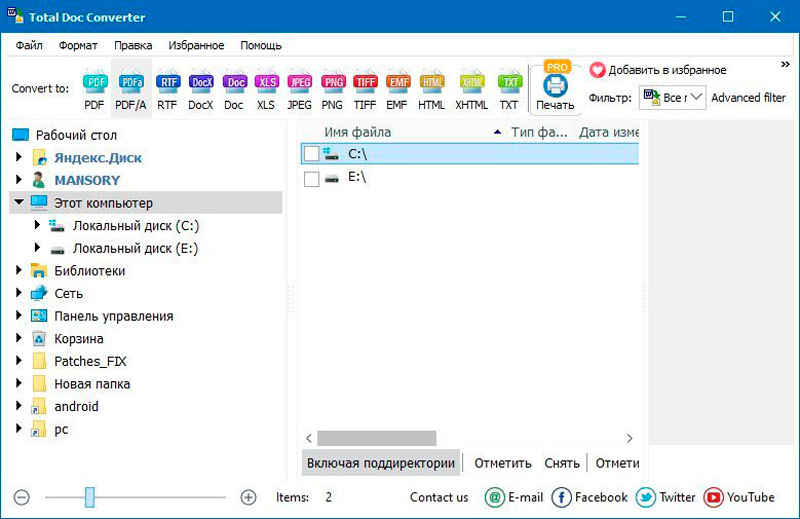
Conversion can also be done using programs such as:
- Total Doc Converter;
- Free File Converter.
Conversion using online services
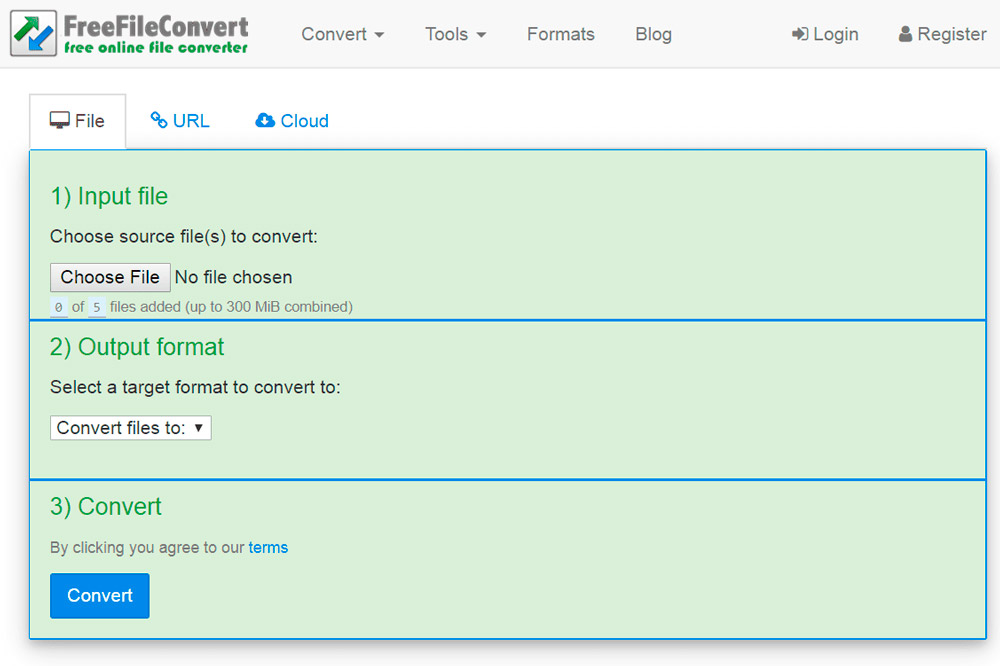
An option for those who do not want to install any programs on their PC or laptop. There are tons of online converters that perform the same task as Abex Excel to Word Converter. And in most cases, data transfer with their help is performed even more correctly, so they should be given preference. Among those, the following can be distinguished (they are most often recommended for use by the users themselves):
- Convertio;

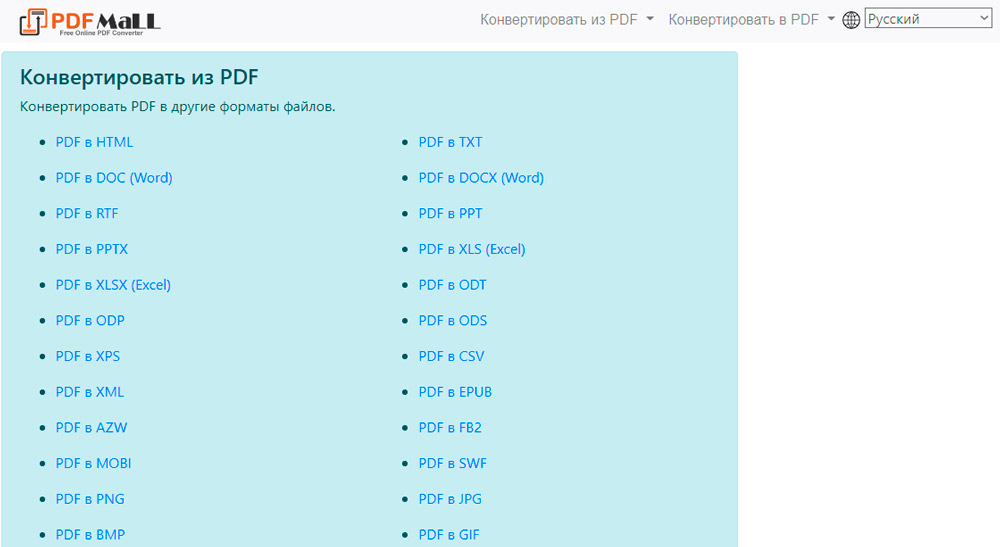
- Pdfmall;
- Anyconv.

The principle of work with each of these services is quite similar. Using Convertio as an example, document conversion is performed as follows:
- go to the official website of the service;
- select “From computer”;
- in the “Explorer” window that opens, select the file to be converted;
- select the file format after conversion (.XLS or .XLSX);
- click “Convert”;
- in the window that opens, specify the location where the file will be saved (if automatic downloading of files in the browser is enabled, the document will appear in “My Documents”).
After that, it remains only to manually check the formatting, if necessary, make changes.
In total, the most convenient option is to use online services. But manual data transfer, although it takes an order of magnitude more time, however, allows you to get the highest quality option while maintaining all formatting settings. In the comments, tell us what conversion methods you are using and what difficulties you had to face, how you solved them.