In this article, we will analyze in detail how to configure the D-Link DIR 300 router for Rostelecom subscribers.

Contents
Preparatory procedures
Before you start setting your own parameters, it is advisable to reset the existing ones. Hold down the reboot button for about 15 seconds to reboot the router.
We also recommend running a LAN connection test on your PC or laptop. We recommend doing this as follows:
- Right click on the Windows icon in the lower left corner and select “Control Panel”.
- In the new window, click on the line “Network and Internet”. At the same time, if you did not find this item, make sure that the correct “View: Category” mode is selected.
- Then go to the “Network and Sharing Center” and on the left side of the window, click on the “Change adapter settings” tab.
- Find the “Ethernet” connection, right-click on it and select the “Properties” option.
- In the list of network components, select “Internet Protocol Version 4 TCP / IPv4” and open its “Properties”.
- The current parameters should be set to automatically obtain the IP address and DNS server: if yours is different, make the appropriate edits and save.
Connecting DIR-300 to PC
There are five ports on the back of the router. The provider’s cable (in our case, Rostelecom) must be inserted into the “Internet (WAN)” port, and a wire must be connected to one of the LAN ports (we recommend using LAN1), which will connect with its other end to the network card of the PC from which the configuration will be carried out. The last step is to plug the DIR-300 into a power outlet.
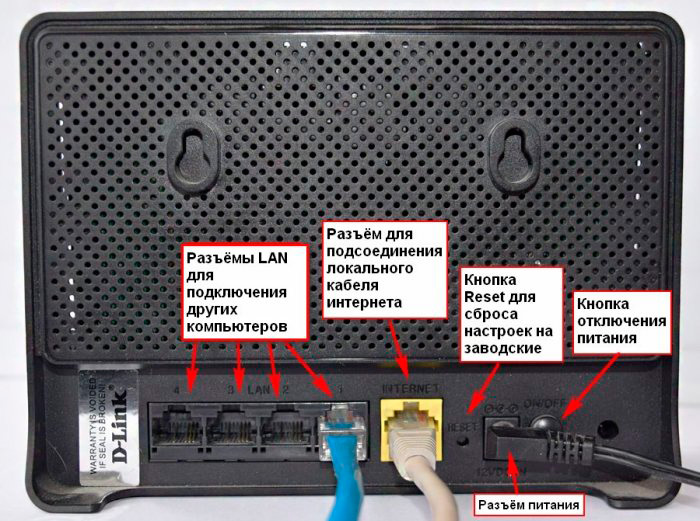
Another important point: you need to break the Rostelecom connection on the computer and not activate it again either during the router setup process or upon its completion. That is, if you have any icon from a company that provides the Internet, just forget about it. Otherwise, there may be problems with Wi-Fi and its correct display on other devices, for example, a laptop.
Configuring a Rostelecom connection for a DIR-300 router
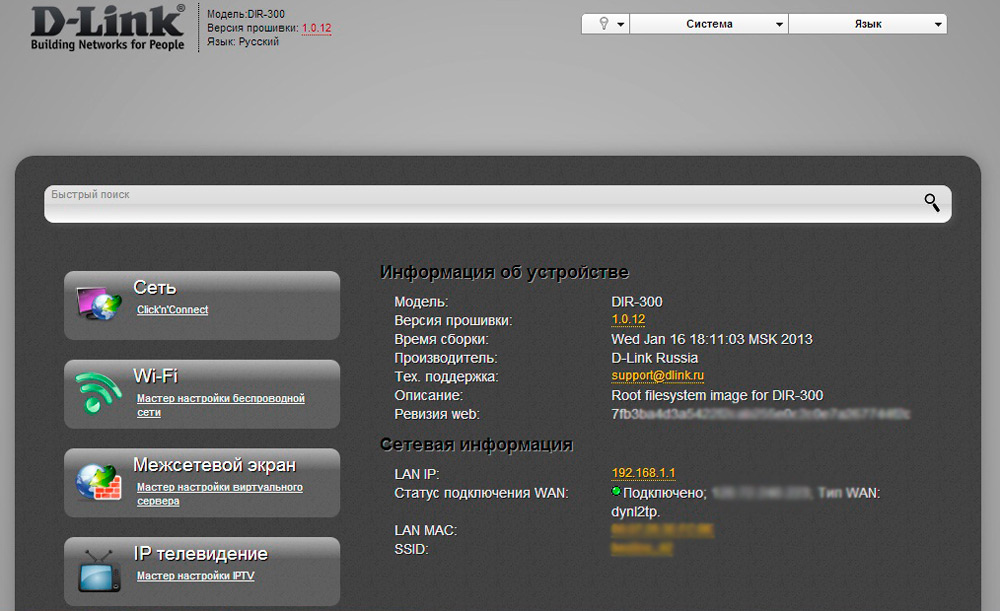
Before proceeding directly to configuring the router, it is extremely important to know the current firmware version. To access the router, enter 192.168.0.1 in your browser in the field for the site address. Next, enter admin in the login and password fields. You will also be prompted to set your password instead of the existing one.
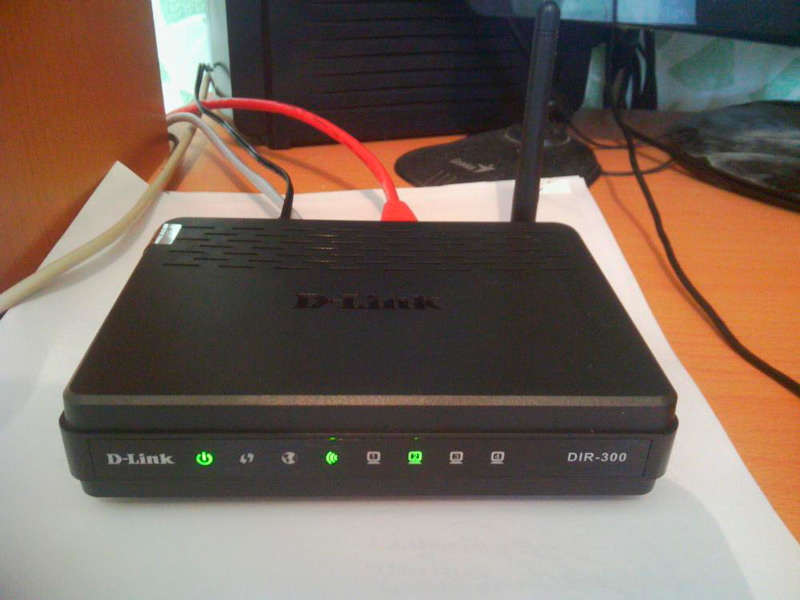
After all these actions, the main page will open to you, it may have a different look, it depends on the version installed. The language is changed to Russian (if it is not the default)
At the moment, you may have one of three current versions:
- 5.x – the newest with an updated web interface.
- 4.x – it is she who is most often found among users.
- 3.x is the earliest version.
Having decided on the version, you can immediately go to the desired instruction. In some cases, in particular with the DIR-300 A / C1 model, it may be necessary to update the firmware. In most models, it is optional, but it will definitely not be superfluous. Further in this article, you will find detailed instructions on how to do this and not make a mistake anywhere.
Firmware B5, B6, B7 1.4.0-1.4.9 and A / C1 1.0.x
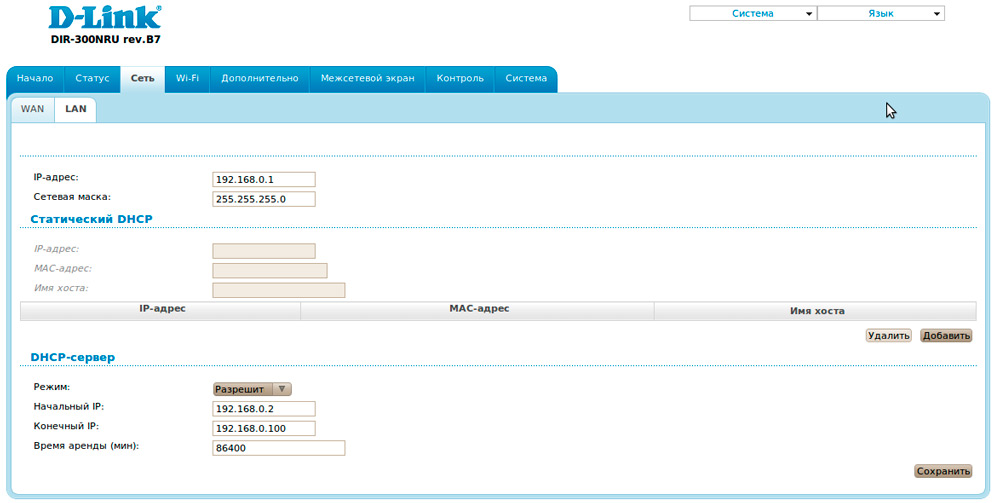
At the very bottom of the main page, click on “Advanced Settings”, go to the “Network” tab and select “WAN”. In the list of connections it is necessary to remove the item “Dynamic IP”. Now you need to create a new connection, for this click “Add”.
It remains to enter the appropriate PPPoE parameters for Rostelecom. All required values are shown in the screenshot below:
Do not forget to save your settings to complete the procedure successfully. At the very bottom of the page there is a blinking light bulb notification, click on it and select “Save”.
Refresh the page in the browser, if you did everything correctly, then the connection you made should receive the “Connected” status, provided that the Internet connection from Rostelecom was previously disconnected.
To connect Wi-Fi, go to the “Wireless Network Settings Wizard” and write down the name of your network (SSID), specify the country (preferably USA), authentication (set WPA2-PSK) and password (encryption key).
It remains to be saved and that’s it. Ready.
Firmware B5, B6, B7 1.3.0-1.3.4
On the first main page, click on the “Configure manually” block, and then select “WAN” in the “Network” tab. The table shown will be the only option that you need to click to bring up the properties menu. Delete the existing WAN connection by clicking on the “Delete” button.
As a result of the manipulations done, the connections field turned out to be empty. Now you need to click “Add” and configure the appropriate parameters: PPPoE connection, Rostelecom login and password, and also check the box next to “Keep Alive” if it was unchecked by default.
Save the settings changes by clicking on the notification that appears at the top of the list. If you did not make any mistakes in the process, then the newly created connection will change its status to “Connected”.
Setting the parameters of the wireless network is carried out through “Manual settings” → “Wi-Fi”. Among the main points:
- SSID is the name of the network.
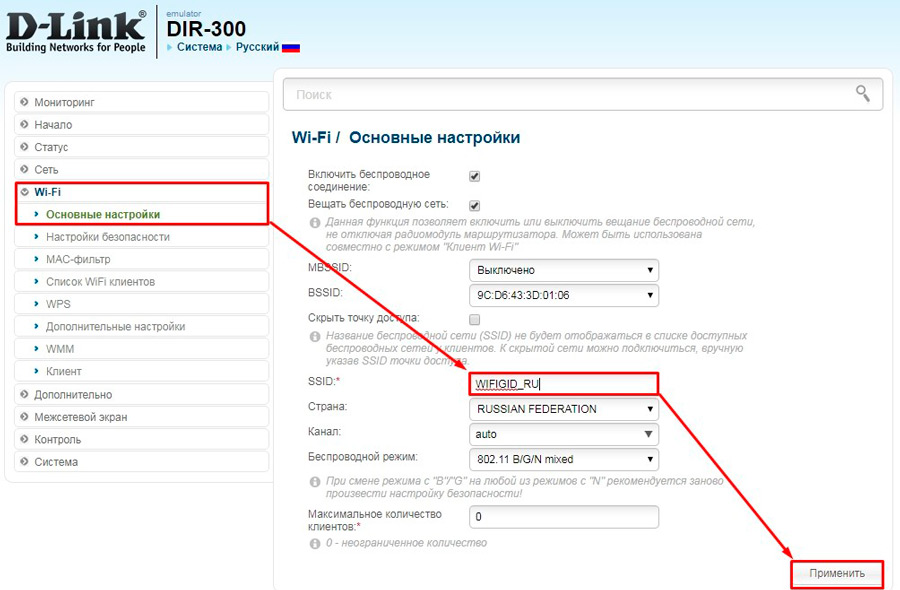
- Country – we advise you to choose “USA”, not “Russia”.
Then go to “Security Settings” and specify the network authentication format “WPA2-PSK”. In the “Encryption key” box, enter the password for the wireless connection. Finally, be sure to click “Change”, and then save these settings when the appropriate notification appears.
At this point, the router is ready to work, you can try to connect to it from any available devices via Wi-fi.
Firmware 2.5.11-2.5.19
In order to establish high-speed Internet access, after logging into your account, on the left side of the screen, select “Network” → “WAN”. Next, select the only item “Dynamic IP” and delete it.
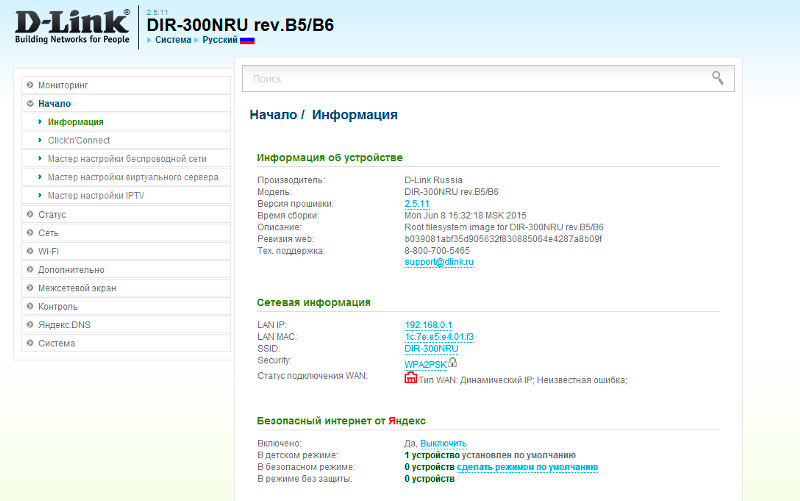
After that add a new connection and fill in the following parameters:
- Connection type – PPPoE.
- Interface – Internet.
- Any name.
- Username and password from Rostelecom.
You don’t need to change anything else, click on “Apply” and then click on the “Save” button in the pop-up notification about the change in the current device configurations. This is a mandatory moment, otherwise all entered data will be lost upon reboot.
Wi-Fi is configured in the “Basic Settings” and “Security Settings” tabs. The network name (we recommend not to use the Cyrillic alphabet) is entered in the “SSID” field. Then select the WPA2-PSK authentication method and set the network password (eight characters or more). Apply and save your changes.
How to set up television from Rostelecom
The algorithm of this operation for different firmware has practically no differences. Owners of versions 1.3.x go to the “Configure IPTV” tab, the rest – through the “IPTV settings wizard”.
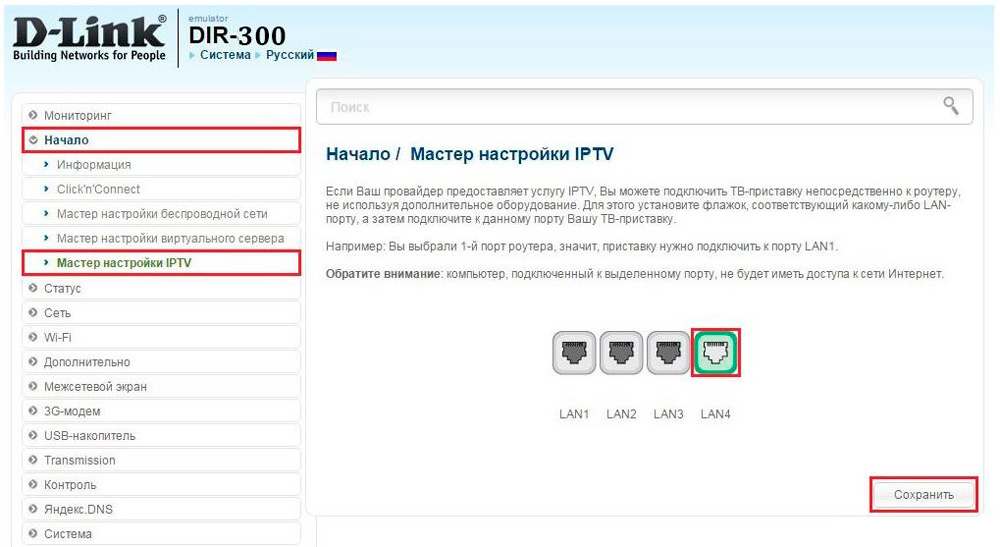
In the next step, you need to select a free port through which the set-top box will be connected. Then save your selection. The setup is complete, you can safely proceed to watching your favorite channels.
Firmware upgrade
We recommend timely installing fresh software from the manufacturer of the DIR 300 router. This will help to avoid possible errors in operation or any obvious shortcomings. The firmware process is extremely simple and will not cause difficulties even for those who have never encountered it.
- Go to the official site “ftp.dlink.ru”.
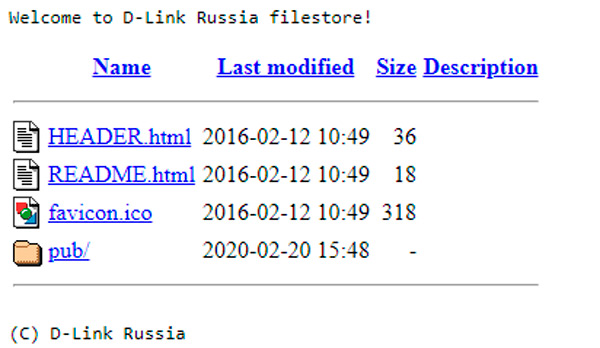
- In the presented list of folders, depending on your router, go to the “pub” → “router” → “DIR-300_NRU (DIR-300A_C1 for A / C1)” → “Firmware” folder.
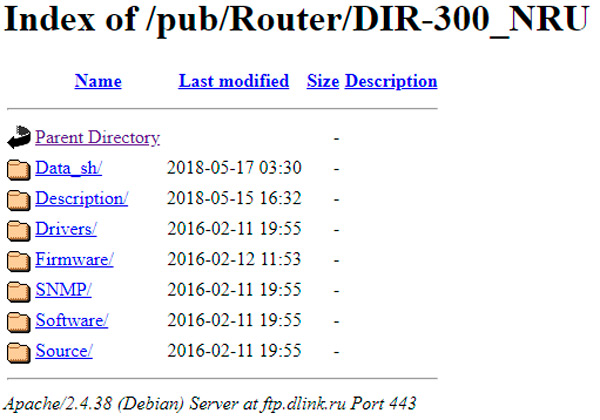
- This category contains the only file with the “.bin” resolution, which you must download.
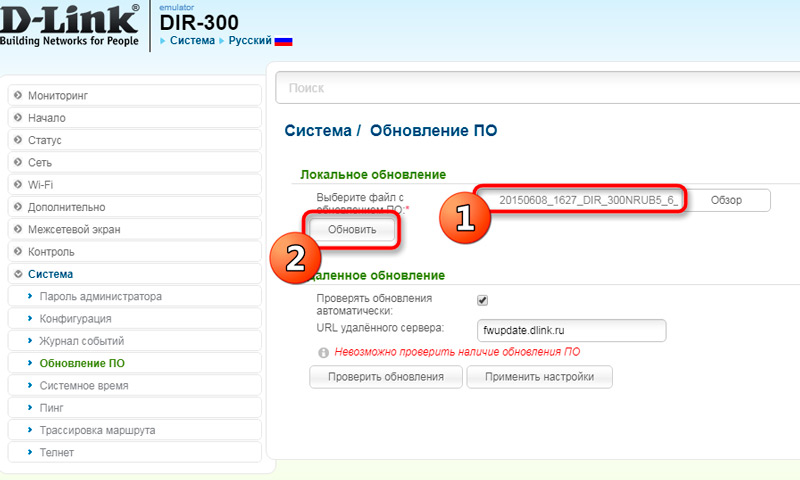
- Open your browser and go to the home page of your router. Find the System tab. In version 1.3.x it is located in the “Configure manually” section, and for firmware 1.4.x you need to open “Advanced settings”.
- Click on the line “Software update”.
- The next step is by clicking on “Browse”, select the file that you recently downloaded.
- Click “Refresh” and wait for the process to finish.
In such a simple way, you can configure the D-Link DIR 300 router. Write in the comments how much the article helped you, as well as your opinion about this router model.