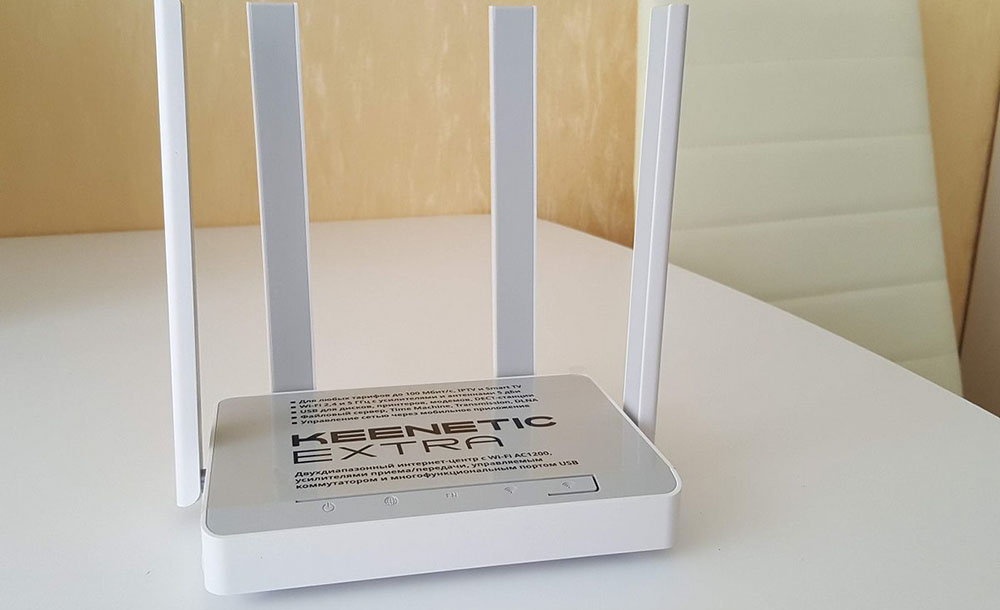
A home router, or router, is the de facto modern standard for private wired Internet users. Gone are the days when the only consumer of such an Internet was a personal computer, today in every family there are several smartphones, smart TVs, media players, laptops and other equipment that requires access to the World Wide Web for normal operation. You can’t do without a router here, and in order for the connection to be stable and reliable, you need to be able to configure it. Today we will deal with this, and the object of our delights will be the ZyXEL Keenetic Extra router.
Contents
Description, main characteristics
Keenetic Extra could be called a “gray mouse” that does not stand out from their own kind: small size, only two antennas – a router as a router. But he has a zest, thanks to which he can rightfully be considered much more versatile than other relatives. We are talking about the possibility of connecting a GSM modem using a single USB port. In this case, the unstable Internet from the provider (and a temporary lack of communication happens with very well-known and reliable service providers) can be compensated for by a mobile Internet connection. And where a cable connection is generally impossible (for example, in a country house), such a router will be the only way to distribute Wi-Fi to all household members, or rather, to those mobile gadgets that do not have the ability to independently use a mobile connection.
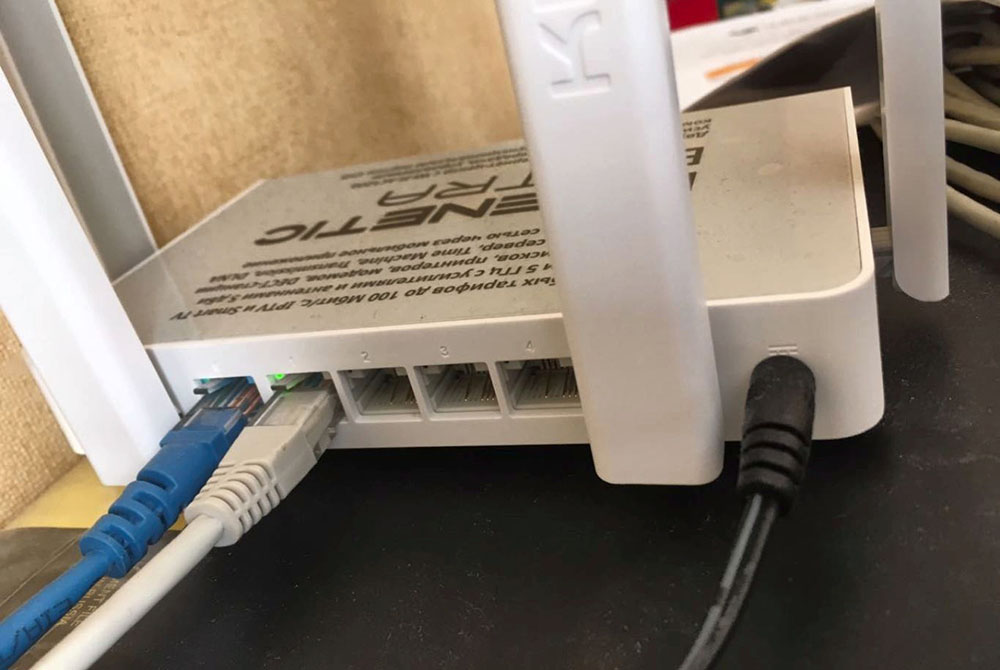
On this optimistic note, the review of Keenetic Extra KN capabilities can be completed, but I would like to finally give its technical characteristics.
In addition to wired connection (4 LAN ports and one WAN), the gigabit router supports wireless Internet access using 3G / 4G / LTE standards using a compatible USB modem.
The supported Wi-Fi standard is 802.11 b / g / n, the operating frequency range is 2.4 / 5 GHz with a speed of up to 300 Mb / s at any frequency and the possibility of simultaneous operation on both bands.
The Keenetic Extra transmitter has a power of 20 dBM with an antenna gain of 3 dBi. A single USB 2.0 port can be used as a file or print server, or to connect an external USB modem.
Dimensions: 160x110x35 mm, weight 250 g. In addition to the router, the delivery set includes a patch cord, a power cable and documentation.
Firmware upgrade
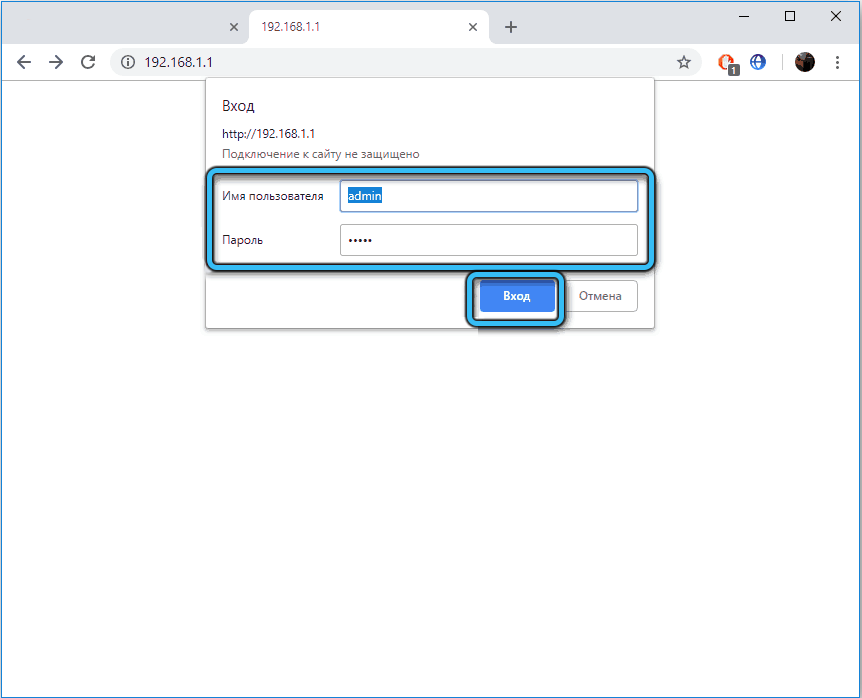
Although you can use the router’s command console to update the Keenetic Extra firmware, for the vast majority of users it is much easier to perform this operation through the web interface, in which you do not need to enter anything by hand, except for entering the program itself. To do this, in the address bar of any browser, including those launched on a mobile device, you need to dial 192.168.1.1 – this is the standard IP address of the device within the internal network of this router. You can also use an alternative option – to type my.keenetic.net, but the digital version is much easier to remember, it or the 192.168.0.1 address is used in almost all routers.

To enter the admin panel, you will need to enter a username and password, which are set by default for Keenetic Extra as admin and 1234, respectively. Note that during the initial setup, the program will ask you to change your password, so it may be different. Without knowing this password, you cannot get into the web interface.
The easiest way is to update the operating system of the Keenetic OS router using the built-in tool available in the firmware itself.
Keenetic automatic flashing
So, go to the web interface and go to the “General settings” section – either directly through the “Management” tab, or through the “About system” section, where in the “OS version” subsection there will be an “Update available” button.
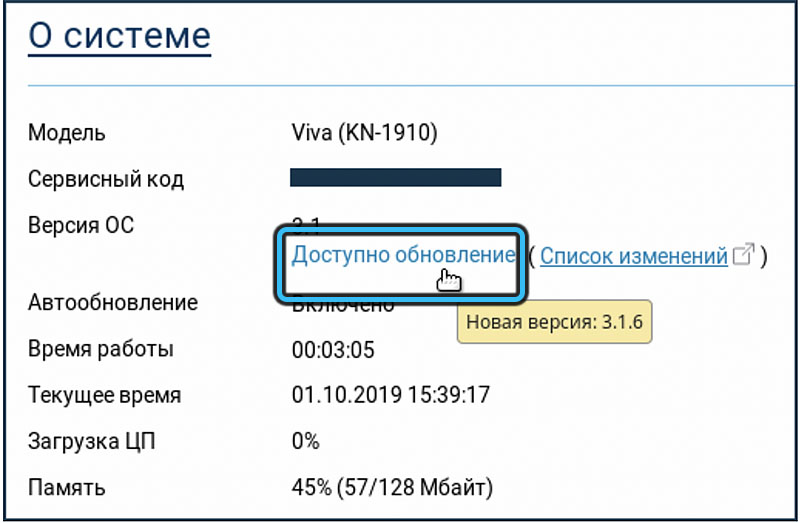
It is recommended to use the second option, because here you can find out whether the router needs a flashing or the installed firmware has the latest available version – in this case, the button will be inactive.
So, our version is not the latest, we found it out and ended up on the general settings page. Our next steps:
- in the “Updates and components” block, make sure that the “Automatic OS update” switch is enabled. This is its default value, but if it is disabled, activate the option;

- press the button “Install update”, confirm our intentions in the next window;


- the flashing procedure will begin, during which the device will download the latest firmware version from the official website and automatically start writing it to the EPROM;

- after 5 minutes, the procedure will end, and the router will go into reboot.

Flashing Keenetic Extra in manual mode
In some cases it may be necessary to replace the firmware manually – for example, if the internet connection is very unstable or if you need to roll back to an earlier version.
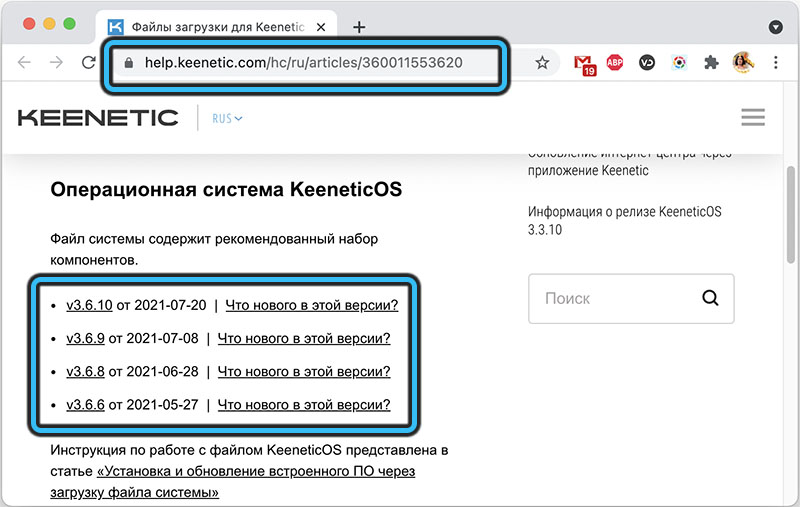
In this case, the first step is to download the required firmware version from the official website. After downloading the file, you need to unzip it, since it is supplied in a packed form (zip archive).
We proceed directly to the flashing:
- go to the web interface;
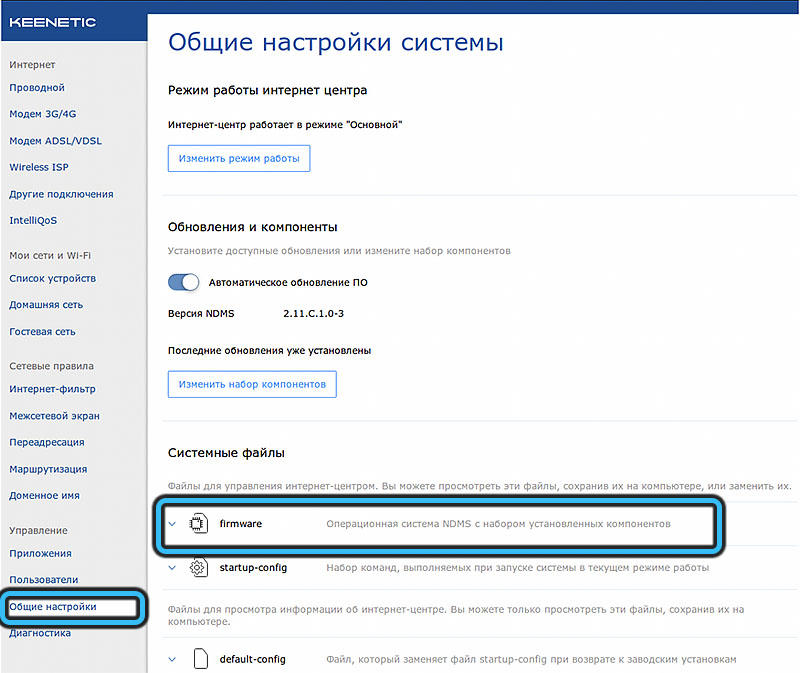
- select the “Management” tab;
- click on the “General settings” menu item;
- look for the “System files” block and the firmware subsection, click on it once;
- press the button “Replace file”;
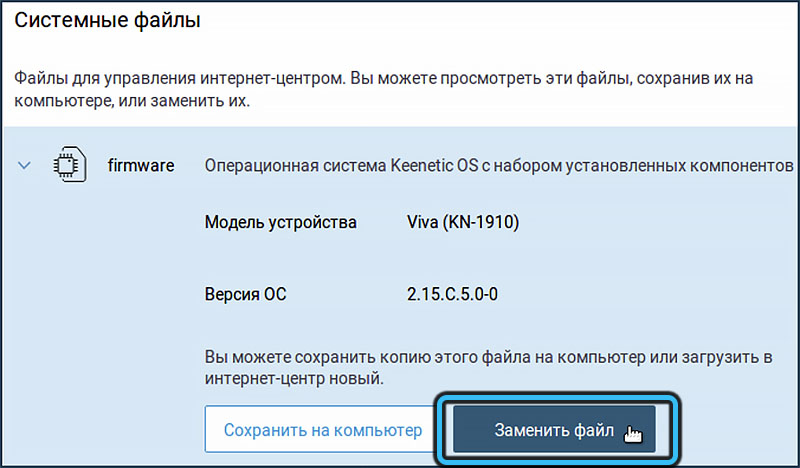
- select the unpacked firmware file, click OK;
- we are waiting for the end of the procedure.

After rebooting, the Keenetic Extra KN-1710 router will run on the firmware version you need.
Quick setup
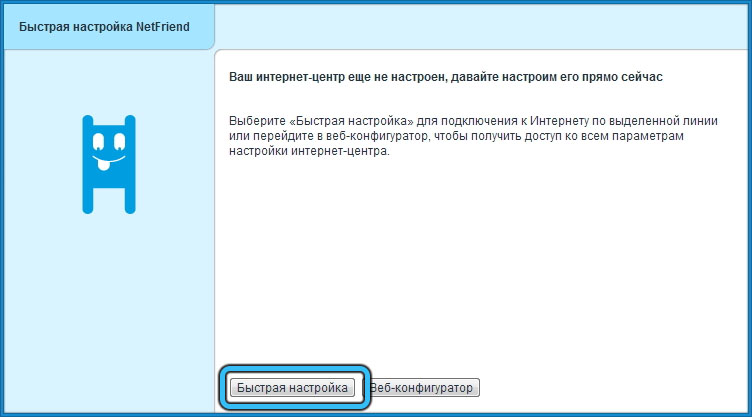
When you turn on the router for the first time, by going to the web interface (through the login window to the admin panel, with the default username and password), you will be taken to a page where two buttons will be available: “Web configurator” and “Quick setup”. We choose the second one, which will allow you to quickly and easily bring the device into working condition.
Further actions:
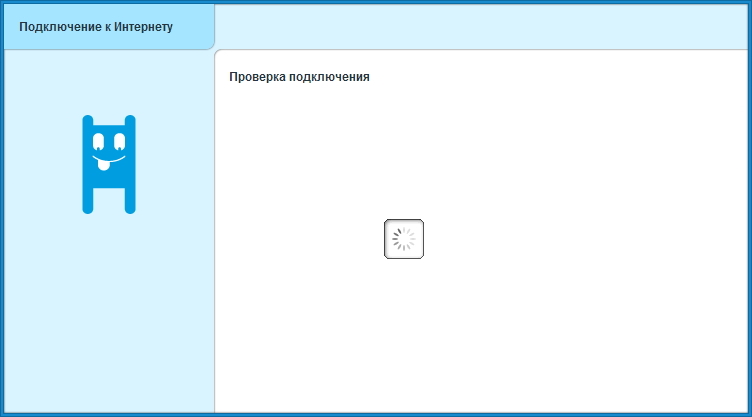
- the router will try to determine the method of connecting to the Internet, after a few seconds of delay, the page will display exactly how you did it, by cable or using a modem. We press the button “Next”;
- select a country from the highlighted list. If the required value is not in it, use the search console above the block;
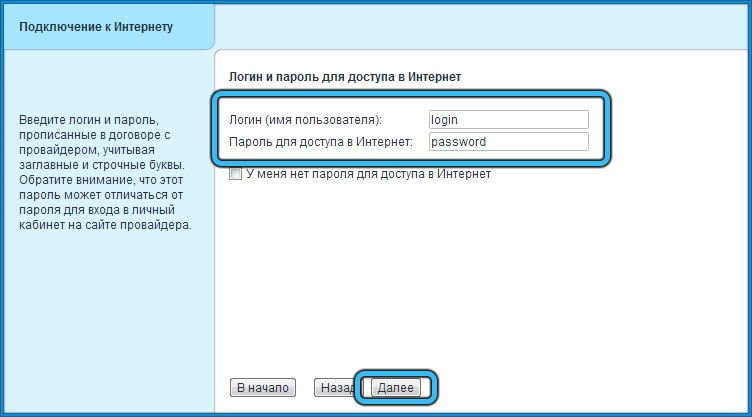
- now you need to enter the authorization data provided by your Internet provider (this is not a login / password to enter the web interface!);
- in the next window you will be prompted to use the Yandex DNS Internet filter to ensure a safer surfing. Since antivirus software is rarely installed on smartphones, we advise you to check the corresponding box;
- press the “Next” button and complete the KeeneticExtra KN setup by pressing the “Go to the Internet” button.
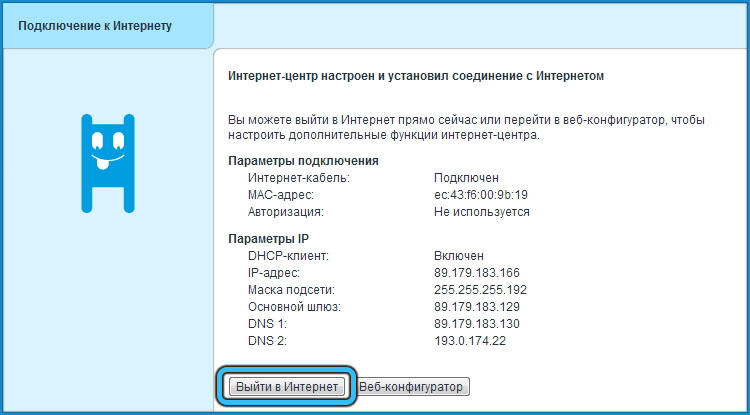
If everything is done correctly, it remains to configure the wireless connection, which we will discuss below.
Manual setting
Sometimes, during the operation of routing, it becomes necessary to manually configure the connection using the web interface. In this case, the procedure will be more complicated, and the steps taken will be different for different types of connection.
PPPoE / VPN setup
For a wired connection, this is one of the most common connection formats. Step-by-step algorithm for setting up the Internet:
- go to the admin panel;
- click on the “Internet” tab;
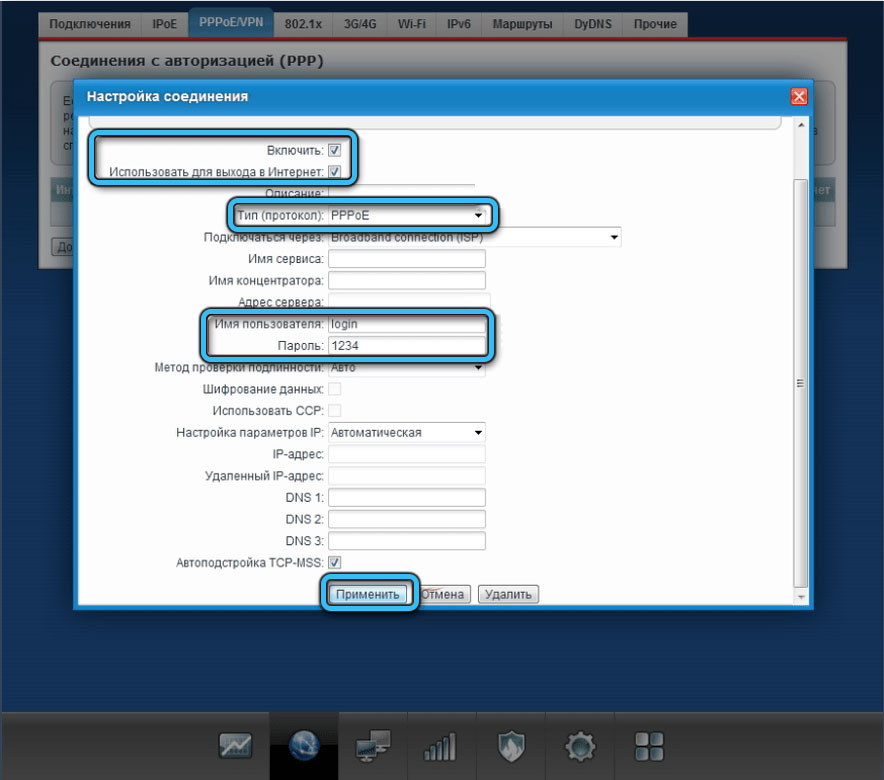
- in the top menu, select the “PPPoE / VPN” tab and press the “Add connection” button;
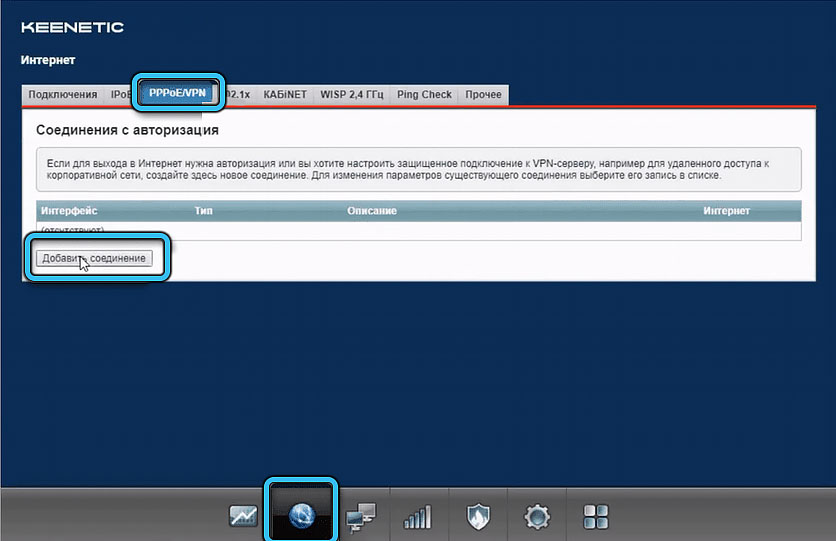
- the page for configuring the Internet connection will open;
- at the top, put a checkmark in front of the options “Enable”, “Use to access the Internet”;
- in the “Type (protocol)” column, select the line PPPoE;
- do not change anything in the “Connect via” column;
- in the following columns, enter the provider’s username and password;
- in the column “Setting IP parameters” should be “Automatic”;
- to complete the configuration of the Keenetic Extra KN router connection to the Internet, click the “Apply” button.
IPoE configuration
A protocol that does not require the use of a login / password from a company providing an Internet access service. It is not used as often, but it is much easier to configure:
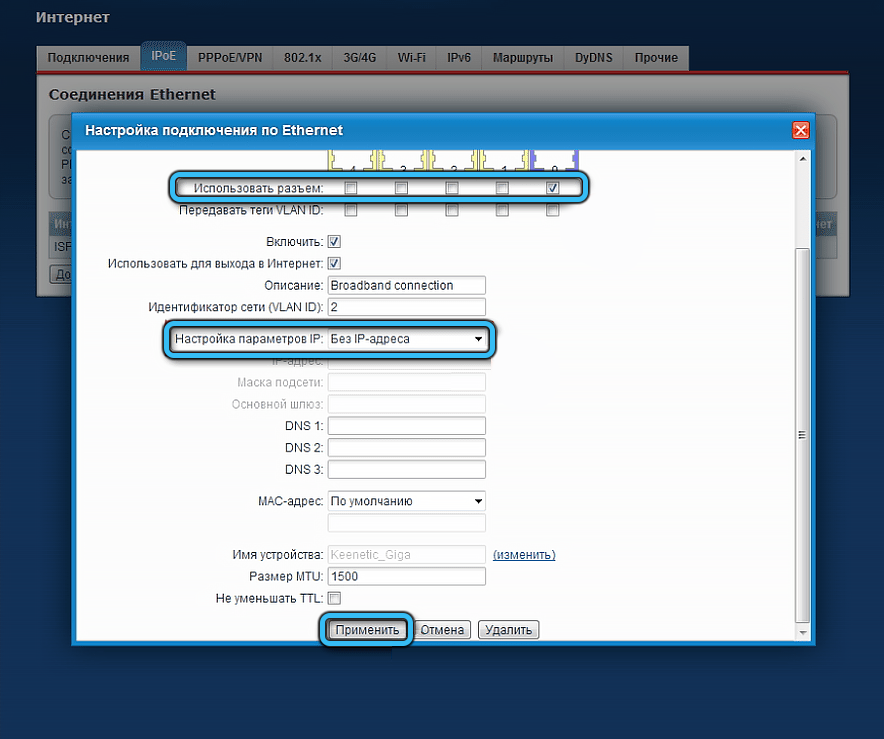
- on the “Internet” page, select the “IPoE” tab and press the “Add connection” button again;
- the settings page will open, where you need to specify the port through which the router is connected to the provider, usually a blue port with a zero serial number;
- in the column “Configuring IP parameters” select the value “Without IP-address”;
- click the “Apply” button.
For the changes to take effect, we restart the router.
Wi-Fi setup
Through 4 LAN ports, you can connect the corresponding number of stationary devices to Keenetic Extra (PCs, set-top boxes, receivers, etc.), but for mobile gadgets, you need to configure wireless access to the router:
- go to the web interface;
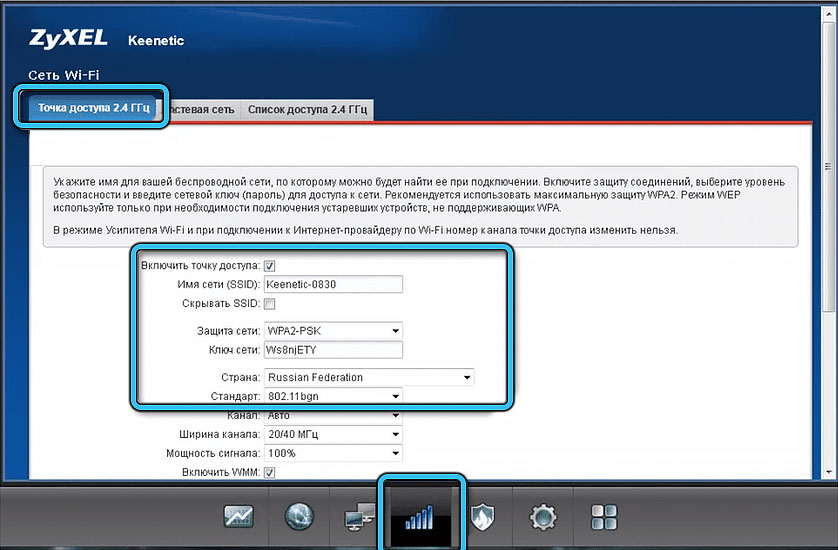
- click on the wireless connection icon at the bottom of the page (vertical stripes with a ladder);
- select the “2.4 GHz Access Point” tab;
- put a tick in front of the “Enable access point” parameter (if it is not there);
- enter the name of the home network;
- in the “Network protection” column, select the value “WPA2-PSK”;
- in the next field, set the password for the home Wi-Fi network;
- click on the “Apply” button.
If desired, you can similarly configure the “guest network” to access the Internet (access to the home network will be closed).
Now you know how to flash and configure a Keenetic Extra router. Share your experience in the comments, did you manage to do it according to our instructions and did you find it difficult.