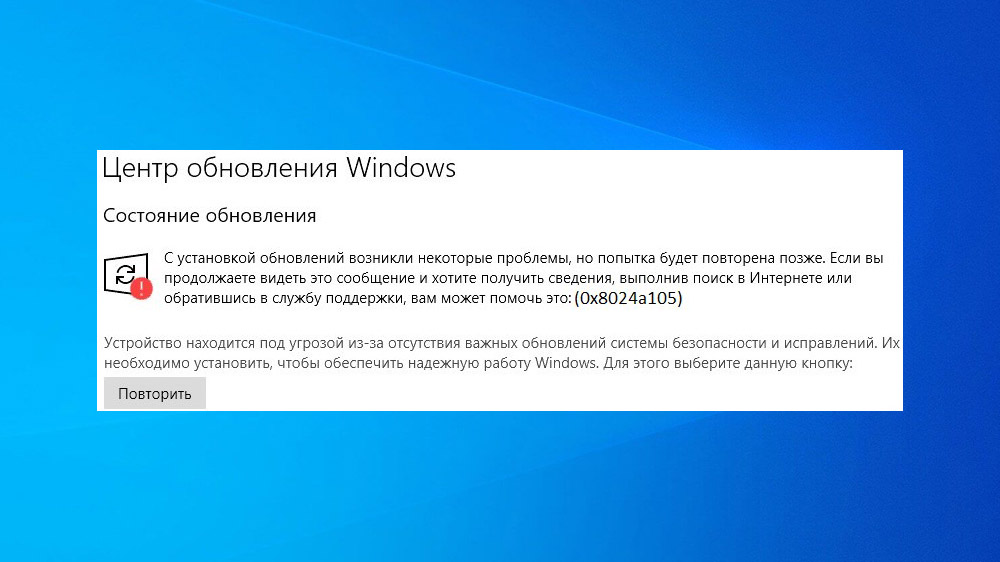
Error 0x8024a105 appears quite often during the process of updating the Windows 10 operating system using the Update Center. In this case, the service will indicate the presence of some problems, and the installation of new components will be delayed. An error can occur for a variety of reasons, depending on which method of correction is chosen. Consider the basic troubleshooting methods, which in most cases are sufficient.
Contents
Troubleshooter
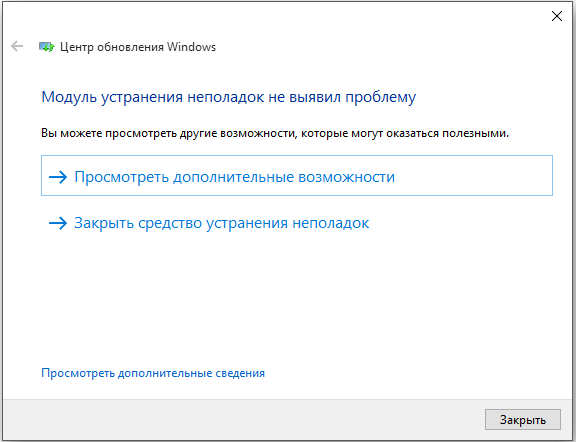
When thinking about how to fix error 0x8024a105 in Windows 10, you should first turn to the built-in troubleshooter for help. This is a special utility provided by the developer to automatically identify problems and select the best way to solve them.
To use the program, you need to do the following:
- On the keyboard, press the Win + S keys, which will open the Programs and Features Search window.
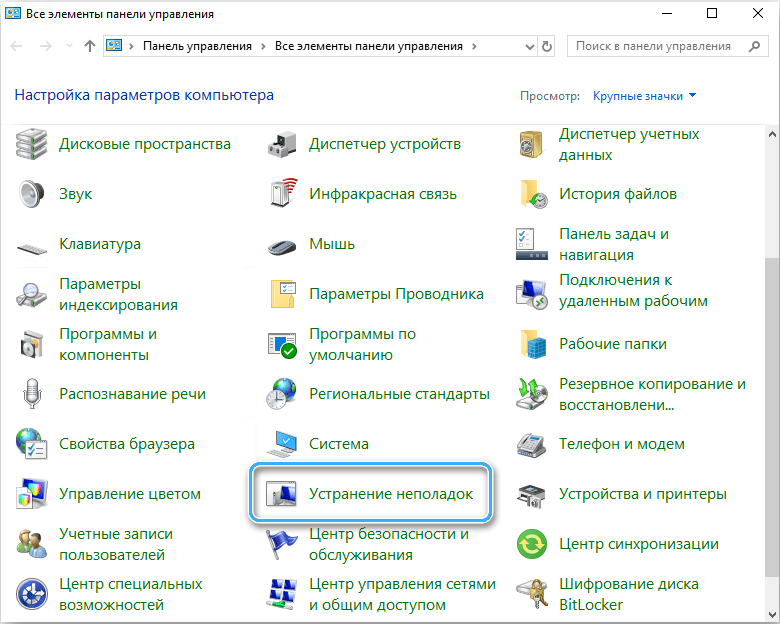
- In the line that appears, enter the query “Troubleshooting”.
- A list of suitable search results should appear at the top, among which you need to select the desired utility and left-click on it.
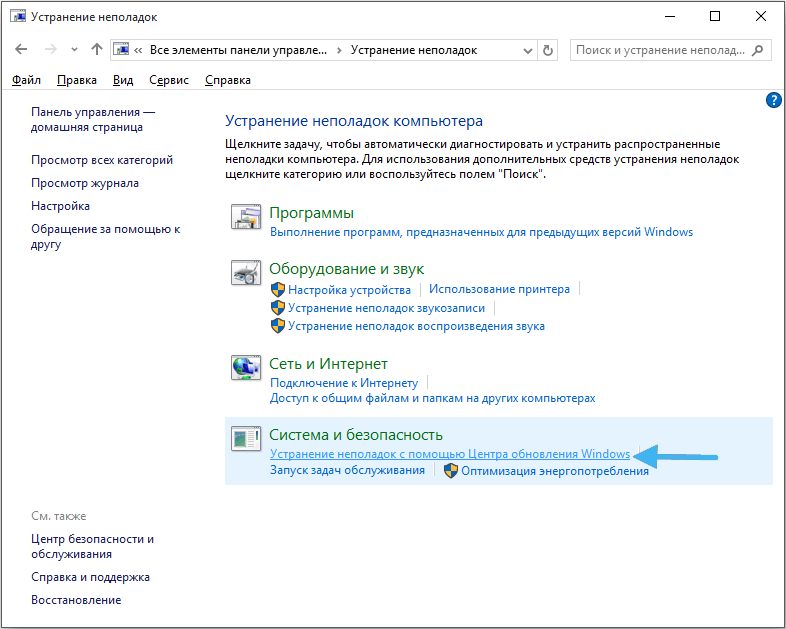
- The main window “Troubleshooters” will open, in which you need to find the “Start and run” section and click on the item “Windows Update: Fix problems that prevent Windows from updating”.
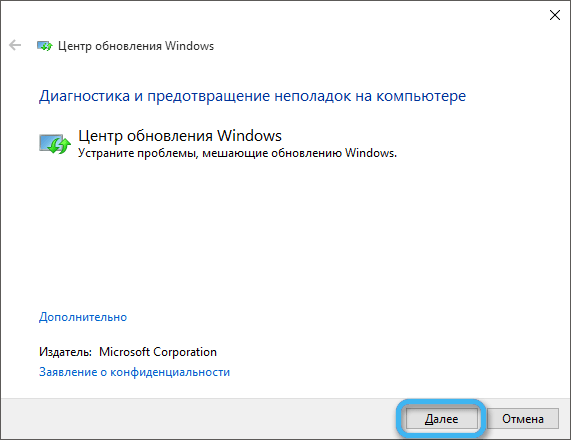
- Directly below this item there will be a button “Run the troubleshooter”, which you need to click.
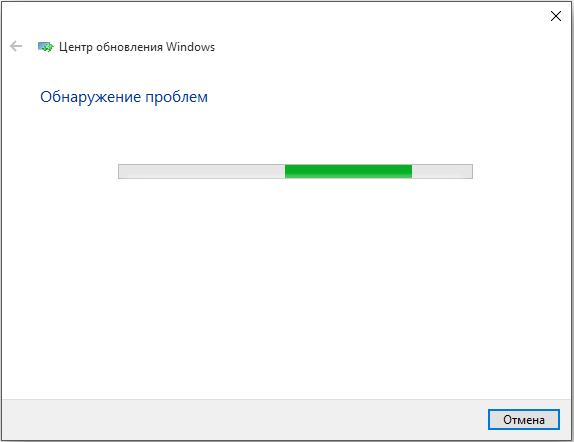
- Follow the instructions on the screen so that the utility can perform all the necessary operations and fix problems in the Update Center.
After the troubleshooter completes, it is recommended that you try to update the system again and check if the error still appears. It should be noted that in practice this method is not always possible to solve the problem. The methods described below are often much more effective.
Setting the administrator access level
In some cases, a problem with code 0x8024a105 occurs due to incorrect account settings and the lack of a certain set of rights to fully update system files. So a simple debugging of administrator access can fix error 0x8024a105.
To obtain the rights necessary for a normal update, you need to do the following:
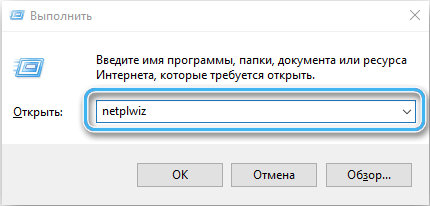
- On your computer keyboard, press the Win + R keys at the same time.
- In the command window that opens, enter the query netplwiz and press the Enter button.
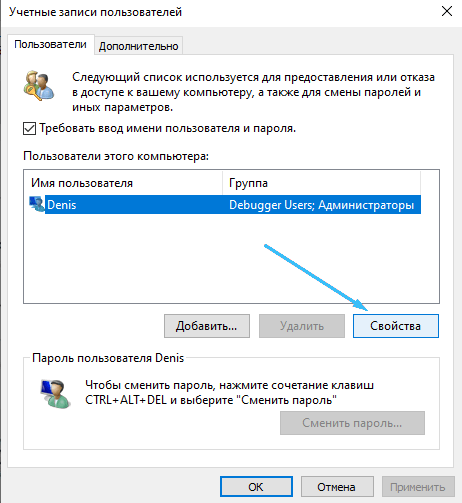
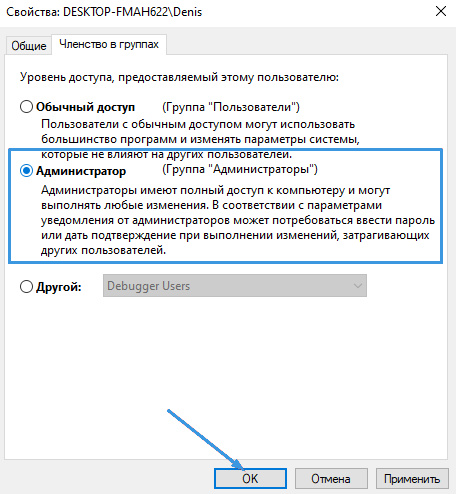
- A window for selecting accounts created in the system will open. Select the desired item and click on it.
- Click on the “Properties” button.
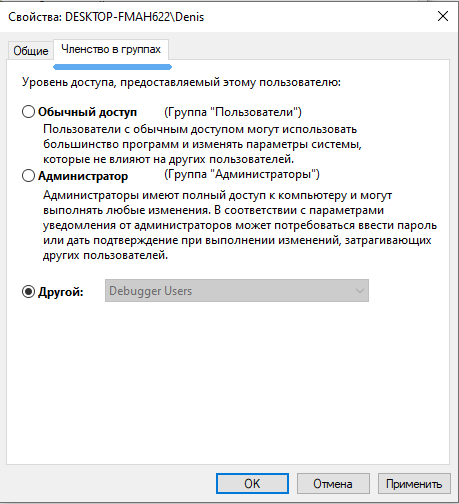
- Go to the “Group Membership” tab.
- Check the box next to the item that grants the user Administrator rights.
- To restart a computer.
Now you need to try to install the necessary updates again and check if the error still appears. If the method does not help, you will need to use other approaches.
Resetting update function components
Error code 0x8024a105 appears on the computer screen when there are any problems or malfunctions in the Windows Update components. The bottom line may be the penetration of malicious code, incorrect settings or errors in the previous update process. In any case, resetting the utility components to default settings can help.
To do this, you will need to use the command line and a number of special combinations that, if used incorrectly, can damage system files. Therefore, it is recommended to resort to this method only if you have some experience.
Procedure:
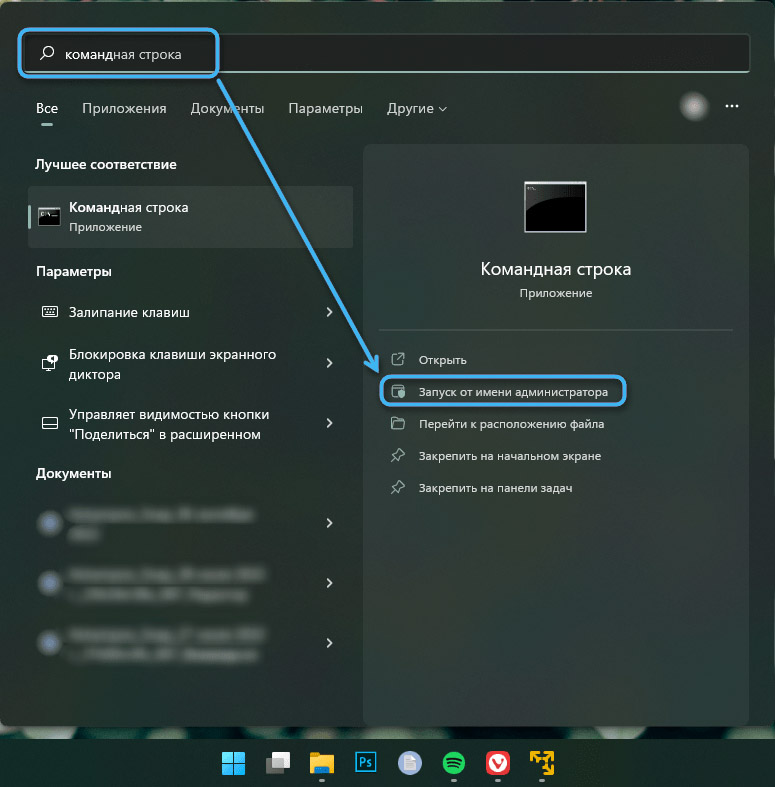
- Click on the “Start” button.
- Type cmd in the search bar below and click OK.
- Launch Command Prompt with administrator rights by using the appropriate item in the context menu of the right mouse button.
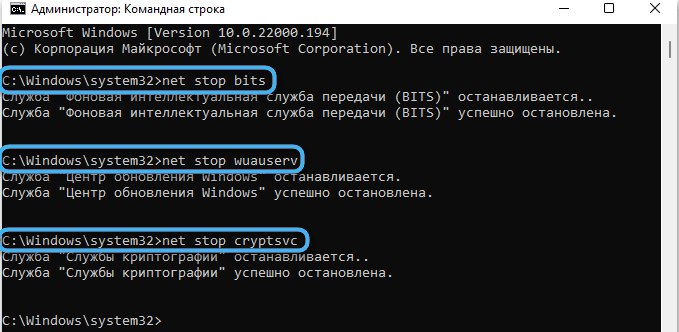
- Consistently enter the commands “net stop bits”; “net stop wuauserv”; “net stop appidsvc” and “net stop cryptsvc”. After each, you need to press the “Enter” key to confirm.
- Wait for the system to automatically update the Update Center, Cryptography and BITS components.
- Enter the commands Ren%systemroot%SoftwareDistribution SoftwareDistribution.bak and Ren %systemroot%system32catroot2 catrootbak to change the names of the folders used when installing updates.
- Reactivate all disabled services by sequentially entering the commands “net start wuauserv”; “net start cryptSvc”; “net start bits” and “net start msiserver”.
After that, it remains only to restart the computer and check if the updates are installed without errors.
Deleting the contents of the Softwaredistribution folder
The softwaredistribution folder located on the main drive is responsible for saving system updates in Windows. Each update increases the weight of this section and may result in insufficient space. This results in various kinds of errors. Clearing the folder of old files will help solve the problem. It should be noted that such an operation is available only to the Administrator.
Algorithm:
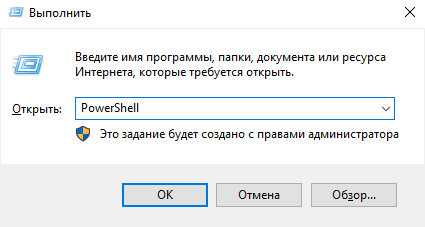
- On the keyboard, press the Win + R buttons.
- Open the PowerShell utility.
- In the line that appears, enter in turn the commands “net stop wuauserv”, then “net stop bits”. They will stop the update services.
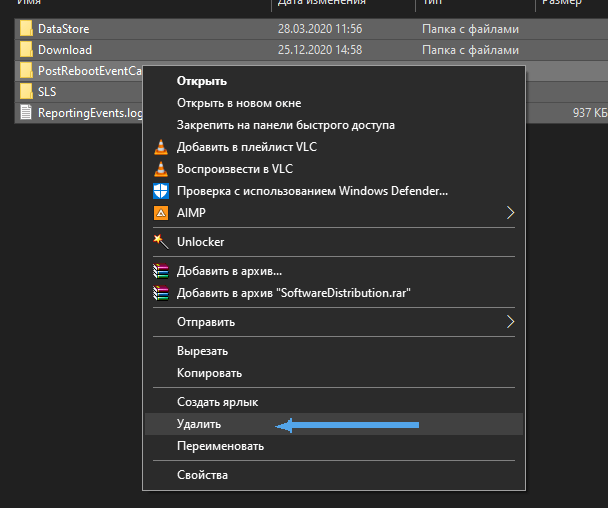
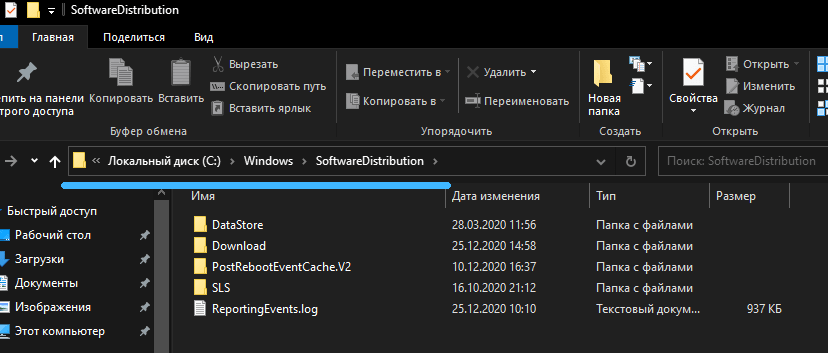
- Open File Explorer and navigate to the C:WindowsSoftwareDistribution directory.
-
Mark all the files in this folder and click on the “Delete” button.
- Reboot the system, and then check the performance of the Update Center.
Special attention deserves consideration of the activities of various kinds of malicious programs that can make changes to files and prevent the normal installation of updates. In this case, antivirus programs will help, with the help of which it is worth checking the entire computer. If viruses are found, they must be removed. If this was the cause of the problem, the Update Center will begin to function as usual.
Update the system using the Media Creation Tool
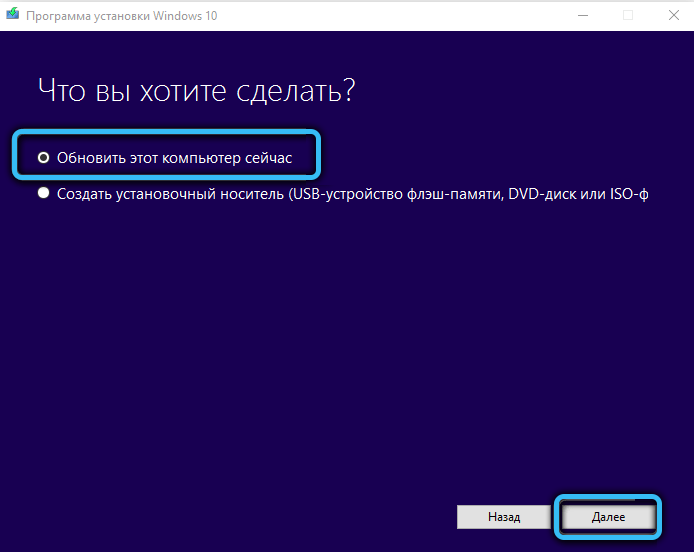
The described problem is often helped by the special utility Media Creation Tool, created by Microsoft specifically for updating the operating system.

You need to download it in advance from the official website of the developer, and then run it. Then all that remains is to follow the instructions of the application, which will help you quickly install all the software.
Download and install the patch separately
If none of the presented methods helped, you can simply try to manually download the patch of interest and install it yourself. This process is not too complicated, but requires some experience. If in doubt, it is better to seek help from specialists.



 Mark all the files in this folder and click on the “Delete” button.