Devices connected to the same network can use the network discovery feature provided by the standard Windows OS functionality. It allows other computers to see (find) the user’s computer, and also makes it possible to view devices that are connected to the network and use this function.
After turning on the visibility, the system automatically opens the necessary ports, changes the network mode, and also starts the necessary service. We will figure out how to configure this feature on your device, as well as what to do if you have problems.
Enabling Network Discovery
Every time a user connects to a new network, the system prompts to allow other devices to discover the user’s PC. This can be refused, or allowed using standard means. In the future, it can be activated / deactivated using the methods presented later in the article.
Consider a way to enable this feature through a tool designed to automate the system – the Powershell system utility:
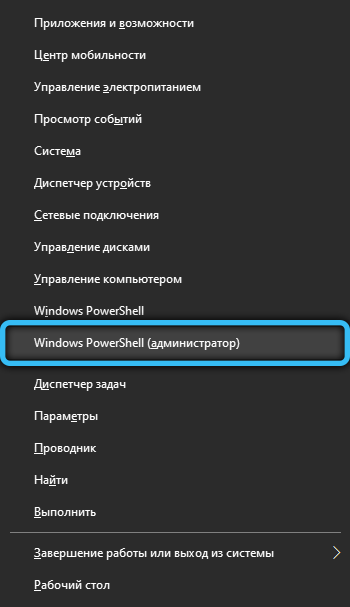
- Right click on the Start button, select Powershell with Administrator Rights. If there is no item in the list, try to open any directory (go to any folder, directory), then hold down the Shift key and right-click on the free space of the file browser, select “Open Powershell window here …”. In another way, the terminal is turned on like this – using the hotkeys “Win + R” request the launch of “powershell.exe”.
- Copy and paste the following command into the terminal: “netsh advfirewall firewall set rule group =” Network Discovery “new enable = Yes” and then press the Enter key (Enter on your keyboard).

- If an error occurs, the message of which says “None of the rules matches the specified criteria” – you should use another version of the command. Enter: “netsh advfirewall firewall set rule group =” Network Discovery “new enable = Yes”.


- As a result, Microsoft Powershell must report that the rules have been updated + a certain amount (digit). The script worked successfully, it is recommended to restart the PC to fully apply the changes made to the group policies.

The second method of enabling network discovery involves manually changing the OS network parameters. To do this, follow the simple steps from the instructions:
- Go to the “Control Panel” using the keyboard shortcut Win + I.
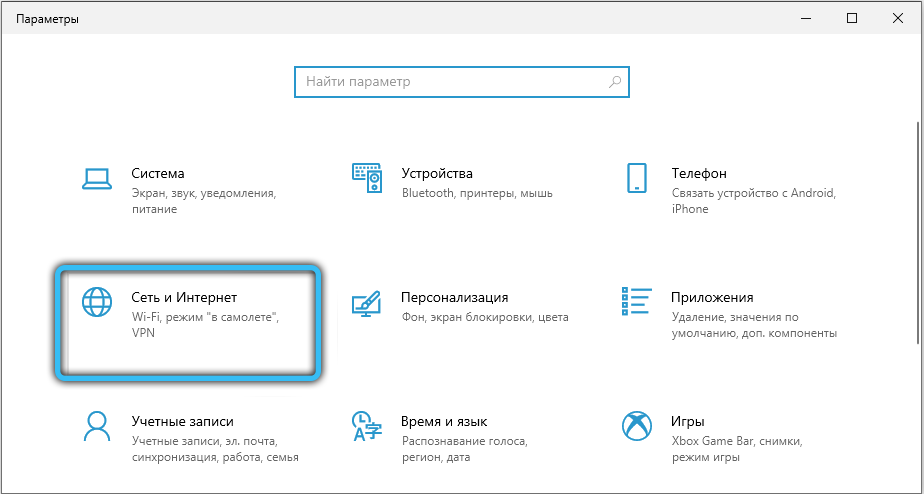
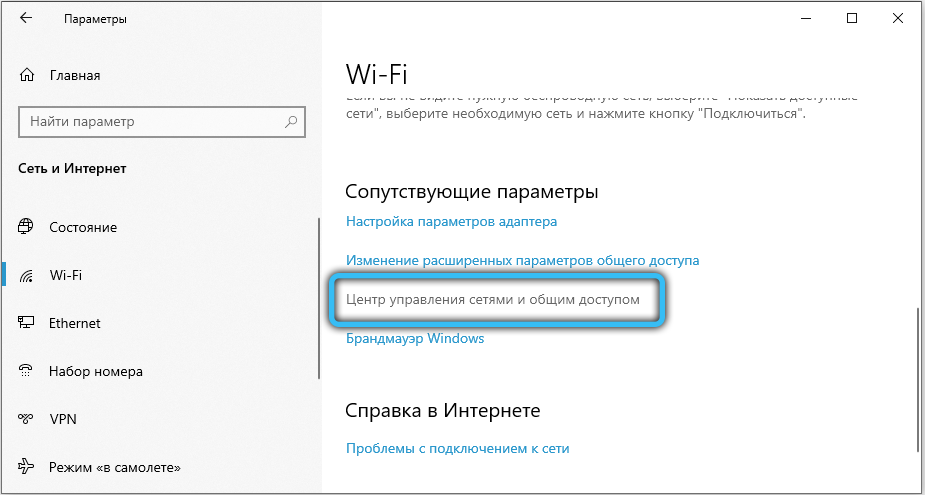
- Select the “Network and Internet” category, then go to the “Wi-Fi” subsection (on the left side of the settings window).
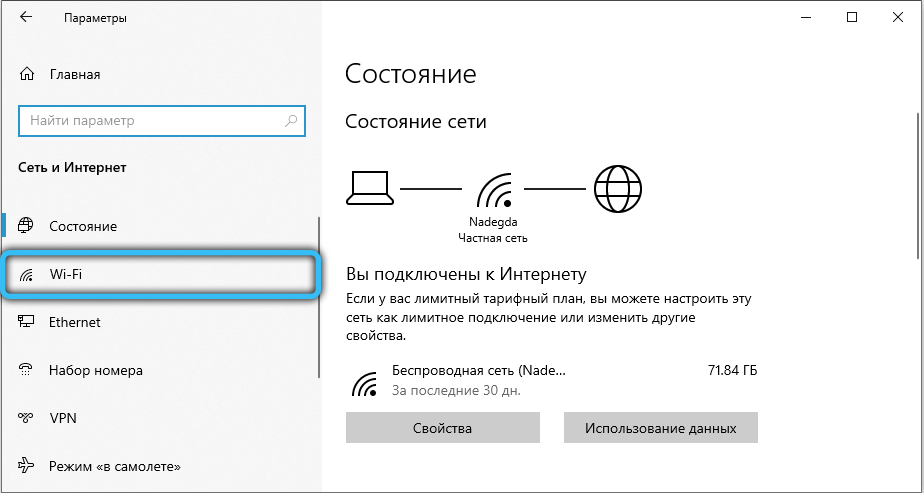
- From the list of Related Options, select Network and Sharing Center.
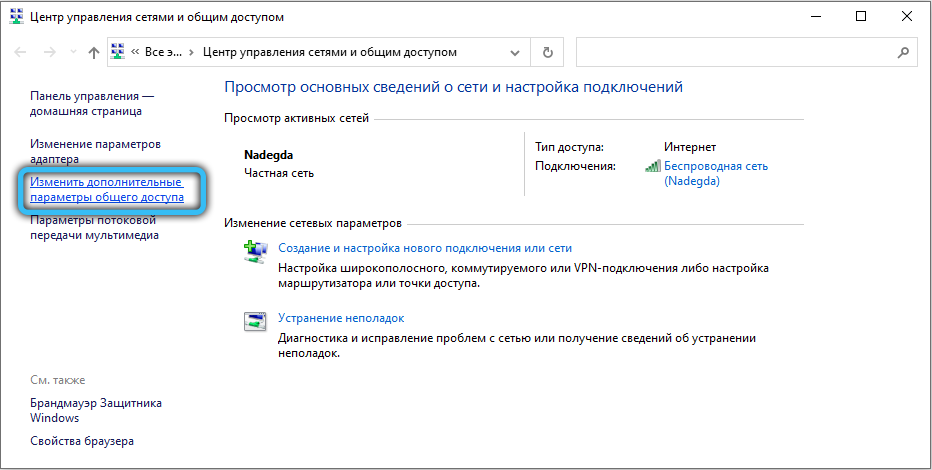
- Click on the “Change advanced sharing options” button.
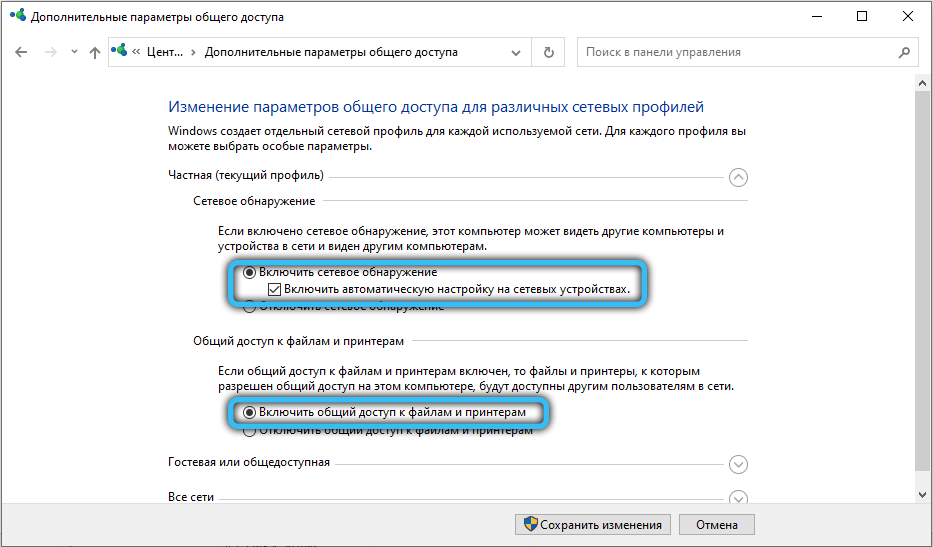
- There are different profiles for customization here. We will be configuring the one that is current (applied to a given local network). Activate visibility by placing a dot in front of the item with the appropriate name. File and Printer Sharing must also be enabled. For a private network, you can select the Enable automatic configuration on network devices check box.
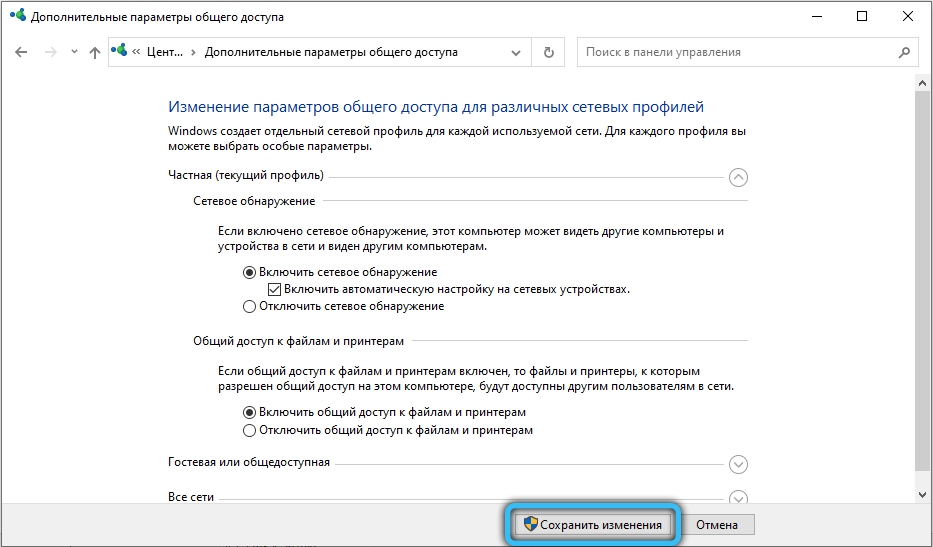
- Save your changes. If you need to share files with other computers, you need to enable sharing and these files will be visible to connected devices.
For older operating systems like XP, this method will not work. To enable network discovery in Windows XP, use the following procedure:
- Open the Start menu from the button in the lower left corner of the taskbar.
- Go to your control panel. Here you need to select the category “Network and Internet Connections”.
- Click the “Next” button, and then in the settings wizard, indicate that you are using an Internet connection through a gateway or through another computer on the network (you must check the second option).
- You will be prompted to enter two parameters: “Description” and “Computer name”. Both the first and second fields are optional (the entered name will be displayed to all other users of the local network in the future).
- Enter the workgroup (example “HOME” or “OFFICE”). All computers connected by the same network must use the same group. It is not recommended to use letters from the Cyrillic alphabet.
- Select “Turn on file and printer sharing”, then click “Next”, then again.
- Specify the action to be performed – “Just complete the wizard.” Click Next and then click Finish. You will need to reboot your system for the changes to take effect.
Disable network discovery
In order to deactivate this feature, you can use the Windows PowerShell program (or the standard command line with administrator rights). This procedure does not take much time, and the result is usually successful and without failures. First, you need to start the command line or Powershell, for this, run the key combination “Win + R” and request the launch of the “powershell.exe” object (or right-click on the “Start” menu and select “Command line (Administrator)” if used by Windows 10).
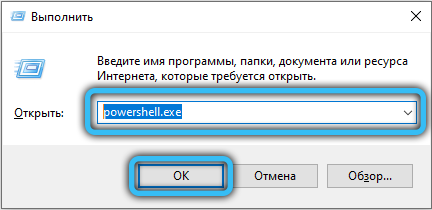
In the terminal, enter the following command, then press Enter:
netsh advfirewall firewall set rule group="Обнаружение сети" new enable=No

If the English localization of the system is used, you need to use another variation:
netsh advfirewall firewall set rule group="Network Discovery" new enable=No

You can also disable network discovery by changing some of the sharing settings for profiles (the method for disabling the function in Windows 7 and higher). To do this, follow these steps:
- Open the Start menu, then go to Control Panel. You can also use the hotkeys Win + R, then enter in the line “shell ::: {26EE0668-A00A-44D7-9371-BEB064C98683}” and click OK.

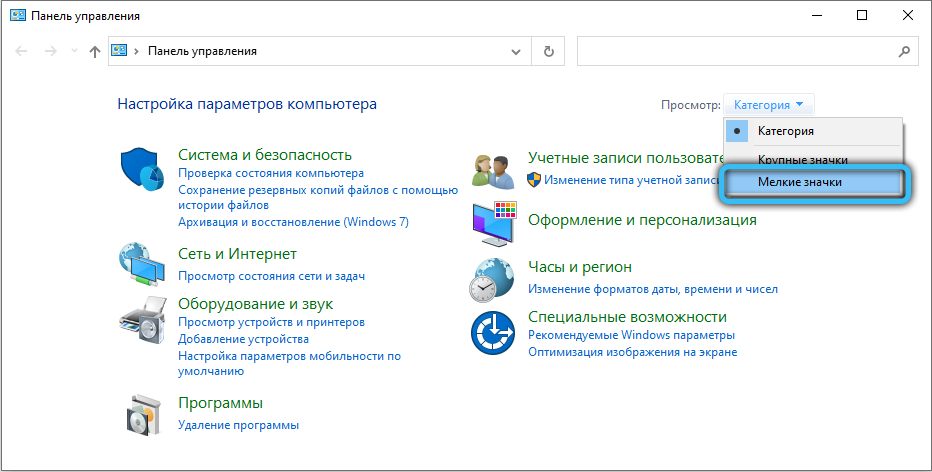
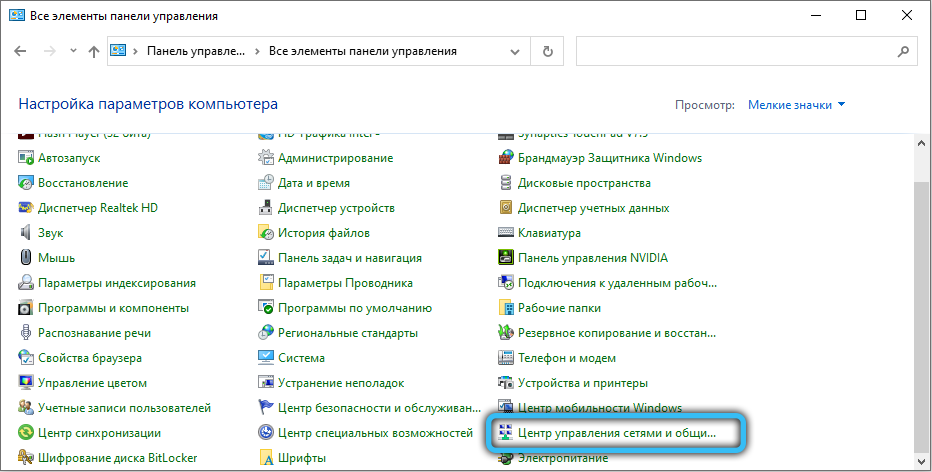
- Set the view type to “Small Icons”. In the entire list of items, you need to find the “Network and Sharing Center”, then go there.
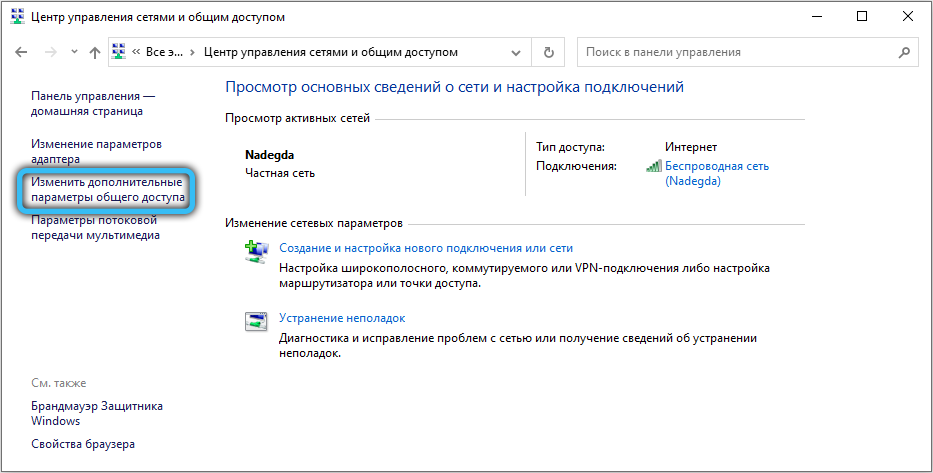
- In the upper left menu of the window, select “Change advanced sharing options.”
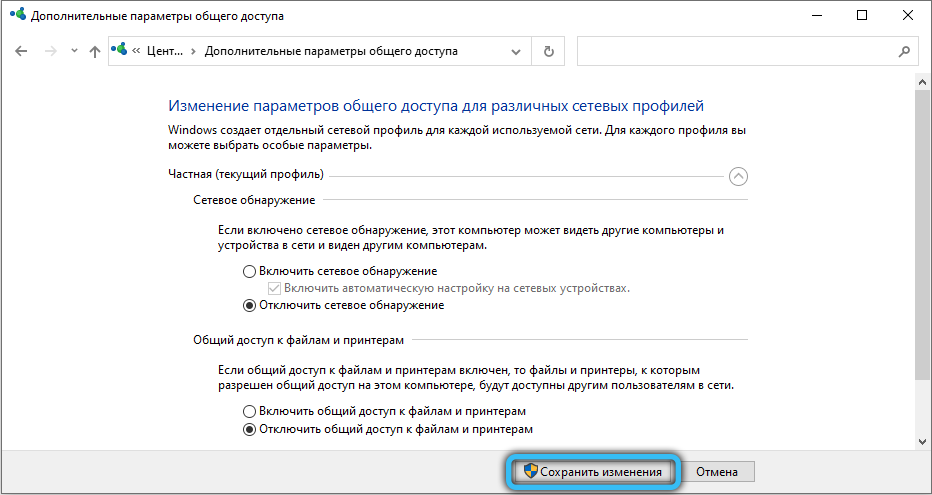
- Expand the settings for the current profile. Select the Disable Network Discovery check box and Disable File and Printer Sharing (if selected).
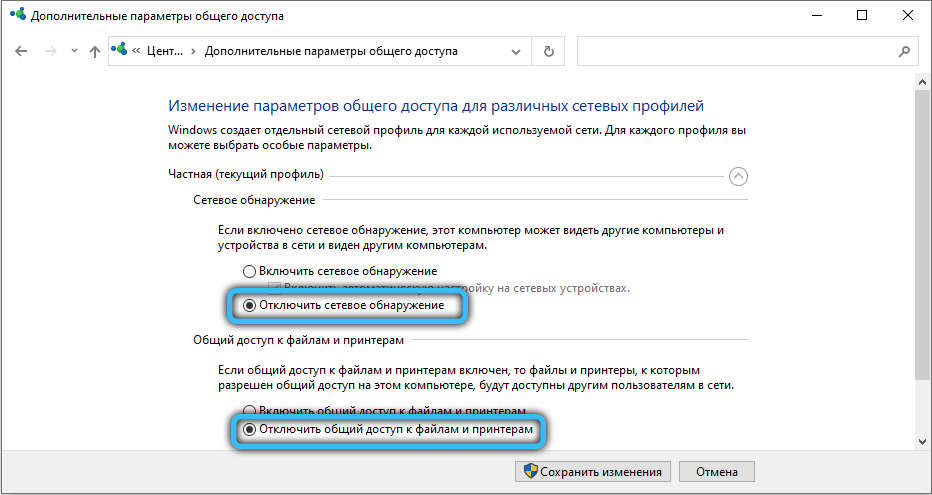
- Save your changes.
You can control the status of the function through the “Settings” application in Windows 10. Use Win + I for a shortcut, then go to the “Network and Internet” section. Select the “Remote access” category (if you use not a local connection, but Wi-Fi, you need to go to the section of the same name using the left menu), then select your local network from the list and use the “Additional parameters” button (will be highlighted after selecting an item) … This tab contains the only switch “make this computer discoverable”, put it on.
Network Discovery Not Enabling on Windows
Check your current firewall settings first. It is possible that the parameters you have set do not allow this function to be used. Go to the “Control Panel” in any known way (for Win 10, you need to use the combination “Win + I”), then open the “System and Security” category, then in the left menu you need to select “Allow an application or function through a firewall”. Go to the change settings and agree to change the system settings (if Windows asks for a password or confirmation). Select Network Discovery and click OK. If you are using a third-party firewall or firewall, it is recommended that you check the settings and make sure that this feature is not disabled or disabled.
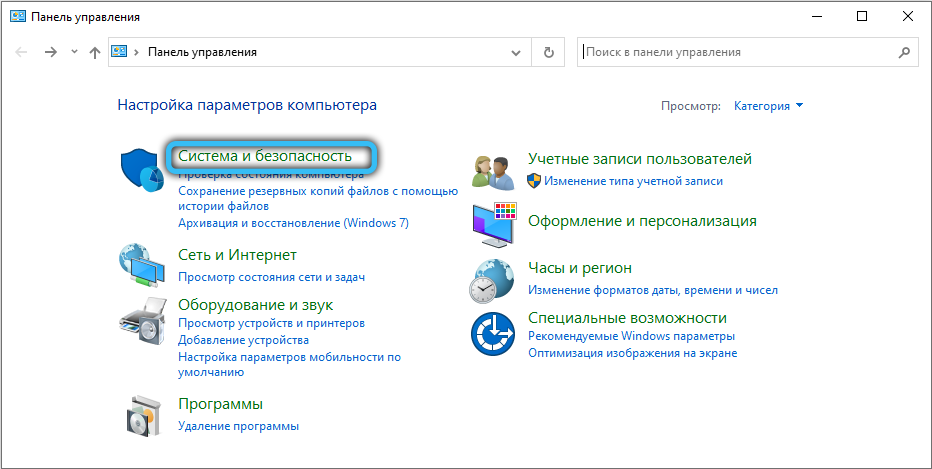
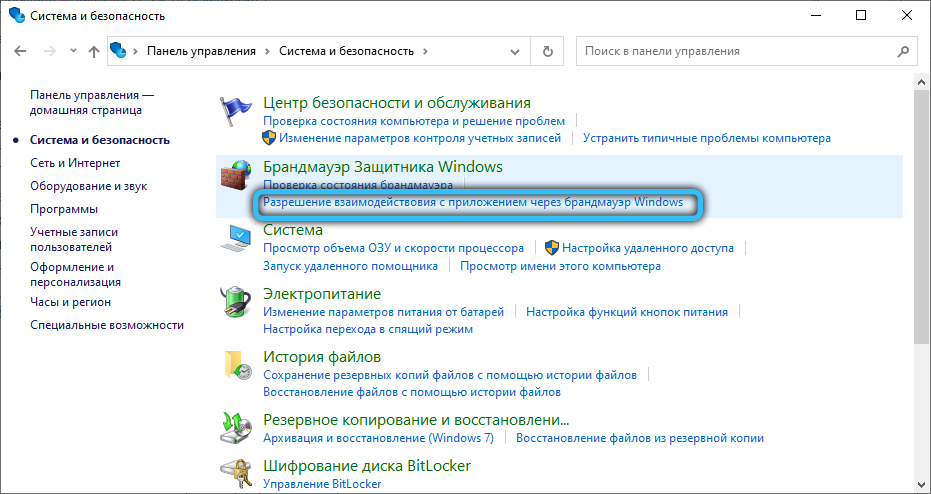
Also, the built-in feature will not function properly (or will not be available at all) if one of the component services is in a disabled state:
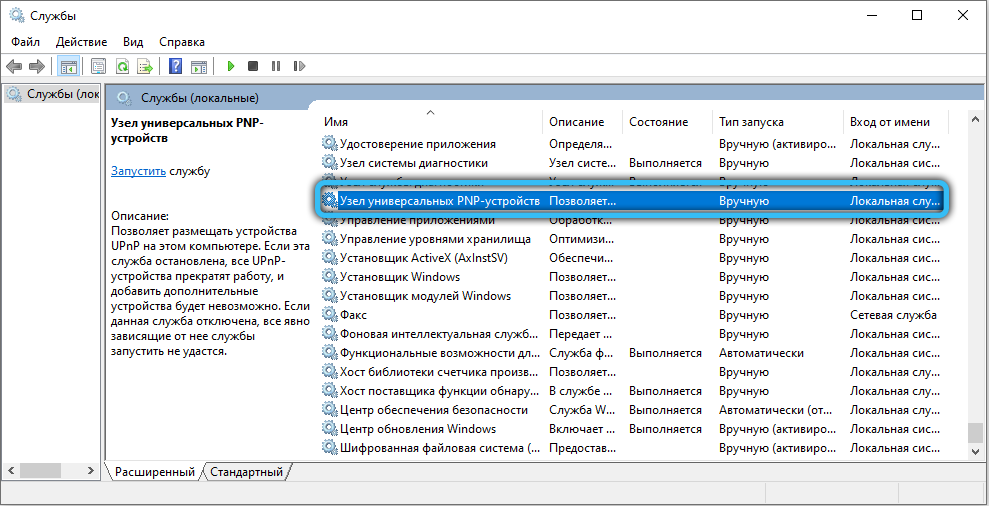
- UPnP Device Host.
- Function Discovery Resource Publication (fdPHost).
- SSDP Discovery (SSDPSRV).
- DNS client.
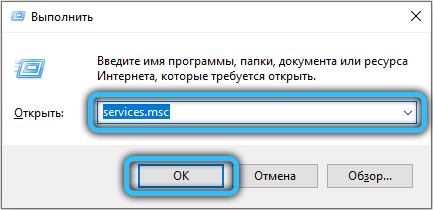
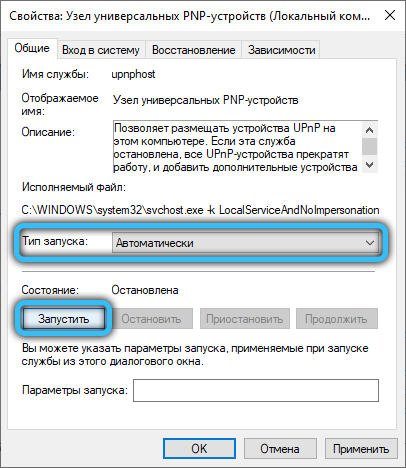
If Network Discovery is not enabled on Windows, go to the Services app. To do this, use the hotkeys “Win + R” and request the launch of “services.msc” (a similar result in Windows 10 will bring the utility call through the menu opened by the combination “Win + X: here you need to select the” Computer Management “item, and then go to “Services and Applications” -> “Services”). Find the first service from the list above in the list, if the state is indicated as “Disabled”, then you need to double-click on the name to get into the settings. Specify the startup type “Automatic” and start the service using a dedicated button. Check each service of the four, and if it is found disabled, perform the operation to enable.
We hope you figured out how to enable network discovery in Windows 10, 7, XP or other operating systems of this family. The suggested methods will help to activate the visibility on the network if it does not work in your operating system. Leave your feedback and suggestions using the compact form located after the article.