The Google Chrome browser is one of the most popular Internet browsers, which is used by a huge number of users. This is a convenient program that is regularly improved and receives the latest updates directly from the developers.
However, the automatic browser update function does not always have a positive effect on the operation of the program, which is why they prefer to disable it. Let’s look at several ways to disable the automatic installation of new browser files.
Contents
Changing Services
Two main services are involved in updating the Google Chrome browser, which cannot be disabled using standard methods. However, you can still deactivate them using a special algorithm of actions:
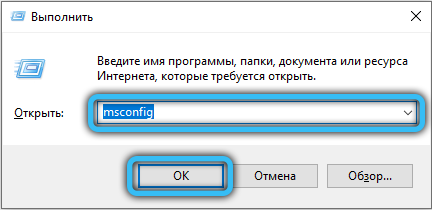
- Use the Win+R key combination to open the Run window on your computer.
- In the field that appears, enter the msconfig command, and then confirm the actions with the Enter key.
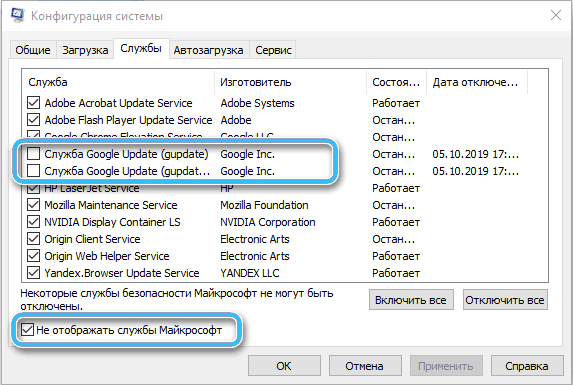
- In the system configuration window that opens, go to the “Services” tab.
- Find the items “Google Update Services (gupdate)” and uncheck the boxes next to them. At the bottom of the list, you also need to check the box next to “Do not display Microsoft services.”
- Confirm the action by pressing the OK button.
If everything is done correctly, the automatic browser update feature will be disabled. You can check the effectiveness of the method by simply going to the browser itself. There you need to open the settings and go along the path “Help” – “About the browser”.
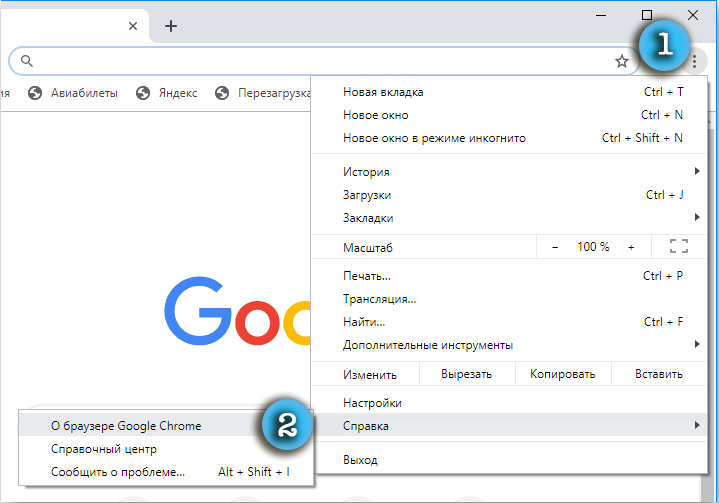
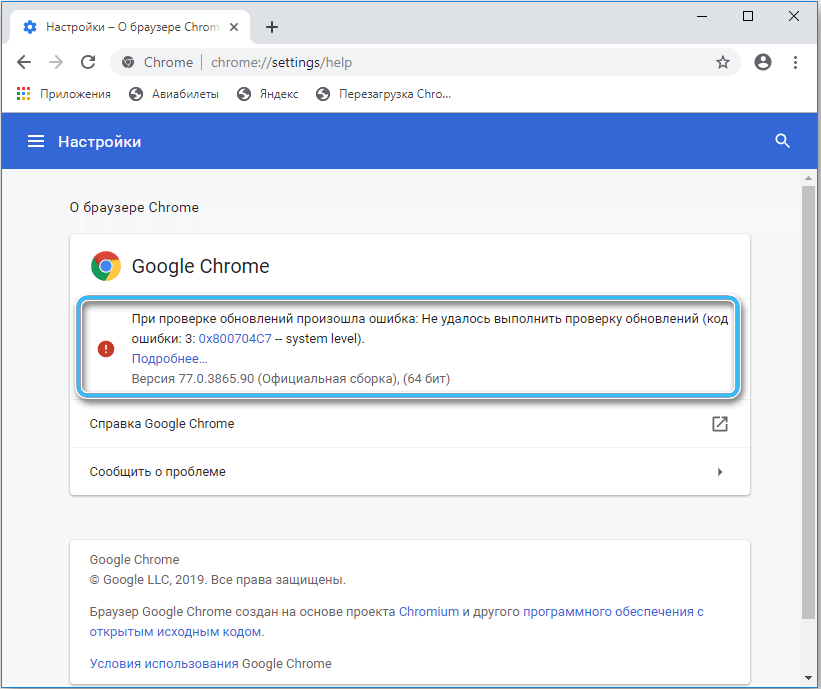
The system will immediately transfer the user to a page where all the necessary information about the version of the program used and available updates will be presented. An error should appear there, marked with a red exclamation mark and a corresponding message.
File Correction
This is one of the simplest methods that will allow you to disable the ability to automatically update the Google Chrome browser without complicated manipulations. Moreover, if necessary, the option can be re-enabled at any time at the request of the user.
Sequencing:
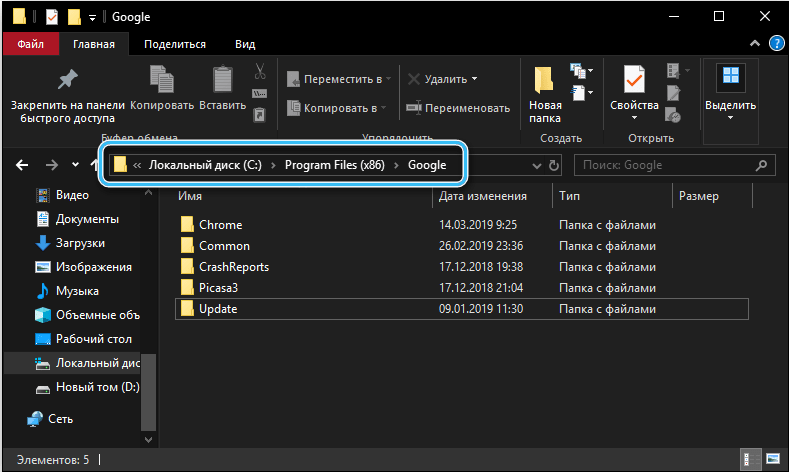
- On your computer, open the folder where Google Chrome browser files are stored. Most often, the relevant data can be found along the path C: / Program Files (x86) / Google /.
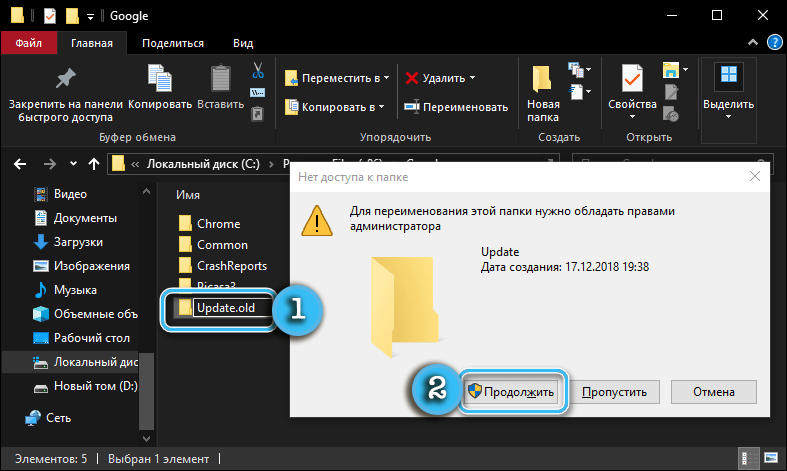
- Find a folder called Update in the directory, and then rename it to your liking. You can use any name that differs from the original.
Now the browser simply will not be able to correctly install the necessary updates, because the system will not find the right folder to save files. Moreover, it will be impossible to install a new version either in automatic or in manual modes. An error will appear in the corresponding settings section indicating that it is not possible to check for updates and download new files.
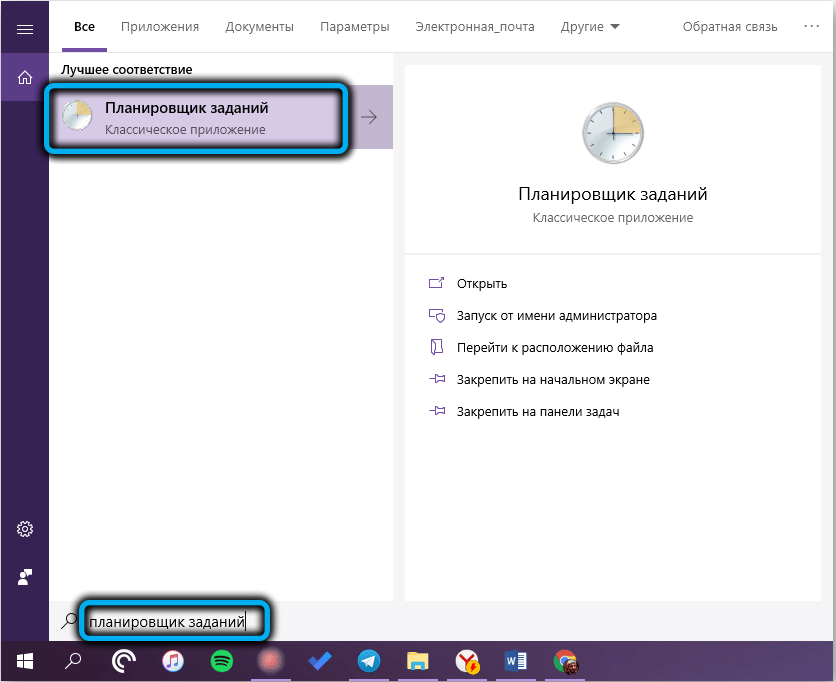
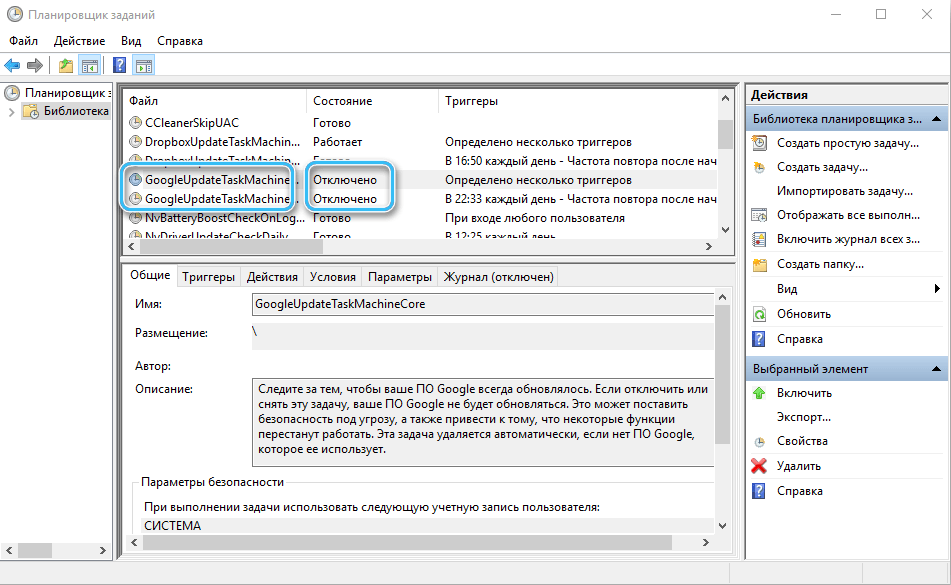
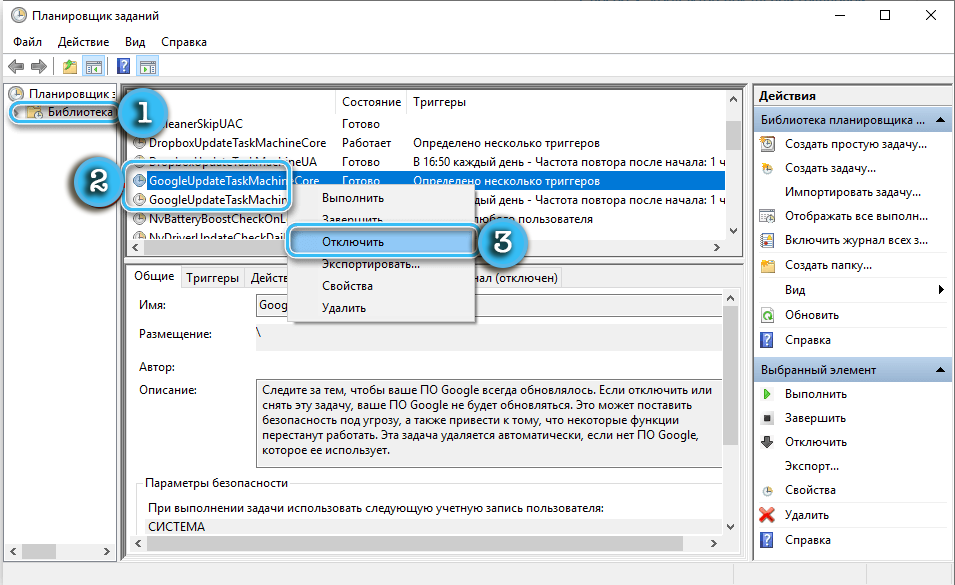
In the Windows operating system, it is also advisable to configure the task scheduler accordingly in order to avoid errors in the future. The program can be found in the search field of the start menu. In it, you need to find GoogleUpdate tasks, and then completely disable them.
Disable via Registry Editor
A more advanced method of disabling automatic updates involves using the Registry Editor. At the same time, the method is recommended by Google itself as the most reliable and secure.
To avoid errors, when working, you must clearly follow the described algorithm:
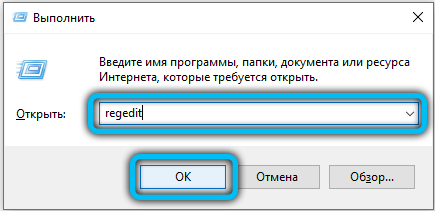
- Open the Run window by pressing WIN+R.
- Enter the regedit command in the window that opens, thereby opening the registry editor.
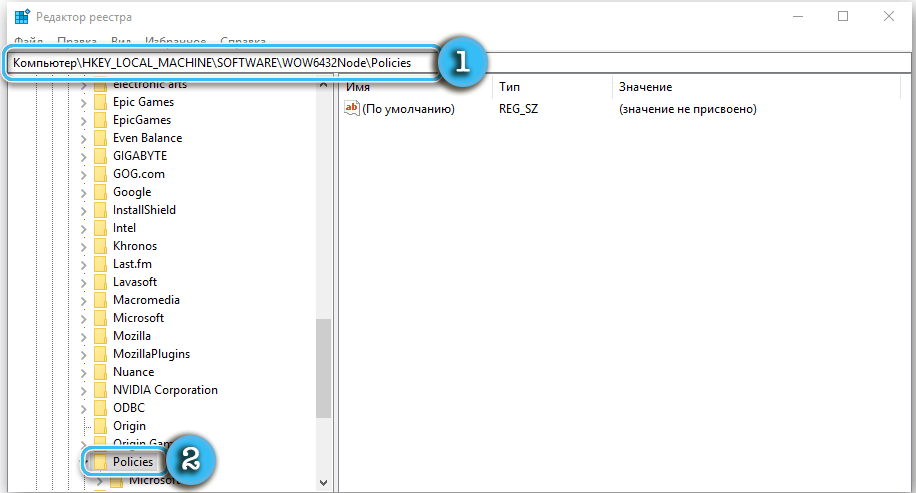
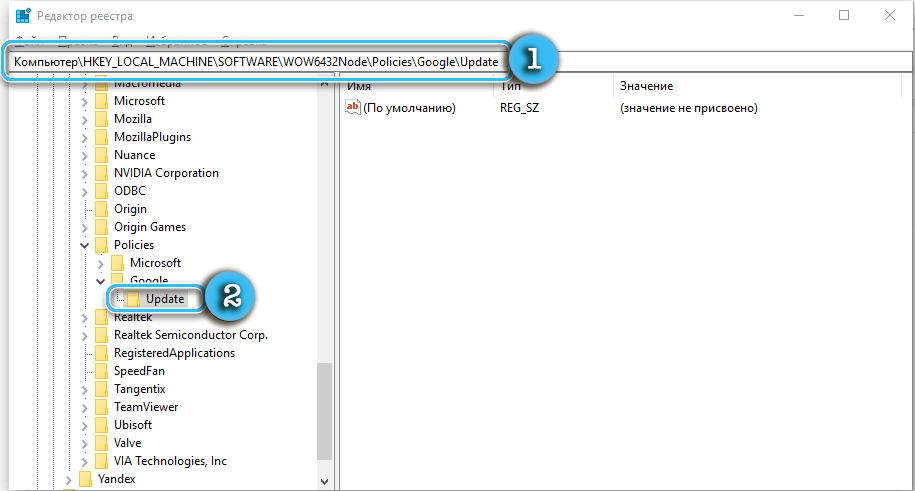
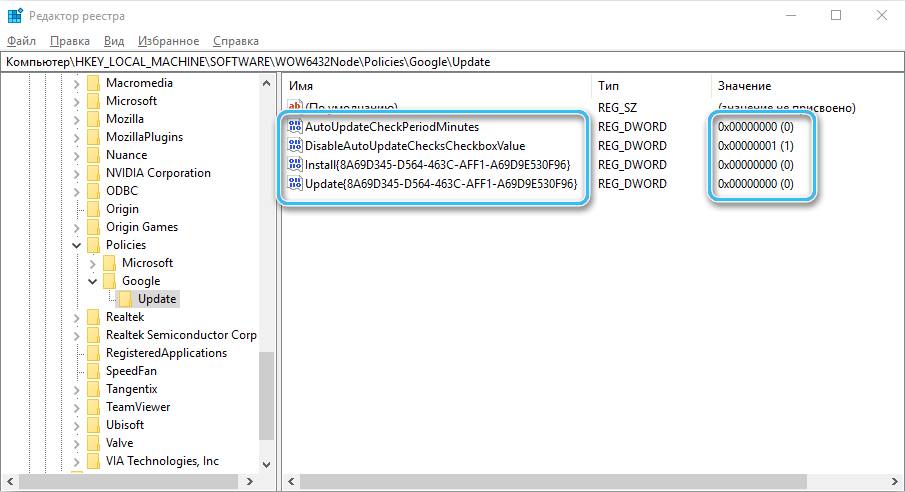
- Go to the path HKEY_LOCAL_MACHINE/SOFTWARE/Policies (for 32 bits) or HKEY_LOCAL_MACHINE/SOFTWARE/WOW6432Node/Policies (for 64 bits). This branch contains policies in the Windows operating system.
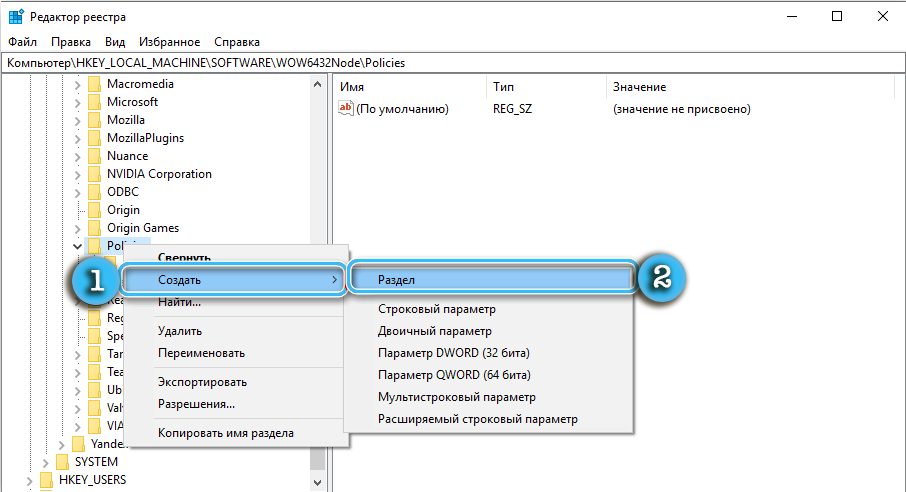
- Right-click on “Policies”, then select “Create” – “Partition”.
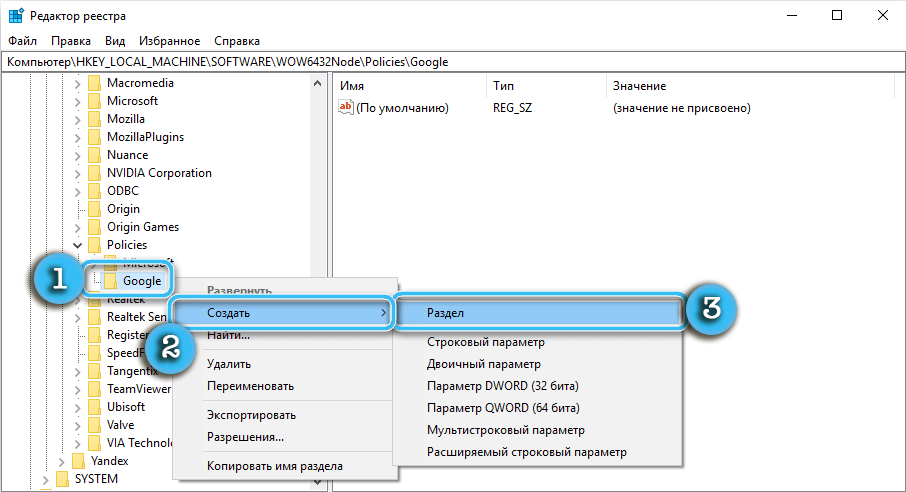
- Name the new section “Google”.
- Add a section to “Google” called “Update”. Jump into it.
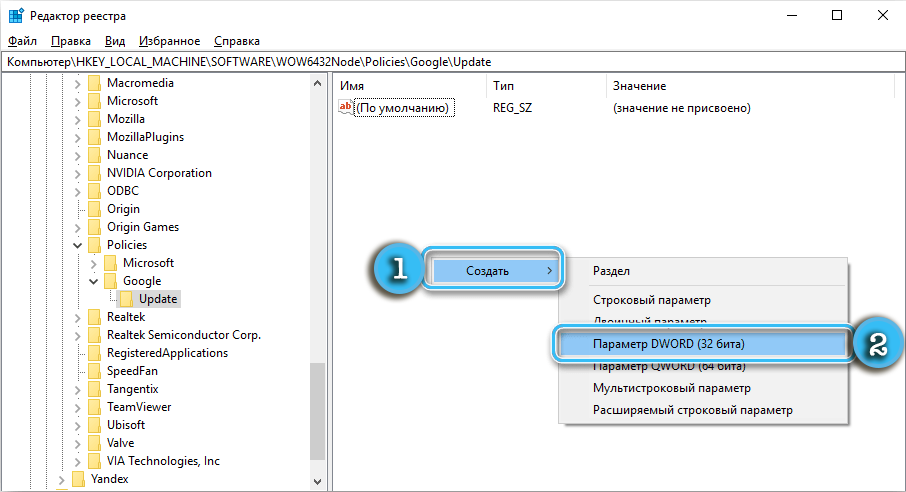
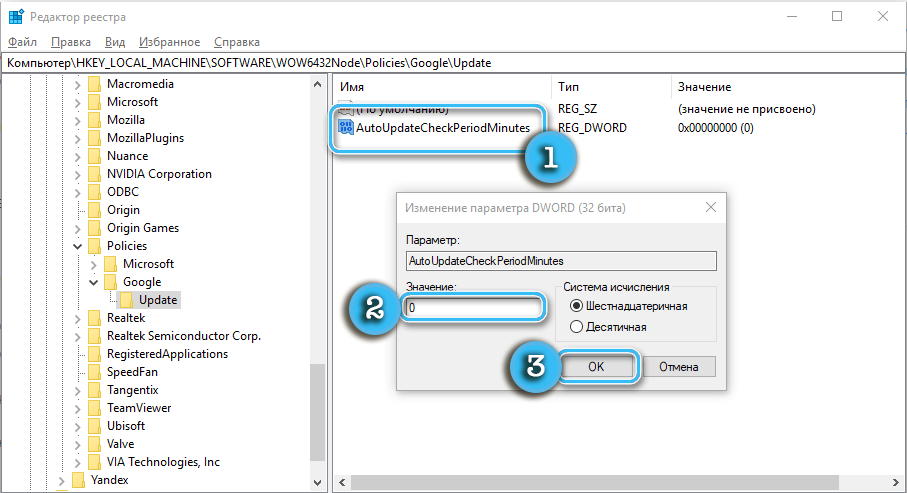
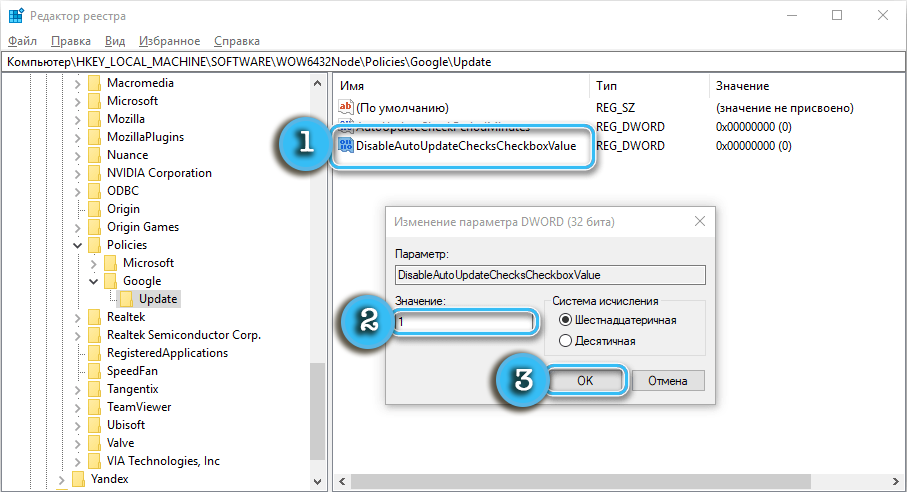
- Using the context menu of the right mouse button, create four DWORD parameters in the new section:
- AutoUpdateCheckPeriodMinutes – 0
- DisableAutoUpdateChecksCheckboxValue – 1
- Install{8A69D345-D564-463C-AFF1-A69D9E530F96} – 0
- Update{8A69D345-D564-463C-AFF1-A69D9E530F96} – 0
- AutoUpdateCheckPeriodMinutes – 0
- Save all changes and close the Registry Editor.
- Open Task Scheduler using the search bar.
- Find the items with the names “GoogleUpdate” in the planner and disable them.
Now the Google Chrome browser will not automatically update, creating all sorts of inconveniences. To return the ability to automatically update, you just need to go back to the registry editor and delete all the created settings and keys. After saving the changes and activating tasks in the Scheduler, everything will be as before.
If after performing the described steps nothing has changed, you need to check the correctness of the commands and names of the DWORD parameters. Even minor errors can lead to the complete failure of the method.
Through the Local Group Policy Editor
In some cases, none of the methods described above may give the desired results. The browser from Google will continue to receive new files and be updated automatically, regardless of the user’s desire. Here it makes sense to use the local group policy editor, making significant changes to the order in which updates are downloaded.
It is worth noting that this is a rather complicated method that can cause a lot of questions from an ordinary user. And since there is a risk of violating the integrity of the system, in the absence of confidence, it makes sense to turn to specialists.
Procedure:
- On the official Google website, open the browser section and download the group policy template from there.
- Unpack the downloaded archive into the PolicyDefinitions system folder located in the C:/Windows directory.
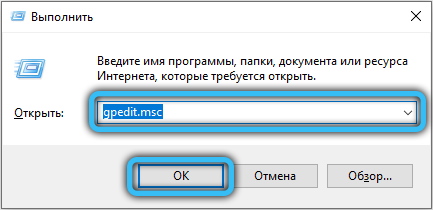
- Press the Win + R keys, and then go to the local group policy editor by typing the gpedit.msc command in the line.
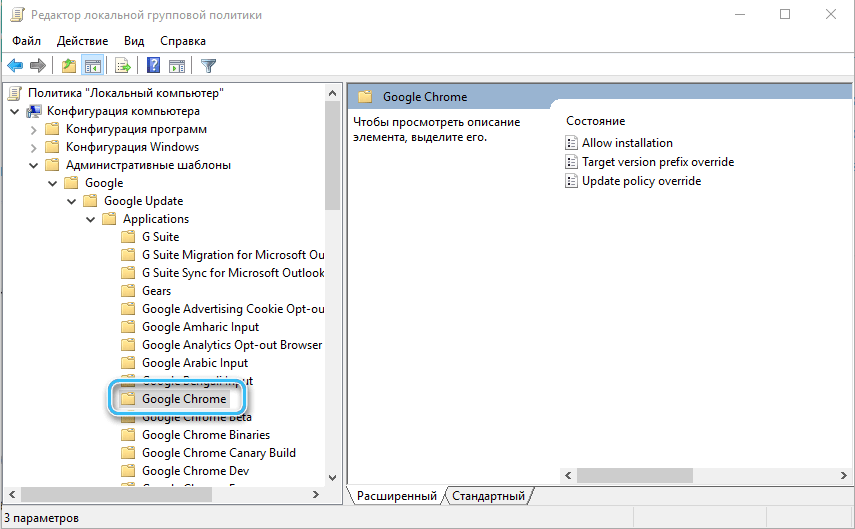
- In the window that appears, navigate to the Computer Configuration/Administrative Templates/Google/Google Update/Applications/Google Chrome directory.
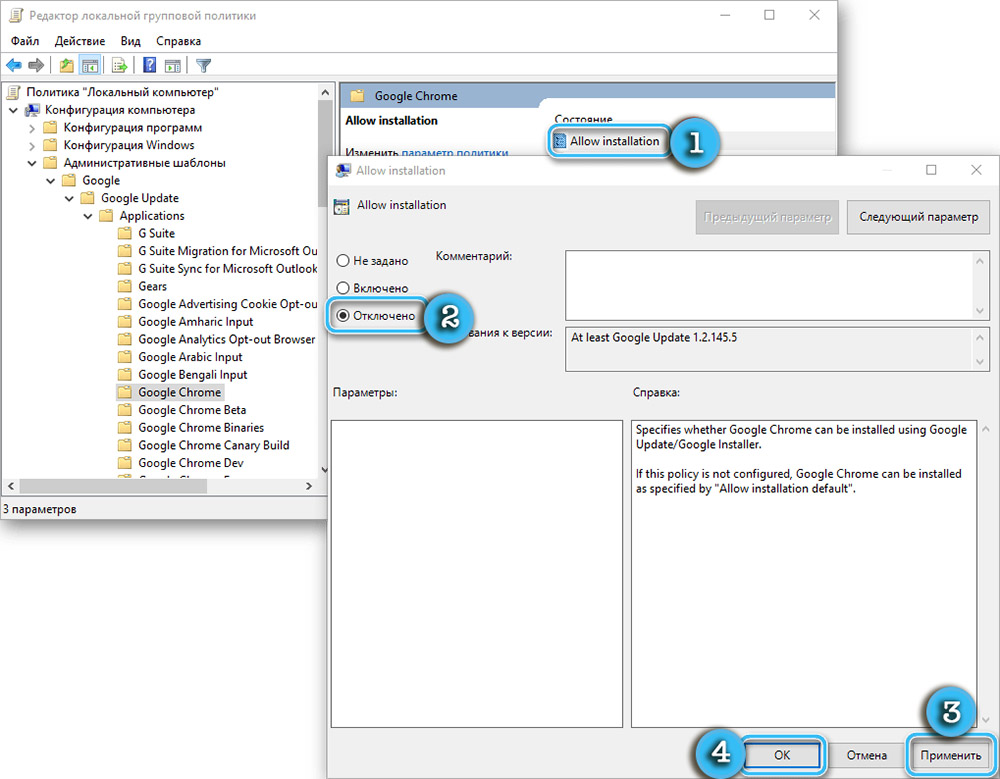
- Find the option “Allow installation” and disable it through the appropriate menu.
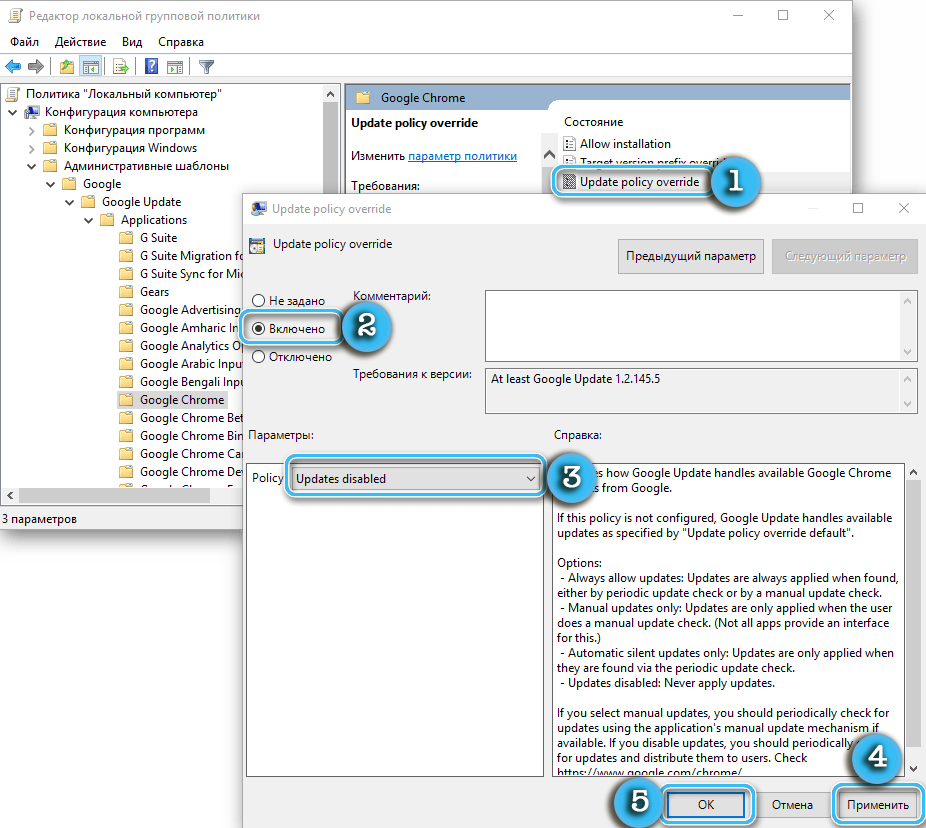
- Find the “UpdatePolicy Override” parameter, but this time set it to active mode.
- A little lower, find the “Parameters” window, in which there will be a list with options opposite the “Policy” item. In it, select “Updates disabled”. If the user wants to be able to at least manually update the browser, you should select “Manual updates only”.
- Confirm all changes by clicking on the OK button.
It is worth remembering that the Group Policy Editor is available only to those users on whose computers an operating system version higher than “Home” is installed. The “home” assembly has extremely limited functionality and significantly reduces the ability to configure settings.
The complexity and laboriousness of the described method is fully compensated by efficiency. After completing all the necessary steps, the user will completely disable the browser update.
And what method did you use to disable the automatic updates of Google Chrome? Share your experience in the comments.
