Windows OS users may encounter a problem such as the disappearance of the D drive in Explorer, which can be caused by various reasons.
The phenomenon is observed both immediately after installing Windows or updating, and already during the operation of the system. Let’s look at why dysfunction can occur and what to do if a disk is missing.
Contents
Reasons for the disappearance of section D
Before we begin the solution, let’s look at the reasons for the loss. It is important to determine what exactly is missing: a logical partition (usually HDDs are divided into system C and user D and other partitions) or a separate hard drive if C and D are different physical drives. To narrow down the possible causes, remember what preceded the problem, for example, you connected a new drive, the drive disappeared after installing Windows, updating, or some other action on your part.
So, depending on the type of dysfunction, the reasons may be the following:
- no contact with the motherboard due to lack of connection or loose connection of the cable to the HDD connector;
- Accidental formatting or deletion was performed;
- system failure when reinstalling or updating Windows components;
- the logical structure of the HDD is damaged due to a virus attack or accidental failure;
- violation of the integrity of system files;
- the connected drive is not initialized or formatted;
- outdated drivers;
- The logical partition has been hidden by another user.
What to do if drive D is not displayed
There are several ways to eliminate dysfunction and most often you can cope on your own; depending on the cause, one or another option will be suitable. Since it is usually not obvious what exactly caused the previously displayed section to disappear, the source of the trouble will be identified as the actions progress. Let’s take a closer look at what to do if there is no D drive.
Checking the drive connection
If the system sees only one of the physical media, and the second one is no longer displayed, you should first check the connection of the hard drive to the motherboard. The cables could have moved away, causing a loss of contact, which means the HDD will not be accessible in Windows Explorer.
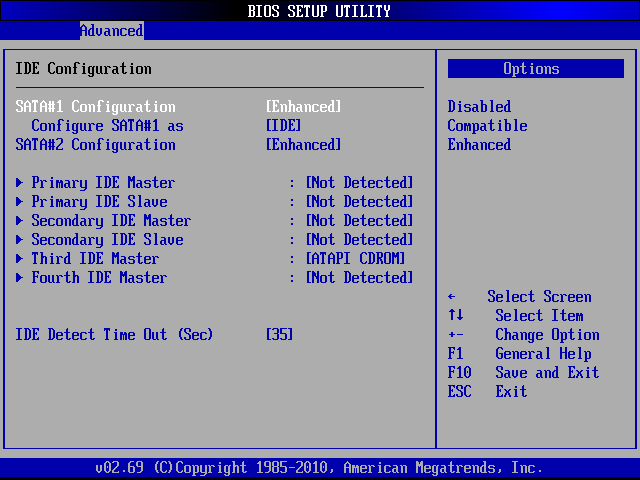
When the connection is checked, go to the BIOS and see if the drive is visible. To do this, follow the instructions:
- We reboot and during the initial boot process we use a key or key combination to enter the BIOS menu (depending on the version, this can be Del, Esc, F2, F8-F10 or a combination of several keys).
- In the menu in the Main tab we find Primary IDE Master or Secondary IDE Master (depending on the connector), if the media interface is IDE.
In the case of SATA, we are looking for sections with a suitable name. The name or the inscription “Hard disk” (Not installed) will be written opposite the item.
The BIOS will detect the drives, otherwise you will see a “Not Detected” message.
Checking the quality of the connection, connecting to another connector or to another computer will help eliminate the culprit for the lack of connection.
Rescan
In some cases, for example, if the CD/DVD drive has occupied this letter, as a result of which the logical volume is no longer displayed after reinstalling or updating the OS, rescanning helps. To activate the procedure, do the following:
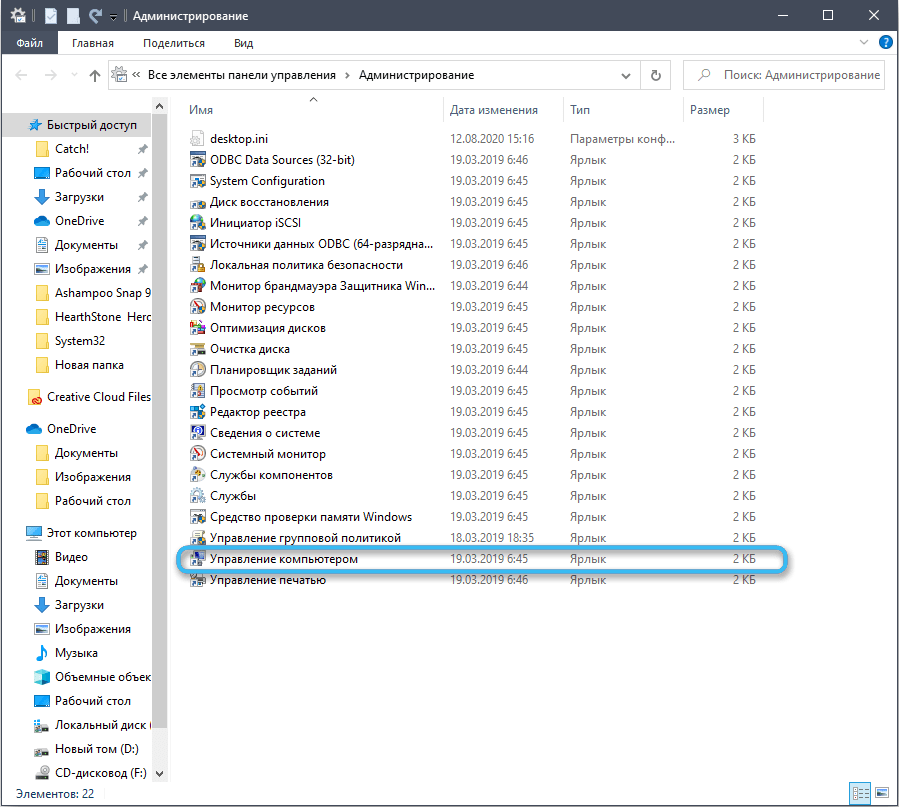
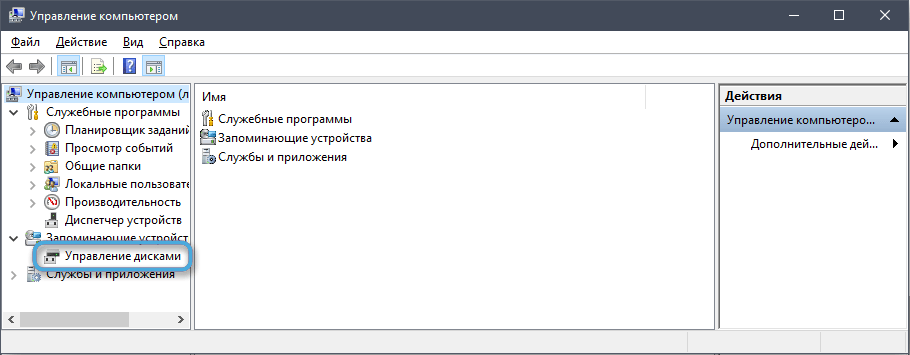
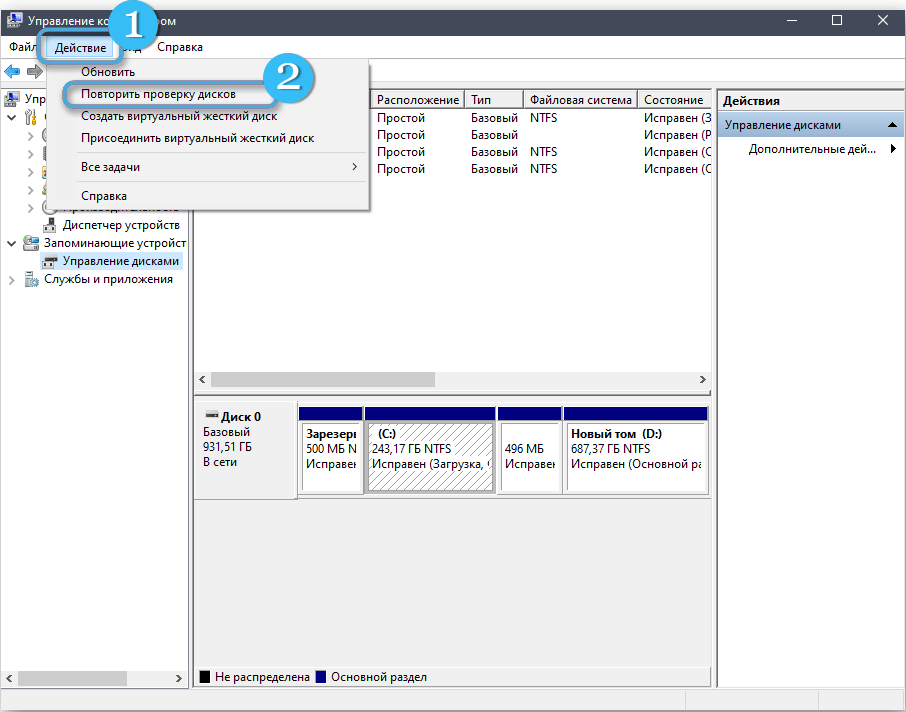
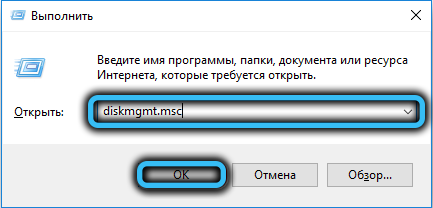
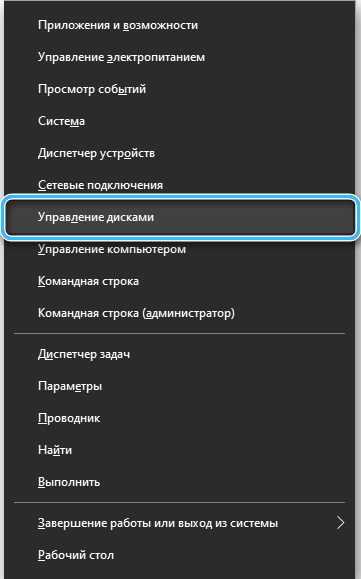
- Go to the “Disk Management” system snap-in (right-click on the “This PC” icon and select “Manage” – “Disk Management” or use the “Run” console (Win + R) and the diskmgmt.msc command).
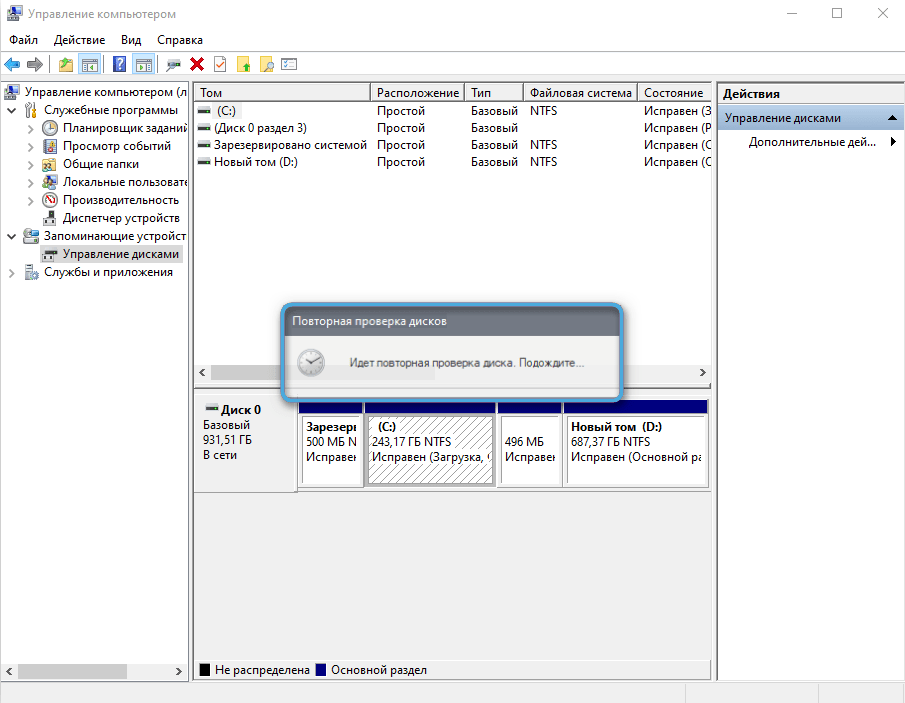
- In the utility window, from the “Action” menu on the top panel, select “Repeat disk scan.”
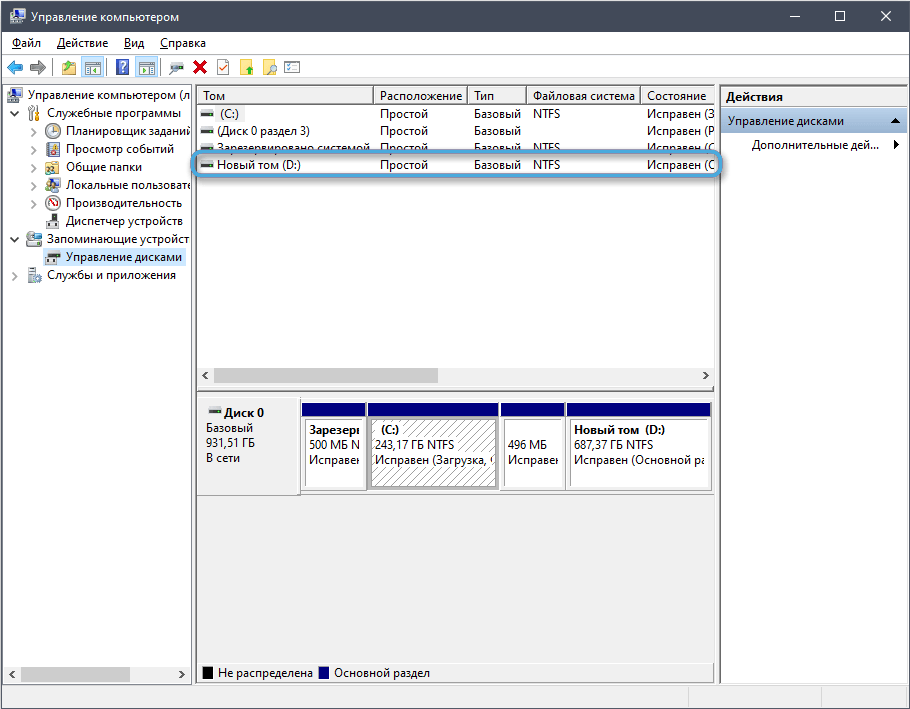
- We wait for the scanning procedure to complete, after which a list of identified connected drives will be shown. D should be among them. If not, we try other ways to solve the problem.
Unhiding empty volumes
If D is empty, which often happens when reinstalling the system, there is a possibility that an option has been applied that hides empty volumes. To make the section appear in Explorer, perform the following steps:
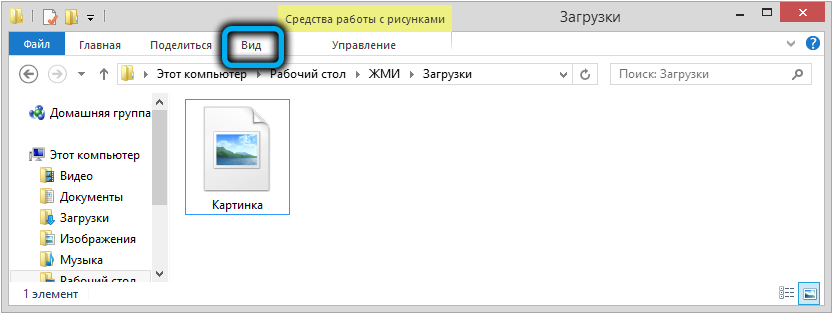
- Let’s go to Windows Explorer.
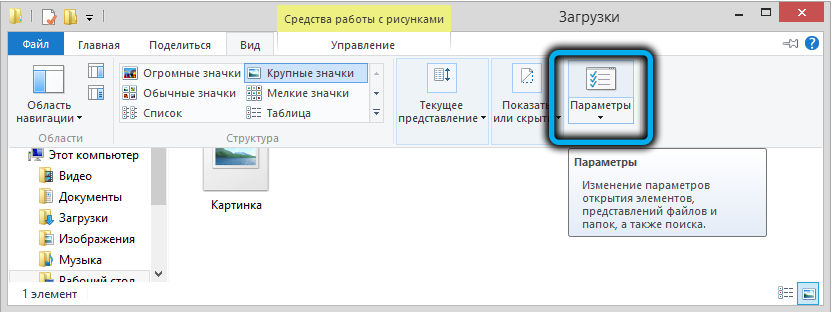
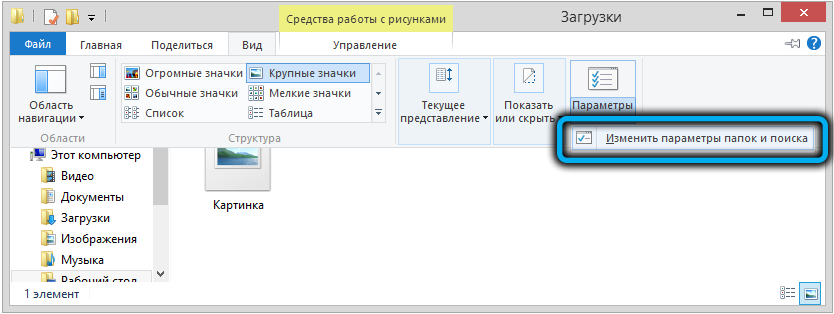
- Go to the “View” tab and select “Options” in the top block that appears (click on the icon or select “Change folder and search options” in the drop-down menu).
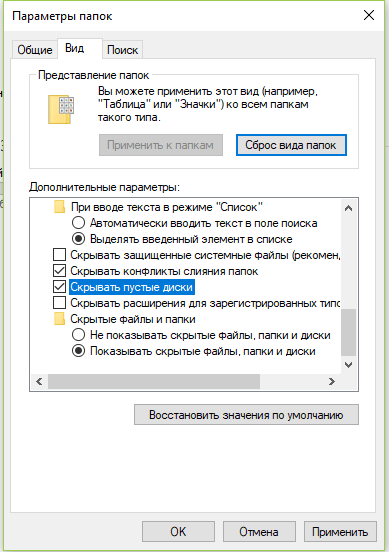
- On the “View” tab of the new window, in the additional parameters block, find the “Hide empty disks” option. If it is checked, uncheck it and apply the changes made.
If the volume was hidden, you can enable its display using the System snap-in. To do this, perform the following steps:
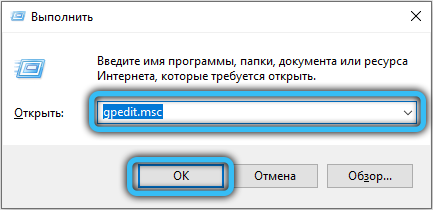
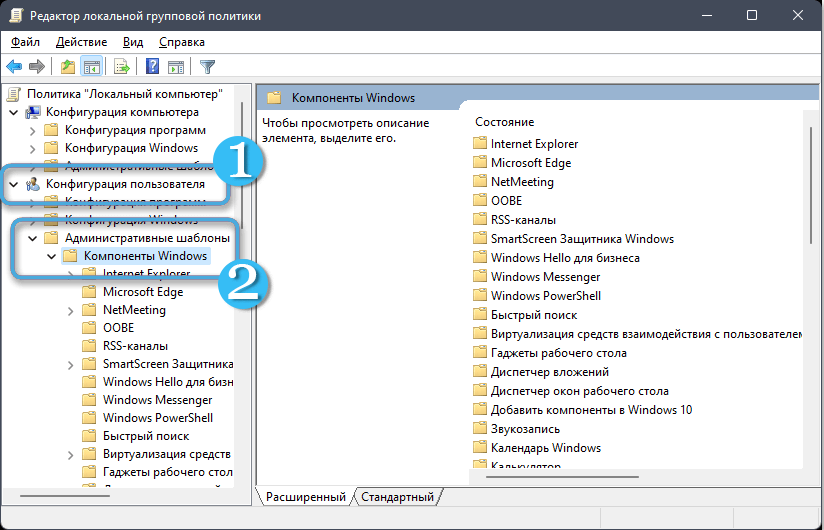
- Using the Run console (Win+R) and the gpedit.msc command, open the Local Group Policy Editor;
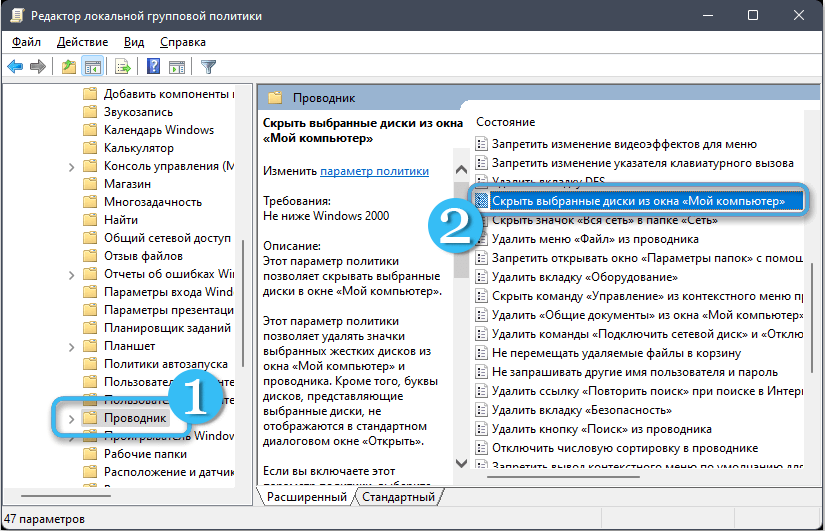
- in the “User Configuration” branch, follow the path “Administrative Templates” – “Windows Components” – “Explorer”;
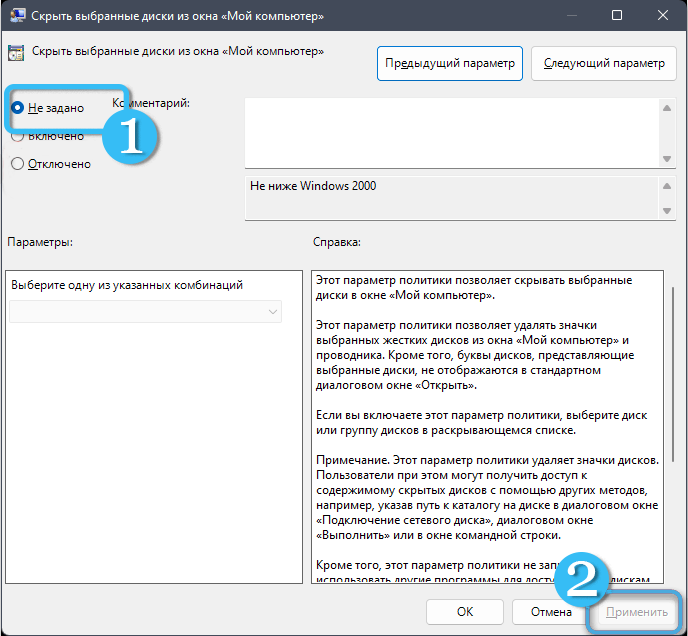
- in the right part of the window, select the option “Hide selected drives from the “My Computer” window”, right-click – “Change”;
- in the new window, select “Not specified” and apply the changes.
Reassigning a missing drive letter
This method will solve the problem if the letter identifying the partition has disappeared. A logical volume reset could happen accidentally, for example, when reinstalling Windows. To return a letter (or assign another), perform the following steps:
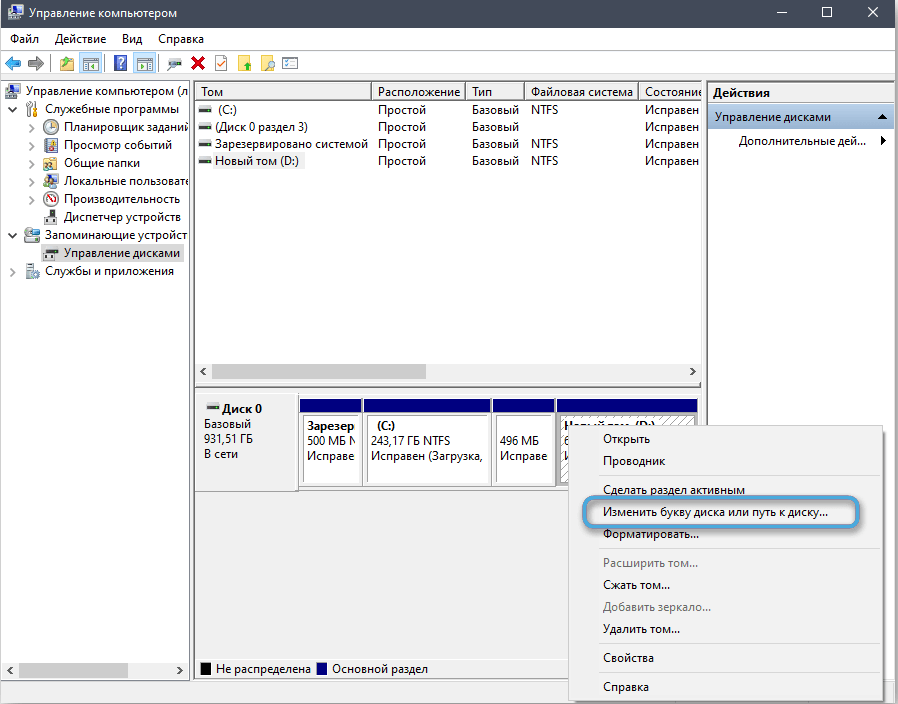
- go to the “Disk Management” system utility in any convenient way (for example, using the “Run” console (Win + R) and request diskmgmt.msc);
- in the lower block of the window, right-click on our unnamed drive and select “Change drive letter or drive path…”;
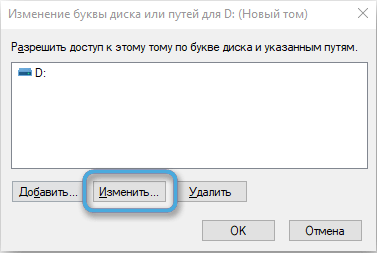
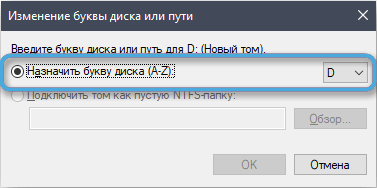
- click “Add” and select the desired letter from the list;
- Save the changes with the “Ok” button.
Initializing and formatting the disk
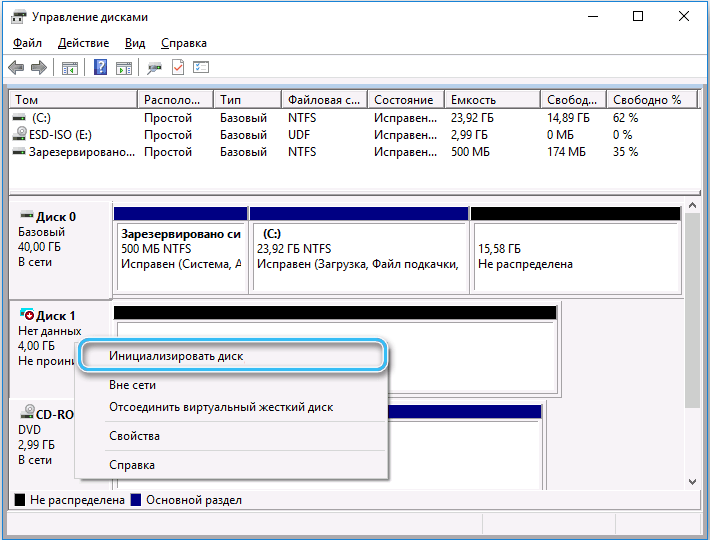
The method is applicable if in the Disk Management utility window you see the status “No data” or “Not allocated”. So, for the first option, we’ll start with initialization, for the second, we’ll move on to formatting.
We perform the following steps:
- open the “Disk Management” snap-in (via “Run” or right-click on the “This PC” icon and select from the available actions “Manage” – “Disk Management”);
- in the lower block, right-click on the drive with the status “No data” and select “Initialize disk”;
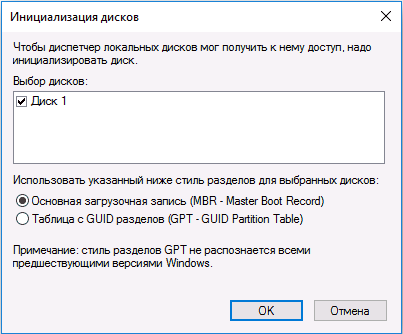
- then in the “Select disks” block, mark the drive, select the GPT format (if you plan to work only in Windows 10) or MBR (for other versions), click “OK” and when the process is complete, select the disk, partition style and click “OK”;
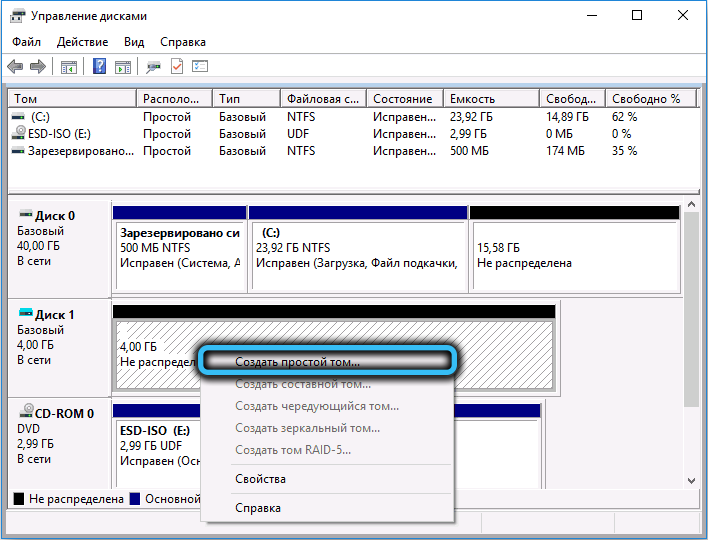
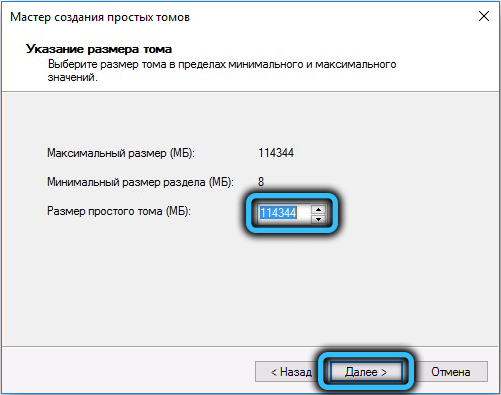
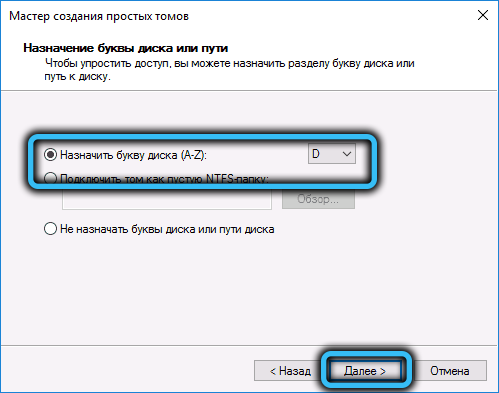
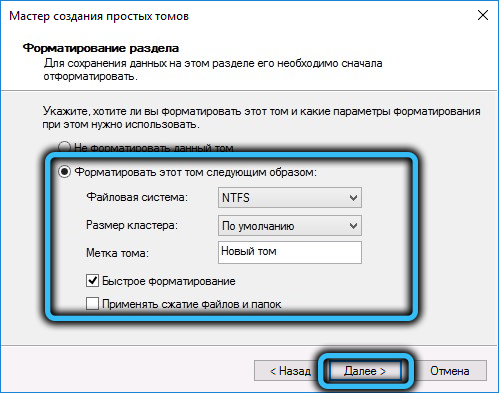
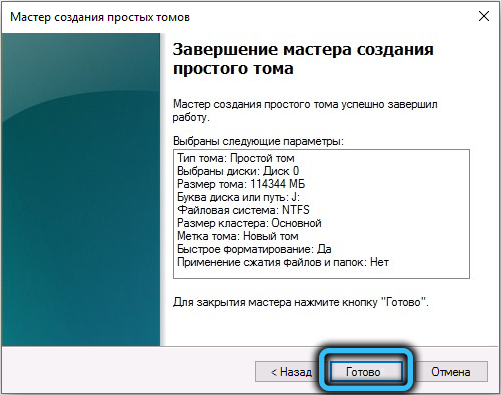
- Next, formatting is performed (if the partition’s status was “Unallocated”, let’s start from this stage, skipping initialization), right-click on the drive, select “Create a simple volume…”;
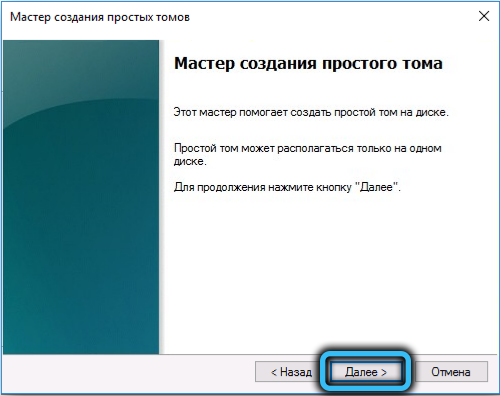
- assign a letter and click “Next”;
- set the format (preferably NTFS) and the size of the local disk (if you skip this step, it will be completely formatted);
- we start the process and wait for the formatting to finish.
Using the Command Line to Format and Restore
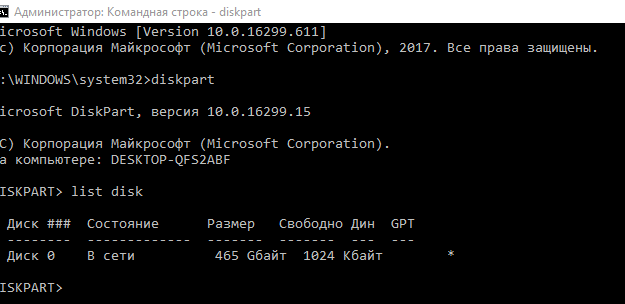
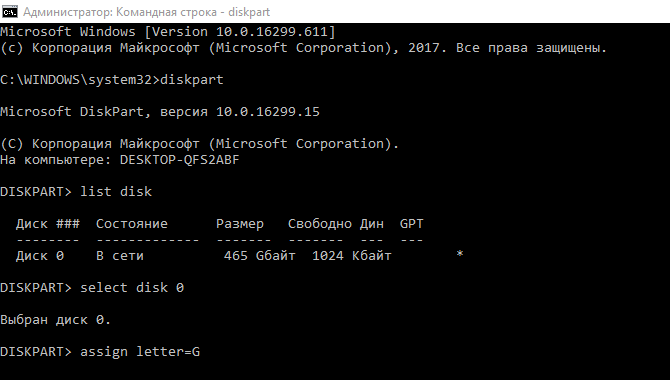
You can also format and restore a local partition using the standard Command Line. To do this we do:
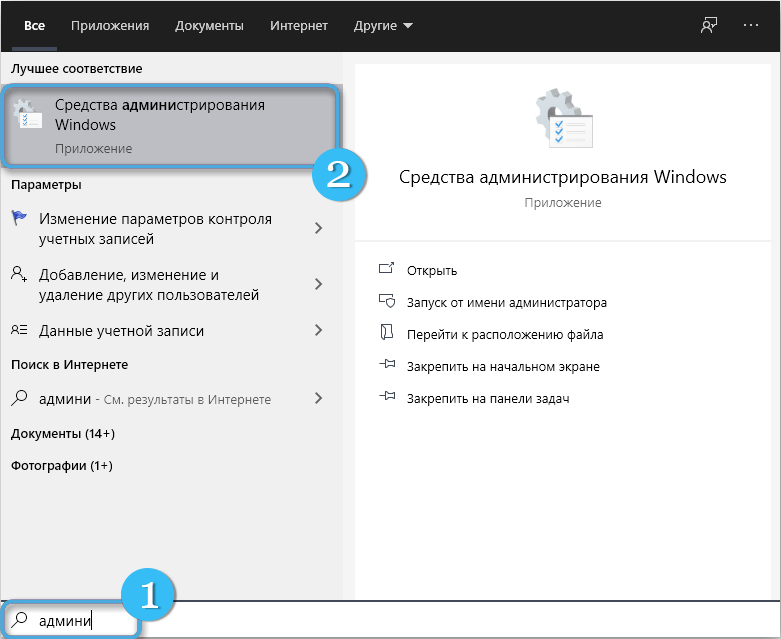
- launch the terminal as an administrator in any convenient way (for example, through the Start context menu or the search bar);
- when prompted, we allow the application to make changes on the device;
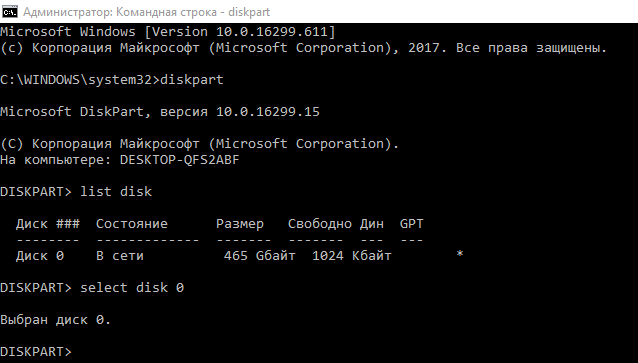
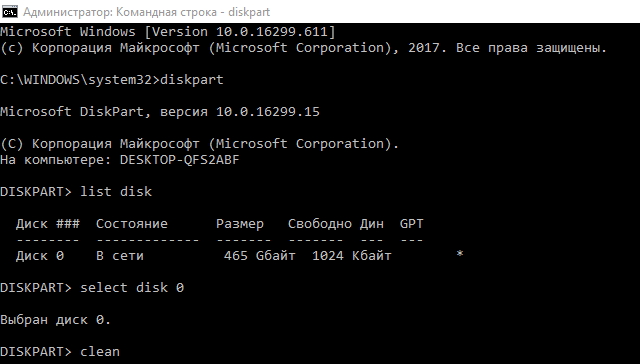
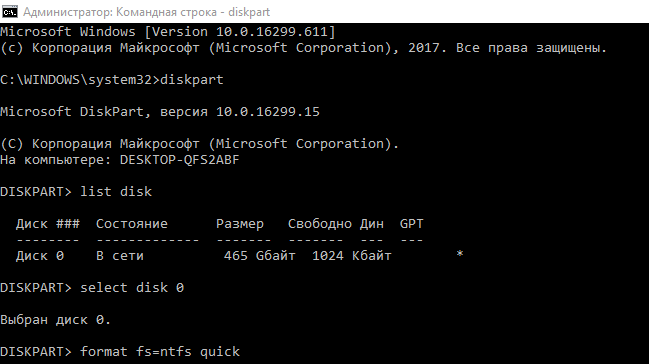
- Enter the commands one by one (press Enter after each):
diskpart
list disk (the command will display a list of connected drives)
select disk E (there may be another drive letter instead of E, the command allows you to select a letter from the list that opened at the previous request)
clean (to clean the selected volume)
- After completing the formatting process for the missing partition, create a new one:
create partition primary
format fs=ntfs quick (convert to NTFS format) - assign the required letter to the section:
assign letter=F (instead of F there can be any letter that does not coincide with the names of other local drives)
- Ready. To exit, enter exit.
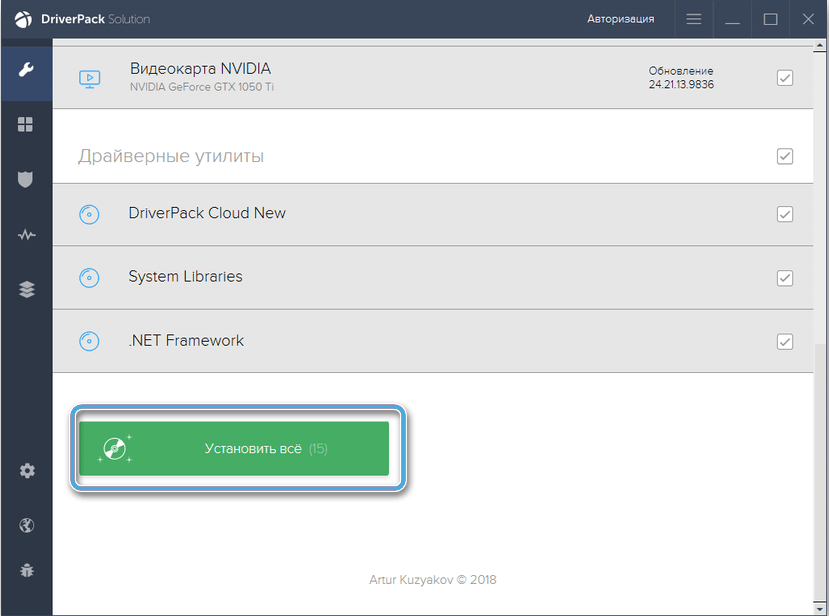
Motherboard Driver Update
The local drive may not be recognized by the system if the motherboard software is not up to date. You can update device drivers in different ways:
- through the “Device Manager” system snap-in, performing an automatic or manual search for drivers;
- manually downloading the software from the device manufacturer’s website;
- through special utilities for updating software.
System rollback
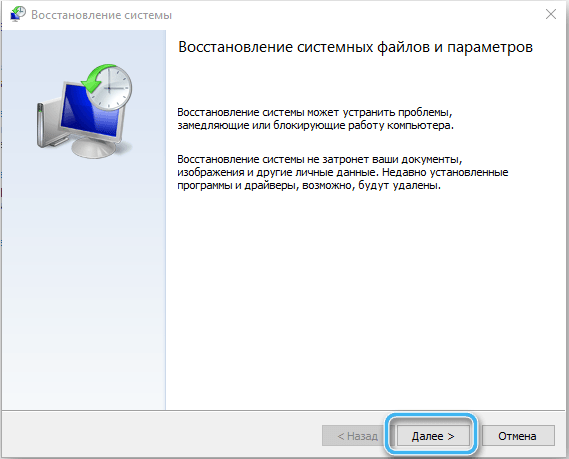
The created system restore points come to the rescue in situations like this, when the functioning of the OS has been disrupted for various reasons. With their help, you can restore Windows to a state when the problem had not yet arisen and everything was working properly:
- open the system recovery options window in any convenient way (for example, go to Settings (Win+I), go to the “Update and Security” – “Recovery” section);
- Click the “Start” button and select the recovery option;
- Click “Next” and “Reset” to start the procedure and wait for it to finish.
Using third party software
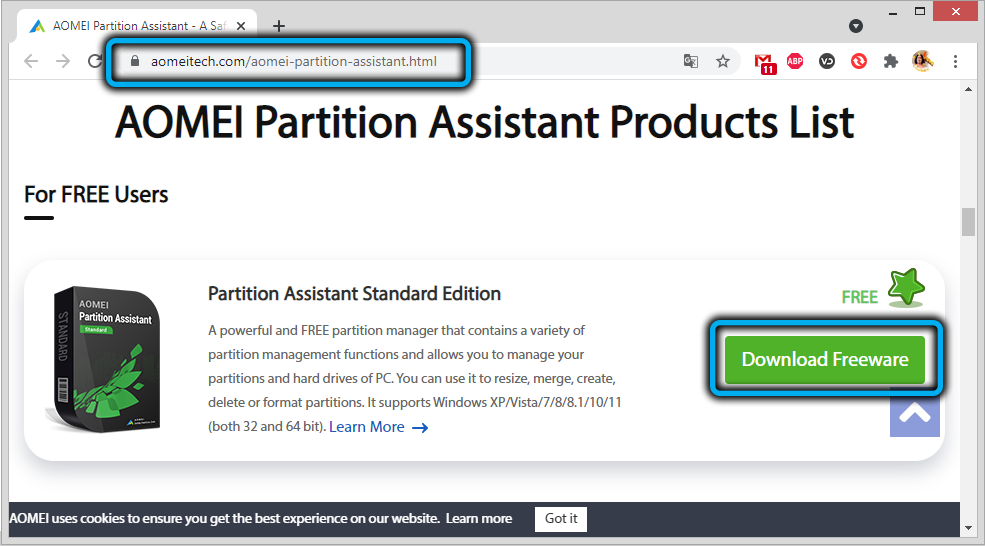
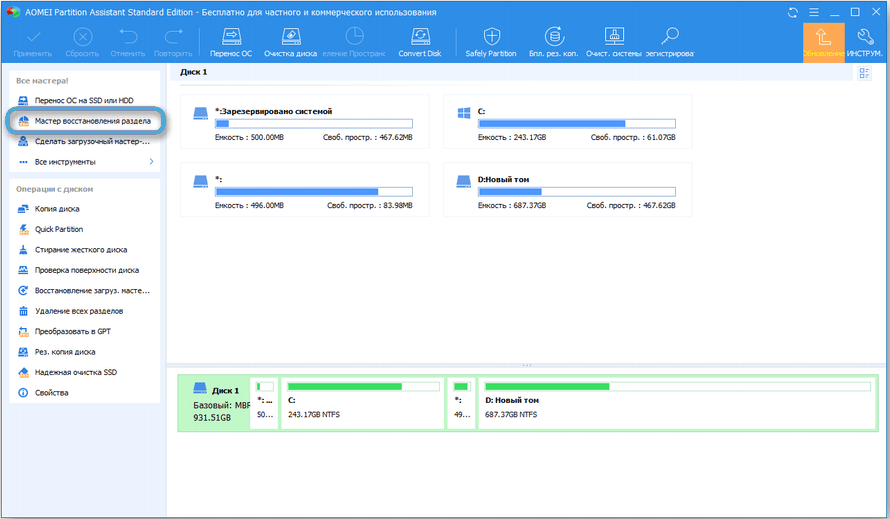
Another way to troubleshoot the problem is to use third-party tools, which include the option to restore a logical drive. Let’s look at how to perform the task using the utility as an example:
- download the software from the official website;
- launch, select “Partition Recovery Wizard” from the menu on the left;
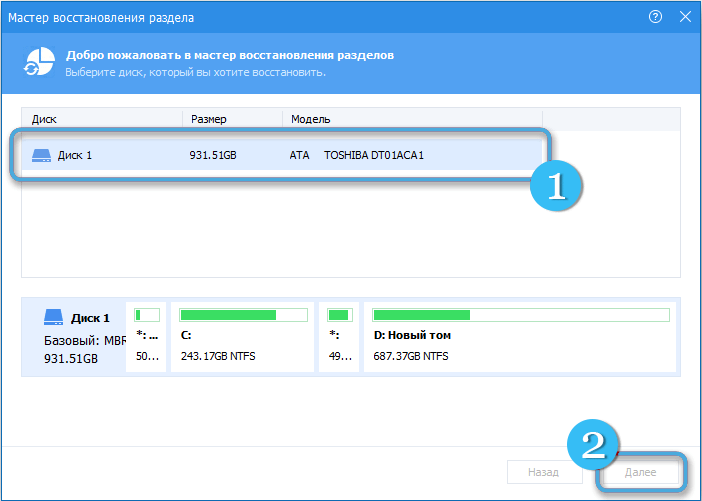
- select the drive, click “Next”;
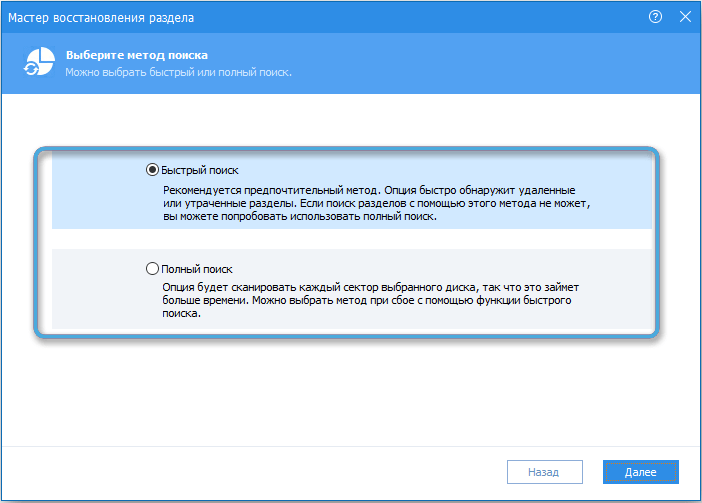
- now you need to select a search method (quick or full) and click “Next”;
- wait for the process to complete (the time depends on the disk size and speed);
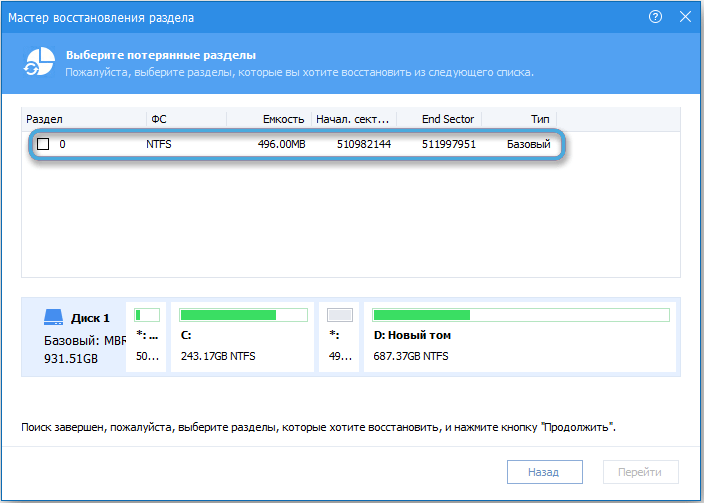
- in the next window, mark the missing volume and click “Go”;
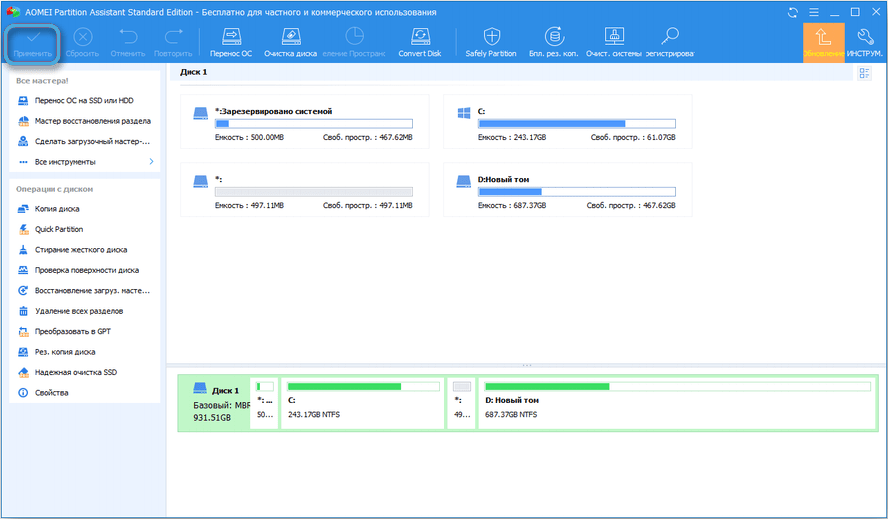
- apply the settings by pressing the corresponding button.
You can also perform the procedure using other tools for working with drives that include this feature.
Using the above methods, depending on the cause of the problem, you can solve the problem yourself and return the D drive to display.
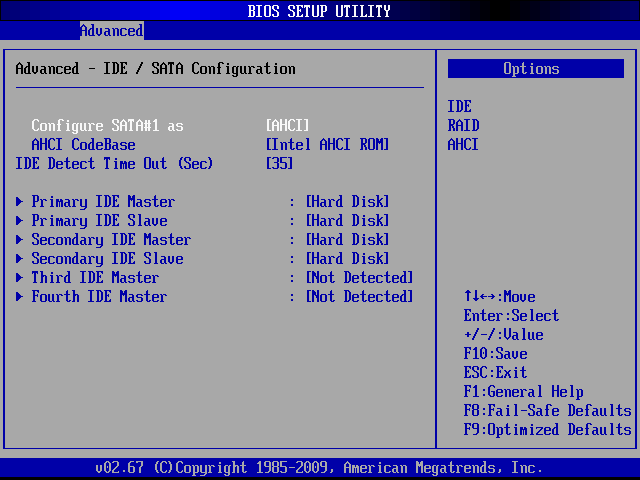 In the case of SATA, we are looking for sections with a suitable name. The name or the inscription “Hard disk” (Not installed) will be written opposite the item.
 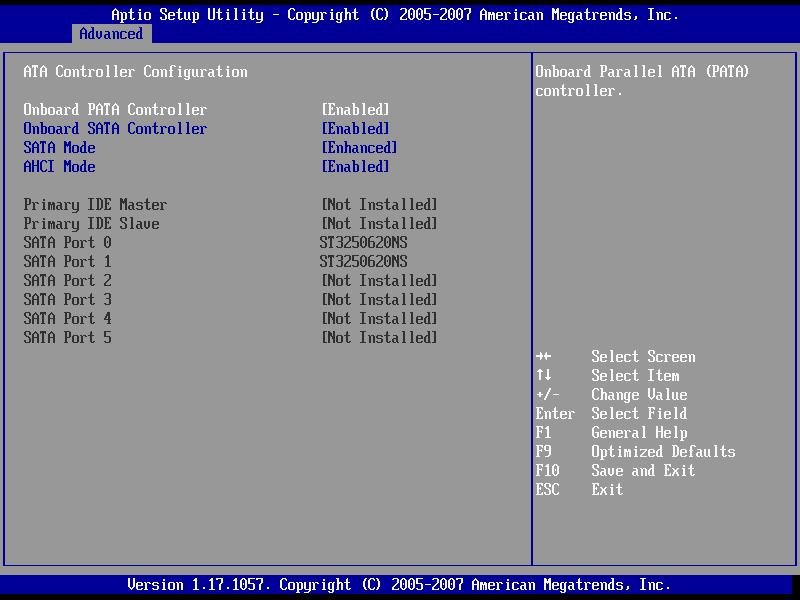 The BIOS will detect the drives, otherwise you will see a “Not Detected” message.