Most conventional computer monitors (like TVs) support 60Hz refresh rates. This is sufficient to ensure acceptable smoothness of movement, but not in all cases. In PC games, where sampling degrades the dynamic gameplay, monitors are used with twice the rate – 120 Hz or even higher. Does this mean that conventional monitors are severely limited by the standard frame rate? By no means, and today you will learn how to overcome this barrier.
Contents
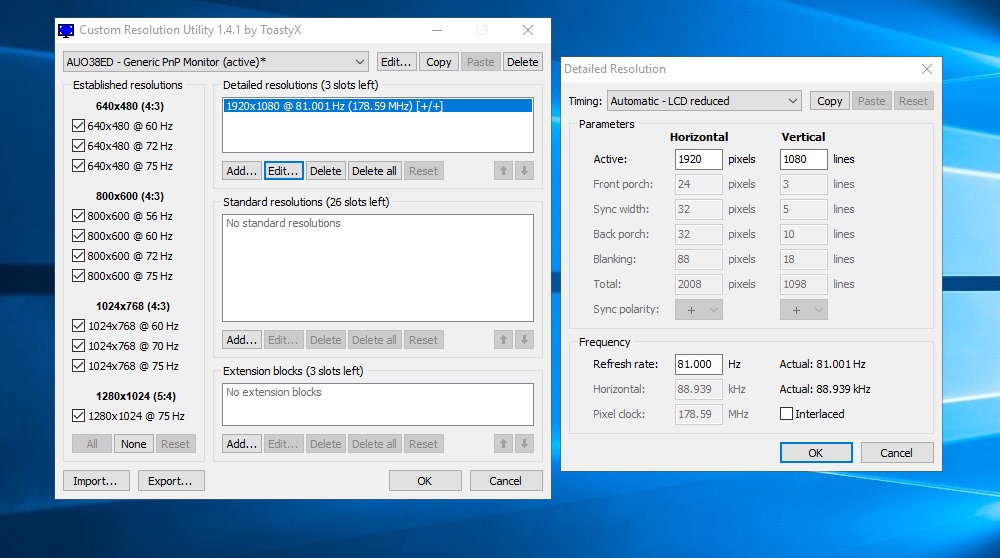
Custom Resolution Utility – what is this program
If the matrix manufacturer claims to support a frame refresh rate of 60 Hz, this means that if you want to use programs that test monitor parameters, you can be sure that this indicator will be at the level. Otherwise, the manufacturer cannot avoid legal claims initiated by consumers.
In practice, this means that on any monitor, the technical characteristics of which say about the refresh rate of the screen equal to 60 Hz, the ability to work with a slightly higher frequency is realized. Since the production process of the matrix is technologically quite complicated, it is better to protect yourself from possible unpleasant consequences by initially setting some error regarding the refresh rate of the screen. And, of course, in a big way.

In other words, any monitor is technically capable of supporting a refresh rate higher than the rated one, and the said margin is about 25%. And if it is 60 Hz, then in fact the monitor is capable of supporting about 75 Hz. Can the monitor be made to run at that frequency?
It turns out – yes. Fans of overclocking and smooth viewing of dynamic scenes will like this, since this possibility is realized in a purely software way. For example, the Custom Resolution Utility. In addition to raising the refresh rate of the screen, the program can adjust the resolution of your monitor, but here it is no longer beyond the specification sheet.
The Custom Resolution Utility supports almost all models of ATI / AMD, NVIDIA video adapters and is able to work correctly with certain models of Intel video cards. True, there are limitations on the part of the OS – the utility will not function in computers with Windows XP, there should be no problems with versions from Vista and higher.
Setting Custom Resolution Utility
Any manipulation of the resolution is fraught with the fact that the monitor will go out and you will not be able to return the settings back in a simple way. To avoid such a scenario, it is advisable to download, install and run any program that allows you to download, install and run before installing the Custom Resolution Utility. TeamViewer has quite good recommendations, but you can use any software of this class, issued on request in Google in the top 10.
An easier way to restore your previous settings if something goes wrong is to restart Windows in Safe Mode.
So, the procedure for installing and setting up the Custom Resolution Utility for the first time:
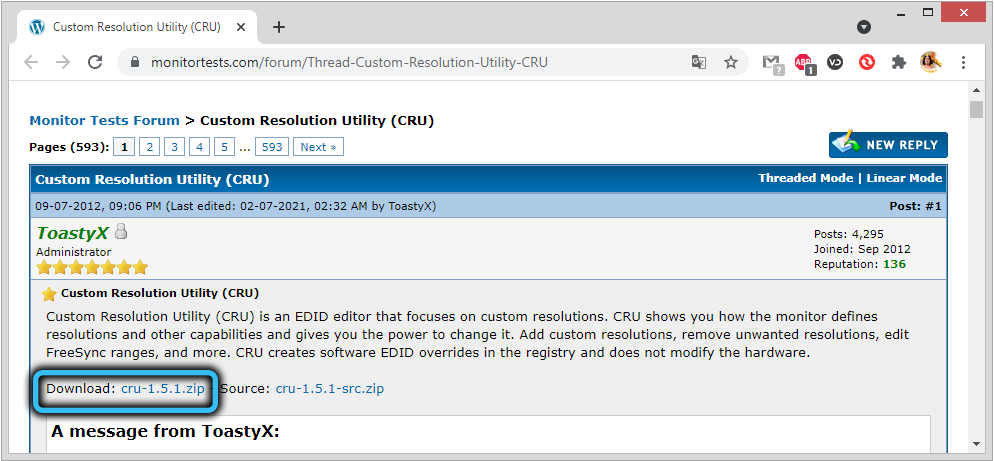
- download the program from a trustworthy file hosting service;
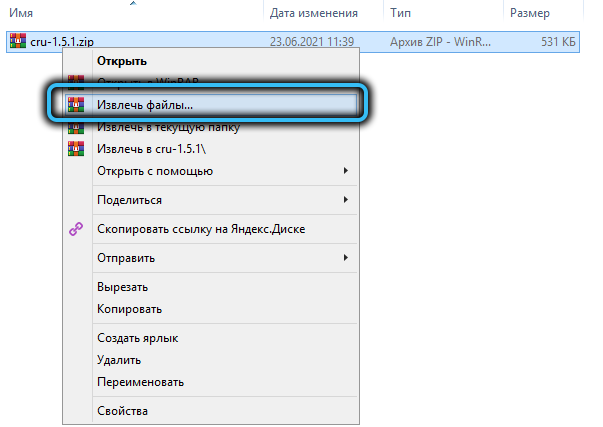
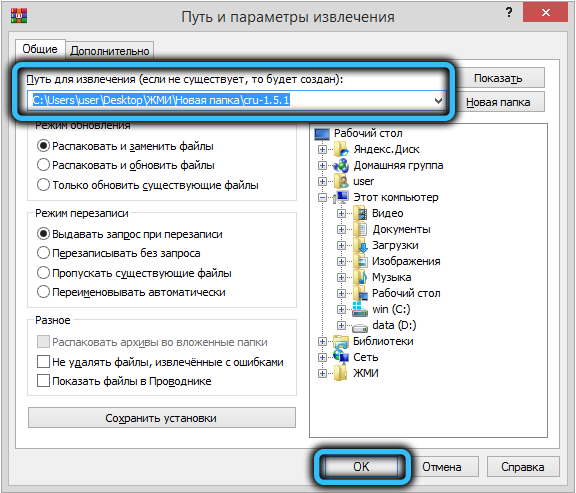
- unpack the utility;
- run the Custom Resolution Utility (always with administrator rights);
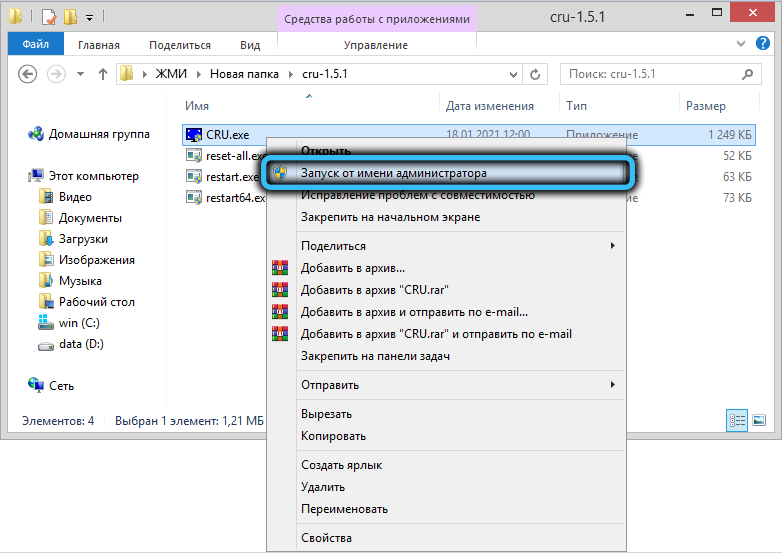
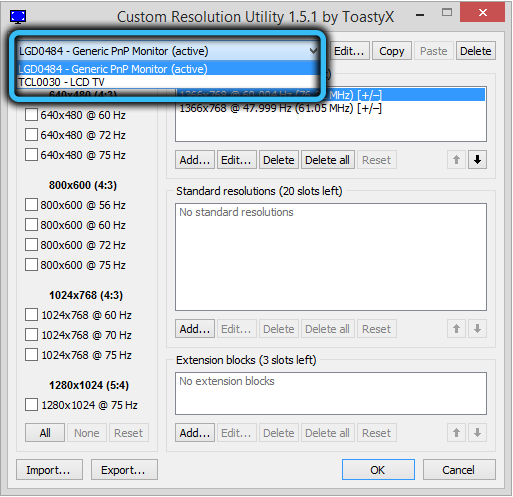
- select your monitor in the list that appears;
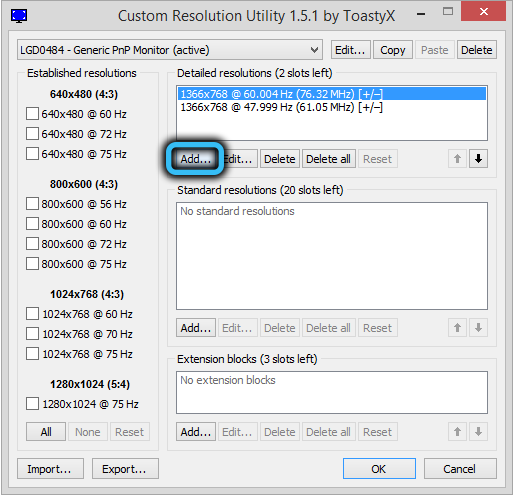
- press the Add button;
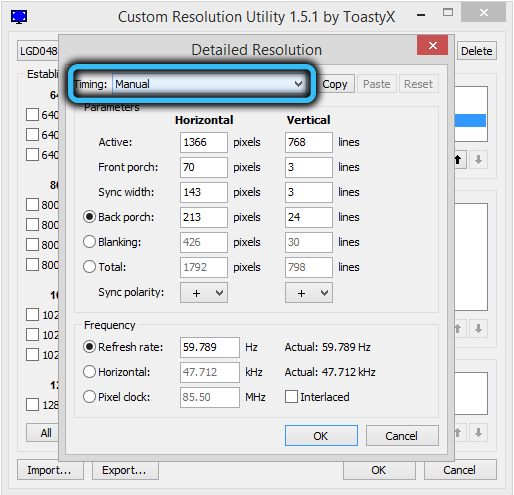
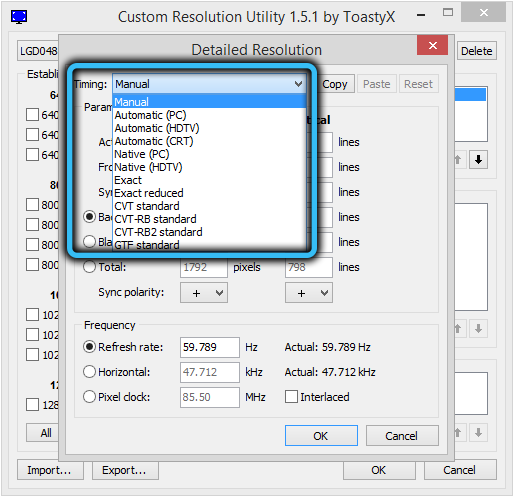
- set the desired value in the Timing parameter (how to select it will be described below);
- we indicate the resolution supported by our monitor;
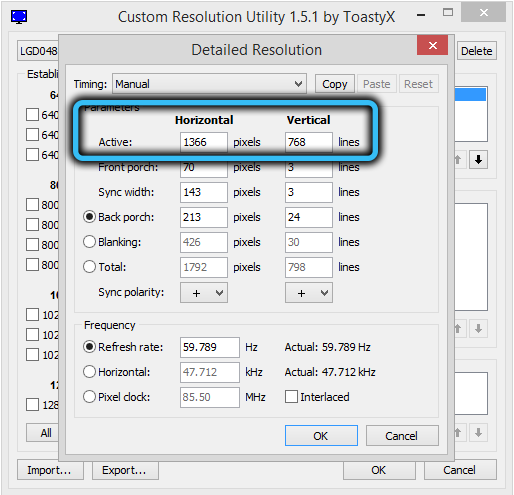
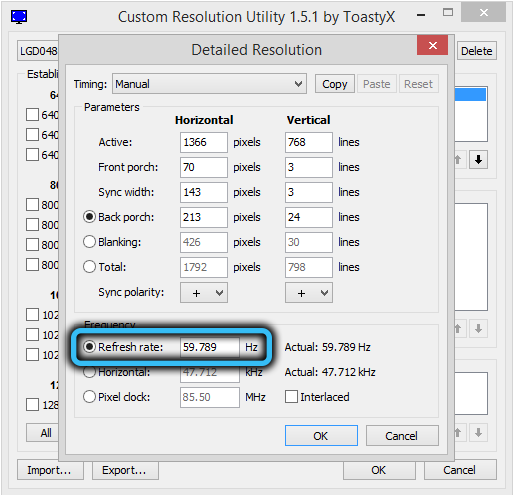
- increase the value of the screen refresh rate (Refresh rate);
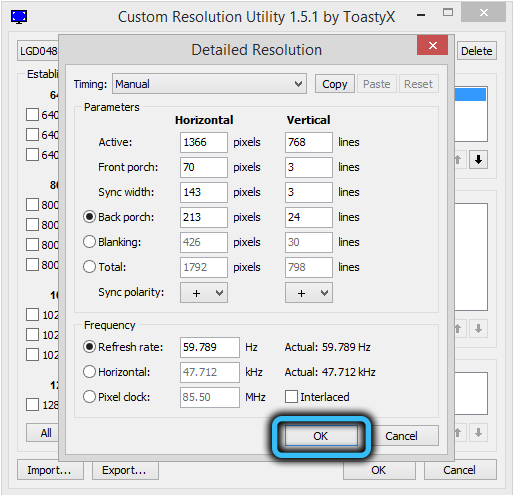
- click OK twice;
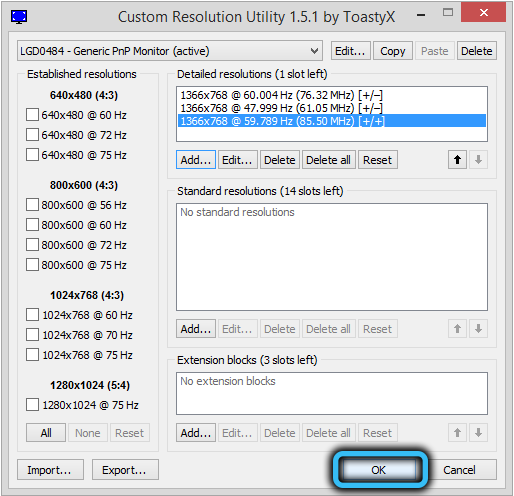
- in the utility’s installation directory, run restart.exe (for 32-bit OS) or restart64.exe (if you have 64-bit Windows).
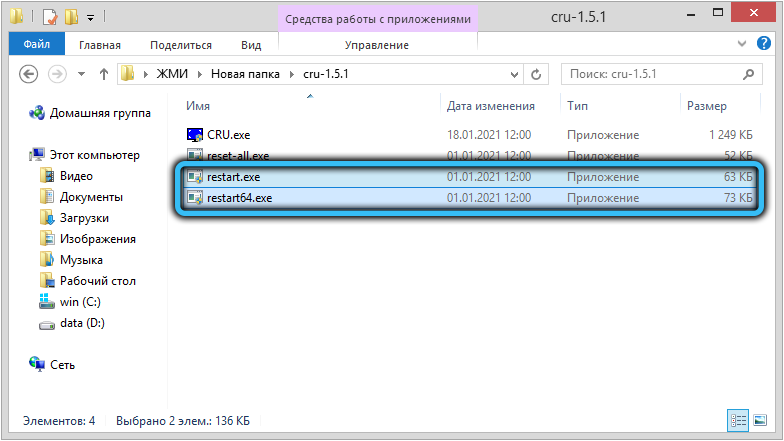
As a result of the actions taken, the screen should first go out, and then go to the mode that you have set. If it turns out to be beyond the power of the video card, the monitor will remain black, and it will be possible to return the previous settings by a workaround – via remote access, in recovery mode or in safe mode.
Now about what to write in the Timing parameter. Here, by clicking on the arrow, you will get a rather long list of the available modes:
- Manual – the default value that allows you to manually set the synchronization parameters;
- Automatic – LCD standart – a mode that allows you to set the standard synchronization characteristics corresponding to liquid crystal monitors, as well as modern high definition TV models;
- the “Automatic – LCD native” mode should be selected if you want to set the standard timing for an increased or non-standard refresh rate, usually used when the frequency is overshoot the nominal;
- “Automatic – LCD reduced” – a mode that allows you to manipulate the timing parameters to reduce the number of pixels in order to achieve an increase in the frame rate;
- the “Automatic – CRT standard” mode is selected for old CRT monitors.
There is no need to try to set the refresh rate to the maximum calculated according to our method: it is averaged, so it does not guarantee that you can increase the frequency by exactly 25%. It is recommended to increase the value of this parameter by 1-3 points, then press OK and observe the results. If all is well, you can proceed to the next iteration until you reach the ceiling for this monitor model.
How to use the Custom Resolution Utility
We have already noted that too high a value for the Refresh rate can lead to the fact that the video card will not be able to send data to the monitor at such a frequency, as a result of which it will remain black. But even if you selected the maximum value at which the image is visible, this does not mean that you have achieved what you want: the operation of the graphics subsystem must be tested, since at an overestimated frequency, artifacts may appear, and then the Refresh rate will need to be reduced.
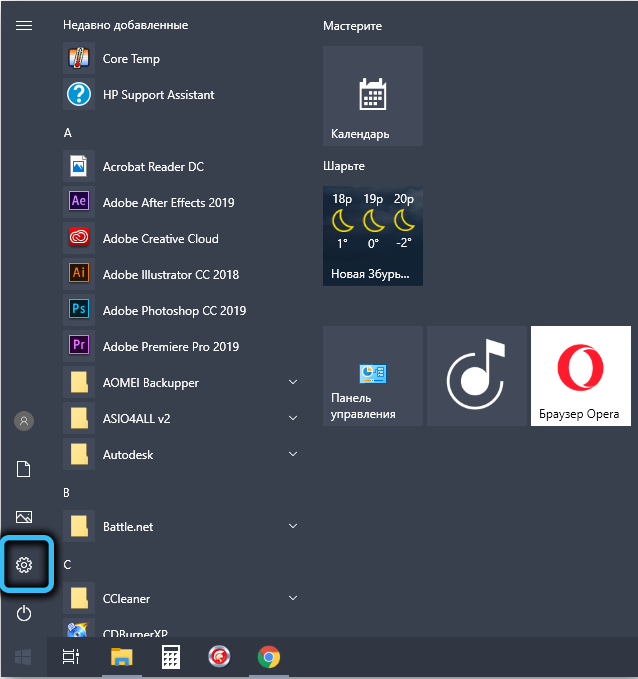
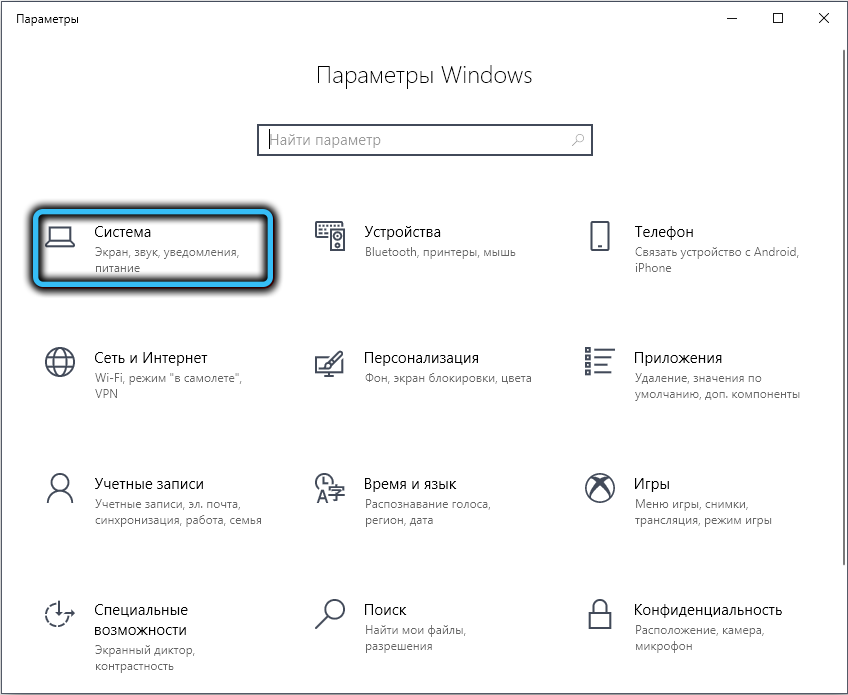
In principle, the algorithm described above, how to change the resolution and refresh rate using the Custom Resolution Utility, is sufficient for the changes to work after starting restart.exe or its 64-bit version. The only function of these two firmwares is to restart the video driver, and this is usually the case. Now, when you go to the video card control panel using standard Windows tools, you will see that in the list of available resolutions and screen refresh rates, new values have appeared – those that you entered when increasing the Refresh rate. They will be available until the operating system is reinstalled, after which the entire procedure will need to be repeated.
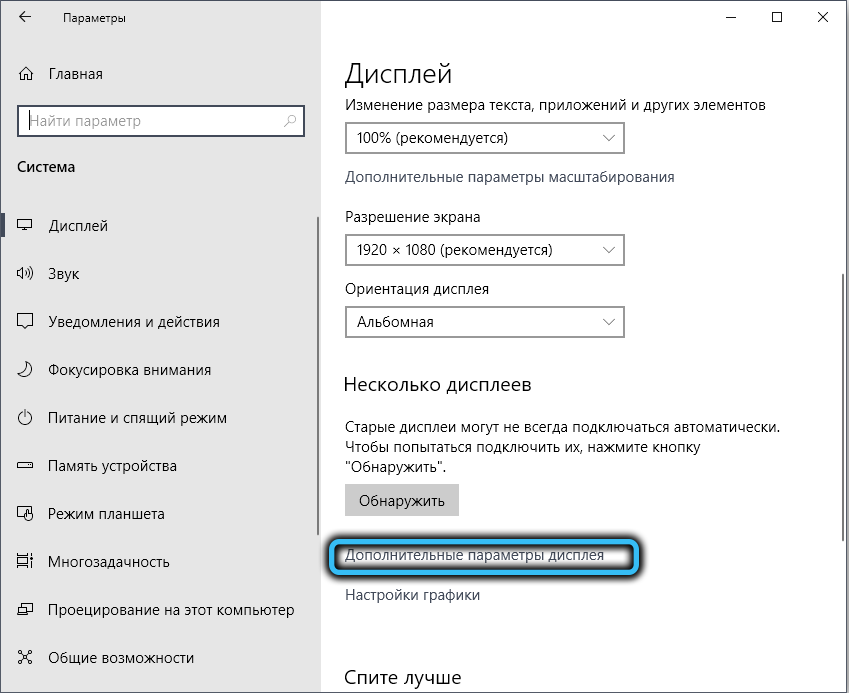
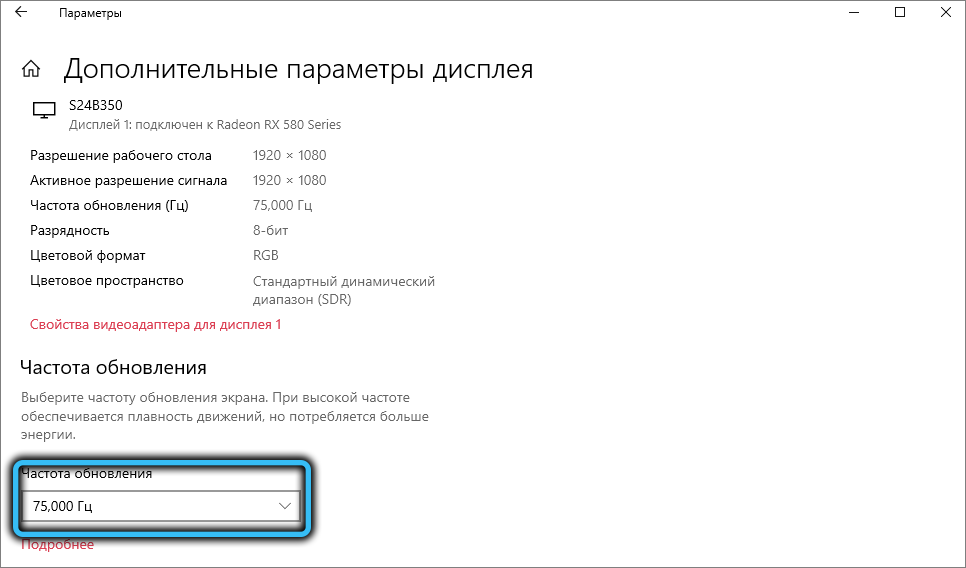
It is advisable to test the operation of the graphics subsystem after the changes made using third-party software or even online, for example, on the TestUFO website.
Adding AMD FreeSync Support
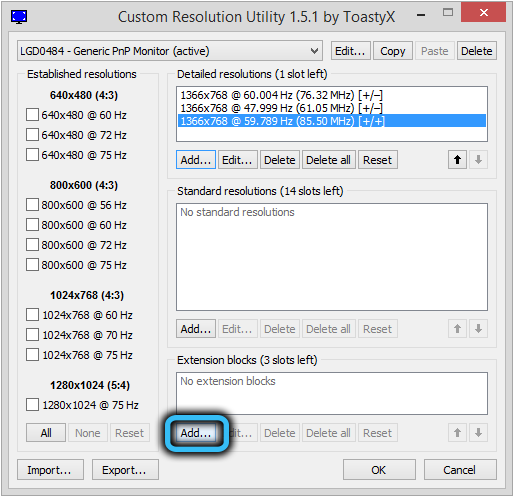
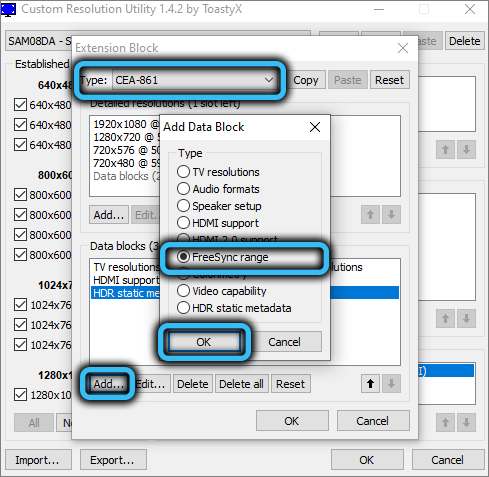
In the main window of the Custom Resolution Utility, there is an Extension Block section at the bottom. If it is empty, you need to click the Add button, if not, then select the CEA-861 mode and click Edit. A new window will open, in which in the lower block (Data Blocks) you need to click the Add button and select the FreeSync range value from the list that appears. Then you need to select the value of the sweep frequency in the range of 50-60 Hz and click OK. Then – restart the video card driver in any of the described ways. If the graphics subsystem is stable, you can try to increase the hertz of the monitor and continue iterating until the optimal value is obtained.
Enabling HDR on monitors without HDR support
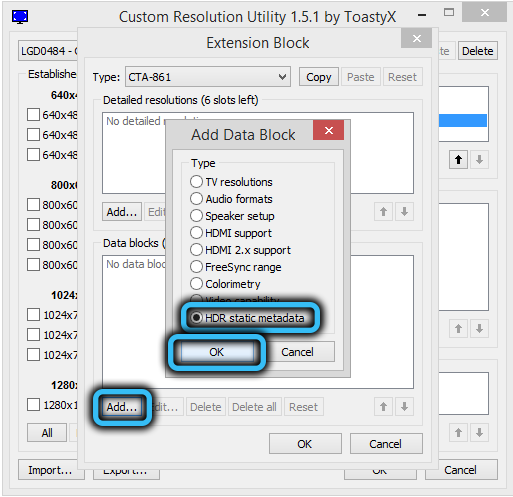
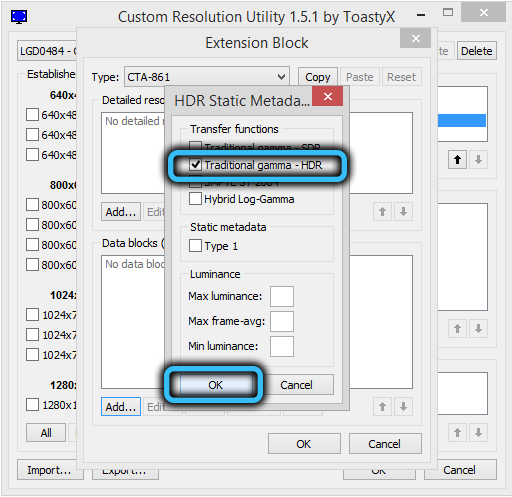
The procedure is similar to enabling FreeSync – again go to Data Blocks, click Add, but in the list that appears, select the HDR static metadata item. After clicking OK, select the Traditional gamma – HDR item in the HDR Static Metadata window. However, the High Dynamic Range mode may not turn on – it all depends on the specific monitor model. Note that this function has nothing to do with hardware – it emulates HDR, and the difference with the standard image will not always be noticeable.
Conclusion
For ordinary users, increasing the hertz of the monitor is hardly vital. And not everyone will be able to notice the difference, especially if the increase is small, within 5-10 Hz. But an increase of 20-25 Hz can reduce desync, especially in dynamic games – when watching a regular video, the difference in the frame rate is not so important, since for the human eye already 25 Hz is a global standard. However, the sensitivity of the eye is much higher – up to 100 Hz, but on small screens the required smoothness is achieved at low frequencies. In games, the situation is somewhat different – all frames are sharp, besides, the player controls the process taking place in the frame, so here the frequency should be higher than usual.