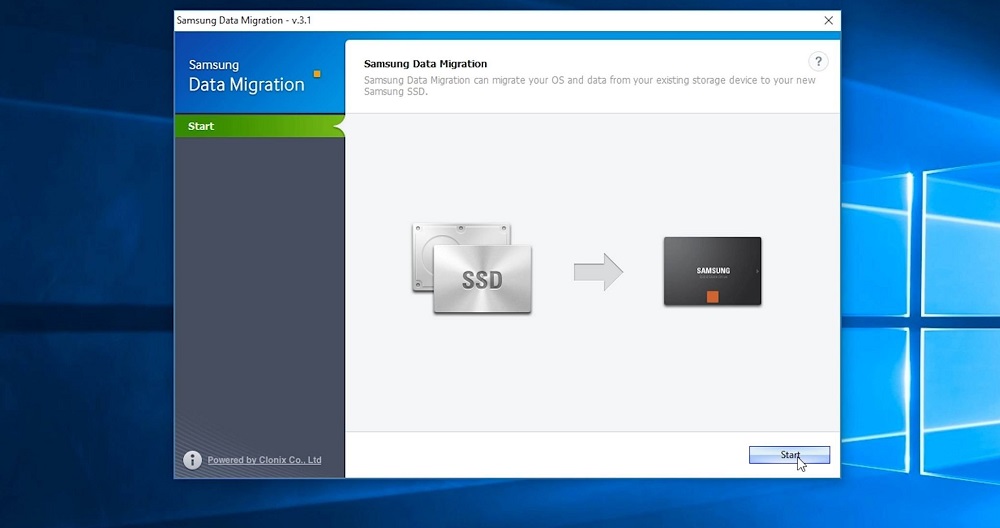
Upgrading a computer is not such a rare procedure, given that the amount of stored data is constantly growing, and the capacity of the existing drive becomes insufficient over time. But replacing a disk, especially an SSD drive, is a rather troublesome procedure, because you need to first install the operating system, and then spend time transferring all installed programs and applications. If there were a lot of them, then on this operation you can spend several days without guarantee that everything will work as before. Copying data from the old media to the new one will not give the desired result, of course, but there is an alternative solution. Special utilities are able to clone a disk and at the same time transfer all important data, including those that are entered into the registry, various INI files and drivers. One of them is Samsung Data Migration,and today we will look at various options for its use.
Contents
What is Samsung Data Migration Program
Solid-state drives, which are predicting a bright future, are already on this path. Their disadvantages are gradually being eliminated, and the advantages in speed are quite obvious. Considering that prices for SSD drives are gradually being compared to those for conventional hard drives of equal size, it can be expected that the transition process may become massive in the medium term. The second important limiting factor, apart from the price, is the relatively low resource of such drives, or rather, the limitations on the number of write operations on such a medium. Therefore, the most widespread and popular area of application of SSD-drives is their use as system drives.
Many media manufacturers also release specialized utilities designed to make new drives easier to use, including allowing Windows to migrate from old media to new ones. Samsung Data Migration is just an example of such a program, the only function of which is to clone an operating system installed on another drive onto a solid-state drive – by the way, it can be another SSD drive, for example, of a smaller volume.

The utility, according to the developers, is focused on disks of its own production, ensuring the correct transfer of information from any other drives.
Samsung Data Migration Tool works correctly in all versions of Windows starting from 7 (version 3.1 worked with XP), supporting most Samsung SSD models.
Installation and configuration
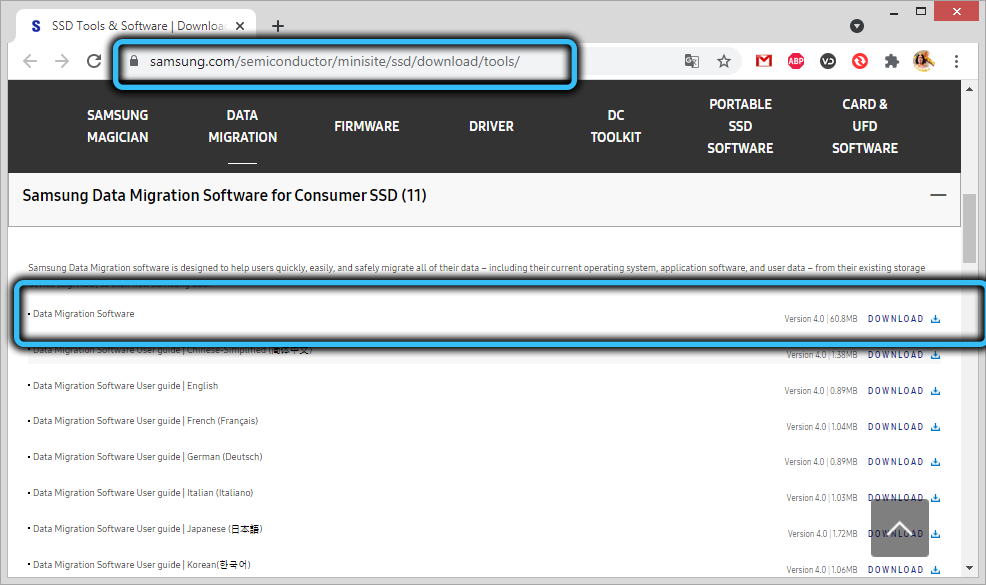
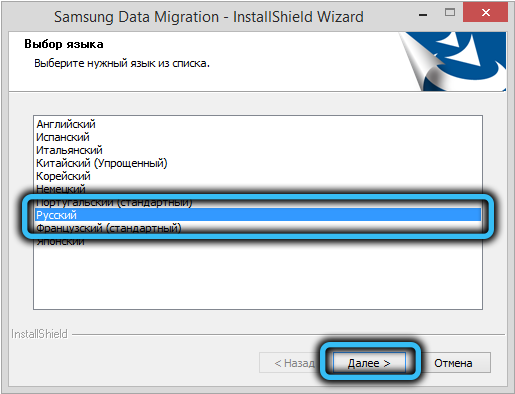
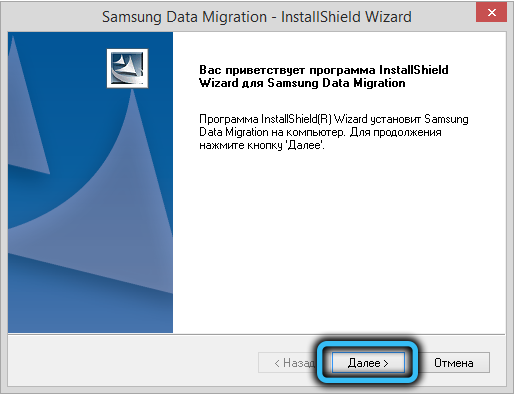
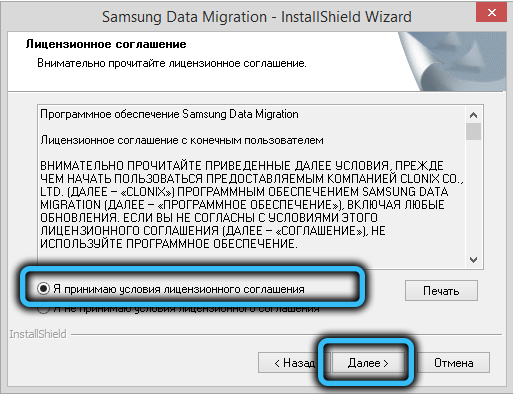
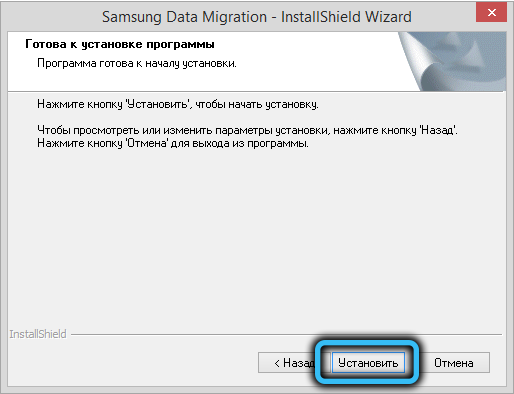
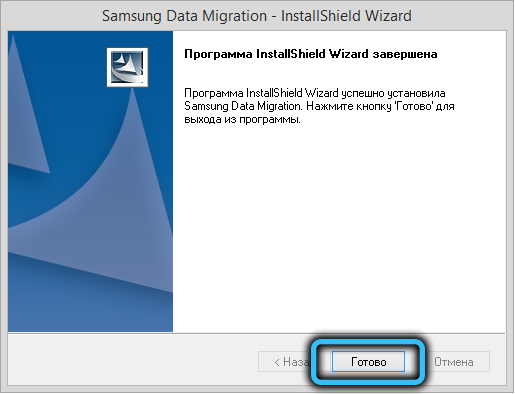
There should be no problems with the installation of the program – this is a standard procedure. The main thing is to download the utility from a trusted source, preferably from the official website, which ensures that you are using the latest version of Samsung Data Migration. At the time of this writing, this was version 4.0. Here you can also download a file with detailed instructions in Russian.
The hardware requirements are small – 1 GB of RAM is enough (free, of course). The drives to be copied can be any other than RAID type.
It is very important to properly connect both the source and destination drives. If this is a desktop computer, the matter is greatly simplified – we simply add a solid-state drive by connecting it with a SATA cable. If the motherboard does not have a second free SATA connector, you can temporarily use the cable going to the DVD drive, provided that it is also SATA.
It is a little more difficult to ensure the connection of an SSD drive using Samsung Data Migration to a laptop – in most cases it will not be possible to insert a second drive inside, so you have to connect it via USB. Well, except that if you insert it instead of the same DVD drive, but this is still a hassle.
To simplify the procedure, you can use the 2.5 ″ pocket by connecting it via USB.
How to Use Samsung Data Migration Utility Properly
Before starting the program, make sure that the following conditions are met:
- you intend to transfer an operating system that is included in the list of supported in the user manual, there is also a list of SSD models supported by Samsung Data Migration;
- you can only clone the disk on which the OS is present, that is, it must be the system one;
- if you have several disks or they are divided into logical volumes, then by default only the C: drive, marked as system drive during Windows installation, will be cloned;
- if the original disk contains an OEM partition created for system recovery, it will not be cloned. As an exception, we can name a PC manufactured by a South Korean company, and provided that the Samsung Recovery Solution utility is installed on the computer, starting with the fifth version;
- the system-occupied target disk may be less full than the source disk. This is a normal situation: the fact is that Samsung Data Migration does not copy large enough files created by the operating system to work with virtual memory (these are so-called swap files, as well as files generated for hibernation mode);
- if the source disk is encrypted, it cannot be cloned. To copy it, you must delete the password used for this drive;
- it is important that the latest versions of the motherboard drivers are installed on the computer – otherwise, the cloning procedure may proceed with deviations;
- correct cloning of Samsung Data Migration is not guaranteed even if the owner of the computer uses several operating systems located on different disks;
- the presence of bad sectors on the original disk can go unnoticed for a long time, without leading to noticeable failures in the OS. But after cloning, errors may appear, so it is important to check the media for bad sectors before copying;
- before performing Windows transfer using the Samsung Data Migration utility, it is recommended to close all other programs in order to free up the maximum amount of RAM;
- the cloning program may not work correctly if the software for instant computer recovery is installed on the PC;
- files located in the “Library” directory will automatically be placed in the list intended to be excluded from the copy operation;
- if you need to exclude other files that are not in the user’s Library directory, you must run the scan function, while such system directories as the Windows root folder, Program Files and Recycle Bin are not scanned;
- If you want to clone an operating system to a Samsung NVMe SSD, check that the NVMe Driver is installed to ensure the guaranteed result.
As you can see, before cloning, you have a certain front of preparatory work. Now let’s get down to the step-by-step instructions explaining how to transfer Windows using the Samsung Data Migration utility to an SSD drive. Several options are possible here. The easiest one is when the volume of the source disk is less than the size of the solid-state media:
- run the program;
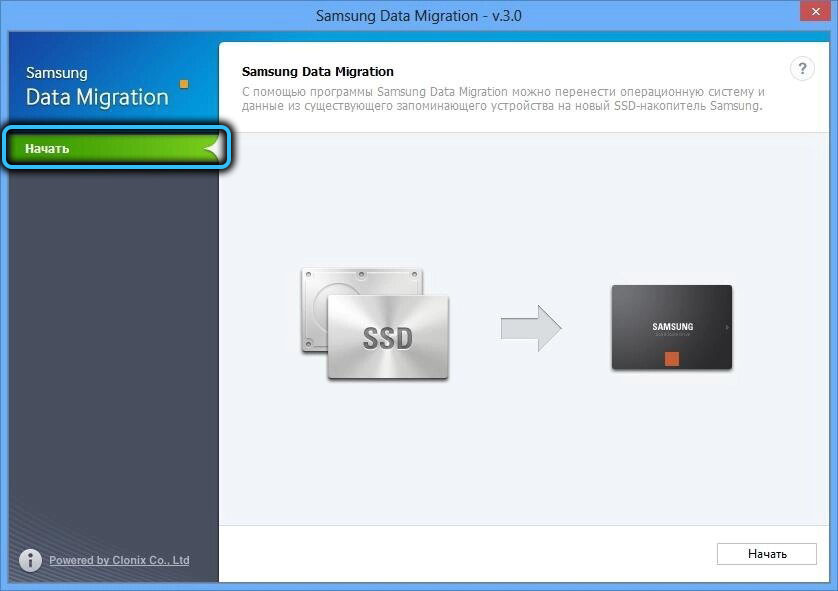
- if the target drive (Target Drive) is connected, you will see its size, if not, then it needs to be connected. You may need to use adapters such as mSATA / SATA, mSATA / USB or PCIe / USB;
- if the source disk contains several volumes, you must select those of them that are to be cloned (it is permissible to transfer no more than three volumes), and then adjust the sizes of the corresponding volumes on the destination disk;
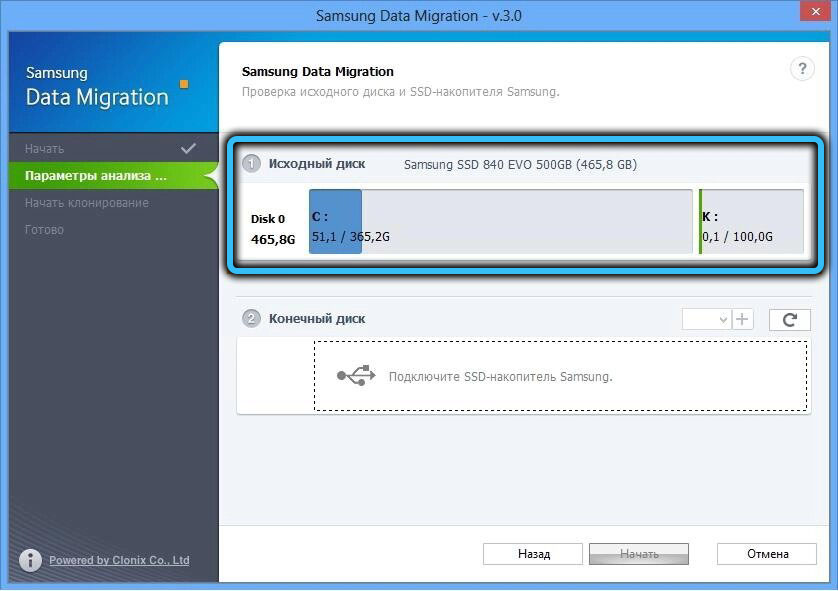
- if you added a volume by mistake, you can delete it in Samsung Data Migration on the destination disk by clicking on the cross in the circle;
- press the Start button and wait for the end of cloning, the progress of which will be displayed in the progress bar.
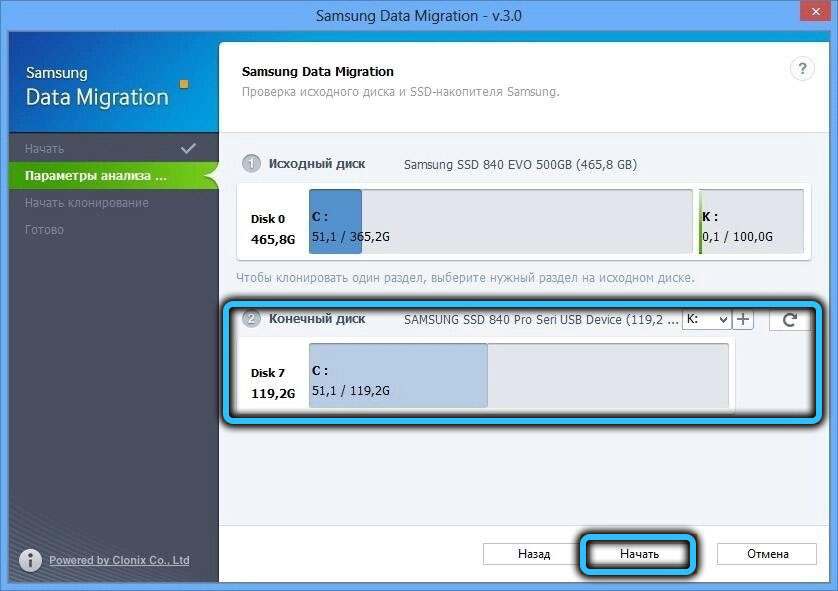
As a result, the disc will be copied and the computer will automatically restart.
The option when the size of the source disk is larger than the target is more common, but the cloning algorithm in Samsung Data Migration will turn out to be more complicated:
- the initial steps are the same: we connect the target disk if it was not connected earlier;
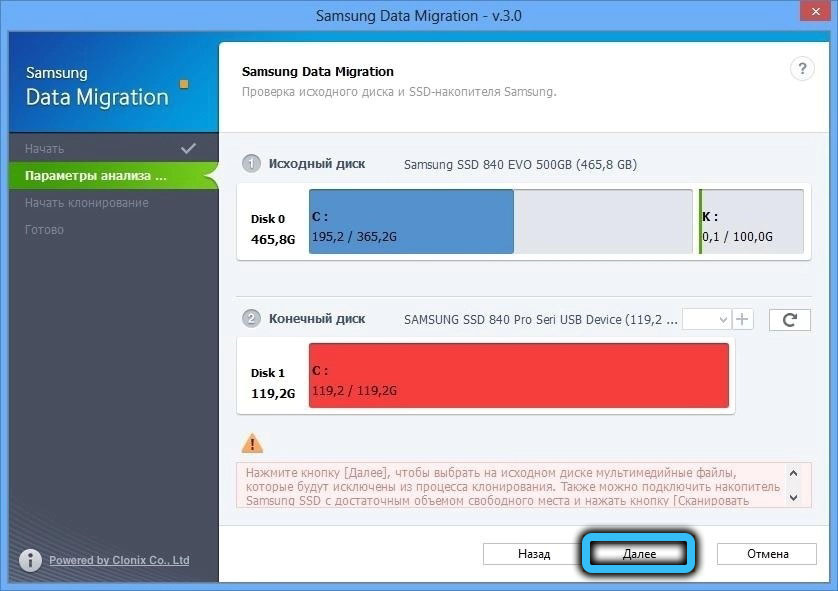
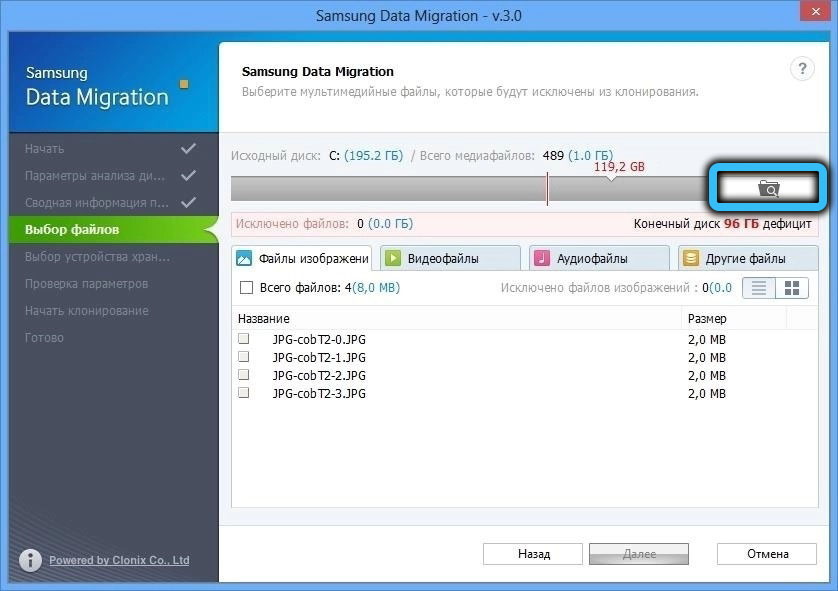
- since the size of the new SSD is smaller than the original, the program will offer to select a directory to search for files that are not involved in the cloning procedure. To do this, click the Search button;
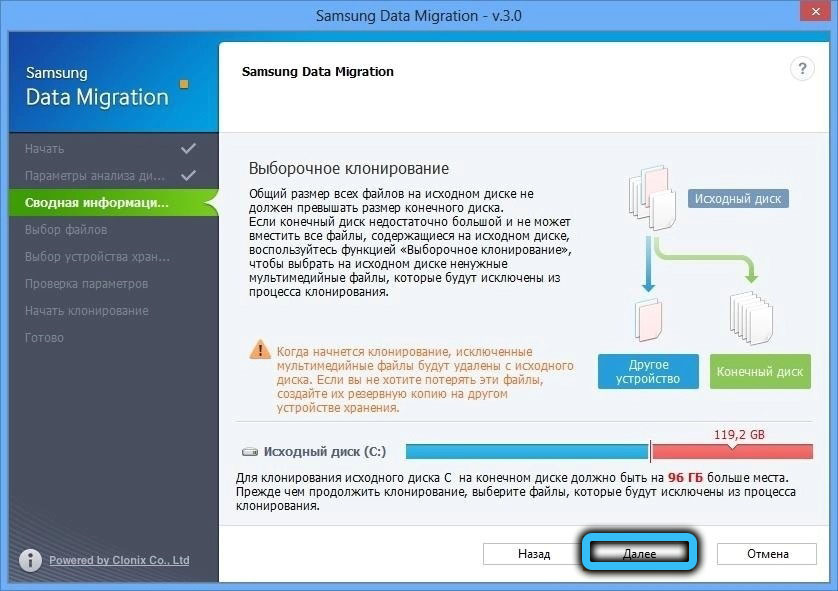
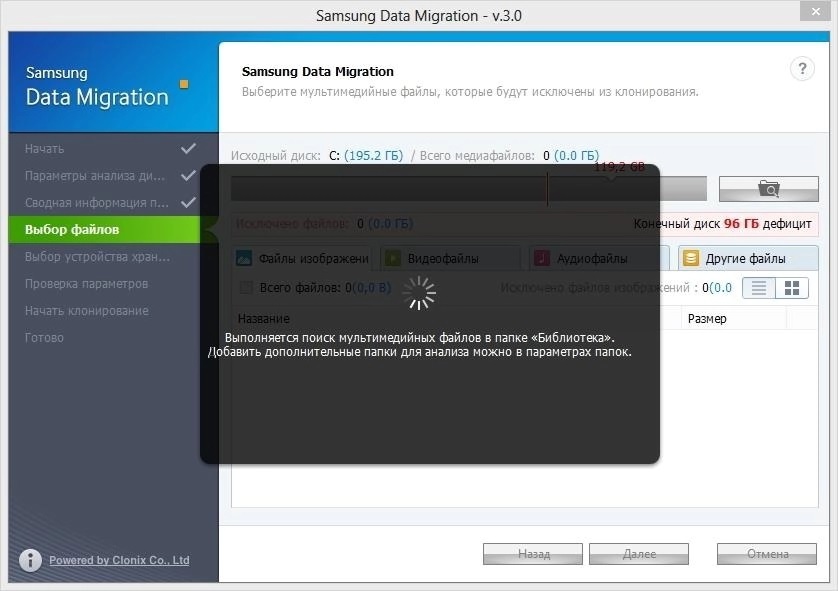
- in the window that appears, click Search again;
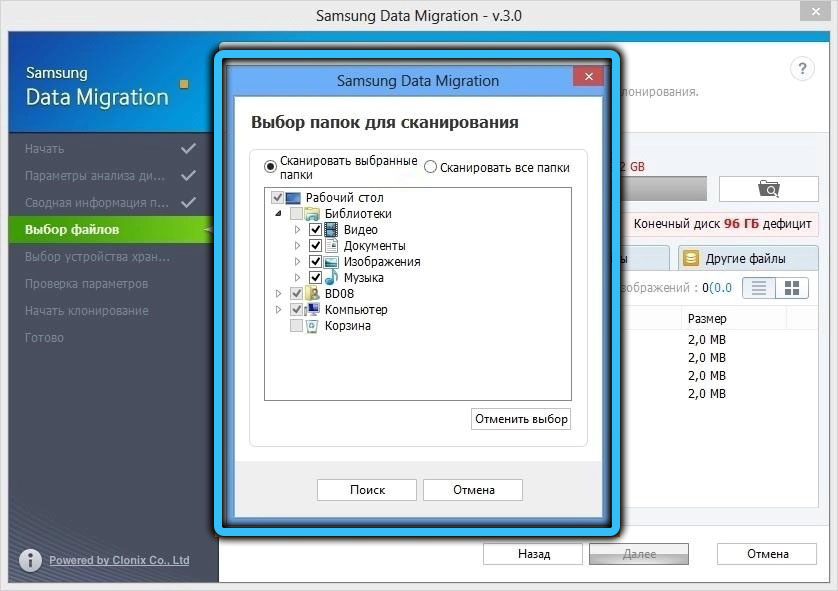
- and then select the directory in which to search for files (mainly multimedia: video, audio, pictures) that will not be copied;
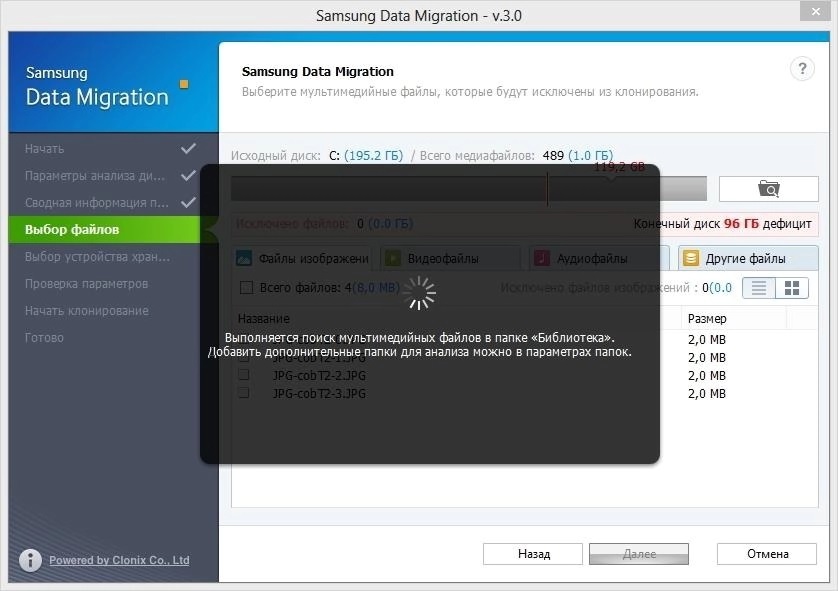
- the main screen displays a list of files that will not be copied. It can be expanded by repeating the search in other folders;
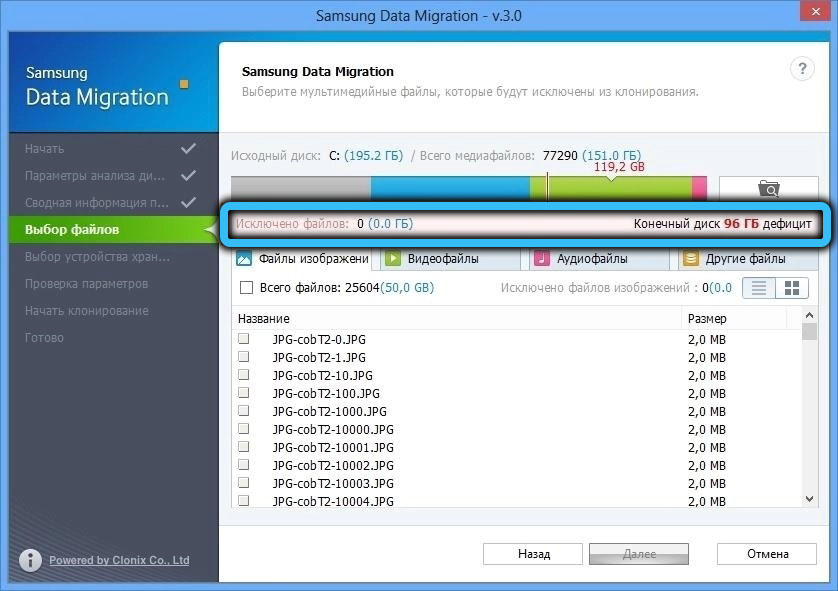
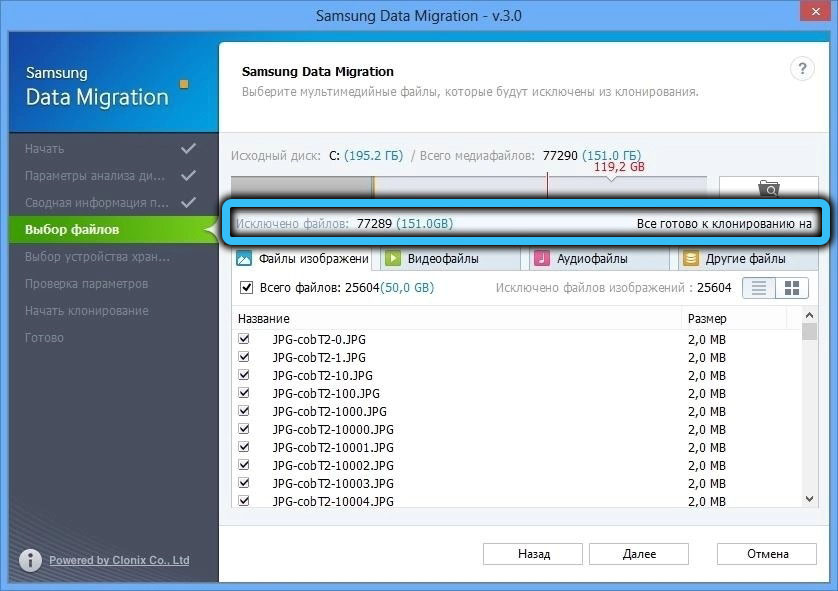
- we need to ensure that the total size of the selected files is equal to or exceeds the amount of disk space shortage (it is indicated in the upper right corner);
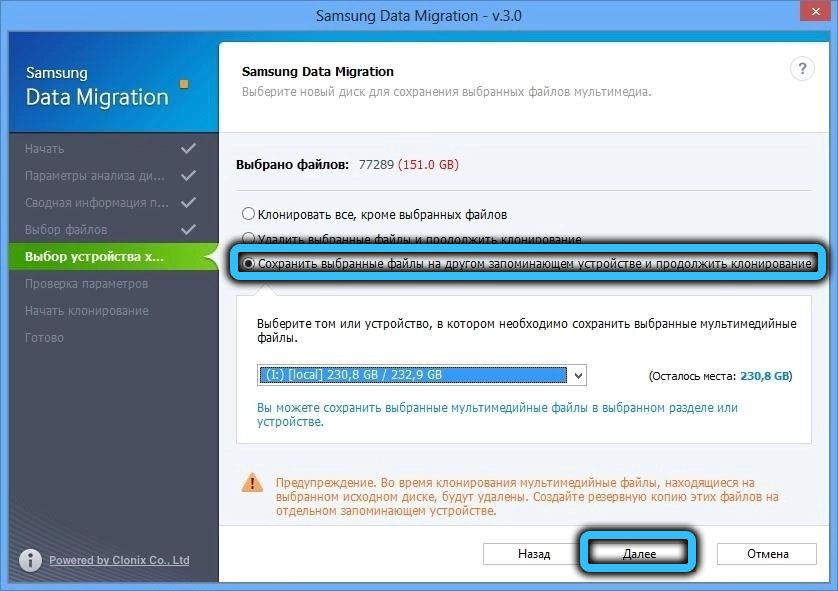
- by default Samsung Data Migration will start copying without these files (first selector). You can pre-delete these files from the source disk by selecting the second selector, or save them to another drive (third selector);
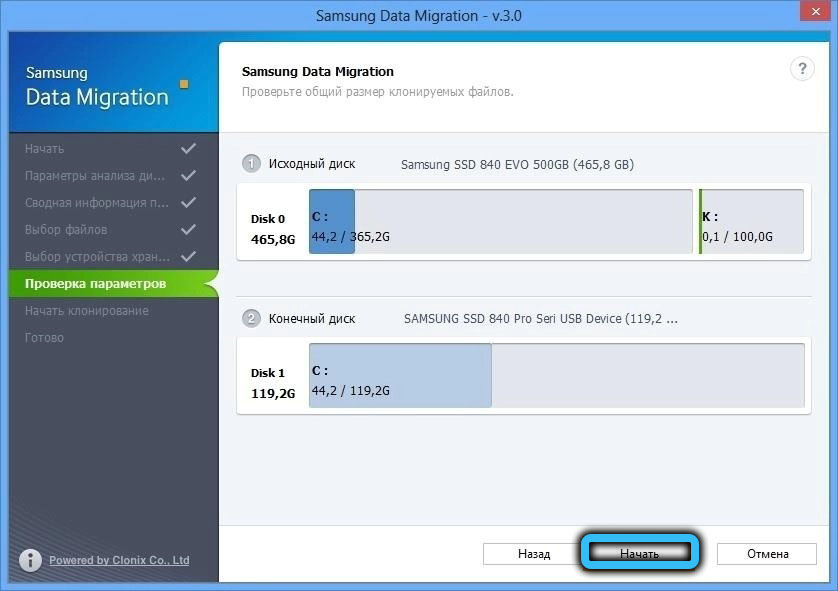
- press the Apply button and wait for the end of cloning.
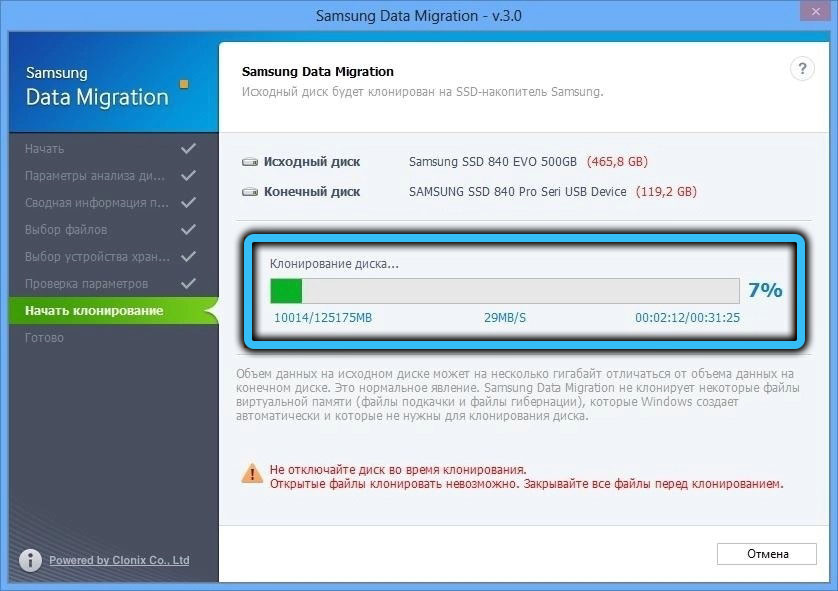
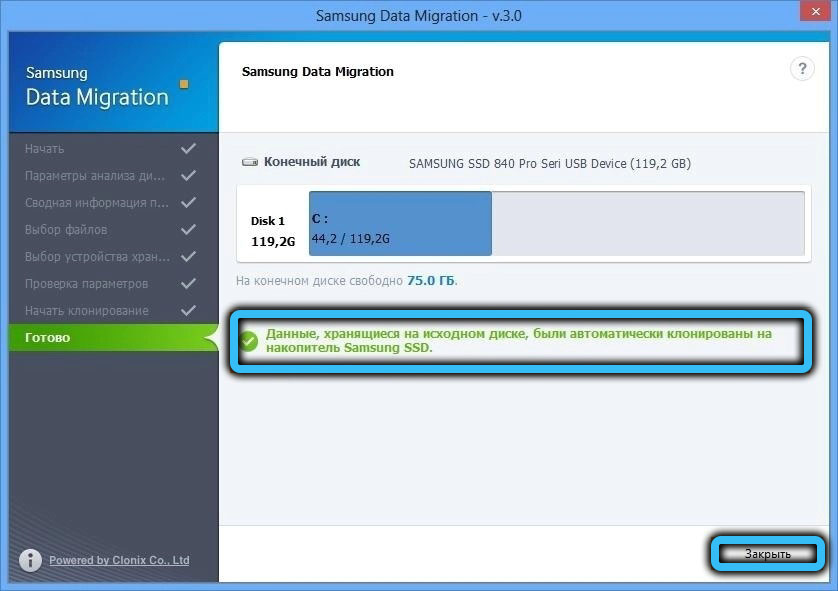
But that’s not all. If you connected an SSD drive via USB, that is, from the outside, you need to insert it in place of the original one (if the computer has the ability to use only one drive, in laptops this is implied by itself), and then make this disk bootable in the BIOS.
Possible cloning errors
More often than others, there is a situation where the target disk is not detected. The reason may be a wrong connection. The verification of the correctness of the connection of the SSD is carried out according to the following algorithm:
- first, check that the cables are connected correctly;
- in the Run window, enter diskmgmt.msc to start Windows Disk Management. Make sure the new drive is in the list of available drives;
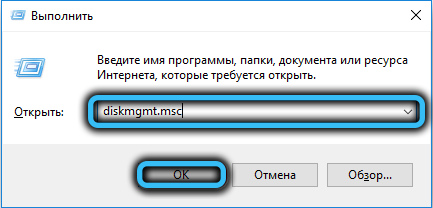
- if everything is fine, click the “Refresh” button in the Samsung Data Migration program (this is a circular arrow located at the bottom right);
- If a window appears with the message “The selected drive does not support this function”, it means that this model of solid state media is not a Samsung product.
It may happen that Samsung Data Migration does not display the original drive, and then again you need to make sure that the drive is present in “Disk Management”. If so, then, most likely, we are dealing with a conflict of letters assigned to volumes. The problem is solved through the console by formatting the target disk and assigning it a different letter.
Finally, the third common mistake. You have successfully cloned the disk, detached the old one and installed the new one, but you see a black screen on boot. Most likely, you simply did not change the boot priority in the BIOS. This can be easily fixed by changing the system boot order in the boot device priority.
Now you know what Samsung Data Migration is for and how to use it. If after reading the article you still have questions, then feel free to ask them in the comments, and we will try to answer.