Clearing the cache is often the solution when an Android application stops responding, crashes repeatedly or is the victim of a series of bugs. We explain how to do it.
When an Android application stops responding, the first step is to force it to stop to restart it. But when the problems persist, you should try to clear the cache. This process gets rid of your application’s short-term memory . The cache allows you to store data so that you do not have to download it each time you open the application. And it is often the source of bugs that cause it to crash!
How to Clear the Cache or Clear Storage of an Android Application
For it :
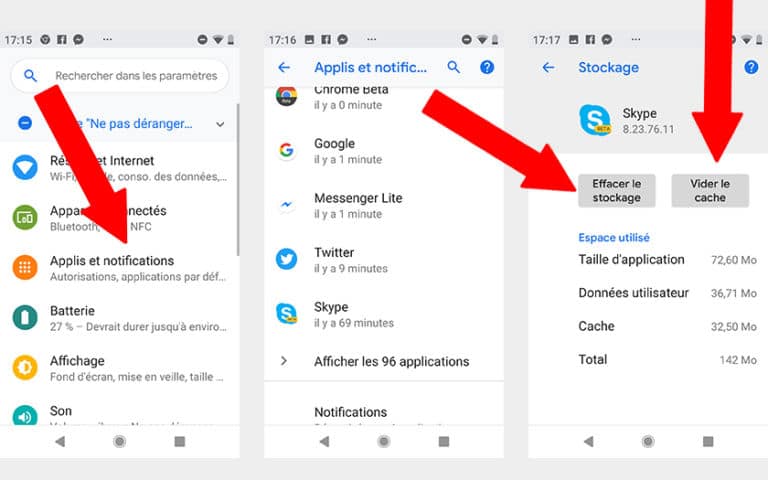
- Go to the Settings of your Android smartphone
- Then go to Applications and notifications
- Choose the problematic Android app
- Head to the Storage option
- Click on Clear cache and / or on Clear storage
Important : clearing the cache does not delete certain data such as identifiers or game saves. It is a first step before erasing the storage, which, there, deletes all the data from the application.
- Then open the application to check that everything is back to normal!
Over time, the cache of an application quickly becomes cluttered and poorly stored, and can generate errors that eventually slow down its operation. Or cause a bug preventing you from using it normally, or even using it altogether.
If emptying the cache was not enough to resolve your concerns, you will be asked to erase the storage of your application . This maneuver will get rid of all the parameters and data associated with the application. If you delete data from a social network, such as Facebook or Instagram, you will have to reconnect. In fact, the application behaves exactly as if you had just installed it the first time.
Read also: what to do if an application crashes (quits by itself, stops responding or does not open)?
Did you find this guide useful? Have you encountered any difficulties? Share your feedback in the comments: we will update this tutorial to improve it!