The volumes of flash drives and modern software allow you to write the necessary distributions of different operating systems onto one medium. In addition to several operating systems, you can also add utilities to the USB flash drive to solve various tasks, for example, to check the RAM, disk, work with HDD partitions, and carry out resuscitation measures (virus removal, recovery, error correction, etc.). Such a multi-boot flash drive is a “must have” for every advanced user, and the process of creating it using specialized software is simple. Let’s consider options on how to make a bootable flash drive with several operating systems and programs.
Contents
What you need to create a multiboot flash drive
The preparatory work consists in choosing a suitable storage device, special software for recording media, and downloading the necessary distributions to the computer. You will need:
- USB-drive of a suitable size (from 8Gb, depending on how many OS and other software will be on the media);
- software for creating a multiboot flash drive;
- ISO-images of OS distributions;
- useful tools for diagnosing, protecting, recovering, troubleshooting, etc. (if needed).
The steps below are performed when all preparatory manipulations are completed and the USB drive is in the computer’s slot.
WinSetupFromUSB
This is one of the most functional free tools for burning bootable flash drives. To burn several operating systems on one flash drive with it, download the utility from the official website and follow these steps:
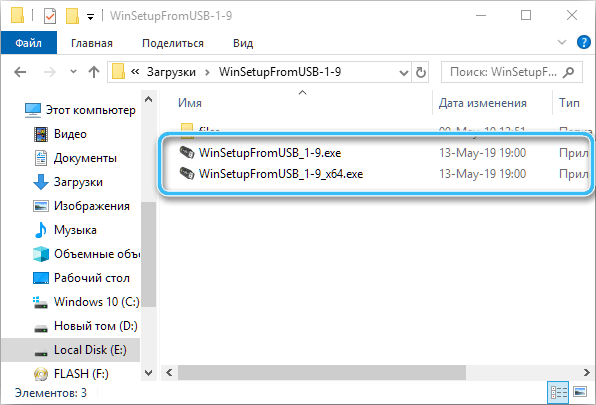
- unpack the archive with the program and run the appropriate version, taking into account the bitness of the OS (x32 or x64);
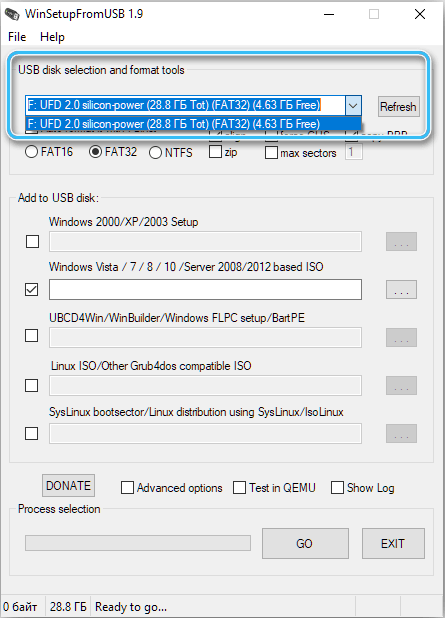
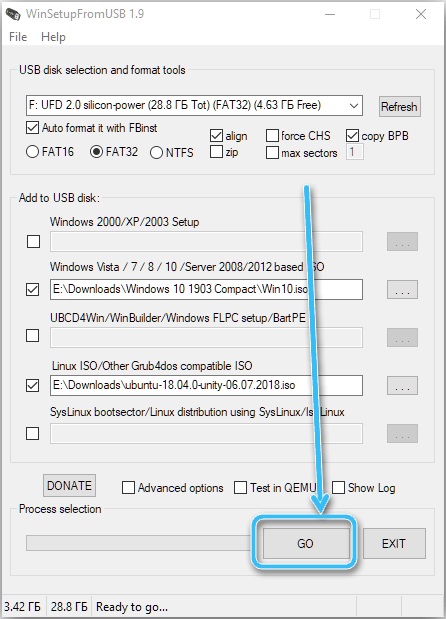
- in the upper area of the main window, select the USB to which we will write distributions;
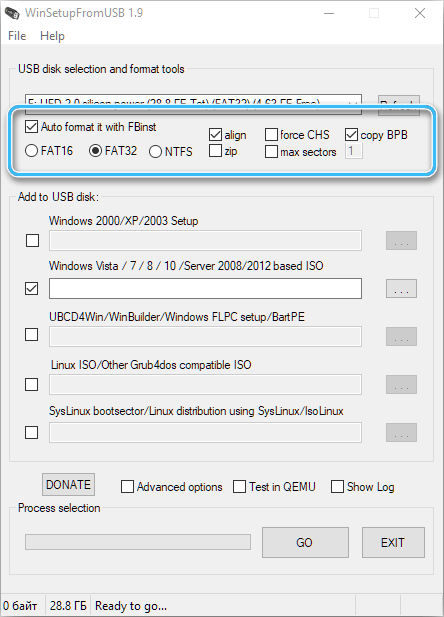
- check the item “Auto Format it with FBinst”, which means automatic formatting of the drive (the option is applicable for the first recording, do not use it if we add another image);
- select the appropriate file system for formatting the drive – “FAT32” for UEFI and installation on a GPT disk or “NTFS” for Legacy;
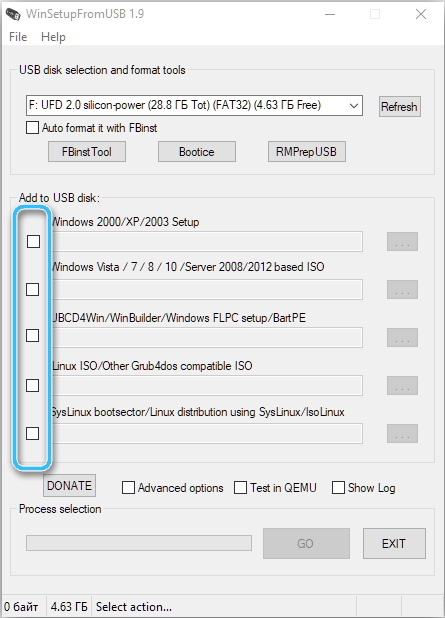
- below, in the “Add to USB disk” block, we indicate which distributions we will burn (check one or more options and indicate the path to the objects – write the address or click three dots to select images);
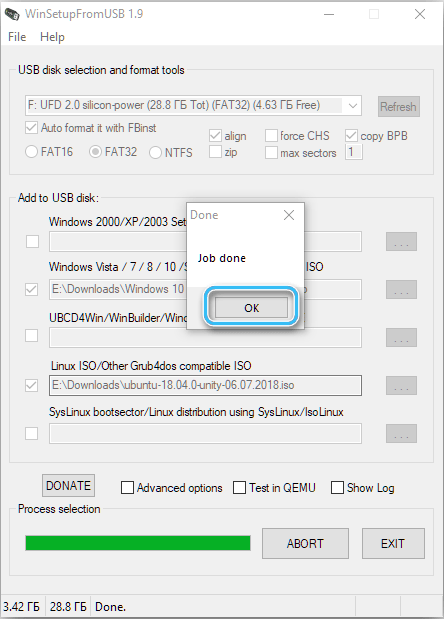
- press the “GO” button and confirm the action, agreeing with the warning. The progress of the procedure can be monitored in the “Process selection” field.
Easy2Boot
The use of Easy2Boot in conjunction with RMPrepUSB expands the possibilities for creating a multi-boot USB. You can easily write images to a bootable USB drive with any OS distributions or utilities that are standardly available for download. It is possible to format the flash drive to NTFS and boot both to UEFI and Legacy.
This method of creating a multi-boot drive may seem difficult for beginners, but by following the step-by-step instructions, you can complete the task regardless of skill level.
To work, you will need to download the following tools from the official Easy2Boot page:
- Easy2Boot for Windows 10 users to make your E2B USB drive – to prepare a USB flash drive (unpack to the folder with the installer);
- Easy2Boot MPI Tool Pack is an archive with tools for booting from a flash drive and installing systems in UEFI (unpacking is supposed to be in any convenient location).
Next, we perform the following actions:
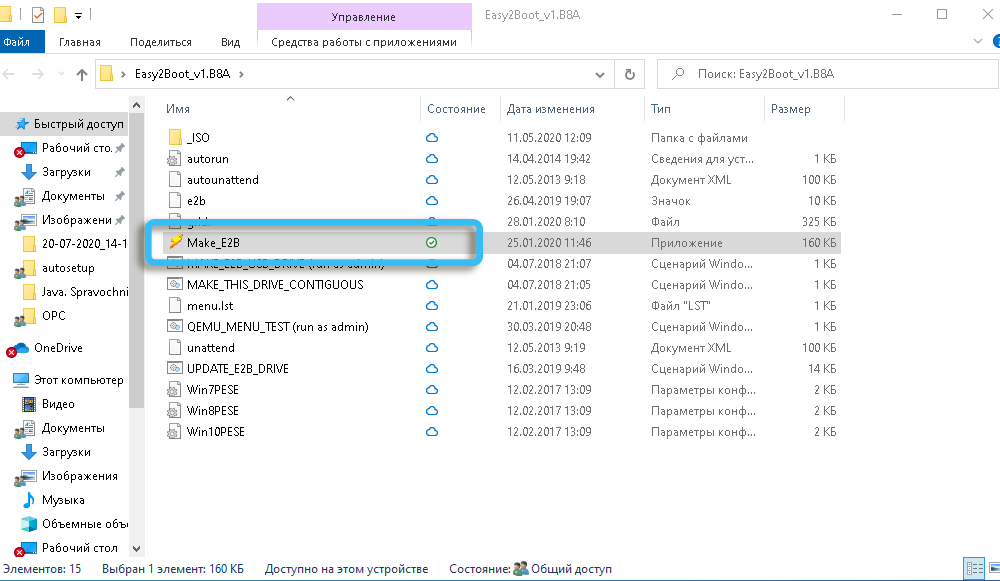
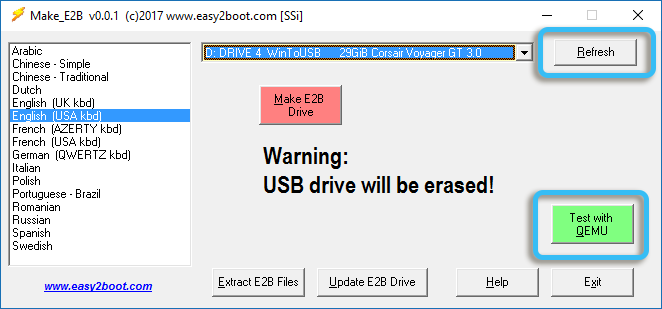
- run the executable file Make_E2B.exe and go to the utility interface;
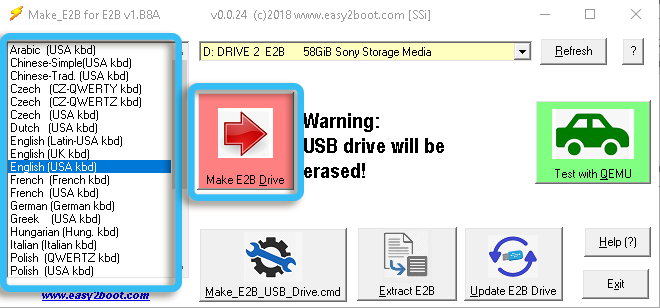
- select the flash drive (data from it will be deleted), you can also select the language for the boot menu on the left side of the window;
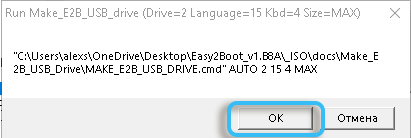
- press the “MakeE2B_Drive” button to automatically prepare the drive in NTFS (it will boot into UEFI) or “Make_E2B_USB_drive.cmd” for manual configuration;
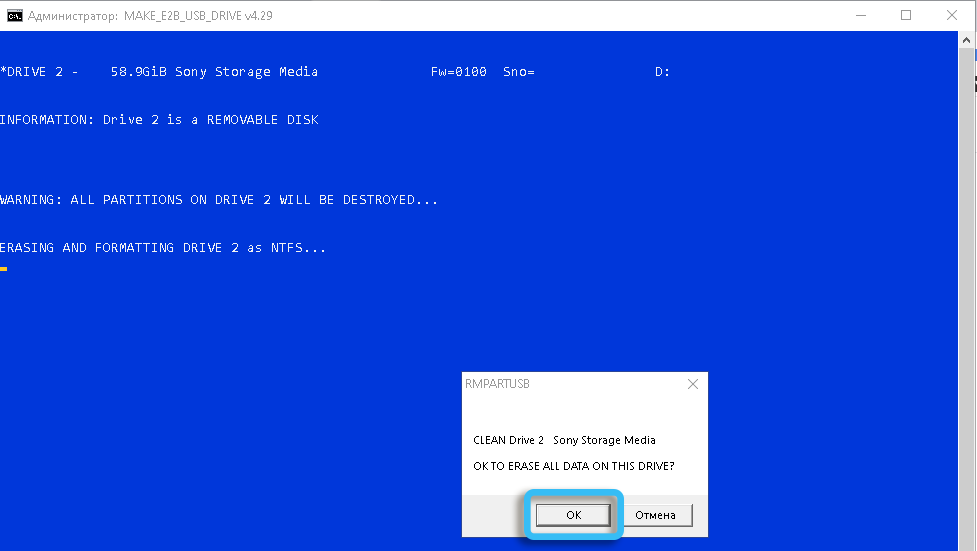
- we agree to format the flash drive when a notification from the program appears, and we refuse the offer of formatting by the system;
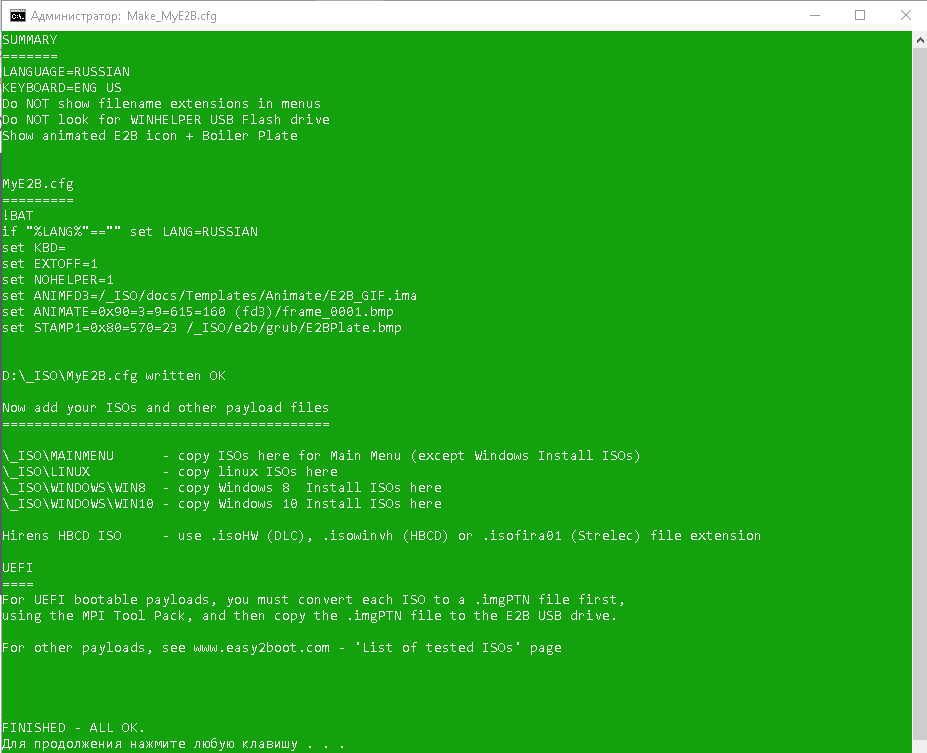
- green color indicates the completion of the procedure. The drive is prepared, the console is closed;
- in the Make_E2B application, click “Refresh”, then click “Test with QEMU” (allows you to check the loading of the drive menu);
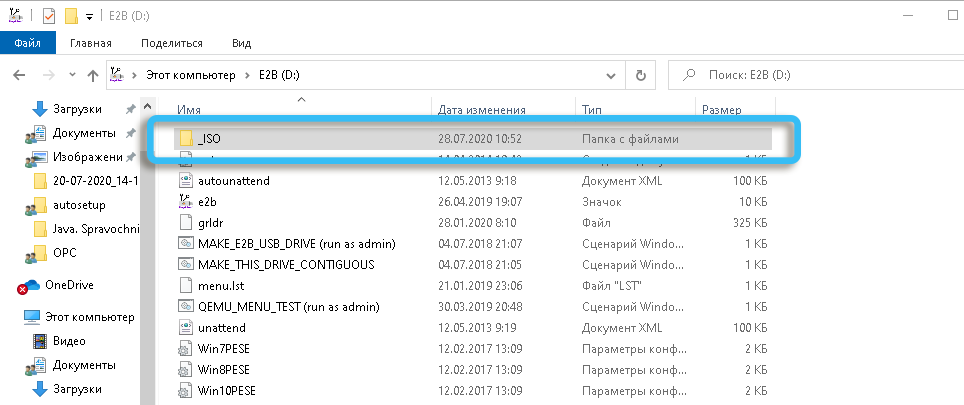
- when the drive is prepared, the preparation utility can be closed, the next step is to add the ISO with Windows 7, 8.1, 10, Linux. To copy images to the device, go to the E2B flash drive section;
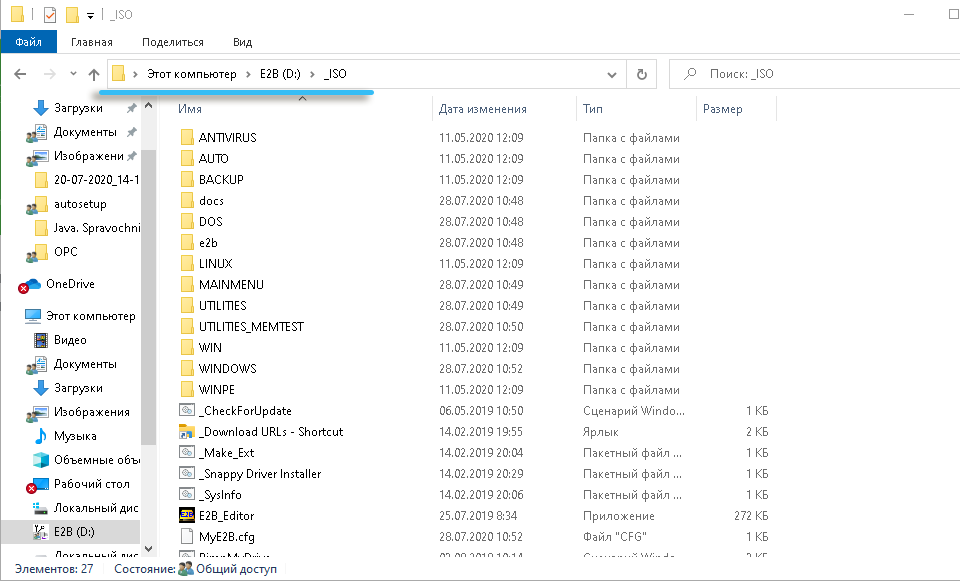
- here, in the _ISO folder, we place in subdirectories with the corresponding names the image files of the OS, antivirus and other software. Distributions with Windows are located in _ISOWINDOWS in accordance with the version, files for placement in the main menu – in _ISOMAINMENU, etc.;
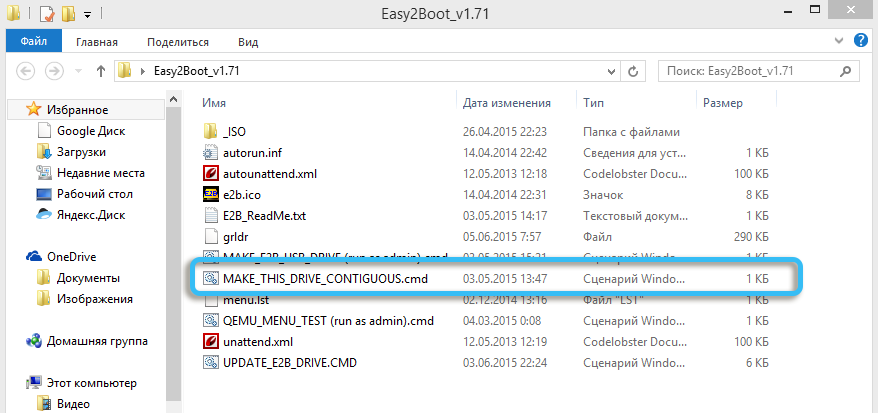
- then we perform the process of defragmenting images on the drive by running the MAKE_THIS_DRIVE_CONTIGUOUS.cmd file, which may be required for the functioning of ISO Linux and individual programs.
Upon completion of the procedure, the finished USB flash drive can be loaded into Legacy and run the distributions recorded on it. Despite some points that may arise when working with software, the above instructions are sufficient in most cases. As for the difficulties that arise in the course of work, solutions to certain problems can be found on the official website of the program.
Ventoy
The task of creating a multiboot flash drive is easy to accomplish with the relatively new Ventoy program. To do this, you will need to do the following:
- download the archive with the utility from the official website, unpack it;
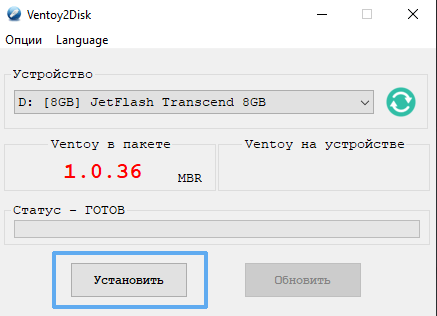
- run the Ventoy2Disk.exe file from the folder (confirm the action when prompted);
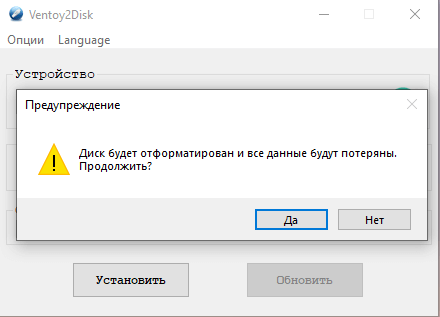
- in the utility window, select the flash drive (the flash drive will be formatted and all data stored on it will be deleted) and click the install button (“Install”) to prepare the media;
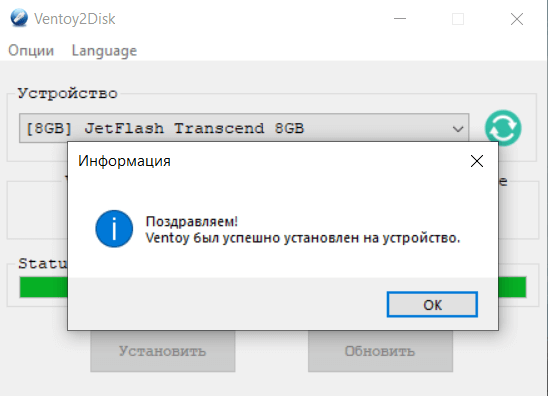
- we agree with the action, after which after a while the program will notify you of successful installation on the device, click “OK” and close the window;
- the flash drive will be formatted and divided into two sections: one in the ExFAT file system for recording images, the second in FAT for storing Ventoy files;
- copy the necessary ISO images to the first partition of the boot drive (if necessary, you can organize it by directories) using a regular explorer.
When the multiboot flash drive is ready, you can check its performance by booting in the standard way, first setting the boot from the flash drive in the BIOS or using the Boot Menu. After starting, a menu will appear on the screen with the ISO images you added, so choose from the available ones.
XBoot Multiboot ISO USB Creator
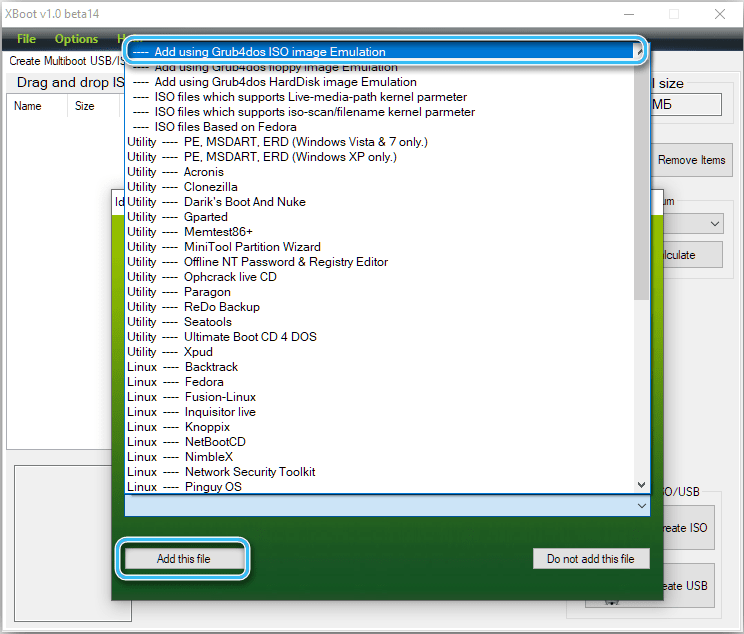
An easy-to-use and powerful utility for creating bootable USB drives, with which you can add any Windows and Linux OS images at the same time, as well as select the ISO Emulation or Grub4DOS bootloader option.
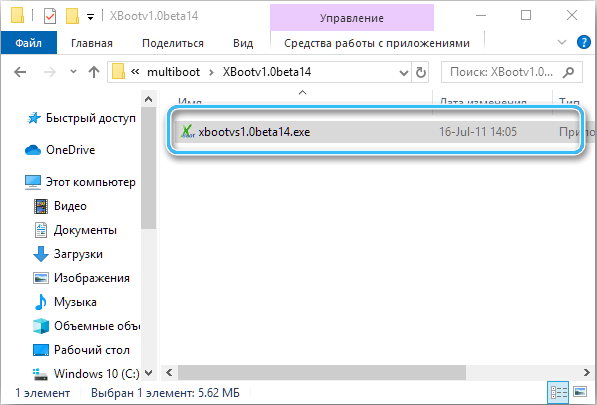
To make a multiboot flash drive, download XBoot from the official resource and follow these steps:
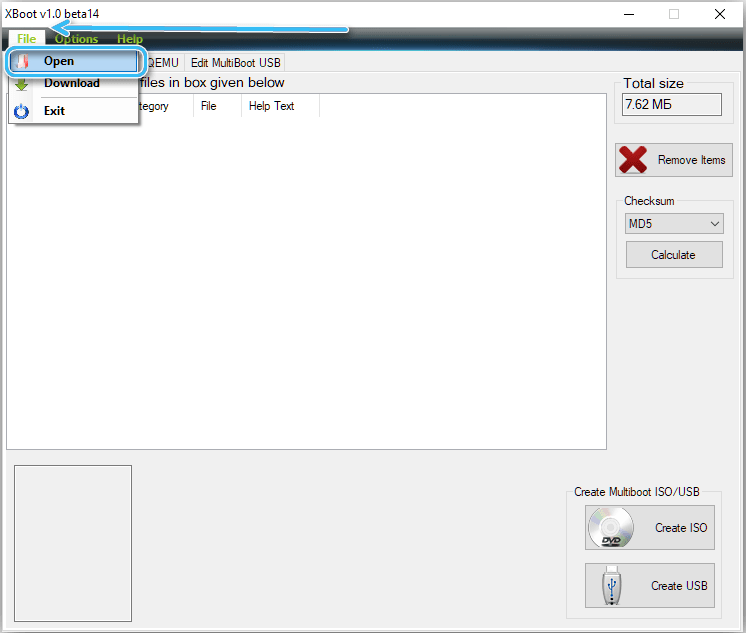
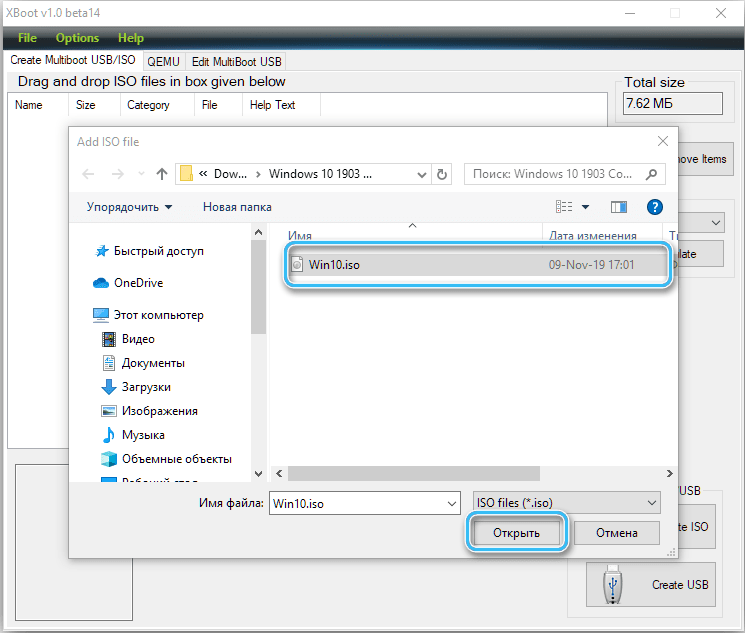
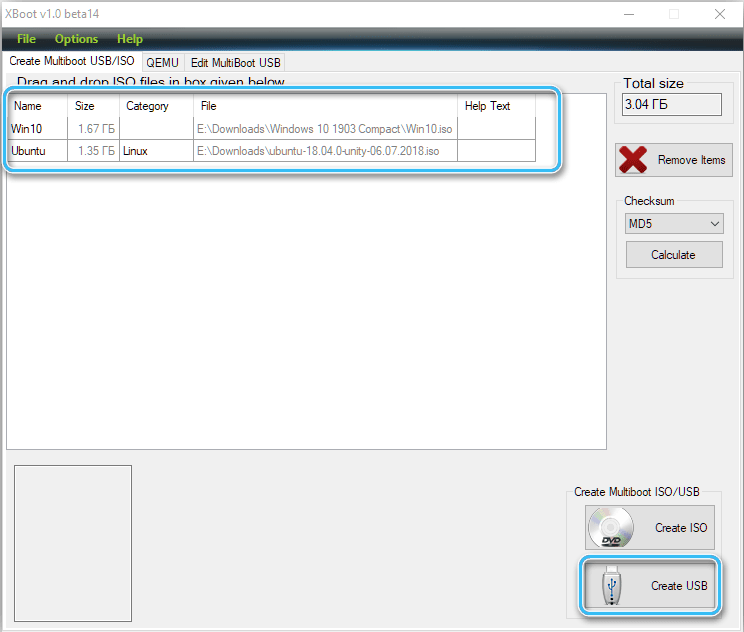
- run the utility and simply drag and drop the necessary ISO files into the main area of the XBoot window;
- to write to a bootable drive, click the “Create USB” button (the “Create ISO” option is used to combine images);
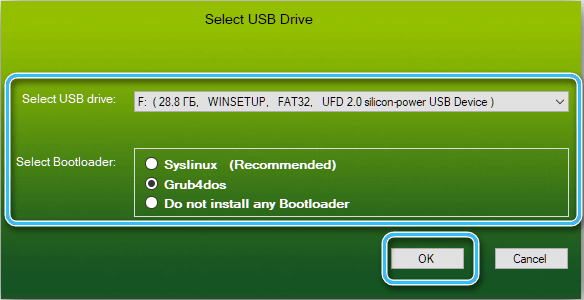
- select the USB flash drive and the type of bootloader (Syslinux is recommended if the USB device is formatted in FAT32, and Grub4DOS if formatted in NTFS), click “OK” to start creating a bootable drive;
- the program allows you to monitor the progress of the process, after which we get a bootable USB flash drive with the selected distributions.
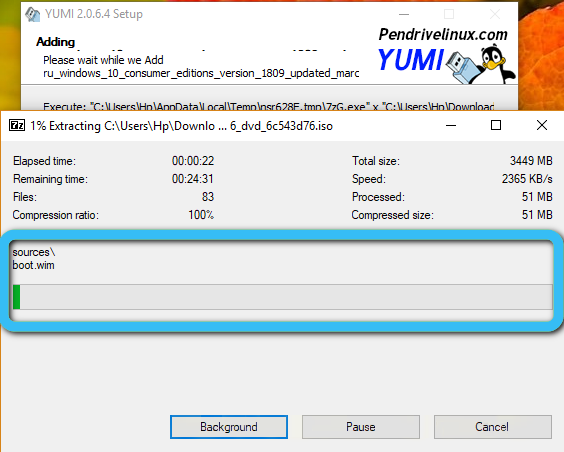
YUMI Multiboot USB Creator
A multifunctional utility that can also be used to create a bootable flash drive with several operating systems. Download the program and follow these steps:
- run the utility;
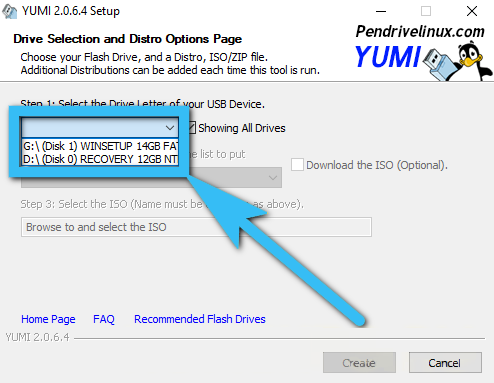
- select the drive that we make multiboot (step Step 1);
- mark the file system type (NTFS or FAT32);
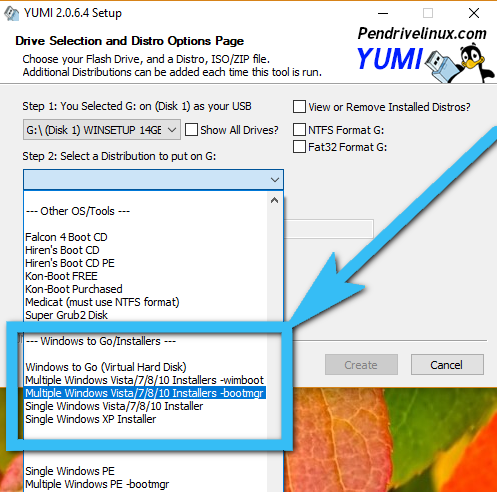
- select the distribution kit by expanding the list (item Step 2);
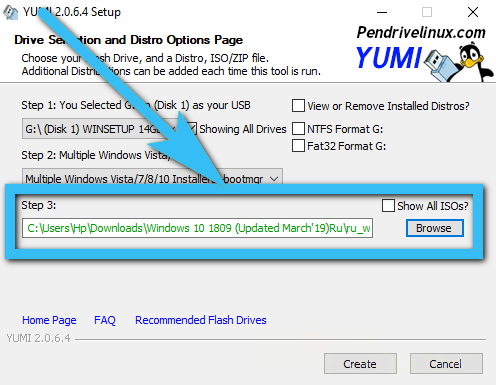
- specify the path to the ISO image (step 3) – write the address in the line under the item or press the browse button (“Browse”) to select;
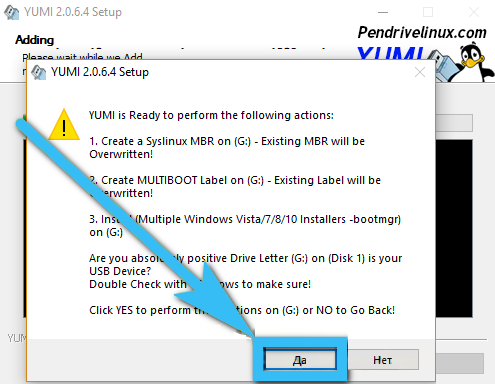
- when all the necessary settings are completed, click “Create” to start the process;
- if you need to add more images, at the end of the procedure, repeat the steps described above, returning to the utility window.
A bootable flash drive with several operating systems can be created by various software tools, some of the methods are discussed in the examples above.
As you can see, there is nothing complicated in creating a multiboot USB drive, and this task is not even for the most advanced user, although in the process, in some cases, you may encounter certain errors and problems associated with the operation of the software or USB device.
