Each user of a PC or laptop customizes the system for themselves, organizing the working environment at their own discretion. And one of the main tasks is the organization of the desktop, where the elements that you most often have to access are located, in particular those related to management. So, the presence of certain objects on the desktop is a matter of convenience, because all the necessary tools should always be at hand. In the “top ten”, the traditional “My Computer” icon that we are used to seeing in Windows is not preinstalled, and in previous versions, its absence may be due to accidental (or intentional) deletion, so let’s consider the available solutions to put this important element in a quick access.
Contents
Why do I need a “My Computer” icon on the desktop in Windows
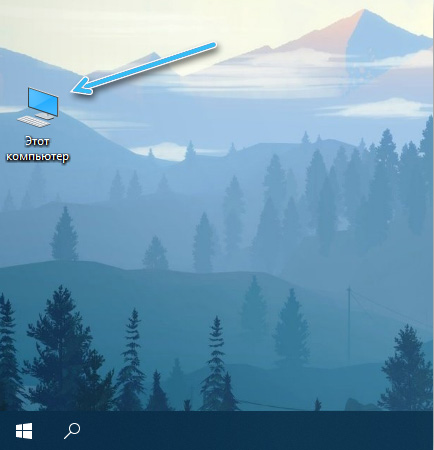
The familiar shortcut for accessing the contents of disks was called differently in different versions of the operating system – “My Computer”, “Computer”, “This Computer”. In the modern Windows 10 OS, it has disappeared from the desktop altogether, which does not delight many users who do not want to part with it and would like to correct the situation, despite the available alternative. An unfamiliar interface, rich in dubious improvements, very often causes a reluctance to update the system, while the “My Computer” shortcut is easily installed on the desktop using standard tools, and you can name it as you wish.
How to add a computer shortcut in Windows to the desktop
When the alternative to the familiar icon does not suit you, you can arm yourself with one of the methods to display a shortcut for accessing disk data.
Via personalization settings
It is easy to place a computer icon on the desktop in Windows 10 by changing the personalization settings (the method is universal and suitable for any versions and builds of the OS), for which you will need to follow the steps:
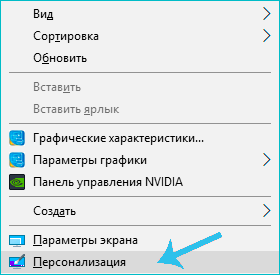
- we press RMB in any free area of the desktop;
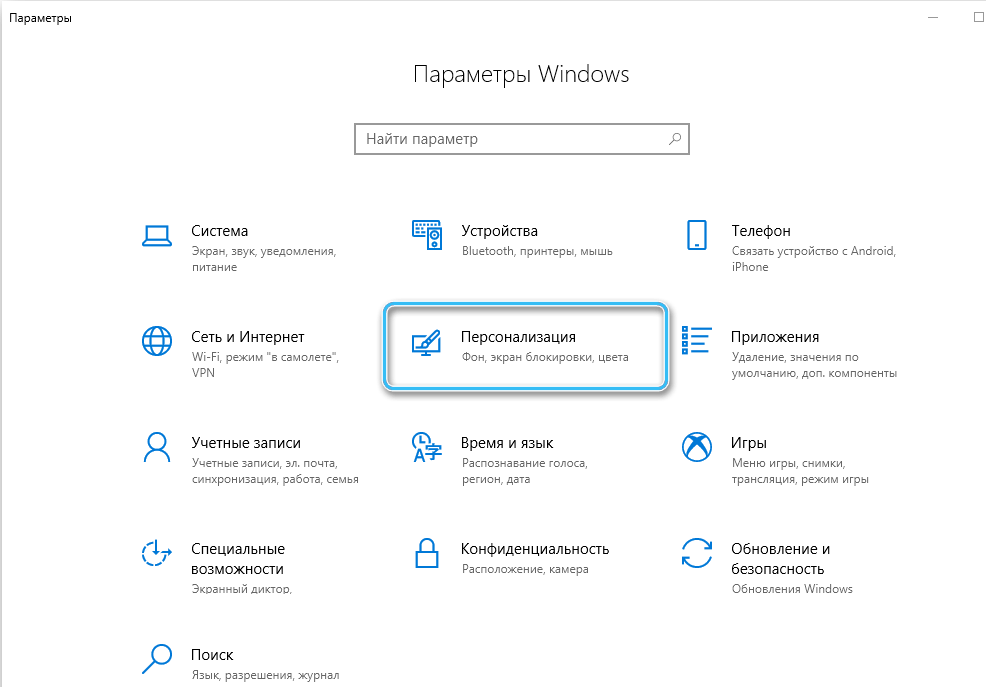
- click “Personalization” (you can also get here through the “Settings” or “Control Panel” snap-in);
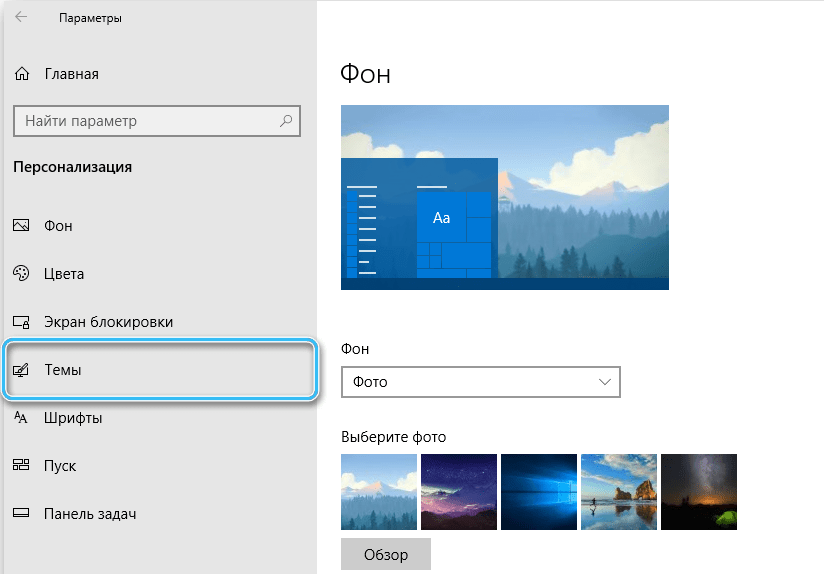
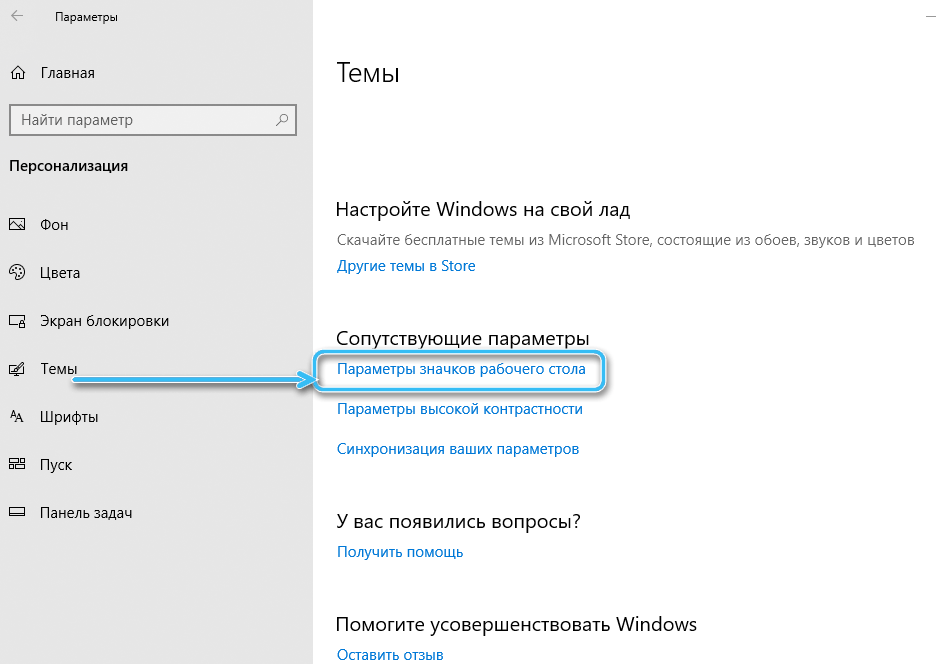
- go to the “Themes” subsection and from the related parameters select “Desktop icon settings”;
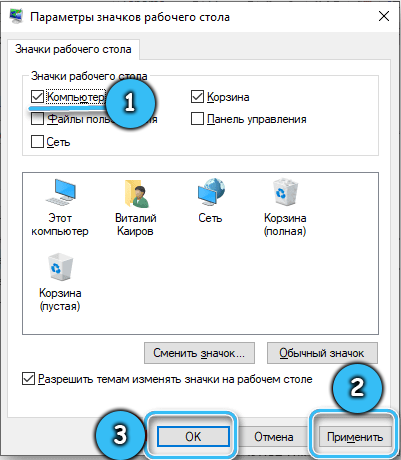
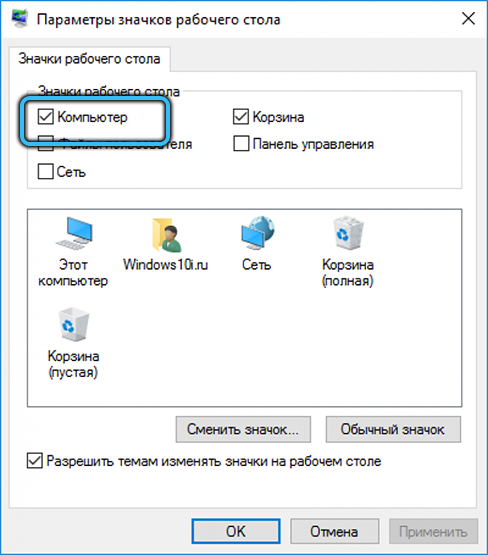
- in the next window, select “Computer” from the list of available preset icons. Put a check mark next to the item (you can also mark other applications along the way, if necessary);
- apply the changes and click OK.
For fresh builds of the operating system, this solution will not work, but you can use it if you need to put “My Computer” on the desktop in Windows 7:
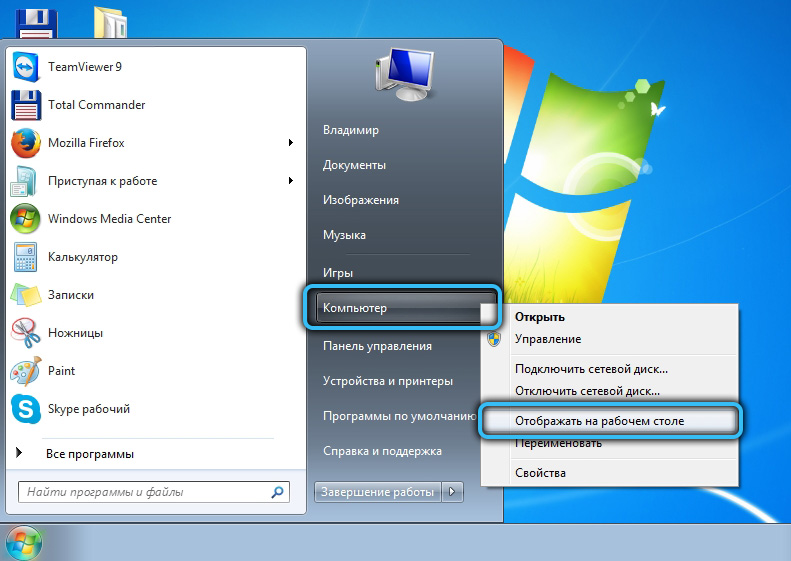
- in the “Start” menu we find “My Computer”;
- press RMB to display the menu;
- select “Display on desktop”, which will allow you to take out the icon.
You can go to the icon options window (suitable for Tens) not only through personalization, but also through the Start button menu:
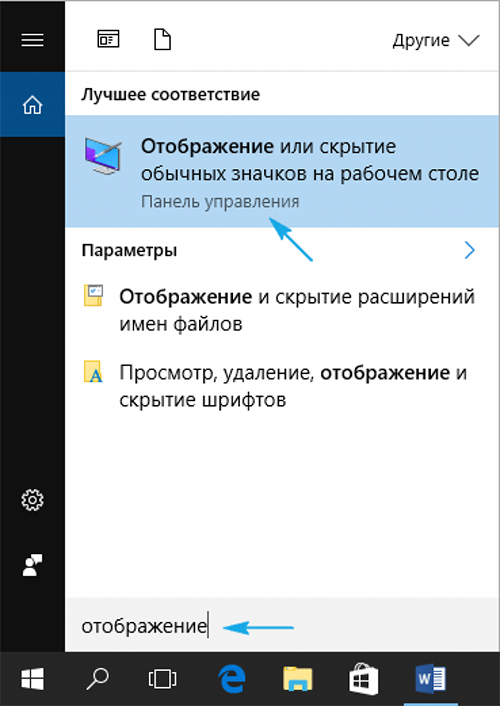
- in the search line we type “icons”;
- from the given matches, select “Show or hide regular icons on the desktop”;
- now it remains to add “My Computer”, marking the necessary item, in the same way as in the above option.
Through the Run console
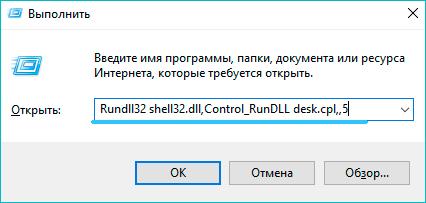
Another quick method to place an icon by editing personalization settings involves using a special command:
- open the Run tool (Win + R);
- in the line we enter Rundll32 shelldll, Control_RunDLLdesk.cpl,, 5 and press “OK” or Enter on the keyboard;
- the command opens the icon options window, where you should check the box next to the name to display the shortcut you need.
Through the registry editor
Windows also has the option to edit the registry to manually create a system icon on the desktop. This method does not differ in speed, but it is suitable if the system is not activated, the solution is designed for a confident user with certain registry skills.
How to return the shortcut through the registry:
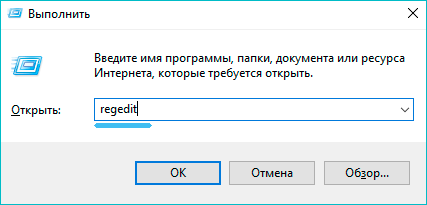
- launch the Run console (Win + R) and apply the regedit command;
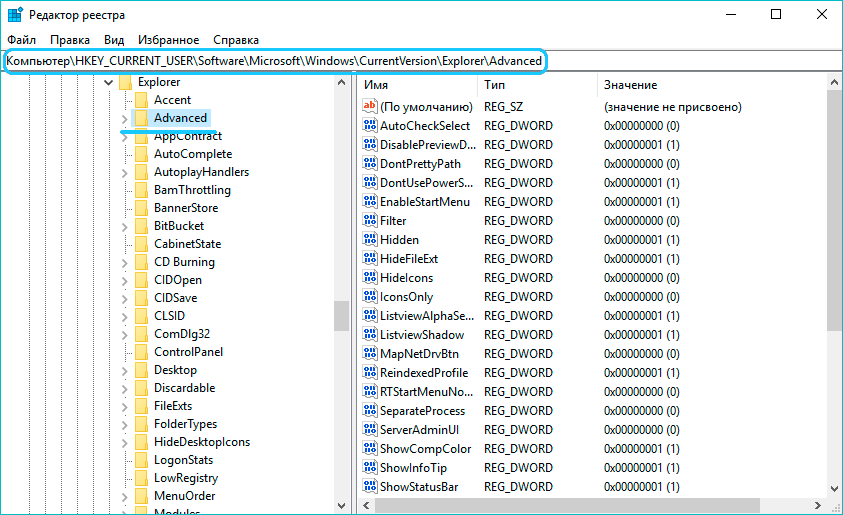
- move along the branch HKEY_CURRENT_USER Software Microsoft Windows CurrentVersion Explorer Advanced;
- on the right side of the editor, look for HideIcons and change the value for the element to 0.
If the parameter is missing, then right-click on the empty field and select the option “Create a DWORD (32-bit) parameter”, name it HideIcons and set the value to 0. Reboot the device.
By drag and drop shortcut
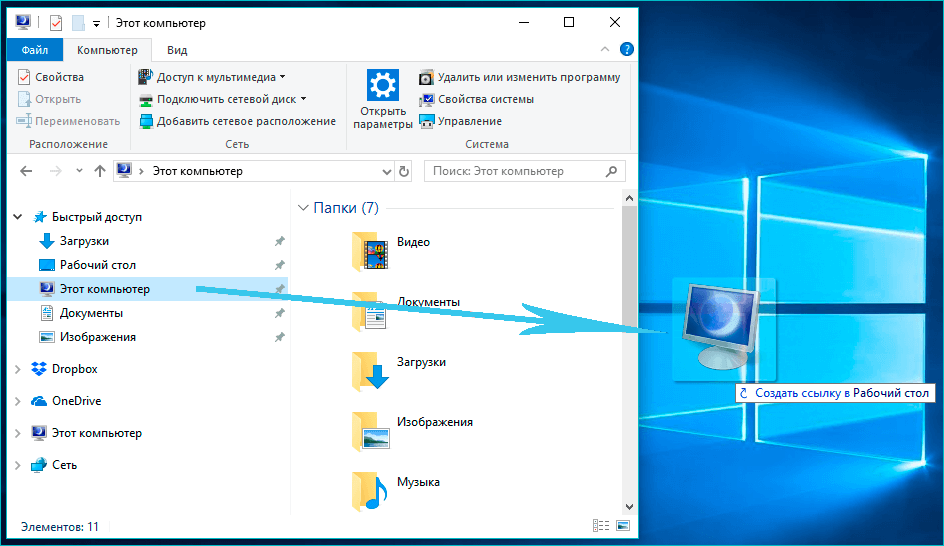
The easiest way is to transfer the icon from the “Explorer” or pull it out of the “Start” menu. To do this, we find the shortcut, grab it with the left mouse button, hold it and drag it to a free area of the desktop. The data will be accessed in the same way as in the case of the system, but it will be marked as a link.
How to change the icon for the Computer shortcut
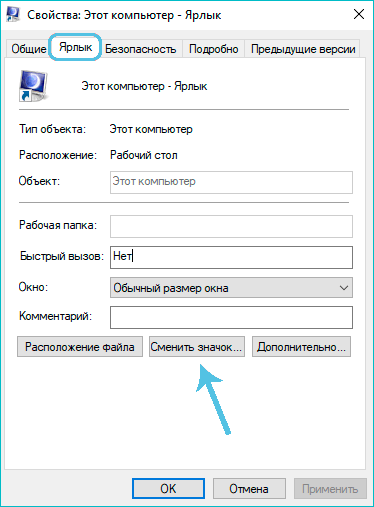
If desired, you can choose another image for the shortcut from those available in the system:
- go to the icon options window (for example, through personalization, see above);
- select the label to be replaced, and click the “Change Icon” button;
- from the graphic elements displayed in the window, select the desired one and apply the change.
How to rename the “Computer” shortcut
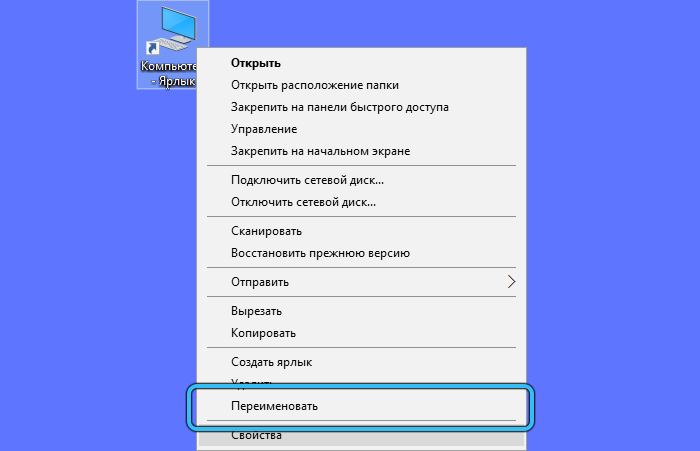
Although the icon is a system icon, you can rename it to give the interface a more personalized look. Changing the name is performed similarly to actions with other objects – right-click on the desired element, select the “Rename” option and assign a new name.
As you can see, the process of returning the system icon is not difficult and does not take much time. Even an inexperienced PC user can complete a task using the instructions, there are usually no problems with this.
