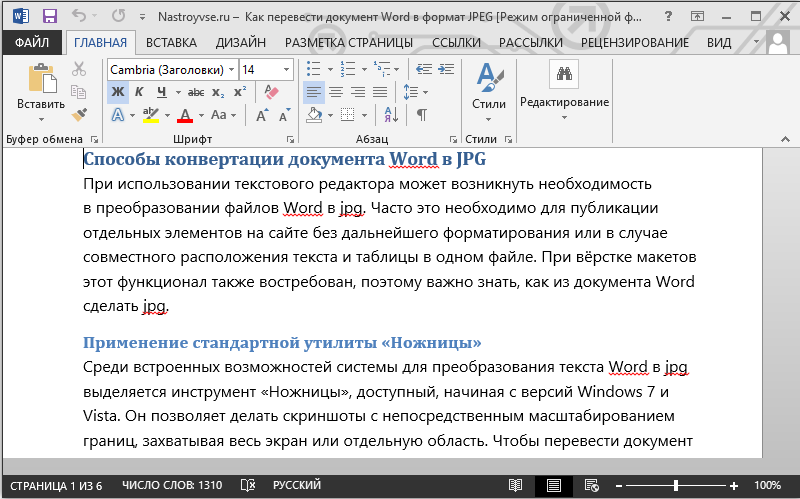
When using a text editor, it may be necessary to convert the Word files to jpg. This is often necessary for publishing individual elements on a site without further formatting, or in the case of a combined arrangement of text and a table in one file. When making up layouts, this functionality is also in demand, so it is important to know how to make a jpg from a Word document.
Contents
Using the standard “Scissors” utility
Among the built-in features of the system for converting Word text to jpg stands out the tool “Scissors”, available starting with versions of Windows 7 and Vista. It allows you to take screenshots with direct scaling of borders, capturing the entire screen or a separate area. To convert a Word document to jpeg, do the following:
- Open the document in a text editor.
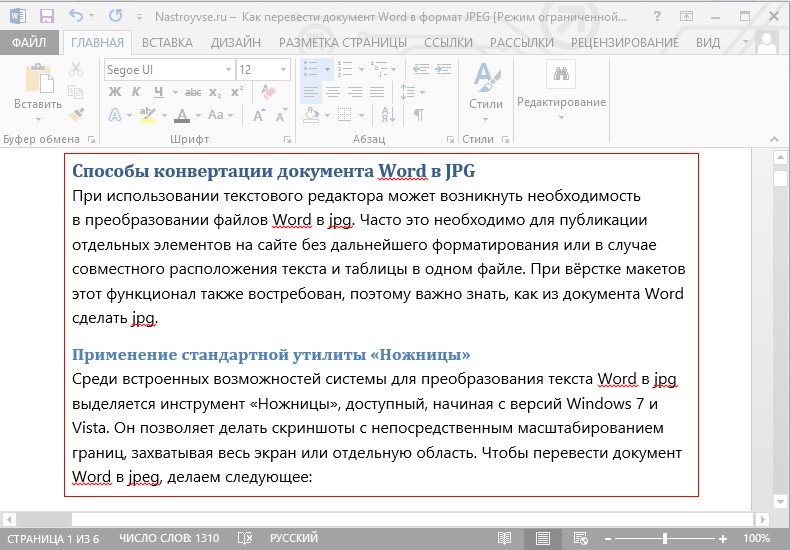
- We place it on the full working area of the screen by scaling, while the text should fit all.
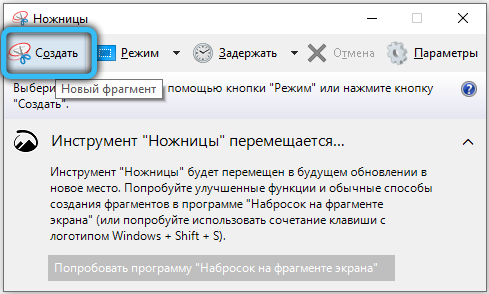
- Find the tool in the “Start” – “Programs” – “Accessories” (in Windows 10, you can find “Scissors” using the search).

- “Scissors” will cut directly the text area itself, without capturing adjacent areas of the taskbar and program control zones. This will positively affect the quality. After launching the tool, press “Create” and select “Window” from the menu, point to the document with the cursor. To select an area, select “Area” and designate the area that should be in the picture.
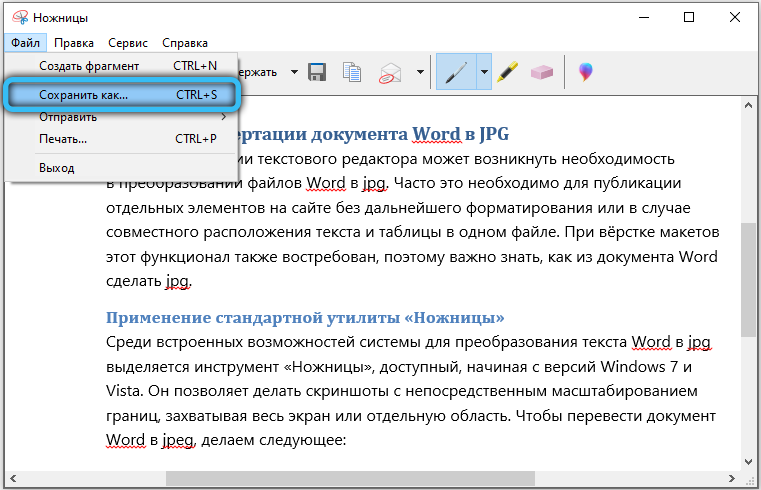
- The selection will open in Scissors. We save the object in the standard way (“File” – “Save as …”), choosing the JPG format. We give a name and indicate the path to save.
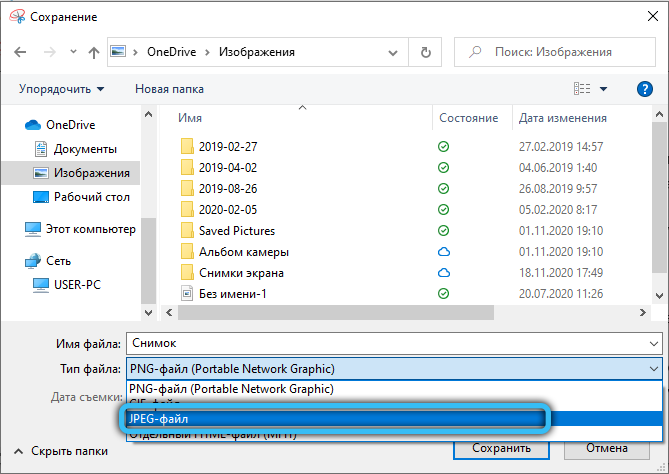
This is how you can translate a piece of a Word test into a jpeg image. This is a useful feature where the user gets a file that will have fixed markup under all circumstances. This feature solves the problem of placing text and tables that have different positions in different environments or when printing.
An easy way to take a screenshot
The method can be used, including on older OS versions that are not equipped with the “Scissors” utility. To use this functionality, just follow these steps:
- Open a text file and place the required page in optimal visibility on the screen. In this case, the text should occupy most of it, but not go beyond.
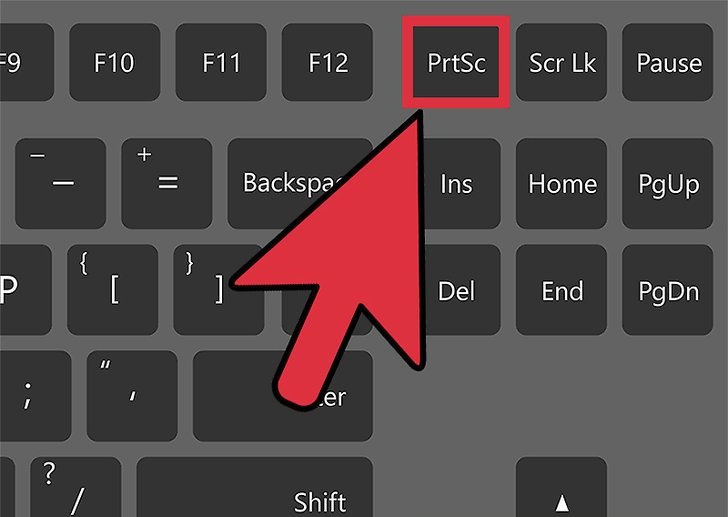
- Press the PrintScreen (PrtScr) key on the keyboard. The image will be sent to the clipboard and will be available for further manipulations already in jpeg format.
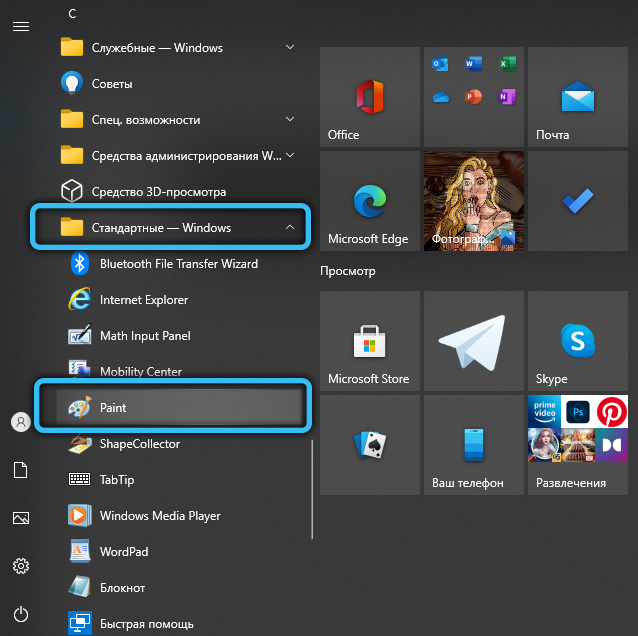
- Open the Paint raster editor, which is also among the set of standard programs of the operating system (in the case of the Ten, it is easier to find it in the search). A ready-made jpeg image from Word is inserted in the new document window (use the key combination Ctrl + V). Then you can change its size in accordance with the requirements.
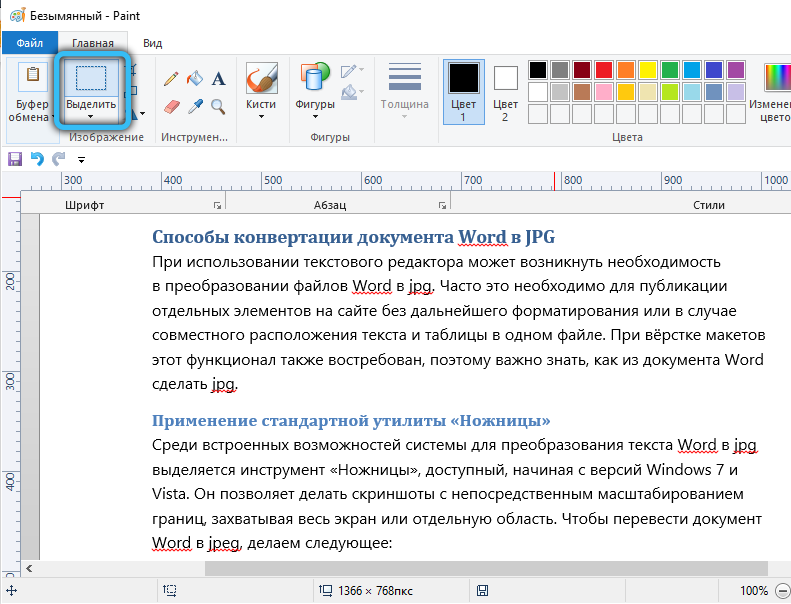
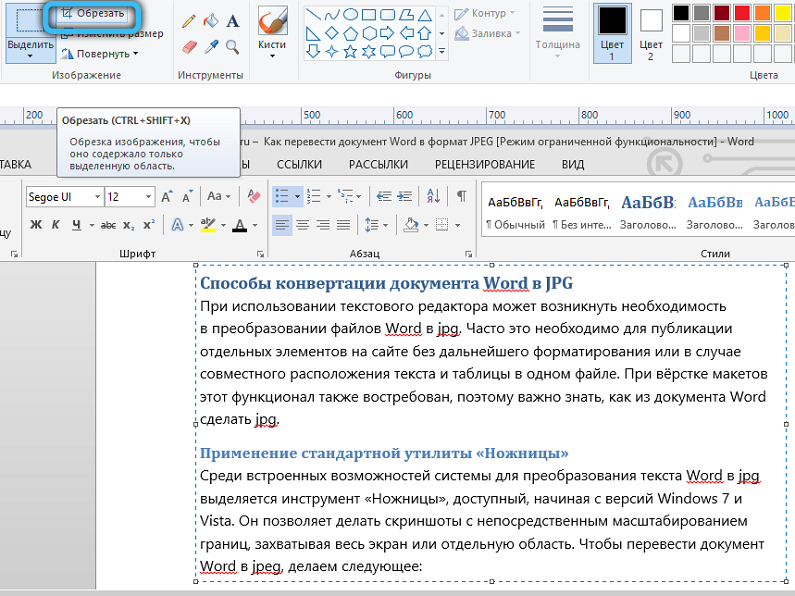
- Save the file as JPG, specify the path and name the object.
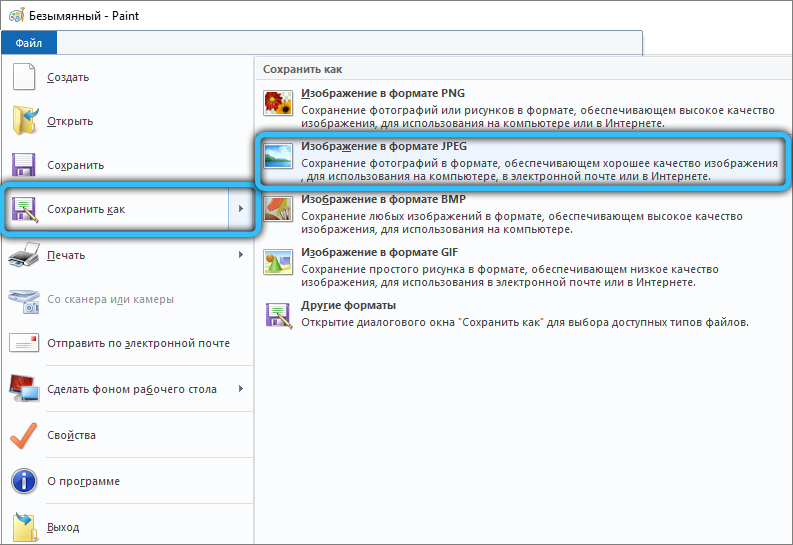
It is important to take into account that the final quality of the jpeg file directly depends on the selected scale of the Word document. If there is a lot of small font on the page, the image may appear blurry or not scaleable. Also, the PrtScr command captures the entire desktop, so it is mandatory for border cropping.
Using the features of the Microsoft Office suite
Among the software tools in the Microsoft Office suite, which includes the Word text editor, there is a note-taking tool – OneNote. It can also be used to convert a text document to a graphic format. Note that the method is suitable if you are using fresh versions of Windows OS and Microsoft Office. We carry out the following actions:
- Open the text file with which we will work.
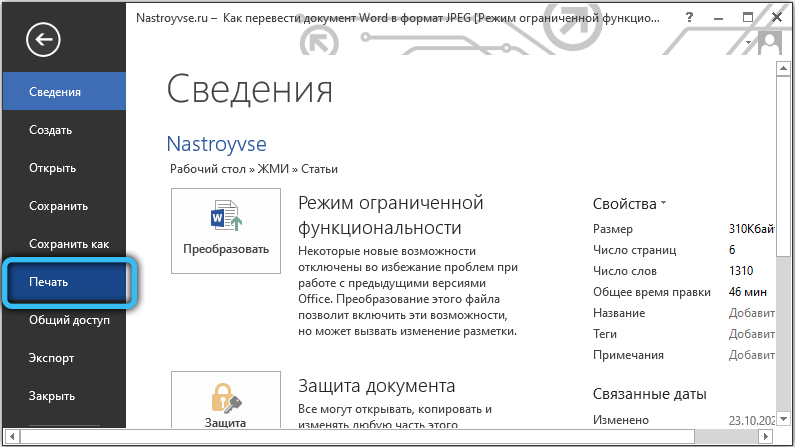
- Click “File” and select “Print” from the menu. In the “Printer” item, select the option to send to OneNote and click the “Print” button.
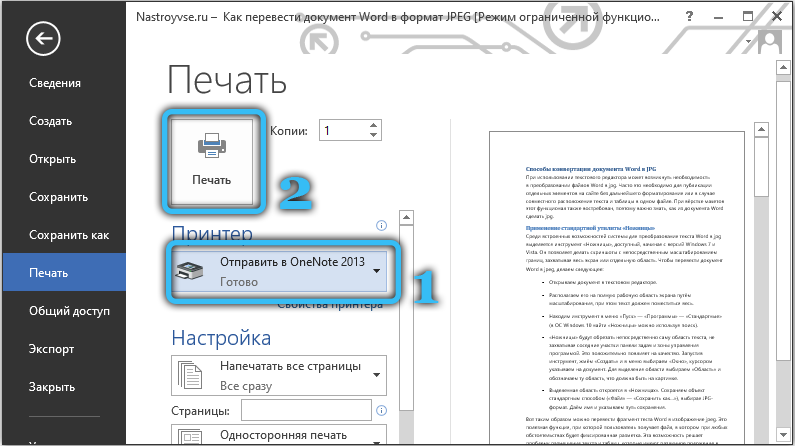
- The document will open in a separate page in the program for creating notes (here you should make sure that only one tab is open – with our document).
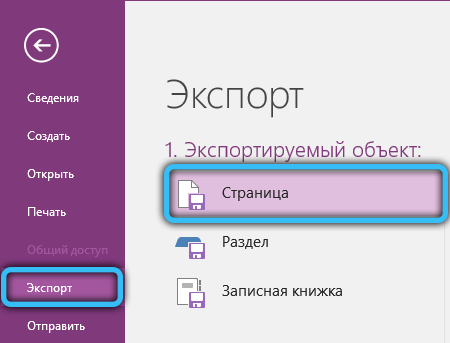
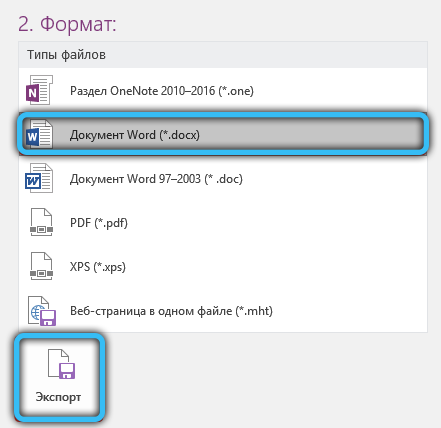
- Click “File” and select the action “Export”, then specify “Word Document” as the object to be exported and click the “Export” button below, and then specify the path to save the item.
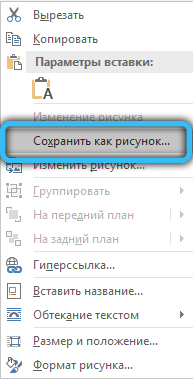
- Let’s open this object in Word. The document will now appear as pages with images of text instead of plain text. You can save these snapshots as separate items. To do this, you need to click on the RMB picture and select the “Save as picture” option, specify the path, select the JPG format for saving and come up with a name for the element – we do this with each image in the document.
Saving images from a Word document in JPG format
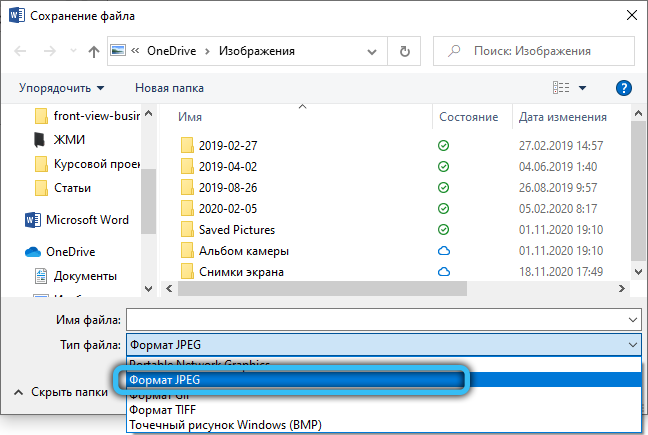
Individual pictures from a document can be saved to a computer directly from Word, without even resorting to other software. It’s easy to do:
- In an open document, right-click on the desired picture.
- From the menu that appears, select the “Save as picture …” function.
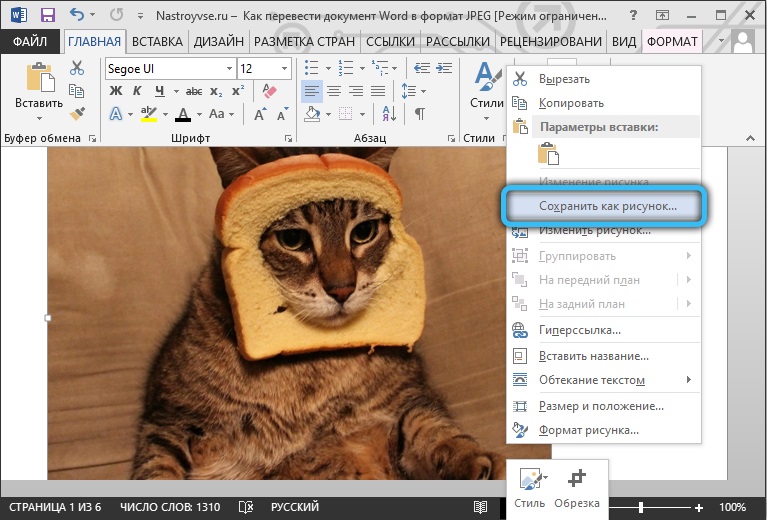
- We expose the “Picture in JPG format”, assign a name, specify the path and press the “Save” button.
How to convert Word document to JPG format using programs
Third-party software is also effective in creating graphics from text elements. It will not work directly to convert text to graphics, so you will have to act in several stages:
- Saving the “Word” object to PDF.
- Launching the converted to PDF object in a graphics editor.
- Convert PDF to JPG.
The initial stage will be carried out in the MS Word editor. To perform the following steps, you will need a graphics software that supports PDF (as an example, we will use the Photoshop editor and the IrfanView image viewer).
Let’s take a closer look at how to complete the task through programs:
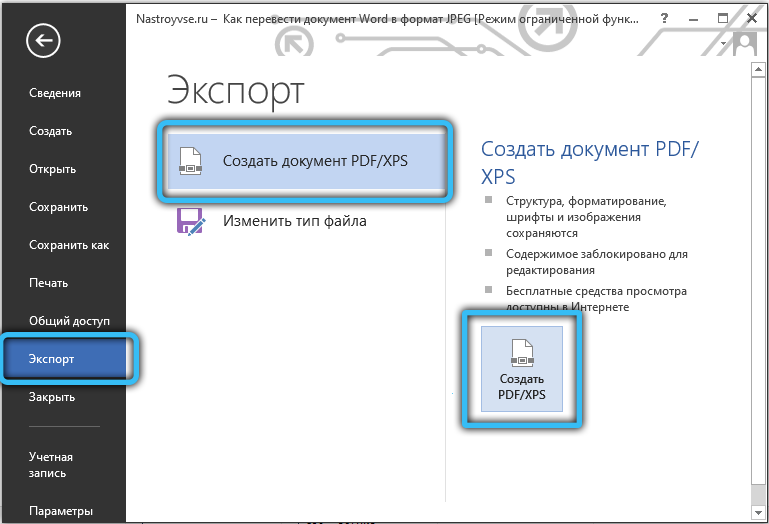
- Open the document in Word. In the “File” menu, select the “Export” – “Create PDF / XPS” option, save the object as PDF.
- Open the transformed element in Photoshop.
- We select the opening option (“Pages” or “Images”), confirm the intention by clicking the “Ok” button.
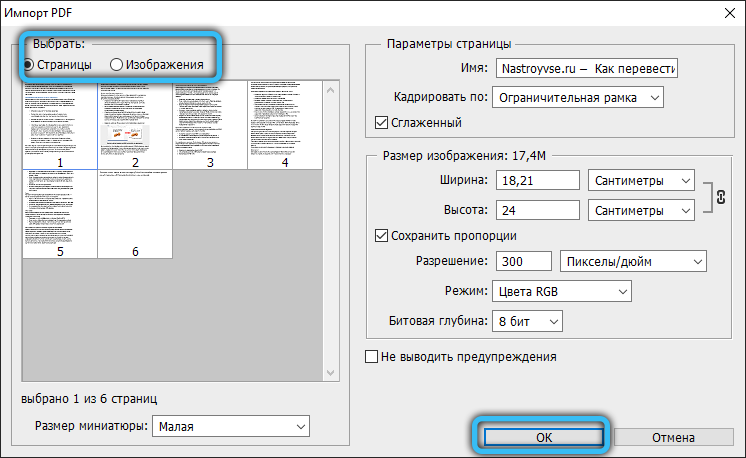
- When you select pages in the photo editor interface, the entire page opens, while selecting images implies opening only the images that the PDF contains. The second option is to save only the graphics, not the entire page.
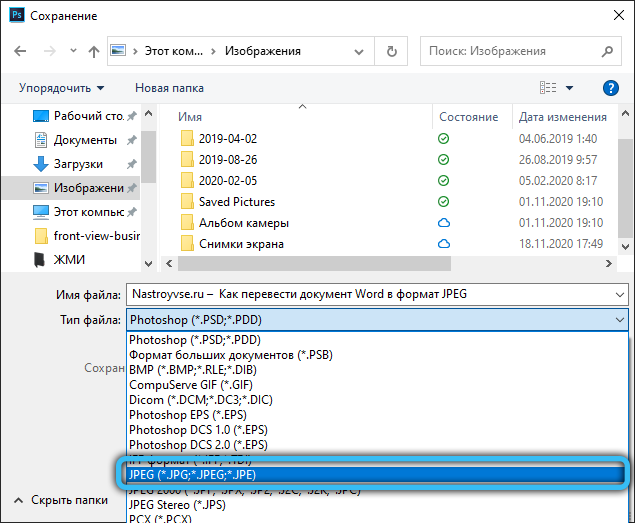
- Go to the “File” menu and select the “Save as …” option, specify the save path, assign a name to the object and select JPEG.
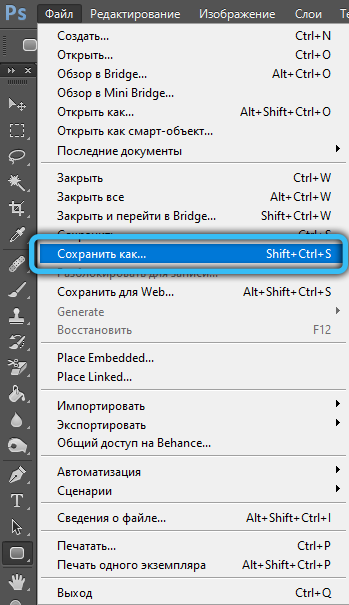
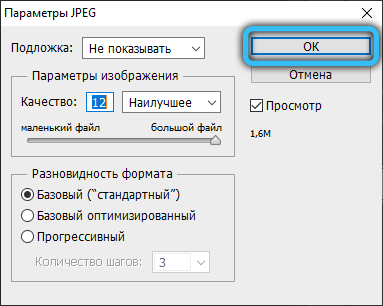
- Next, you need to select the parameters of the JPEG image, after which the picture will be saved.
Similar actions can be performed in the IrfanView viewer (for the program to support the PDF format, install ADPL Ghostscript). Likewise, in the “File” menu, select the option to save the object and save the picture in JPG format.
Use of online services
There are many programs and online services on the Internet that provide work with documents to translate them into an image. Most of them provide free access to features. To use them, it is enough to download a Word document, after which the desired number of pages for translation is indicated.
Popular services have different functionality for working with jpeg, allowing you to create notes, highlight special fragments, and convert them to other formats.
Let’s see how to perform the procedure using several services as an example.
Online-convert
The web service allows you to free convert Word to JPG for all or selected pages from source. To do this, do the following:
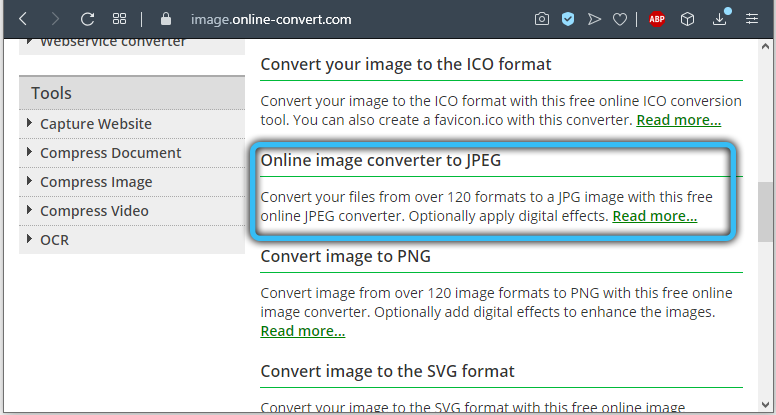
- Go to the site online-convert.com and go to the page “Convert DOC to JPG” (there is support for both documents with the extension “.doc” and files “.docx”).
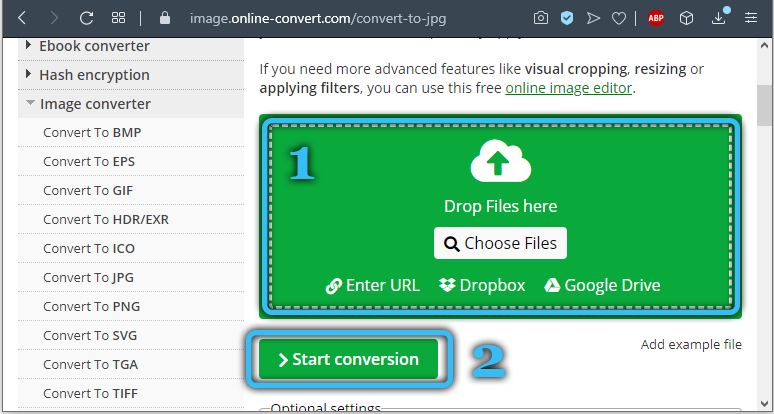
- Click “Select files” or add an object to the appropriate area by dragging and dropping from the explorer (it is also possible to add files from the Internet, for which you will need to enter a URL or download from the cloud).
- Click “Start Converting”.
- At the end of the procedure, select the pictures in JPG (all or selectively) and download individual or all files in ZIP, after which we unpack the archive already on the computer.
Zamzar
Another good service that offers free online conversion is Zamzar. It is just as easy to complete the task with it:
- We go to the site zamzar.com and on the DOC page in JPG click “Add files” (drag and drop them or add a link).
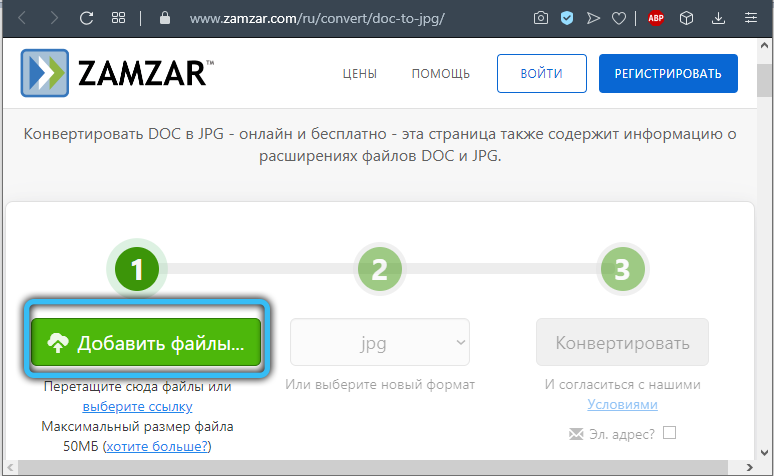
- At the second step, the choice of the final format is offered (leave jpg here).
- Click “Convert” and upon completion of the process, click “Download”.
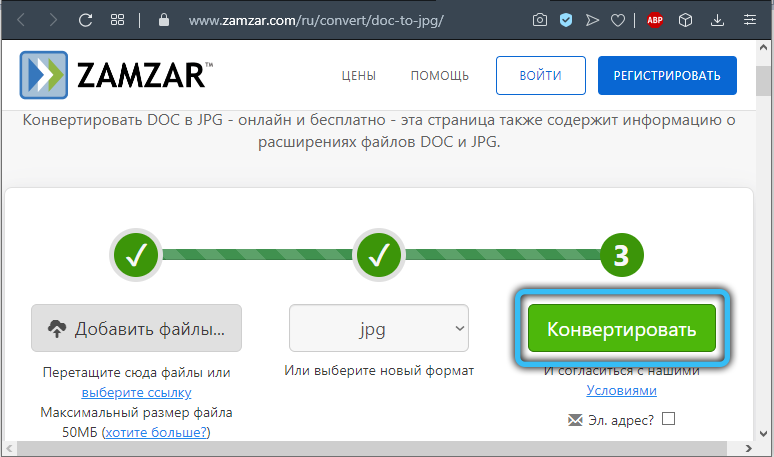
- On the next page, options will be available to download the elements individually or in full (ZIP-archive).
Word to JPEG
A free web service will help you convert Word documents into sets of individual JPEG elements, for which you will need to perform the following manipulations:
- Go to the Word to JPEG page.
- We press the button “Download” (you can select up to 20 “Word” files).
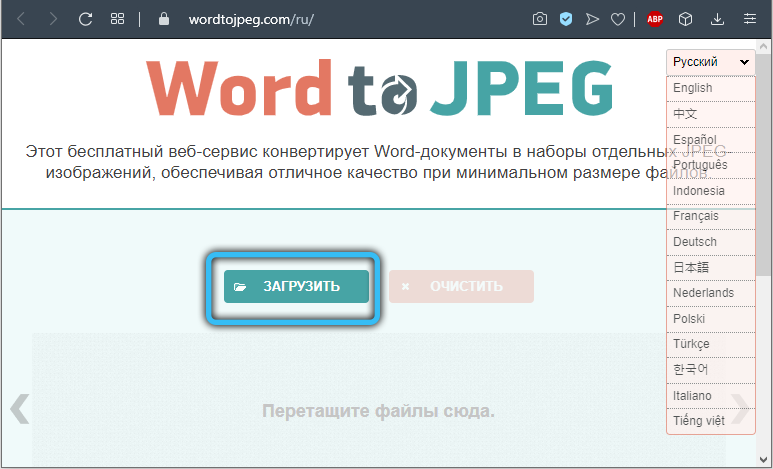
- After conversion, click “Download All” to get the results in one ZIP-archive or download the elements separately.
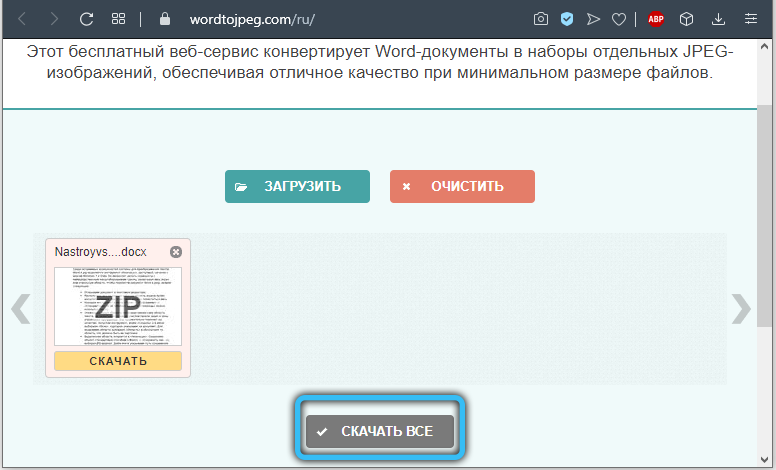
Other online services work in a similar way.
Among the many possibilities for converting Microsoft Word documents and pictures from files into a graphic format, you can choose the option that is most convenient for you. Screenshot is one of the most common methods, since you do not need to install additional software to use it, because it is a standard function of the operating system. If you already have the necessary software on your computer, you can use it, as well as additional editing options available using graphic editors.
Did the article help you complete your task? Which of the ways turned out to be the most acceptable for you? Let us know in the comments.