When you turn on a computer or laptop running Windows 10, an image appears next to the username – an avatar. Replacing it or removing it is not so easy at all, because there are no buttons attached to it that allow you to handle it in one click.

What is an avatar and what is it for in Windows
An avatar is a picture that users of social networks and forums set in addition to their name / nickname. It can be a personal photo, a character you like, a movie hero, etc., etc. Thus, the user becomes less faceless. Windows also has a site with the ability to open discussions, and comments are accompanied by an image. It is also used for the account and is a means of personalizing the computer. Avatars are stored in a special Windows folder, which can be found along the path:
C: Users username AppData Roaming Microsoft Windows AccountPictures
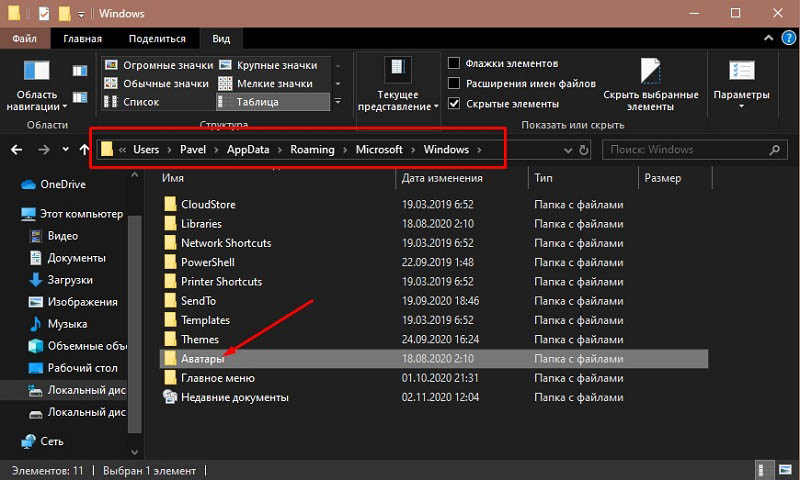
It is also possible when pictures are placed here:
C: ProgramData Microsoft User AccountPictures
If AppData is not found, check the settings to see if the system folders are hidden.
How to set or change an avatar
By default, the faceless silhouette of a stylized man is used as an avatar, but as you can imagine, you can set your own image.
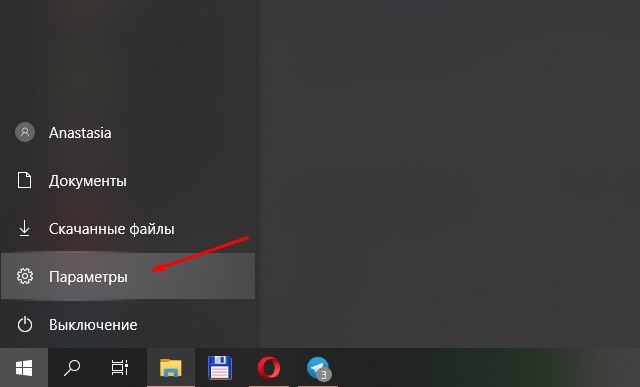
- Type in the “Search”: “Options” (or press Win + I, or open “Start” and click on the cogwheel icon).
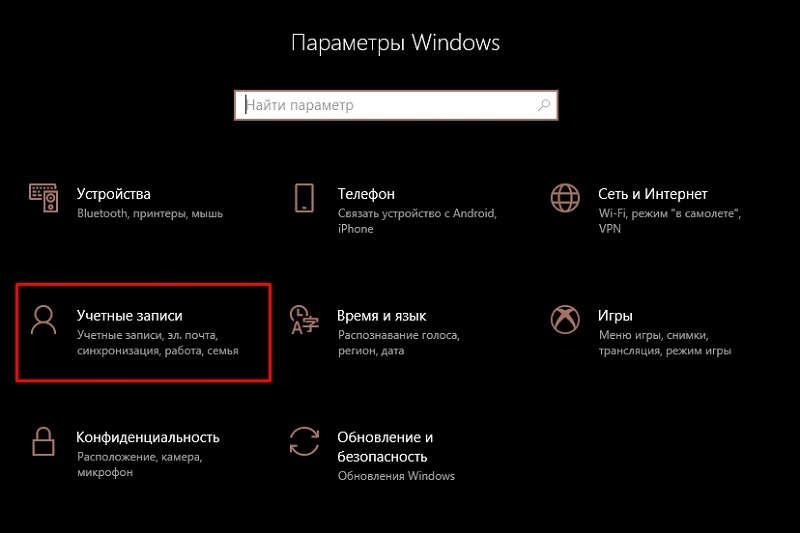
- Here we are interested in the item “Accounts” and the tab “Personal data”.
- In the window, you will immediately see an offer to change your avatar. You can take an instant photo on the webcam or pick up something from the ready-made. Depending on this, either the Explorer window or the camera will open.

- The selected photo is instantly loaded, and the next time you turn on the computer, a new avatar will appear.
If you registered on the Microsoft website, the image will be automatically installed there too, and it will remain even if you buy another PC. All previous photos used as an avatar are stored in the same folder, the path to which is indicated above. You can also change the picture on the Microsoft website, but there is one problem – the old avatar will remain on the computer. Unfortunately, the developers have not yet fixed this issue.
Now let’s look at how to change the avatar in Skype installed in the system.
- Open a window with dialogs – your name will be above them.
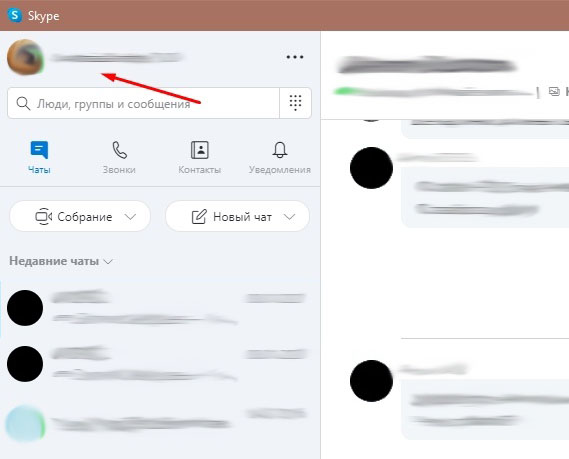
- Click the circle and you will see personal information, as well as a button with the ability to add a photo.
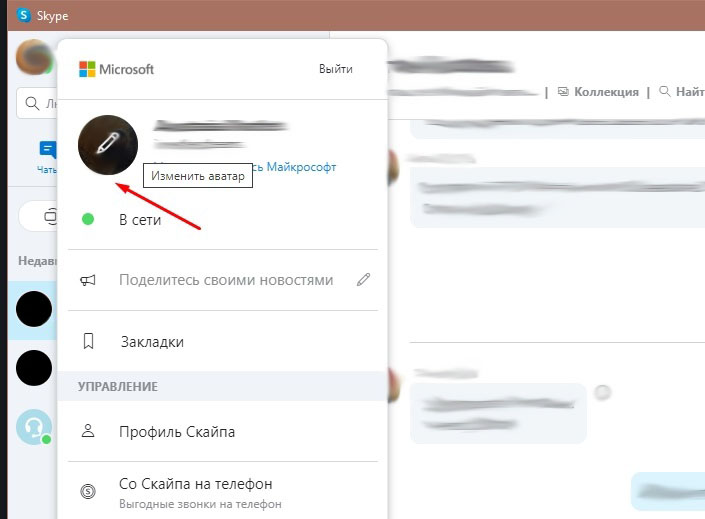
- Select and download the one you want.
You can also go directly to the Skype website and do the same.
How to remove a Windows avatar
The actual deletion of an avatar in Windows 10 is a very complicated procedure. You can do it easier – change the picture to a standard outline of a man or something indefinite. This is done like this:
- Go to “Accounts” and “Personal Data”.
- Make an attempt to add an avatar, wait for the “Explorer” to react and select the default picture offered to all users (for convenience, you can change the view type to “Icons” to immediately notice it).
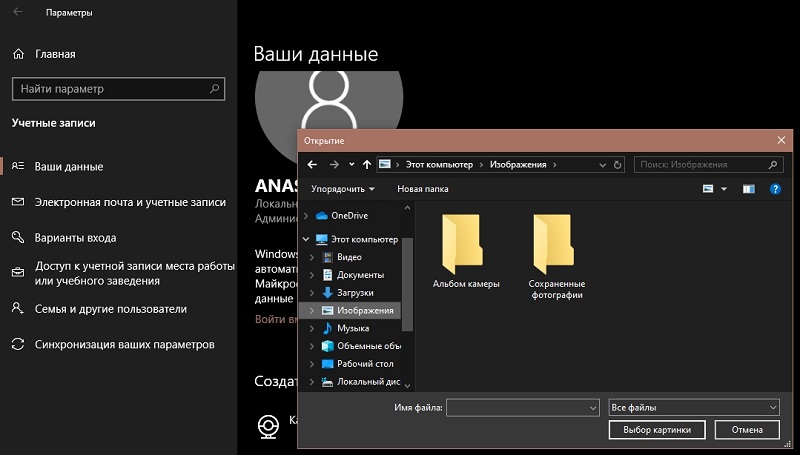
- Delete all other images in this folder.
If this method does not suit you for some reason, try the following:
- Open the folder where the avatars are collected again, find the file with your nickname and the .dat extension.
- Delete it.
- Press Win + R, enter “cmd” there (without quotes) and click “Inter”.

- The “Command line” will start, where you need to drive in “wmic useraccount get name, sid” (without quotes) and also press “Inter”.
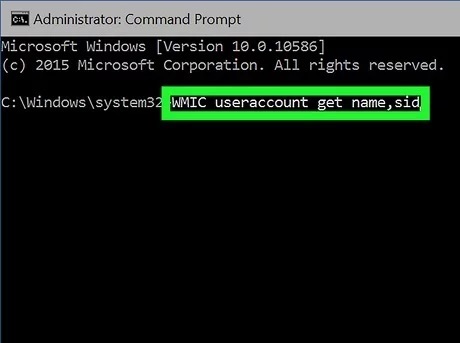
- Delete the found folder as administrator.
- Do not forget that the picture continues to be used on the Microsoft website – go there, open the profile and delete the avatar.
Now you can see how difficult it is to delete an avatar in Windows 10, although the developers assure that they are doing everything possible for the convenience of users. In some cases, to commit the changes, it is not enough just to restart the computer – you need to log out of your Windows account and log in again.