Very often, when trying to edit an image, users encounter a problem when the editor does not support a particular format. Also, different formats have different features and properties, which are better suited for a particular case. One way or another, there is a need to change the expansion. Fortunately, this can be done very quickly and easily. In this article, we’ll figure out how to change the format of a photo. Let’s get started. Go!
In total, there are several ways to install a different extension for the image. Let’s consider each of them in more detail.
Contents
The first method is Microsoft Office
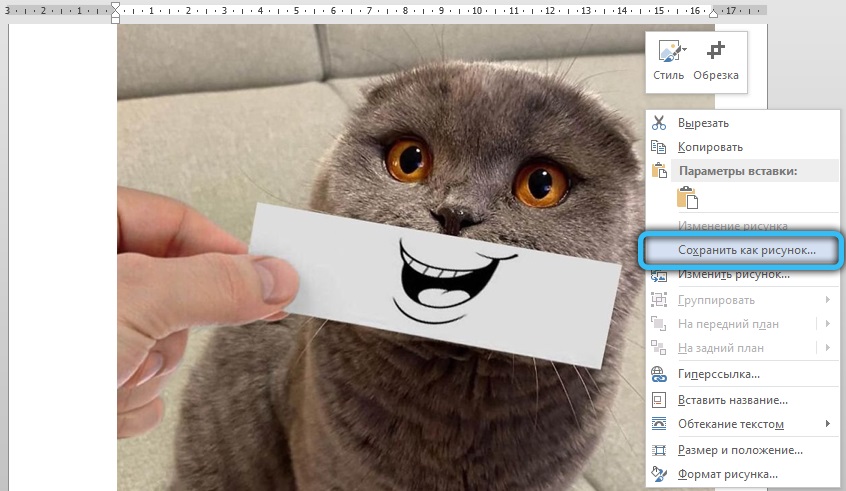
The first option is to use the well-known Microsoft Office program. Despite the fact that this utility is intended primarily for working with documents, it will perfectly help you solve other tasks, for example, converting a photo. To do this, copy the image into a Microsoft Word document. Then right-click on it and in the pop-up menu click on the “Save as picture …” item, after which in the window that opens, you will need to select the extension in which you want to save your photo. Microsoft Office Word allows you to convert images to the following formats:
- TIFF;
- GIF;
- BMP;
- PNG;
- JPEG.
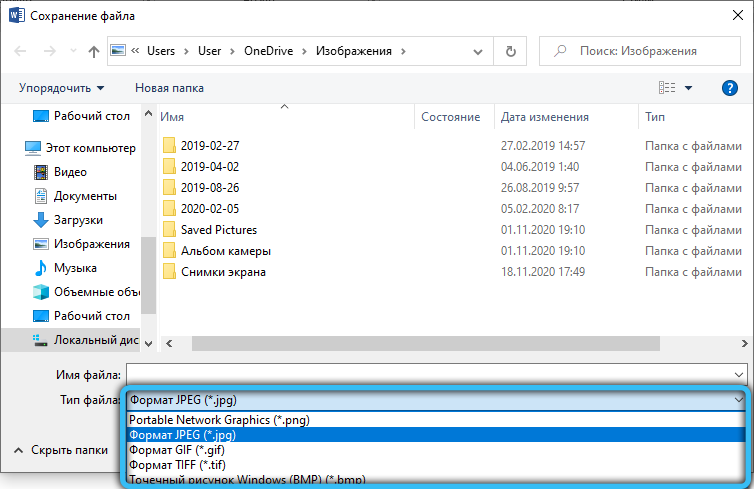
These types of extensions are used the most, so in most cases you can use this method.
The second way is Paint
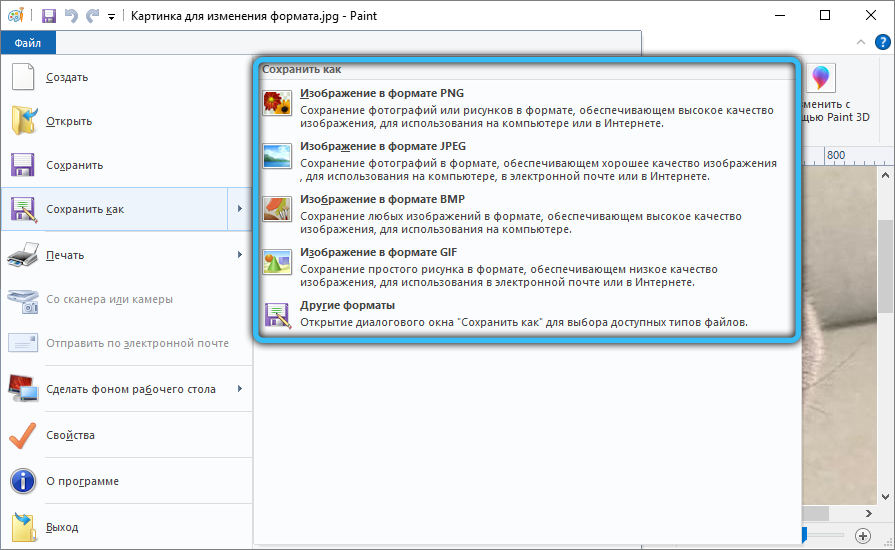
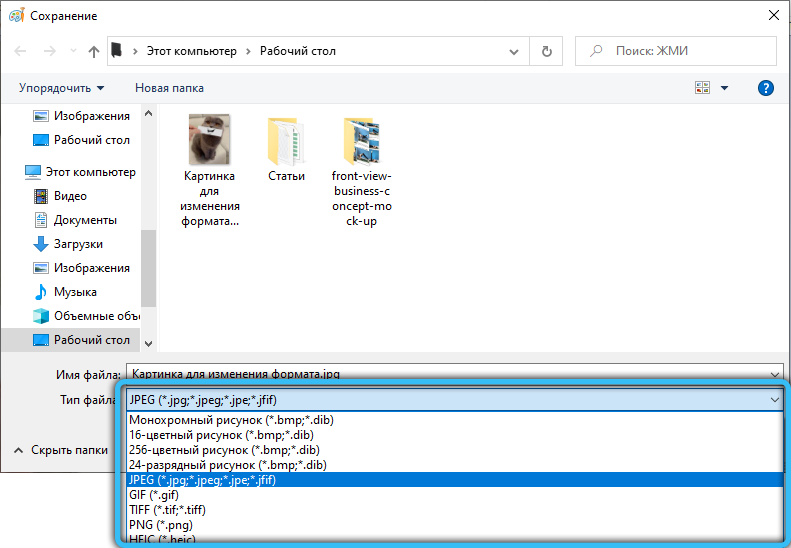
If, for some reason, your computer does not have a Word document editor, use the Paint program built into the Windows operating system. The principle of operation is similar. First, copy and paste the desired picture, and then click “Save As” in the “File” menu. Next, you just need to specify the desired format. If you are using the Paint utility, then the choice of available extensions is slightly larger due to the BMP and JPEG varieties.
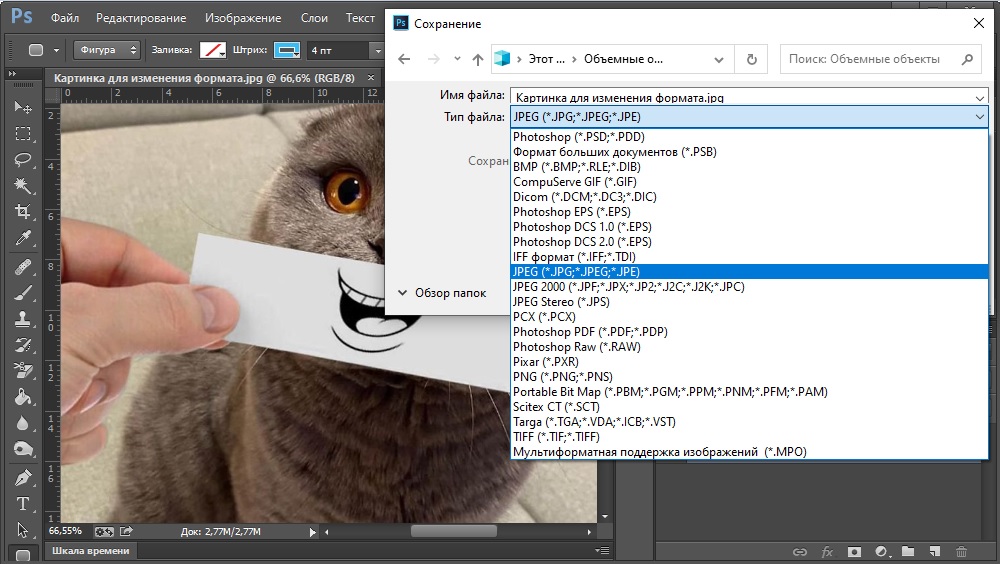
The third way – Adobe Photoshop
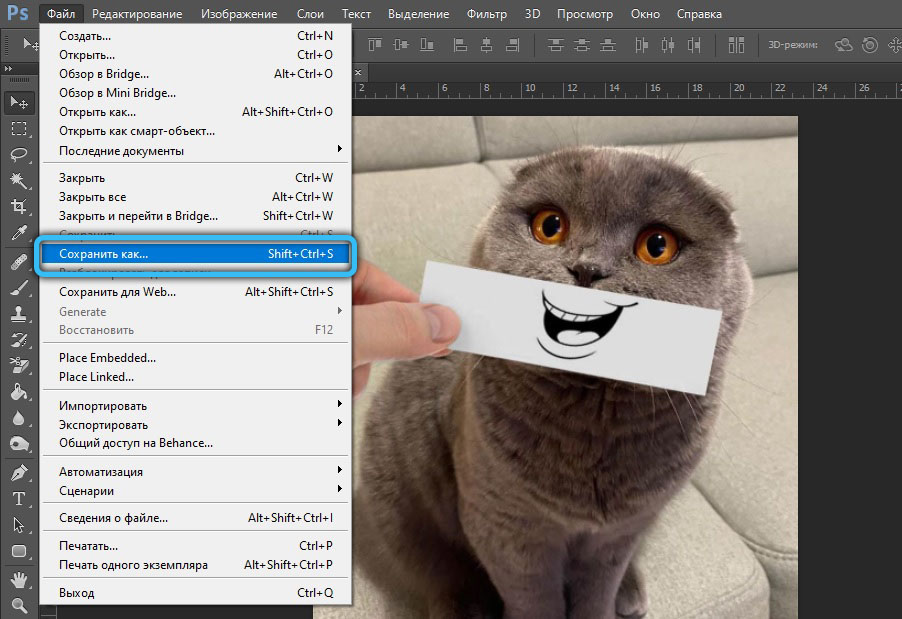
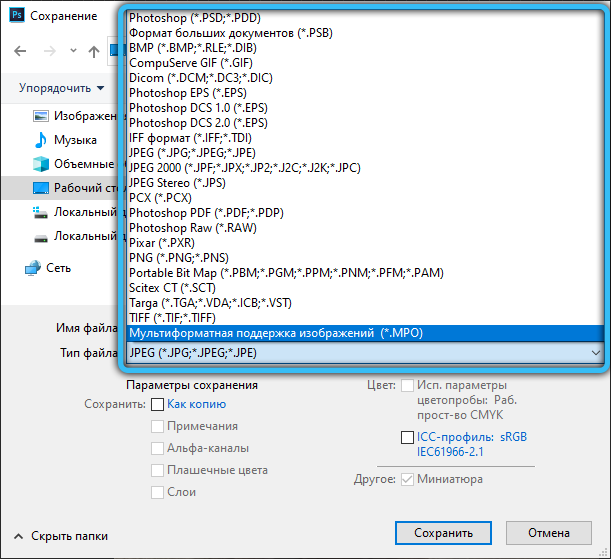
Another way is to use the well-known image editing program Adobe Photoshop. In Photoshop, everything is done the same way. First you upload a photo, then go to the File menu and choose Save as … from it. In the window that appears, it remains to indicate the desired extension, the choice of which in Adobe Photoshop is wide enough. Of course, downloading and installing Photoshop solely in order to convert JPEG to PNG is impractical, because you can use the built-in Paint for this.
The fourth way – Photo Album
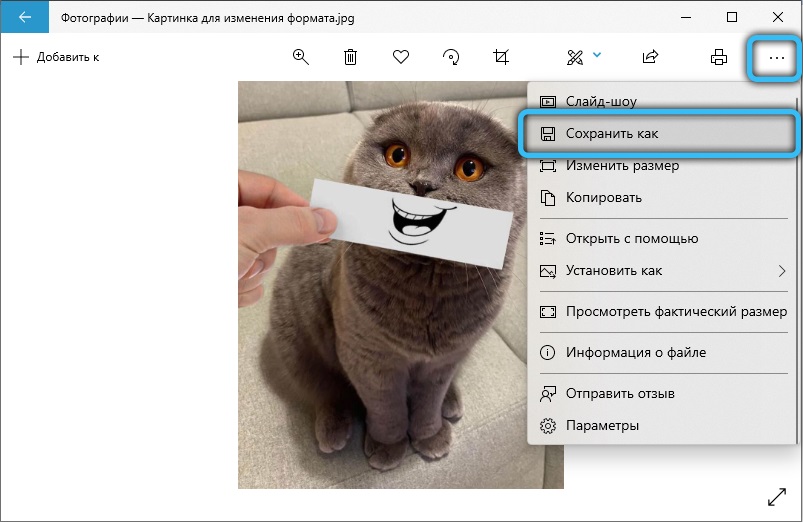
With the help of the free graphic editor “Photo Album”, which is included in the package of useful applications from Microsoft “Windows Live Main Components”, you can also set the required format quite easily. However, at the moment this utility is not included in the programs installed with the operating system. However, you can still download it to your computer via the Internet.
In order to set new characteristics of any picture, the first step is to add it to the program itself. This action is performed through the menu of the “File” tab, or by simply dragging and dropping an image onto the work area. Then click “File” → “Create a copy” and in the window that opens, enter the name of the photo, and then select the desired format: “JPG”, “PNG”, “TIFF”, “WMPHOTO”. Don’t forget to save at the end.
Fifth method – FastStone Image Viewer
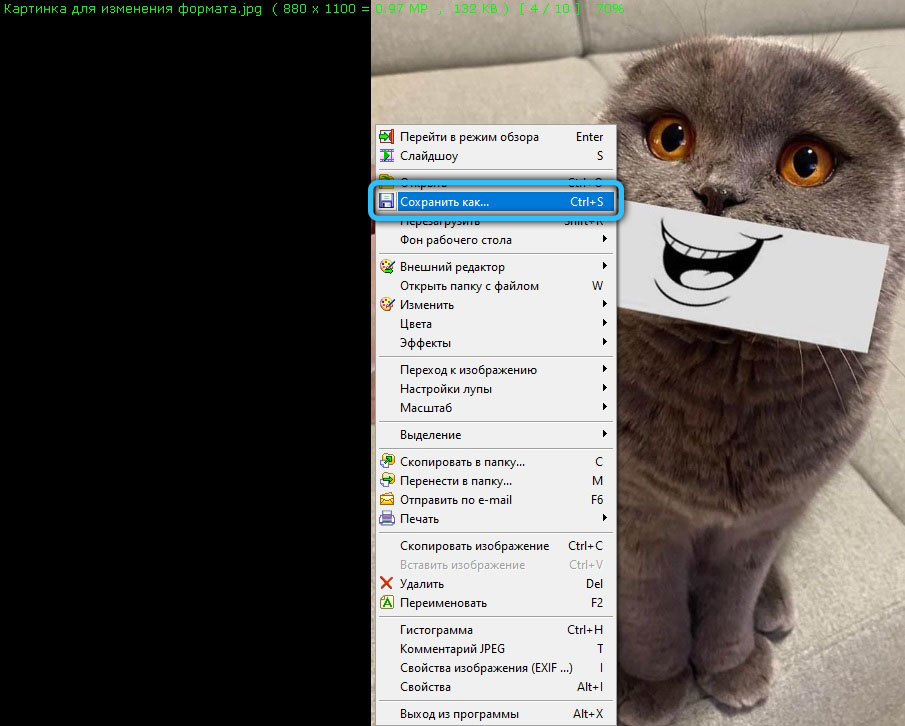
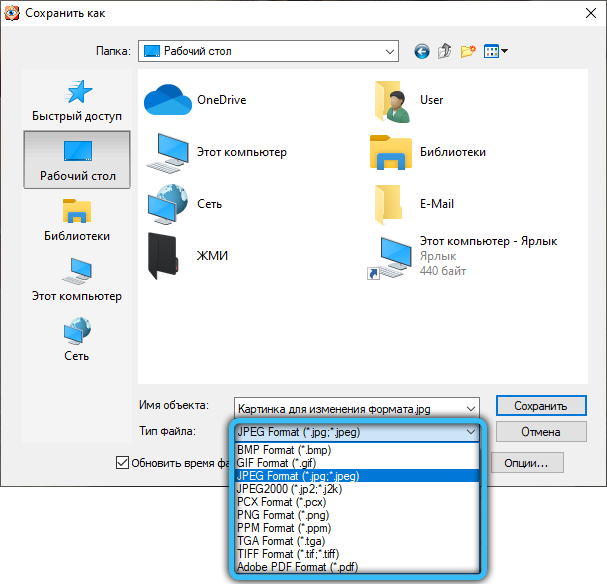
This program has ample opportunities for editing photos. In particular, it has an extension replacement function in its arsenal. After starting the application, select the desired file on your computer, and then on the toolbar, click on the “Save as” line. In the next step, specify the future location of the photo, its name and type. The following formats are available for saving: “BMP”, “GIF”, “JPEG”, “PCX”, “JPEG2000”, “PPM”, “TGA”, “TIFF”, “PDF”.
Sixth way – XnView
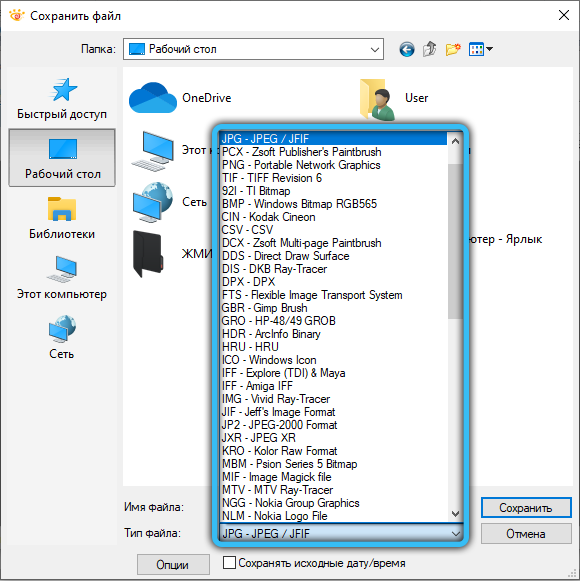
Free utility “XnView” is designed to view and organize storage of photos. In addition, with its help it is very easy to change the current file format to any available one. This program supports a huge number of different extensions, so you will definitely find the option you need.
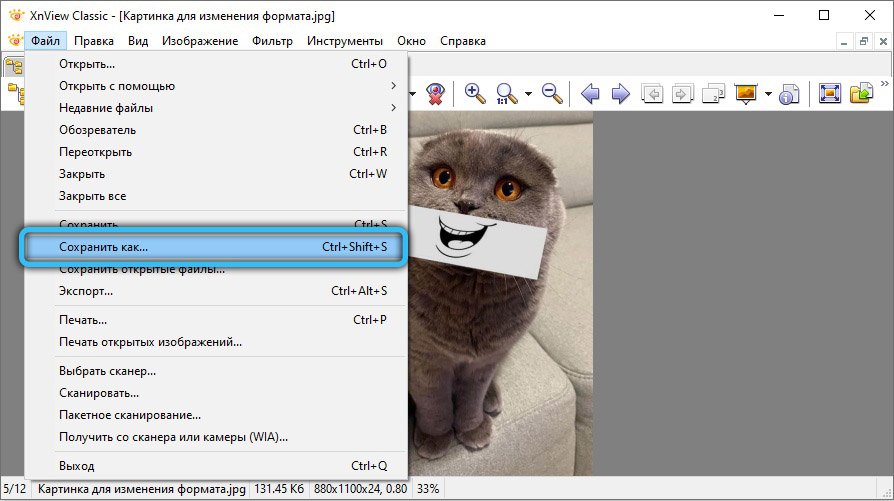
First of all, upload your photo to the application via the “File” → “Open” tab. Next, click on the “Save As” item on the work panel. In the next step, choose a format and save the image.
Seventh way – IrfanView
Working with photos in this application is very convenient and extremely simple. In addition to many options for visual customization, it is possible to edit the current parameters of graphic files, in particular, replace their format.
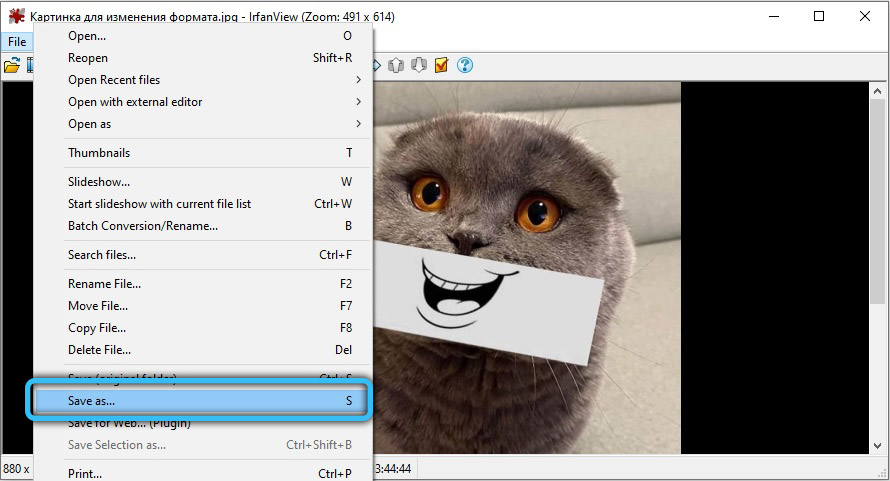
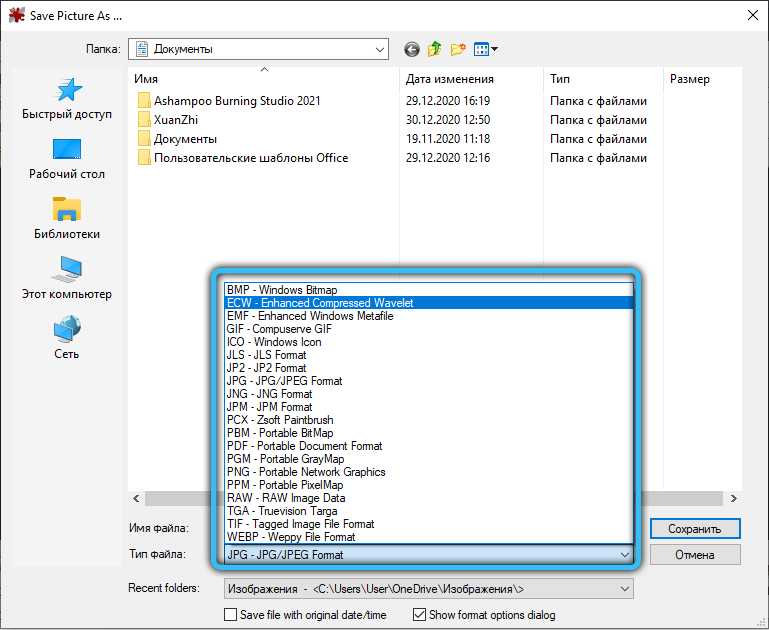
To install a new extension, open the picture in the program window and click on the “Save As” button (floppy disk icon). In the conversion area, select the type you want and save the photo to your PC.
Eighth way – Paint.NET
Raster editor “Paint.NET” is an extended and more functional version of the standard “Paint”. It is able to compete with popular paid applications, practically not inferior in its quality.
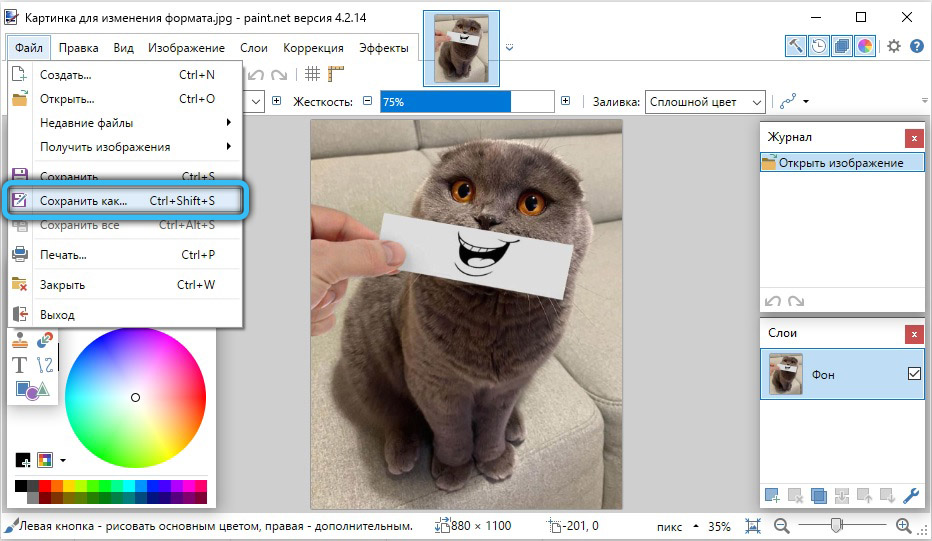
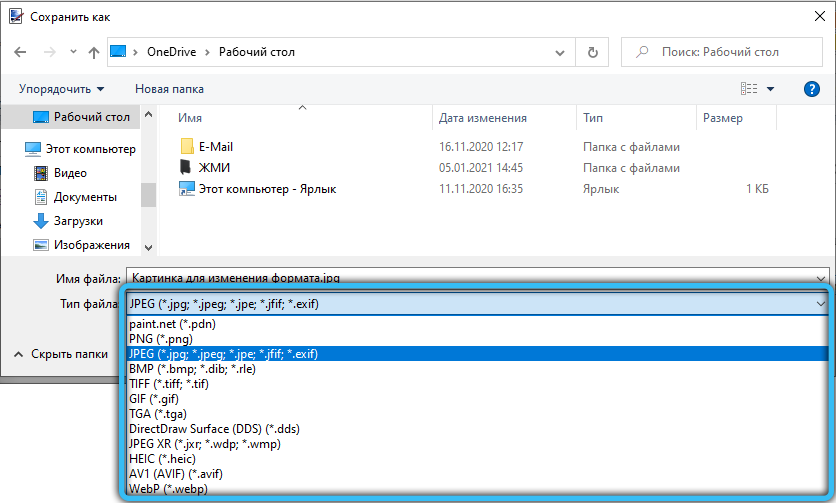
In order to change the old photo format to any other, first load the required file into the program itself. Then go to “File” → “Save As” and select the appropriate extension from the list provided.
Ninth way – Format Factory
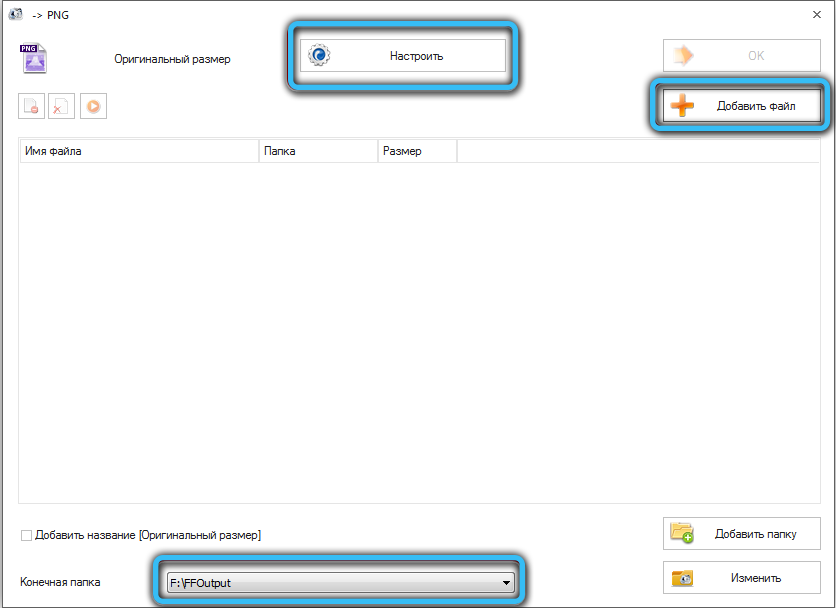
The “Format Factory” program is specially designed to convert the current format of various media files into a new, more suitable version. To change the extension of your photo, go to the “Photo” section and set the desired format for conversion. In the window that appears, click on “Open file” to load the picture into the application. Upon completion of this manipulation, click on the “Start” button on the main page.
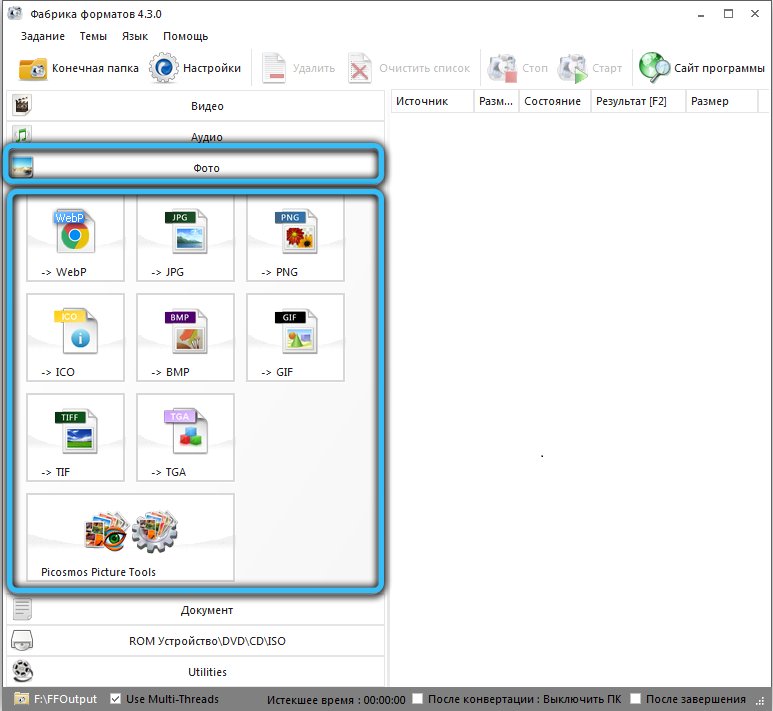
Conversion is available among the following graphic formats: “WebP”, “JPG”, “PNG”, “ICO”, “BMP”, “GIF”, “TIF”, “TGA”.
Method ten – Movavi Video Converter
Despite the fact that this program is primarily aimed at working with video formats, it also implements a fairly voluminous set of functions for editing photos. The fast and reliable Movavi converter allows you to convert one image format to another in just a couple of minutes.
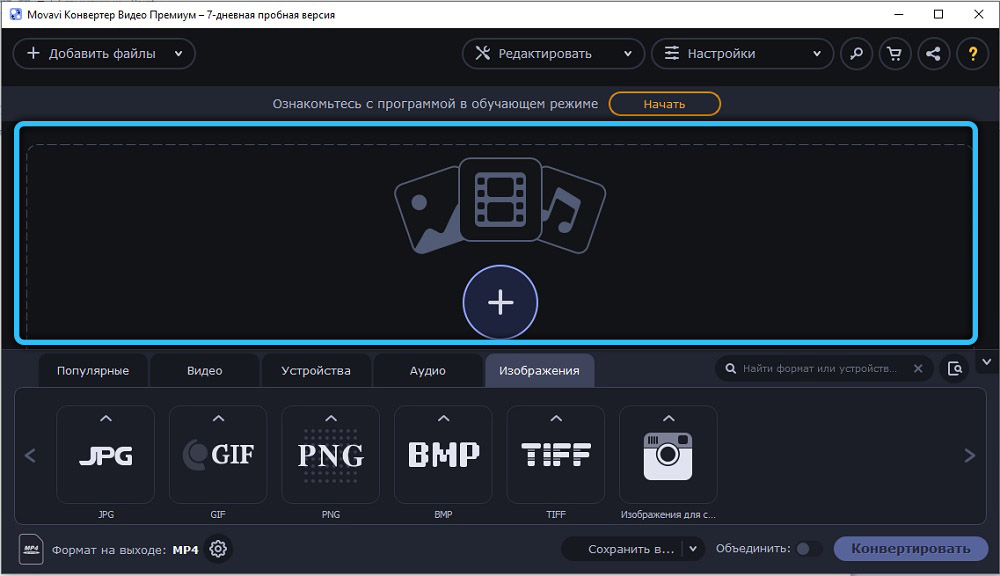
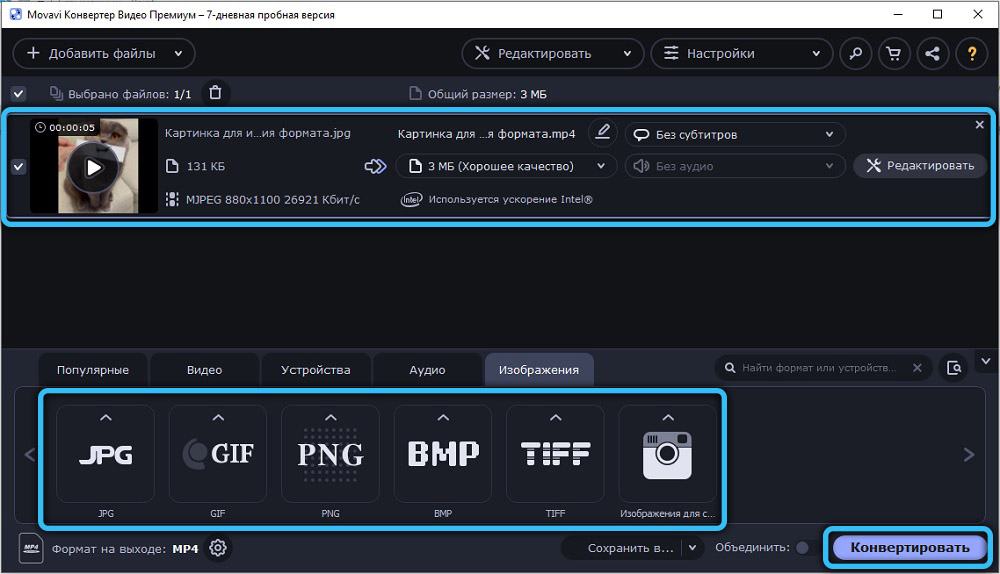
To do this, first you need to add files to the workspace by going to the “Pictures” tab → “Upload images”. At the same time, thanks to batch conversion, you can upload several photos at the same time. Immediately after that, at the bottom of the window, select the required format. Moreover, you have the opportunity to use ready-made presets for various Internet resources that are in this section. Then you should choose the future location of your picture by clicking on the folder icon. The final stage – click on the “Start” button to start the conversion process.
Bonus way – Online services
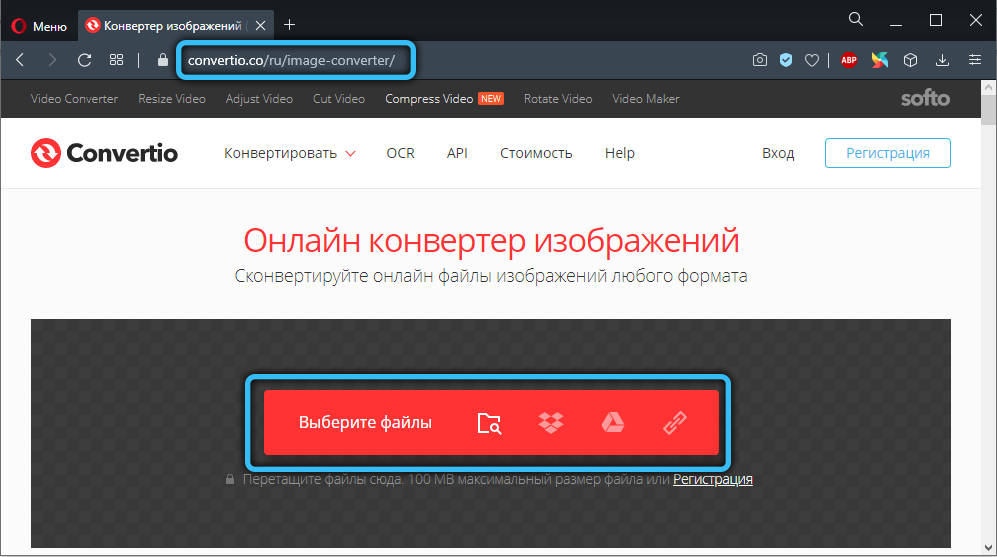
There is one more option that allows, in general, to do without any utilities. All you need is to go online and find a special online image conversion service, of which there are many. Such services allow you to quickly change the extension of a photo without unnecessary fuss and registration.
If you need to reduce or enlarge a photo, this can also be done without any problems in Paint (just click the “Resize” button on the toolbar), Adobe Photoshop and other similar programs.
As you can see, this issue can be solved very simply. Use whichever method you like best. Write in the comments if this article helped you solve the problem and share, tell other users which method you think is the most convenient and effective.