Installing new drives in a computer / laptop is not a routine task at all, especially for mobile PCs. As a rule, hard drives “live” for a long time – 8-10 years, or even more. Their solid-state counterparts have a shorter “shelf life”, but they are also calculated in years. So even if you consider yourself an advanced user, replacing a disk with a new one can be difficult. Skipping the technical issue, in the case of a desktop PC, removing the cover, disconnecting the power cable and interface cable, and unscrewing four screws is not a problem even for a student. But as for the software part, specific knowledge is needed here, and not the ability to hold a screwdriver in your hands. We intend to share this knowledge with our readers.
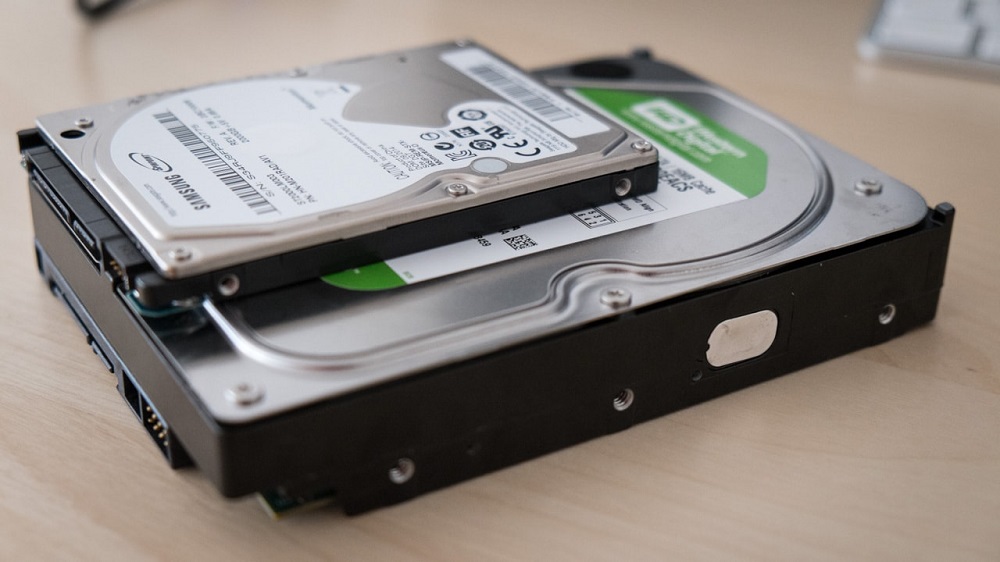
What is HDD / SSD disk initialization
Connecting a new disk to the computer is not enough for the operating system to see it. The fact is that in the factory, disks are produced “pristine”, and in order to make it visible, it must be prepared, and this procedure is called initialization. Essentially, to initialize a disk means that information is written to its special “zero” sector, which includes information about the operating system used and the structure of the drive itself. It is clear that it makes no sense to enter such data at the factory, since it is not known on which computer this drive will be installed.
We will describe below how to initialize a hard or solid-state drive, but for now, note that the initialization procedure can be applied to old media, but it is important to know that all data on the media will be irretrievably lost.
Therefore, the procedure should be approached with the utmost responsibility so as not to accidentally destroy important data. Such emergencies happen with enviable regularity.
Hard disk initialization
It’s no secret that a fairly significant part of the computer park, at least in our country, is outdated PCs with weak hardware, so the actively promoted Microsoft Windows 10 for such computers is an unbearable burden. According to some statistics, currently, 2 to 5 percent of users still use XP, and about 40% – Windows 7. The share of the top ten is growing, but has not yet surpassed the 50% milestone. Meanwhile, the interface and functionality of these operating systems are significantly different, including the disk initialization procedure.
Let’s take a look at how disks are initialized in Windows 7 (for XP, the procedure is almost identical, except for the way the control console is called):
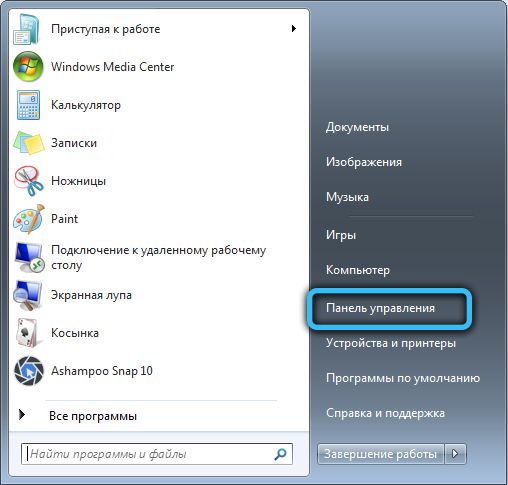
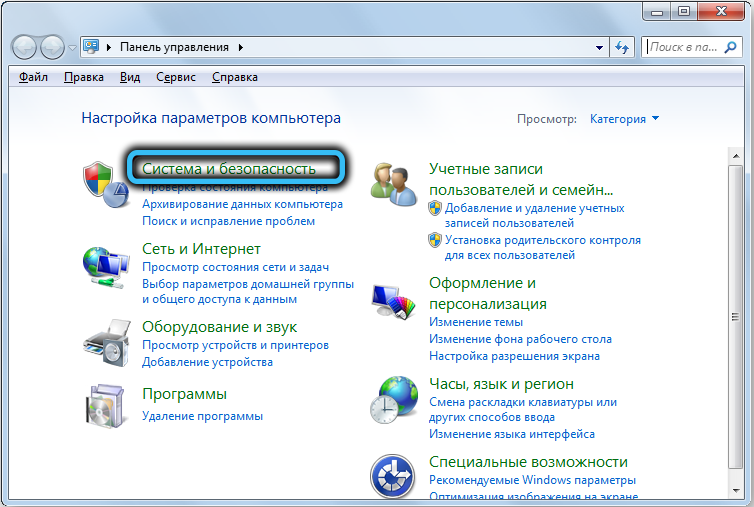
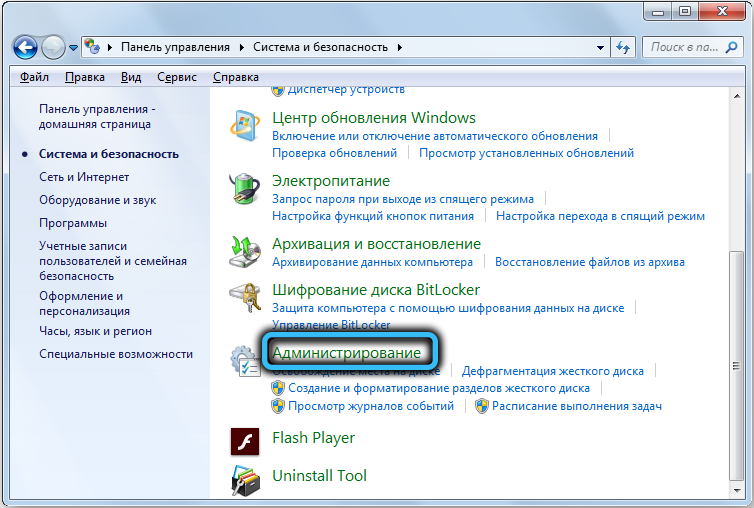
- open the “Control Panel”, select the “System and Security” tab, then “Administrative Tools”, click on the “Computer Management” item;
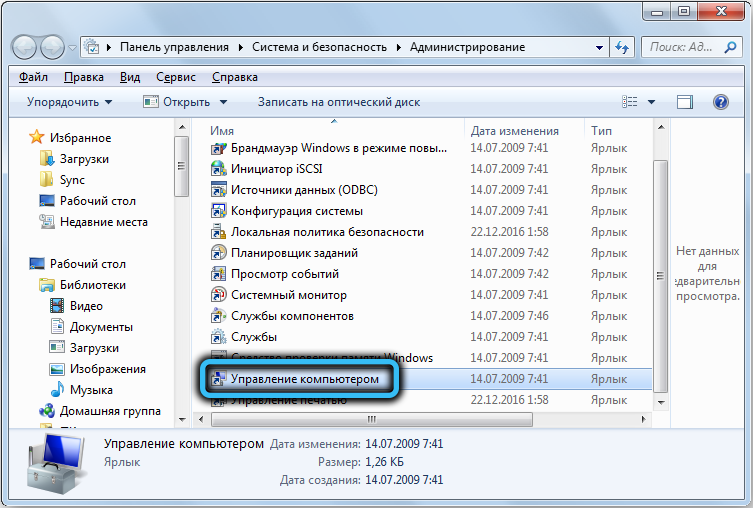
- the same actions can be performed more simply – by right-clicking on the “Computer” icon and selecting the “Control” item in the context menu that appears;
- in the left menu of the console, select the item “Disk Management”;
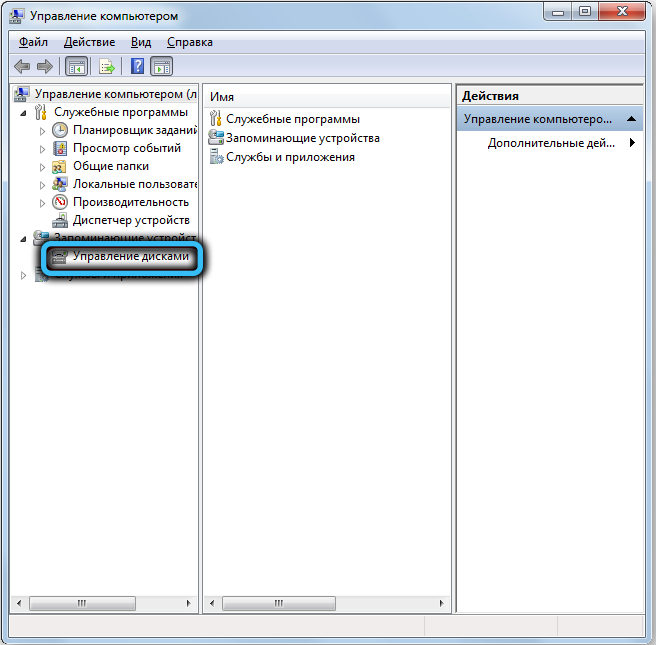
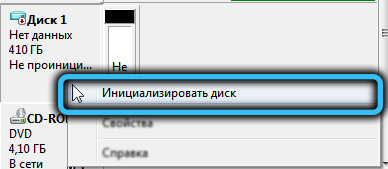
- a list of connected drives will appear, among them there will be one that needs to be initialized. Click on it with RMB and in the menu that appears, select the item “Initialize disk”;
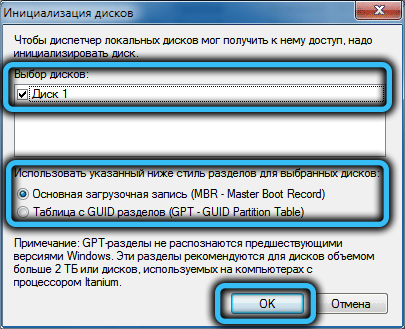
- a new window will open in which you need to check the box for the new media and select the upper parameter (MBR) below. Click OK and wait for the end of the initialization process of the new drive.
In Windows XP, everything is exactly the same, only the disk management utility is called a little differently (in the “Control Panel” click on the “Administration” tab, go to “Computer Management” and here select the “Storage Devices” tab, and then call ” Disk Management “).
Initializing a new hard or SSD drive in Windows 10 is done differently:
- in the “Start” menu in the search bar, enter diskmgmt.msc;
- the corresponding line will appear at the top of the search results, click on it;
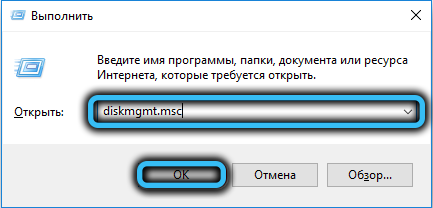
- an alternative way is to press the Win + R combination, after which the program launch console will appear, and type diskmgmt here, confirming by pressing the OK button;
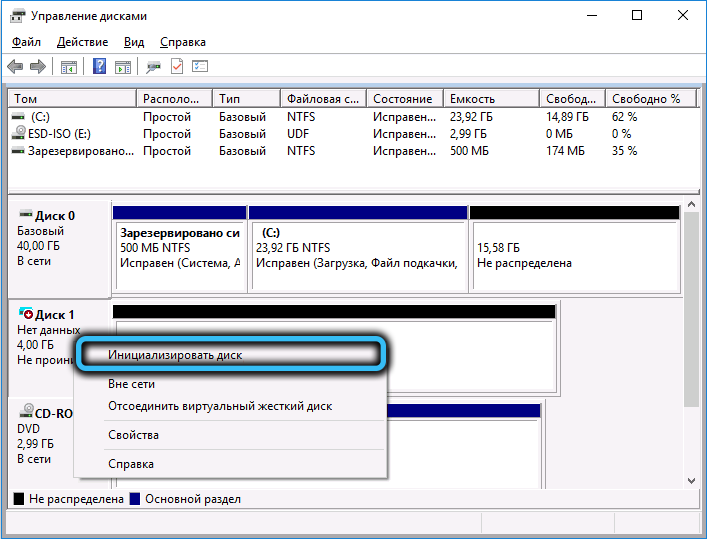
- this will open the Disk Management Utility window, which will display all the disks detected in the BIOS. In the lower block, we are looking for a new drive that is not recognized by the system and is designated as not initialized (such objects are marked with a red arrow pointing down);
- click on the PCM media icon and select the “Initialize disk” option in the menu that appears;
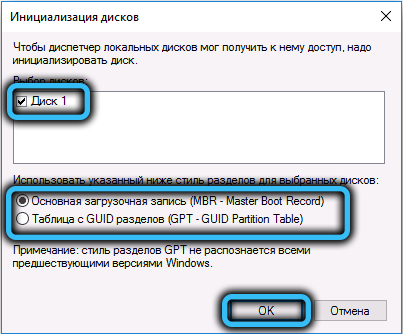
- the final stage is the same as for other versions of Windows: we put a checkmark in front of the disk to be initialized, and below we indicate in what format the control information will be written, in the form of MBR (select this item if the volume of our disk is less than 2 TB), or GUID if the disk is large (it is a hard disk or an SSD, it does not matter). Note that the second option may be incompatible with some versions of Windows.
But knowledge of the procedure on how to properly initialize a hard or SSD drive is not enough to use it. It still needs to be marked, that is, to set the structure.
Create a new volume
As a result of initializing the disk, you can see that it seems to be already available, and even its volume will be displayed, but the inscription “Not allocated” will appear, and our task is to distribute the available disk space. This is done as follows:
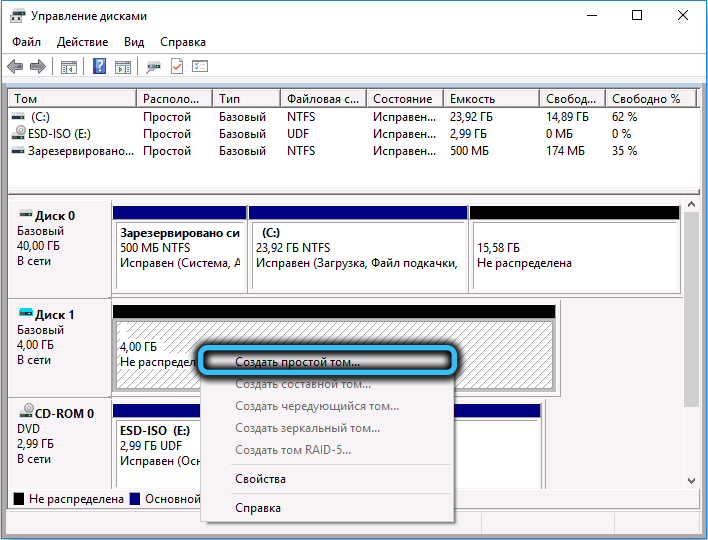
- right-click on the empty (unallocated) space of the new drive;
- in the context menu that appears, select the “Create simple volume” option;
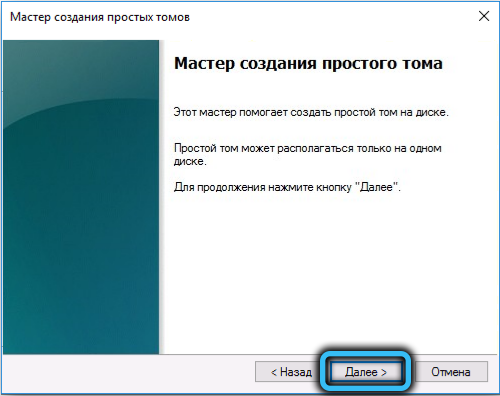
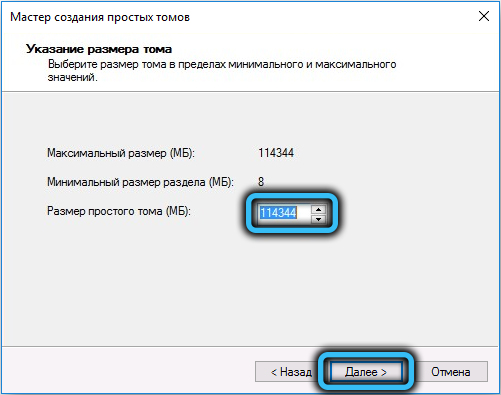
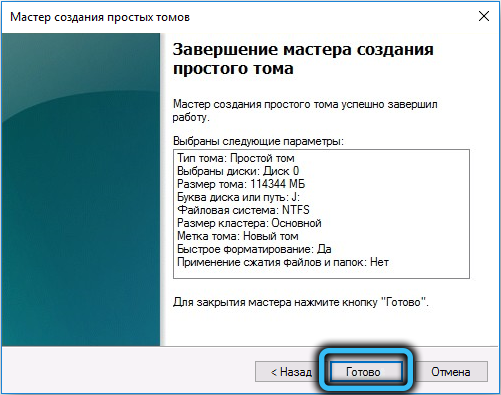
- the corresponding wizard will be launched, in which, after clicking the “Next” button, a window will appear asking you to specify the volume of the volume (indicating the minimum possible size). The default will be the upper limit. Click “Next”;
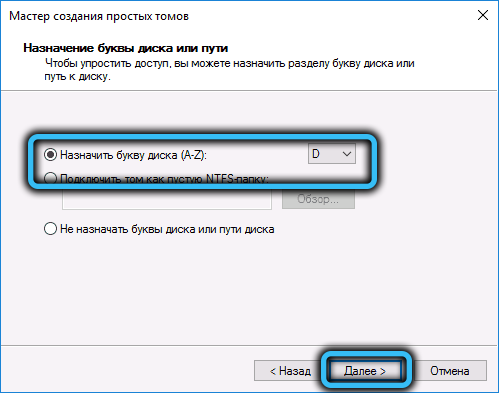
- now we need to assign a letter to our volume. Any, but only from those available. By default, the first of the free letters will stand, and in order not to get confused later, it is better to leave it;
- the final stage is disk formatting, for Windows the most correct option is the NTFS file system. You can put a tick in front of the “Quick format” item, but if time does not limit you, it is better not to do this;
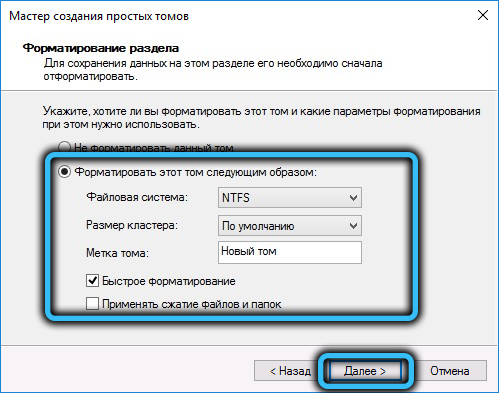
- we press the button “Next”, we agree with all windows where they will try to warn you about the possible loss of data, and wait for the end of the process. That’s it, the new disk is ready to use.
In conclusion, we will give some explanations regarding the choice of the partition type, GPT or MBR. There may be some misunderstanding about what is better to choose and whether it is necessary to use MBR if the volume of the hard drive is less than 2 TB. In principle, this requirement is optional, and the end user should not “bother” about this – Windows will automatically recognize the type of the partition and will work with it correctly. The exception is Windows XP, for which GPT drives are perceived as protected, and a 3TB drive will be recognized as 2TB. And this, by the way, is one of the main reasons to go to the seven or ten, if the iron allows.