Contents
In using Android smartphones everyday, one feature that is quite often needed is a screenshot. Often you want to send an overview of your screen to your friends directly.
We are sure that most of you already know how to screenshot Android, right? Nevertheless we still provide a number of ways to screenshot Android specifically intended for you novice users, or you who want to find new ways.
Check it out!
How to screenshot Android: Standard way
The easiest and most universal way of taking screenshots on your Android smartphone is of course by pressing the power button / on off button and the volume down button simultaneously and in a few seconds.
If successful, you will receive a notification in the form of a camera sound, a sudden white screen, or text notification. You can immediately use your favorite android photo editing application to crop, add filters, or retouch before posting to social media.
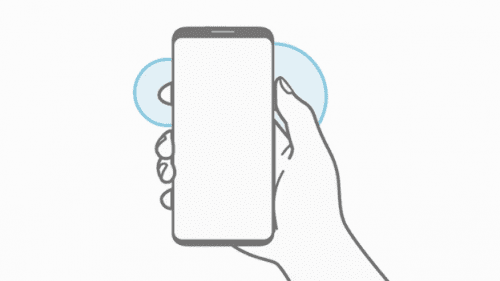
This way has been done by many people, but there are some Android users themselves who do not like this method. This is due to the user’s hand that is difficult to sync so often fails to take screenshots on their smartphones.
If you press the power button too quickly then your phone will automatically turn off the screen, but if you press the volume down button too quickly the onscreen volume slider will appear on your smartphone screen. Are you one of these users?
How to screenshot Android: Using the Home Button
Actually how to screenshot Android using the home button and power button is a standard feature on some Android smartphones, for example on some Samsung Galaxy smartphones that have a physical home button.
Just like the previous method, if you press the physical home button together with the power button of your Android smartphone in a few seconds, your smartphone will automatically take a screenshot. This is also marked by a camera sound, or white flashes appear on the screen of your smartphone, or a notification will appear on your smartphone indicating that you have taken a screenshot.
On Samsung Galaxy series phones this method is a common method used at least until the Samsung Galaxy S8 series, because in this series Samsung decided not to provide a physical home button. The solution? Same as the first way namely with the power button and volume down.
Android Screenshot: Using Swiping Gesture
How to screenshot Android by using this gesture swiping can be done by those of you who use Samsung smartphones, especially the Galaxy S3 series and above. Because to our knowledge the Samsung Galaxy generation under S3 does not yet support this feature.
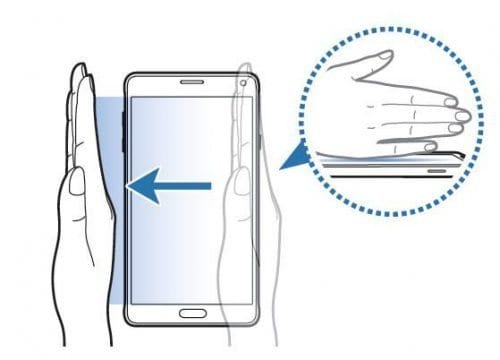
The way you can do it is quite simple, first of all you can simply place your hand vertically in the ” karate chopping ” position on one side of the screen. Then slowly move your hand across the screen like you’re scanning your phone’s screen, and voila! You will get a notification that you have taken a screenshot on your Samsung phone.
The notification that appears on this Samsung smartphone is the same as other Android smartphones, in the form of camera sounds, flashes on the phone’s screen, or written notifications that you have taken screenshots using your smartphone.
How to Screenshot Android: Using a Stylus
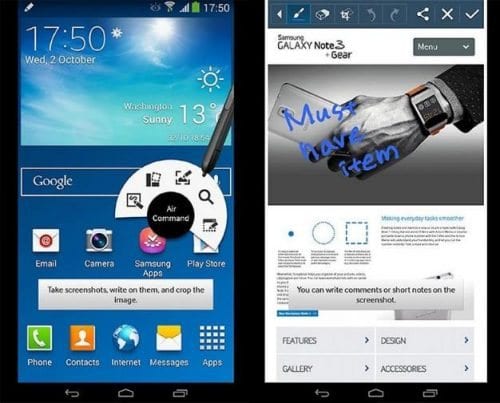
This method again applies to those of you who have Samsung smartphones. Even this method is actually exclusive for those of you who have the S Pen aka Samsung Galaxy Note. How to screenshot Android using this stylus you can do it via air command. You can activate the air command automatically when you pick up your S pen, or if you press the stylus button while holding the tip of your S pen close to the screen of your smartphone.
Well after this you just select a few modes contained in the air command. The interesting thing about taking screenshots using this method is that you can be creative, aka adding pictures or text manually above the screenshot image that you took earlier, interesting right?
How to Screenshot Android: Using Screencast
Screencast is one application that you can use on your Android phone to take screenshots. Basically Screencast is actually an application that has a function to record your Android phone.
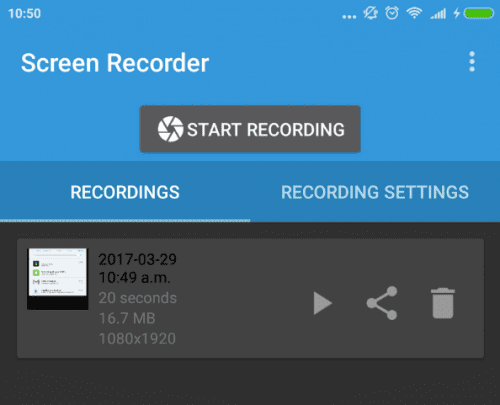
As the main function of this application, of course Screencast was originally created for you who want to record your mobile screen activity. To use this application is very easy.
You just have to open this application, then press start recording to start recording your mobile screen, and if you want to stop you can press stop recording . After you stop recording your file will automatically be saved in the default storage according to the default settings.
How to screenshot Android: Using Google Assistant
This method is one of the most sophisticated methods among several other ways. As the title of this sub article, use Google Assistant!
Google Assistant on your cell phone can be activated by voice command. Bring your cellphone close to your mouth, and then clearly say ” OK Google, take a screenshot “ . If you do this correctly, pronounce the English well, then your cellphone will automatically take a screenshot and then save it to the Google Assistant GUI .
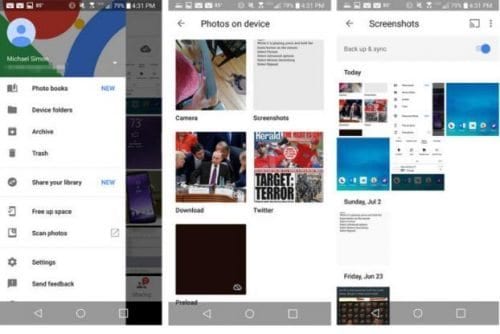
The interesting thing about this feature is that you can make the screenshot that you have taken become a shortcut in your smartphone’s notification panel. Then you can edit or share them with your friends by pressing the shortcut .
In addition, you can also make a back up of the screenshot that you took to Google Photos . You can do this by opening Google Photos, then opening the device folder and then pressing Screenshots and pressing Back up & sync toggle . Now if you do this, then your cell phone will automatically save your smartphone screenshot in Google Photos .
How To Screenshot Android: Old Style!
If you have an Android smartphone version 2.3 and below, you will not find the screenshot feature like today’s Android phones. To do this you need a computer, a USB cable and third party software !
You can first download and install the Android SDK application on your Android smartphone. You can search for this application freely on the internet. In addition, you who use a Windows-based computer must download and install the Java development kit , while you who use MacOS do not need to do this.
After this run the DDMS ( Dalvik Debug Monitor ) in the Android SDK tools folder using your computer which will then move you to another window. At this stage you often fail to do it, now please try several times and hopefully you can enter this window.
Then with your Android device, open the settings for an application a development a USB debugging while you then connect your cell phone to your computer. Your Android should now appear (on DDMS).
Now then press the cellphone icon on the top left of your computer, to select your Android. Well then select the device a screen capture a save. Voila! You have successfully taken a screenshot of your Android. Maybe this Android screenshot method is fairly difficult. We only have one message, please be advised, because in the past this feature was not considered an important feature on Android phones.
Good luck!
