In this tutorial we will show you how to install and use WhatsApp on the PC. We have a step-by-step guide with screenshots for you. This allows you to send the messages to your friends from your PC. WhatsApp is now one of the most used instant messaging apps for Android and iOS. But the app cannot only be used on a smartphone.
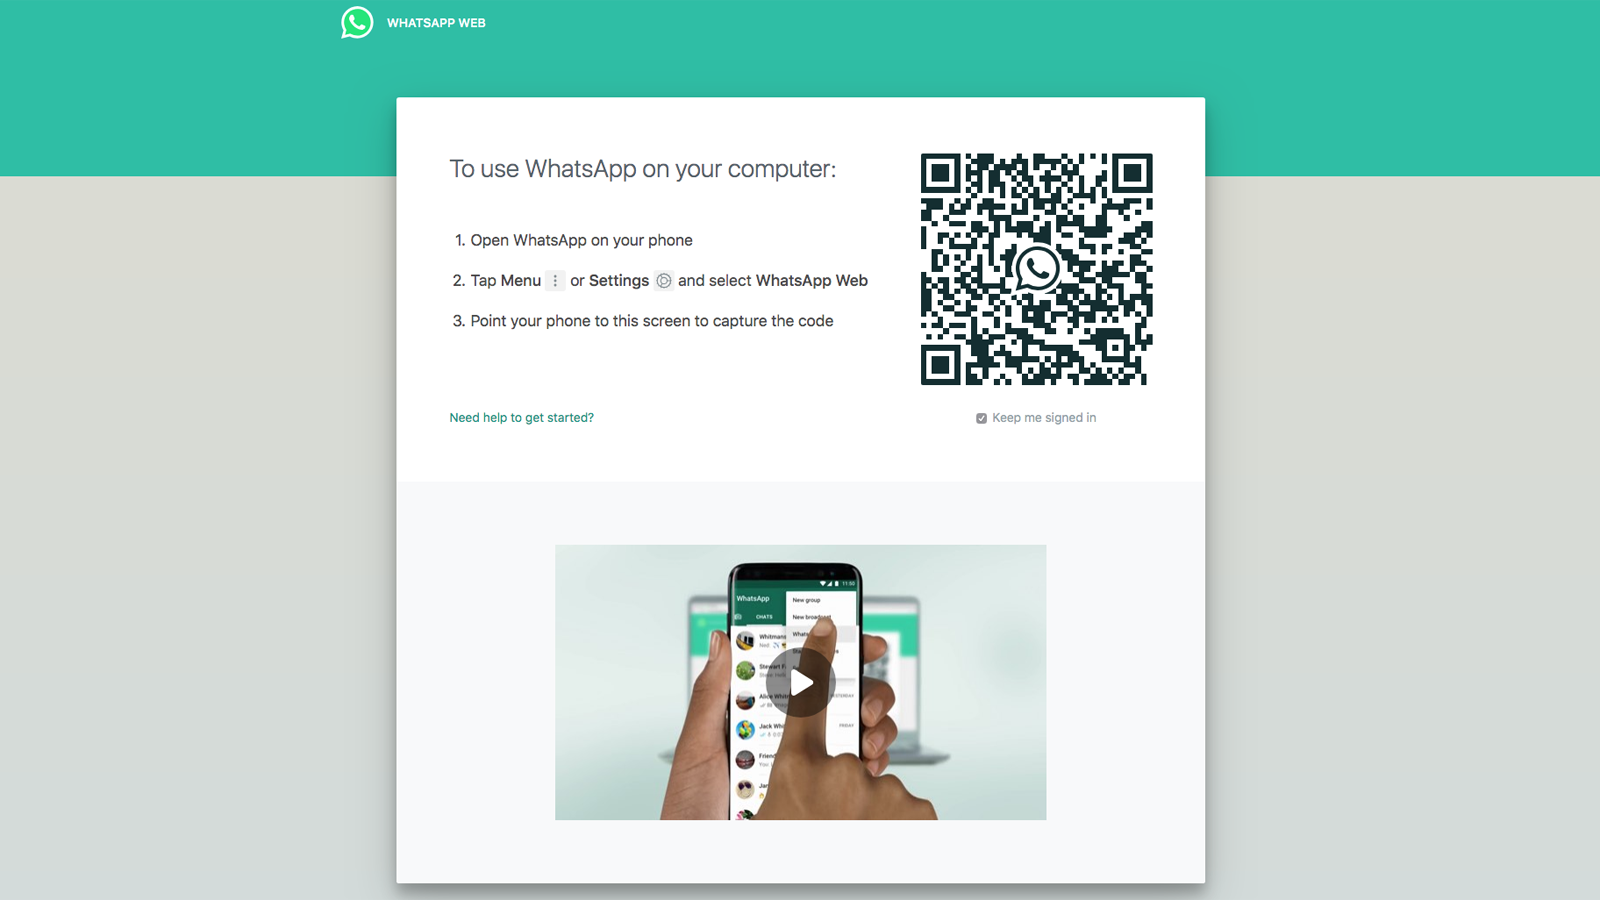
Actually there is no WhatsApp for the PC and soon a correct solution on the part of the developers is not to be expected. But when you are at home, it is more convenient to simply contact your friends from your PC. With our solution you can also use WhatsApp on a PC.
However, the whole thing is not that easy and WhatsApp can only be used on one device under one phone number. Hence first general information on this topic.
Contents
WhatsApp can use these variants on a PC
First of all we want to go into which two variants are available to you to use WhatsApp on the PC. In this tutorial we will introduce variant 1 “With BlueStacks Player”.
| With BlueStacks Player | With WhatsRemote | |
|---|---|---|
| requirements | You have to install the BlueStacks Player on your PC. However, the player is free and runs on almost every PC. | You need an Android smartphone with root access |
| advantages | You can use WhatsApp on your PC in a few minutes and chat with your friends | You can use WhatsApp both on the smartphone and on the PC at the same time. |
| disadvantage | Your messages are not synchronized with your PC and smartphone. In addition, both devices cannot be used at the same time, but a phone number is only valid for | An Android smartphone with root access is mandatory, but only very few have it and if you root your smartphone, you will lose the guarantee |
| For whom to recommend? | You do not have a smartphone, but you want to use WhatsApp or if you have a smartphone, then WhatsApp is not installed. | Use only by people with a rooted smartphone |
Connection failed – WhatsApp can only be used on one device per phone number
If you use the BlueStacks Player to install WhatsApp on the PC, this leads to the following problem. If you use your normal cell phone number with which you also use WhatsApp on your smartphone / tablet, you will receive the information “Connection failed. WhatsApp can only be used on one device per phone number ”.
Accordingly, if you want to use WhatsApp on the PC, you should use a different phone number. If you want to use WhatsApp on PC and Android synchronously, you have to use the WhatsRemote service. However, root access and an Android smartphone are required for this. A tutorial on this will follow shortly.
Tutorial: How to install WhatsApp on the PC with the BlueStacks Player
Nevertheless, we want to show you in the following tutorial how you can also install WhatsApp on your PC. First the short version. We explain the individual steps in the step-by-step instructions again with screenshots. This is variant 1 with the BlueStacks Player.
- Step 1: install BlueStacks Player ( for tutorial )
- Step 2: Install WhatsApp in the BlueStacks Player
- Step 3: Unlock WhatsApp on the PC
If you enter the same phone number in step 3 that you already use on your smartphone, you will only be able to use WhatsApp on one device at a time. Accordingly, it would always have to be verified again, but this is not recommended. Accordingly, you should only use this variant if you do not have a smartphone or do not use WhatsApp on your smartphone at all.
Step 1: install BlueStacks Player
The first step to using WhatsApp on the PC is to install the BlueStacks Player. This is an Android emulator that you can install on your PC in a few minutes. Not only can you play games apps that are normally only available for Android on PC, but you can also use WhatsApp.
Since we have already written a comprehensive tutorial on this, we do not want to go into it in depth in this article and recommend our tutorial on the BlueStacks Player. At the same time, we connect your Google Account with Google Play as described in the tutorial.
-> Click here for the tutorial “ Install BlueStacks Player ”This could be of interest to you Our smartphone recommendations for Christmas 2019 – Find out more!
Step 2: Install WhatsApp in the BlueStacks Player
After you have installed the BlueStacks Player on the PC, you have to add WhatsApp to it. And this is how you do it:
- After you have started the BlueStacks App Player, click on “Search” in the top left corner.
- Now enter WhatsApp and then on the button “Search Play for WhatsApp”.
- Now click on WhatsApp in the opening Google Play and install WhatsApp in the BlueStacks Player.
- On the home screen of the BlueStacks player, tap on “All Apps” and select WhatsApp from there.
After you have followed these steps, WhatsApp now starts on the PC.
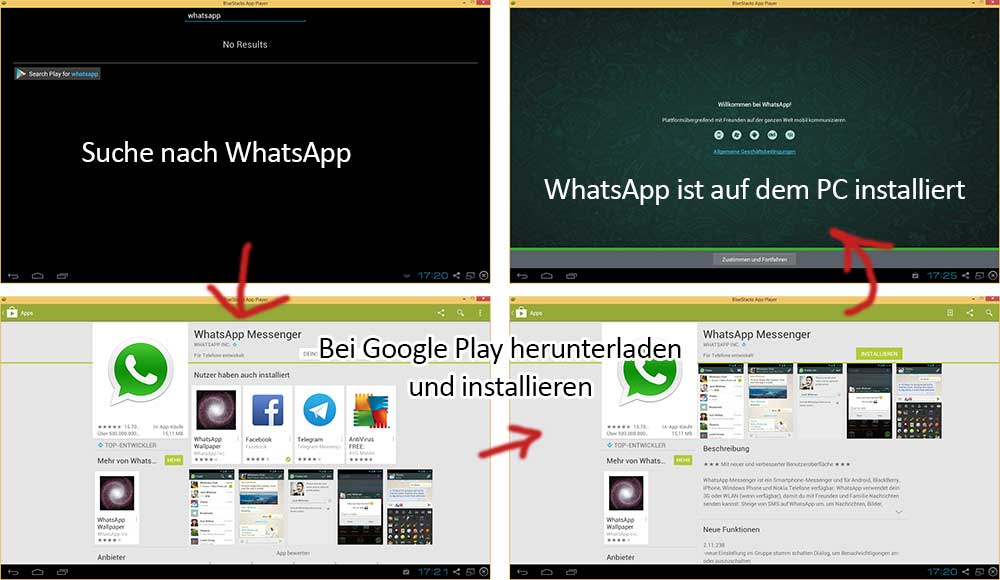
Step 2 Install WhatsApp in the BlueStacks Player on the PC
Step 3: activate WhatsApp on the PC
In the last step, you only have to activate WhatsApp on the PC. If you use WhatsApp on your smartphone and now enter the same phone number in the BlueStacks Player, you will no longer be able to access your smartphone on WhatsApp, but you will have to verify it again. However, your messages will remain.
So just enter another phone number and a code will be sent to you (as an SMS to this cell phone number). Now WhatsApp tries to receive the SMS, but of course that doesn’t work. Now just wait for the 5 minutes.
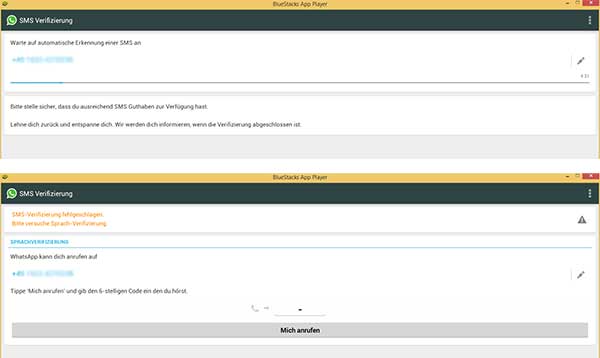
Step 3: verify WhatsApp on the PC – how it works
As can be seen in the screenshot, you will be asked to call after the SMS verification has failed. However, this is also not necessary. Simply enter the numbers that WhatsApp sent you via SMS as a number code.
After that, WhatsApp is already set up on the PC and you have to add your contacts again. You can already use these letters again. This is how it looks like:
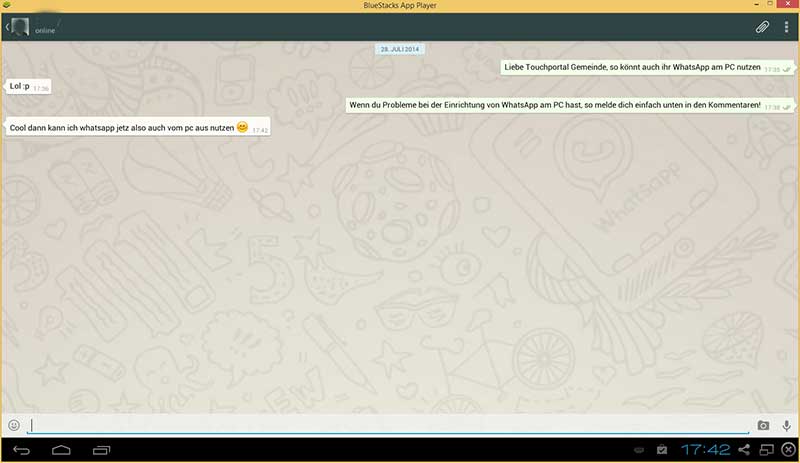
Now you can write on your PC with your friends using WhatsApp