In all versions of Windows, developers have not been able to completely switch to the GUI – many specific tasks are performed through the command line. Starting with the “seven”, it became possible to automate these tasks thanks to the PowerShell shell, in the “ten” this shell replaced the classic command line in the Start menu. Windows 11 went even further – integrated CMD, PowerShell and WSL in a single console with a graphical interface and customizable settings, while each of the applications can run in a separate window.
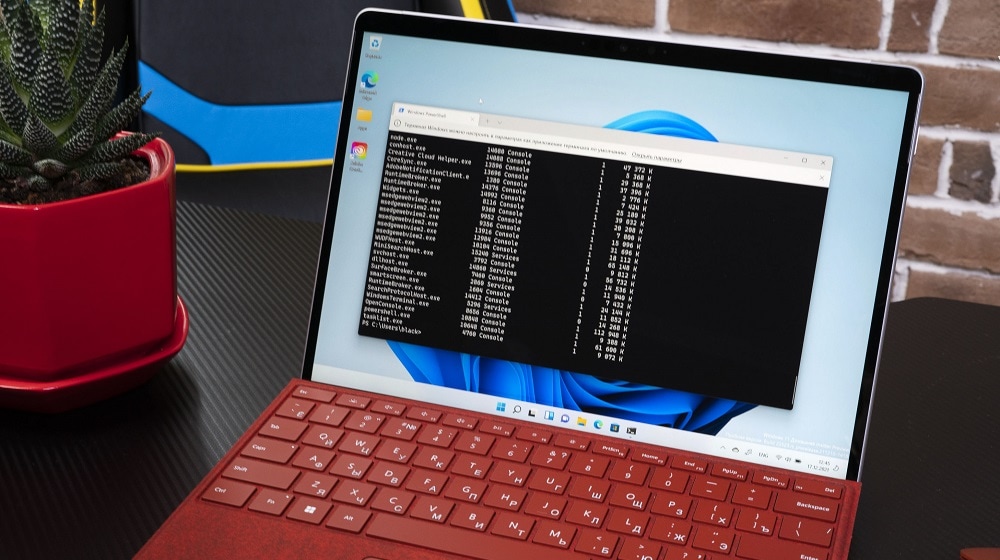
Of course, the opening of WT was added by calling the Start menu. But many users began to complain that there were problems with opening the console in this way: for example, the Terminal just hung at startup, or was absent when you clicked “Start”. Meanwhile, there are many alternative ways to launch a new application, which you will learn about today.
Contents
The classic way involves two options for opening the console: with normal rights and administrator privileges. If the last option in the context menu is missing, you can try the following instruction:
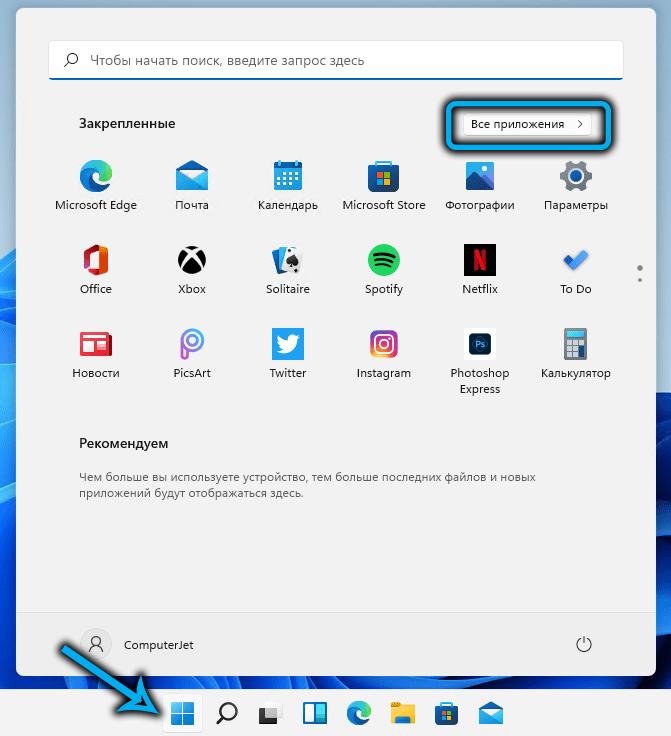
- click the “Start” button (for those who are unfamiliar with Windows 11 interfaces, it is located on the left side of the taskbar);
- in the window that opens, in the upper right corner, open the “All applications” button;
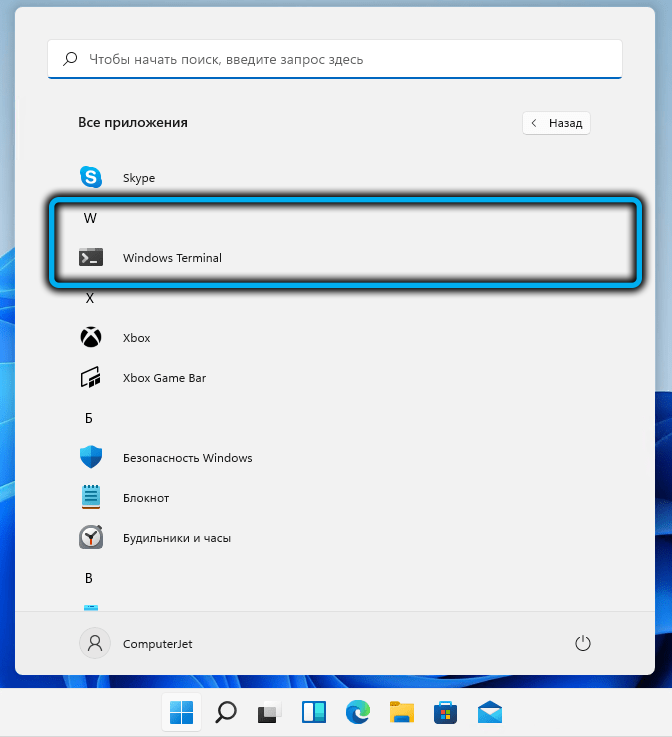
- look in the list that appears for a line with the name of the application;
- holding down the Ctrl + Shift keys, click on this line with the mouse to call the console context menu;
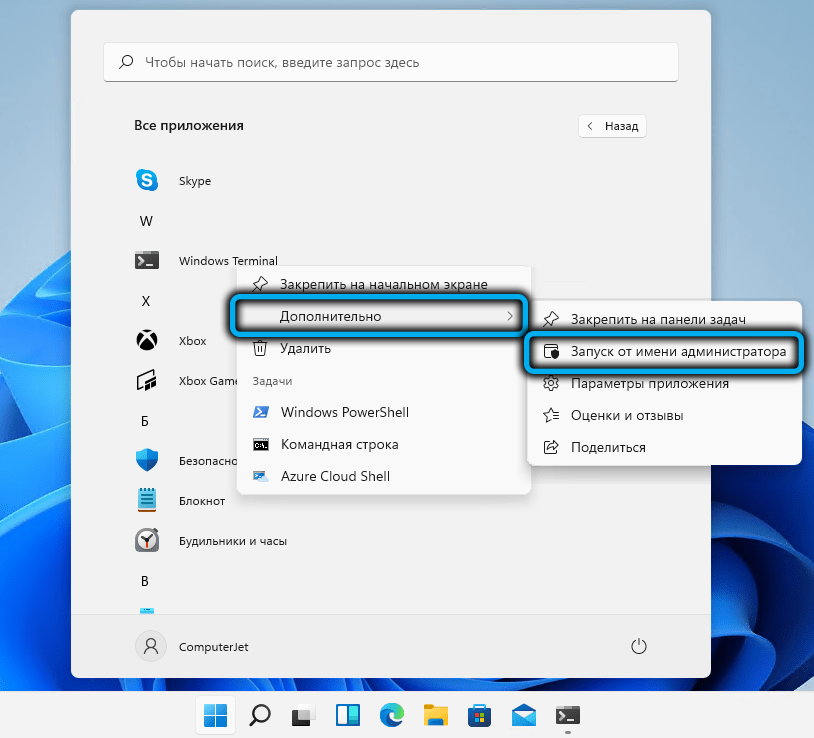
- the same result can be achieved by clicking on the RMB line, and then selecting the “Advanced” item;
- select the item “Run the Terminal as administrator”;
- Confirm your actions by clicking OK.
Using Windows 11 Search
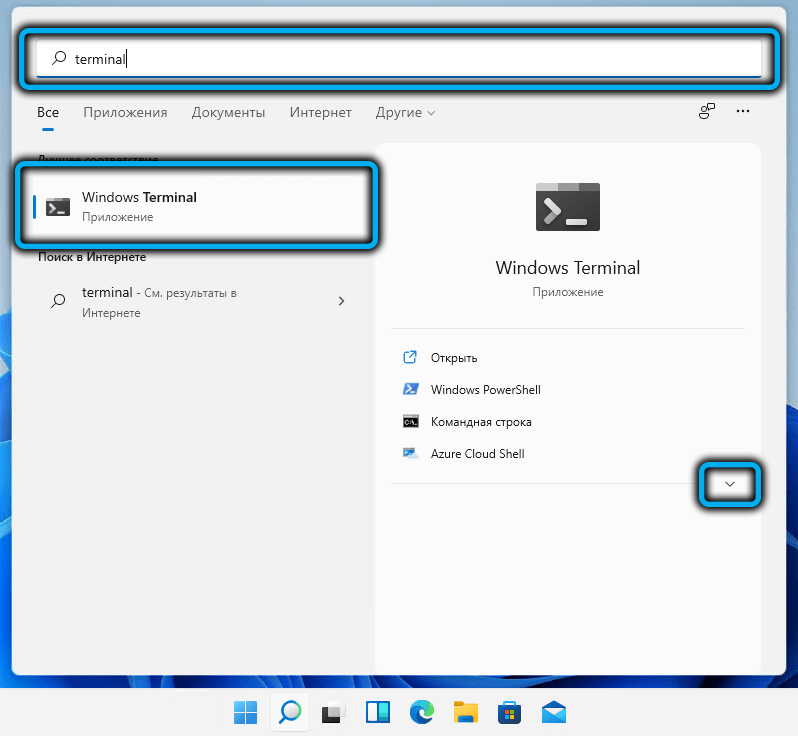
If there is no Terminal in the Start button menu or the Terminal simply does not open, you can launch the console using the search procedure in Windows 11:
- click on the search icon on the taskbar (to the right of the Start icon) or call the search by pressing the Win + S combination;
- start typing in the Terminal Windows search console;
- as a rule, after typing the first word, the results will appear, and the desired line will be the first to be present;
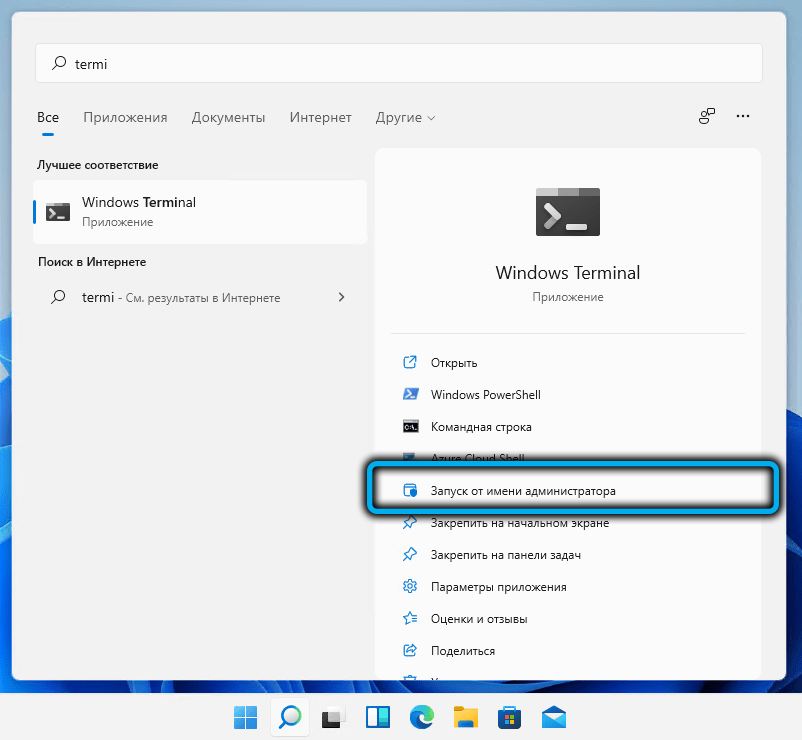
- set the cursor on this result, in the right block click on the down arrow;
- A list of available options will appear – click on “Run as administrator”.
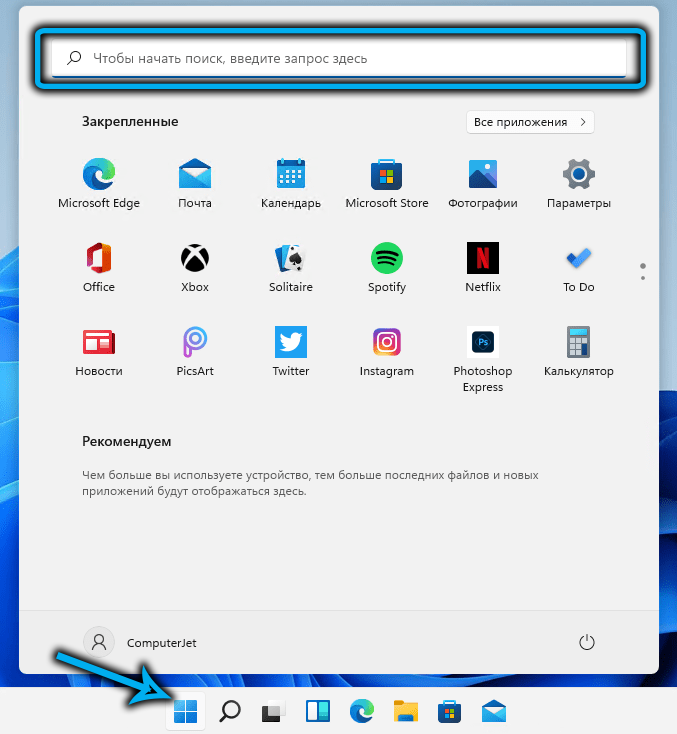
Note that when you expand Start, a search field will also appear, more familiar to users of previous versions of Windows, it can be used in exactly the same way, the search results will be identical.
How to open Windows 11 Terminal through the taskbar
The easiest and most obvious way to open WT is to place its icon on the taskbar. If you do not use the program often, then there is not much point in this, since the icon will take up space on the panel, which, as you know, is not rubber. But for those who are used to performing tasks using the command line or PowerShell, and even more so running applications originally designed to work in the Linux environment, a separate button in the taskbar will definitely not be superfluous.
Opening the console with administrator rights will be as easy as shelling pears – by clicking on the RMB icon and selecting the appropriate item in the list that appears.
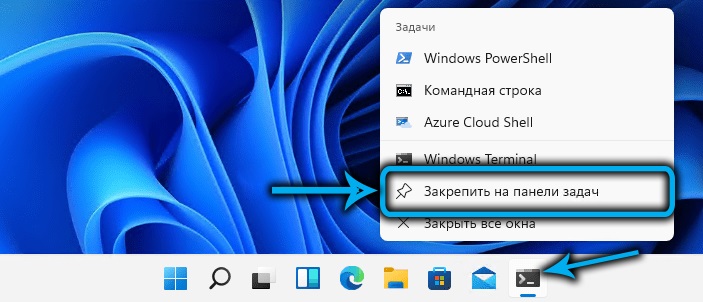
You can add WT to the taskbar in the following way:
- launch the console in any convenient way;
- click on the RMB terminal program icon;
- Select “Pin to taskbar”.
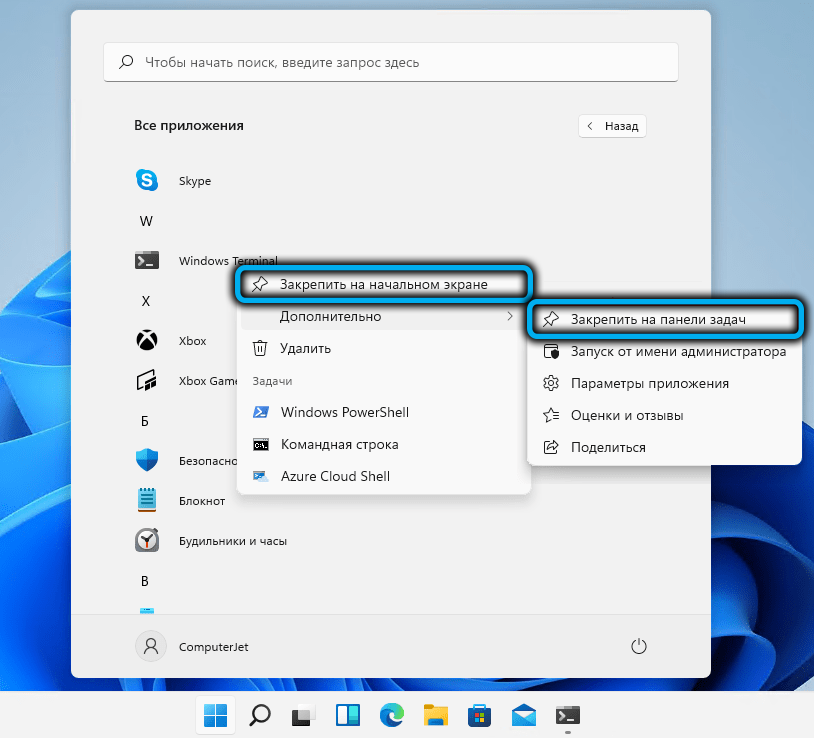
If there is no line with WT in the “Start”, it can be returned there. To do this, open the list of available Windows 11 applications, look for Windows Terminal there, right-click on the RMB line and select the “Pin to Start Screen” item. If you click the “Advanced” button, you will have at your disposal an alternative way to pin the application icon to the taskbar.
Using the Run Console to Launch the Terminal with Privileged Rights
The standard Win + R combination used to launch the Run console can also be used to open the console if launching the Windows 11 Terminal through the menu or taskbar does not work. To do this, type the wt.exe command in the text field, confirm by pressing Enter.
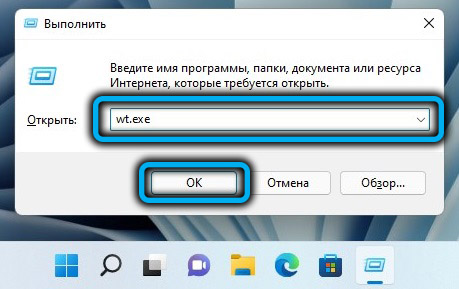
If the current task being performed requires the launch of the Terminal or any of its components with privileged rights, instead of Enter we use the combination Ctrl + Shift + Enter, as a result of which a UAC prompt will appear. We confirm, as a result of which the new terminal application will start with administrator rights.
Launching Terminal via Task Manager
This method of opening the Terminal in Windows 11 cannot be called the fastest and most convenient, but there are users who are used to dealing with the Task Manager and use it, there are even simpler methods for solving current problems.

The Manager interface in the new version of the OS differs from the usual one, but the launch method remains the same – the Ctrl + Shift + Esc combination.
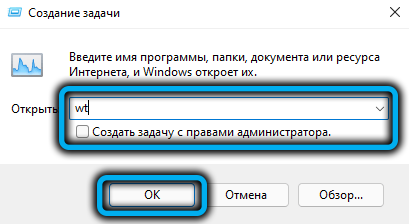
Click on the “File” button, select the “Run a new task” option, in the “Open” field of the dialog box, type the text wt and check the box next to the lower option if you want to open the Terminal with administrator rights. Click OK and enjoy the work in the console.
Using the combination Win+X
There is a fairly large category of users who are accustomed to using this keyboard shortcut to launch such popular system applications as Task Manager, Disk Subsystem Management or Device Manager. WT will also be on this list in Windows 11.
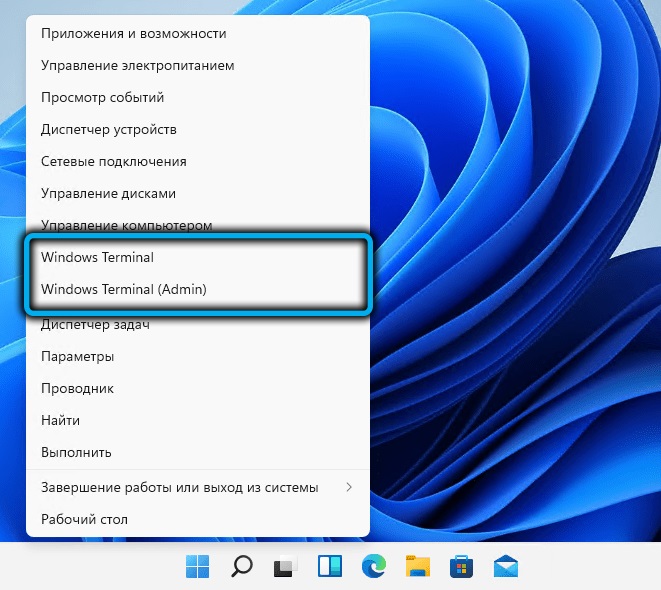
So, the sequence of actions:
- press Win + X, or, equivalently, right-click on the Start menu button;
- owners of laptops with a touch screen or a PC with such a monitor just need to press and hold the “Start” button for a while;
- select a regular WT or a terminal with administrator rights in the list.
Launching the Terminal through Explorer
The ability to run the program from any folder or from the desktop is, of course, a very convenient thing. But to add it to the cascading menu of the Explorer, you need to “sweat” a little, and you can’t do without third-party software here.
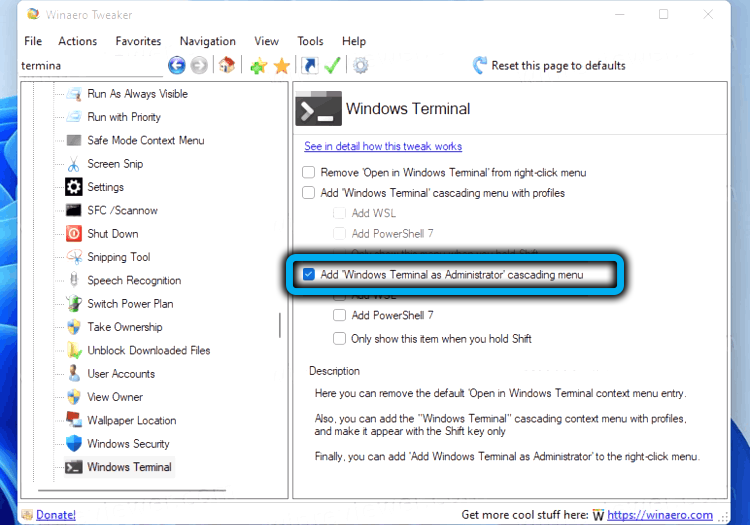
So, to add WT to the Explorer context menu, download the Winaero Tweaker utility from the official site , install it and run it. In the left panel we find in the list of applications Windows Terminal, click on it once. A window for setting parameters for this application will appear on the right – put a tick in front of the option “Add Windows Terminal …”. Here you can also select the profiles used, which will also be displayed in the Explorer menu.
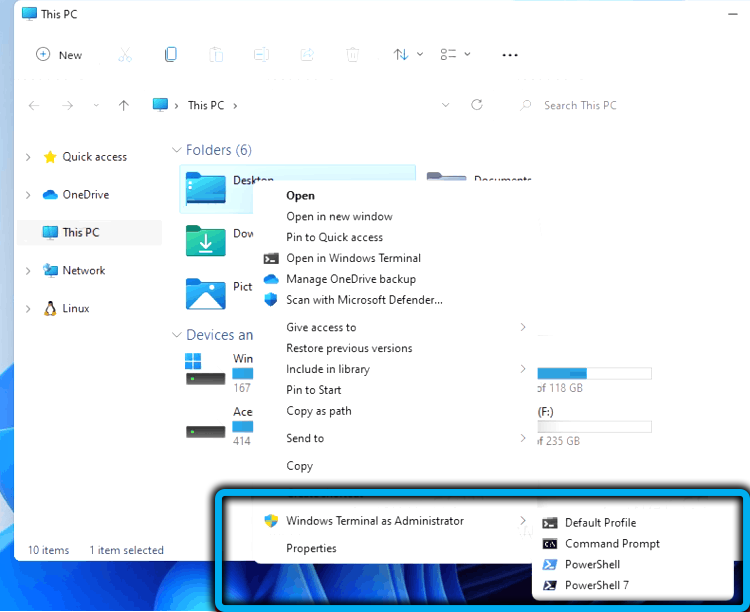
Now we go to Explorer, right-click on any directory, select the line “Show advanced options”, and in the new list – the shield icon and the inscription Windows Terminal. If you also call the context menu for this line, then you will be able to launch WT with a specific profile (for example, only the command line or PowerShell).
Other options
If all the proposed methods do not work and end with an error, there is a high probability that the wt.exe file is simply missing from the system folder or corrupted (for example, as a result of malware activity).
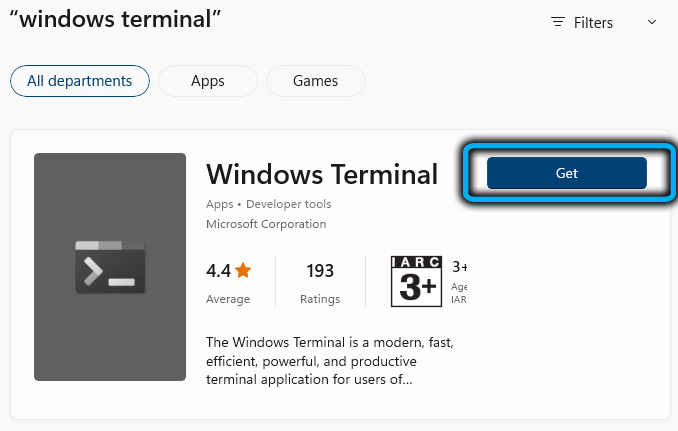
To check, you need to go to the Microsoft Store (the store shortcut must be present in the Start button menu). We type the word Terminal in the search line, the result will appear in the form of a console application window. Moreover, if the application already exists in Windows 11 (you just cannot run it), the Open button will be present. And if the application is really deleted – the Install button, and we press it to reinstall the console.
By the way, for those who often use Windows Terminal components, we can advise you to put the launch of the console in autoload. To do this, you need to open the application in any of the available ways, click on the down arrow in the upper status bar, and select the Settings option in the menu that opens. The Terminal settings window will open, where we go to the Startup tab, and in the right block we activate the switch for the Launch on machine startup option, moving it to the On position. Save the changes by clicking the Save button.
That’s all! We hope that this material helped you in solving the problem with the operation of the Windows 11 Terminal.
