During work or when turning on the computer, the so-called “blue screen of death” may suddenly appear. If you read into the text written on top, then the reason for the failure will be indicated there – the incorrect operation of the Ntoskrnl.exe file. This element is very important for the functioning of the OS, and when something happens to it, it becomes impossible to use the PC.

Contents
What is Ntoskrnl.exe
When you turn on your computer, a number of services start, including Ntoskrnl.exe, which prepares drivers and renders the image on the screen. In this case, an error may occur, which entails a stop of the process. This service is usually located on the C drive along with other system components and occupies several folders: System32, Driver Cache, etc.
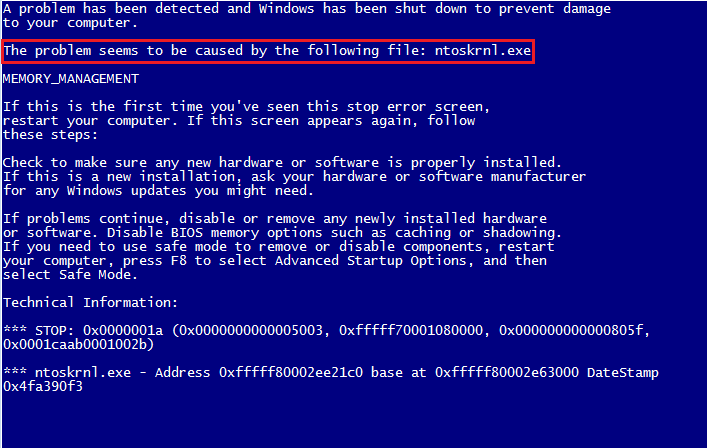
Causes of malfunction
The ntoskrnl.exe error can occur for a variety of reasons:
- Incorrect overclocking and undervolting resulting in overheating.
- Physical deletion of the file (in fact, this is quite difficult to do, but it is possible if you use software that affects system elements).
- File damage / replacement by a virus.
- Corrupted registry entries.
- Problematic or old drivers.
- Internal system failure.
- Hard drive malfunction.
- OS has not been updated to the current version.
- Damage or malfunction of the RAM.
Possible solutions
The ntoskrnl.exe error is serious, but not always fatal, and now we will tell you how to fix it.
- First you need to get to the “Desktop” and get access to the functions of the PC, since the blue screen covers the entire space.
- To do this, reboot, and press the F2 or Del key (sometimes there are other options, it depends on the internal structure of the I / O system).
- The BSVV options will unfold in front of you.
- Select Load setup defaults.
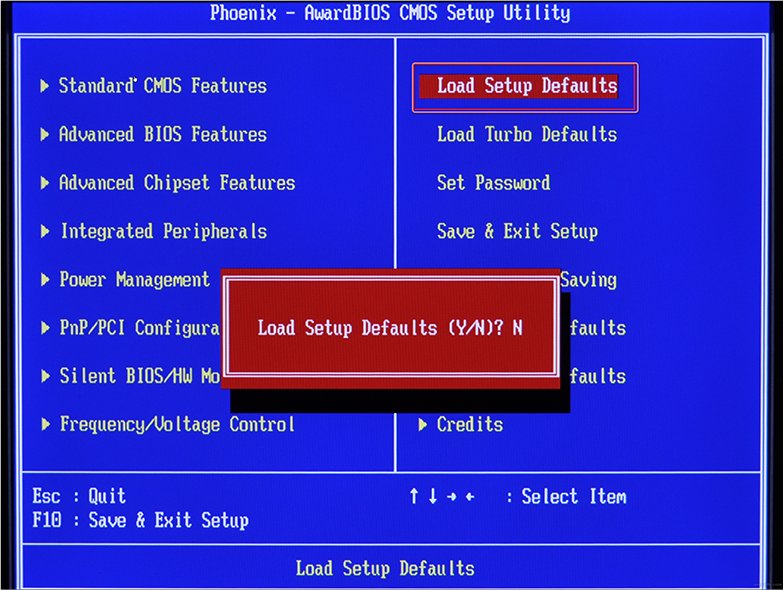
- Click on F10 to confirm your selection.
- Restart your PC again – the blue screen will disappear and you can proceed to fix the error.
Cleaning the registry
Until the ntoskrnl.exe error with a blue screen returns (by the way, most often it occurs on windows 7), you need to start acting. First of all, try to clean the registry from incorrectly executed and obsolete entries. The most convenient and safest way to do this is with the help of special utilities, for example, the notorious CCleaner.
- Download the program and install it.
- Open the window and on the left in the list find the chapter “Cleaning the registry”.
- Click “Analyze” and wait until all problematic entries are found.
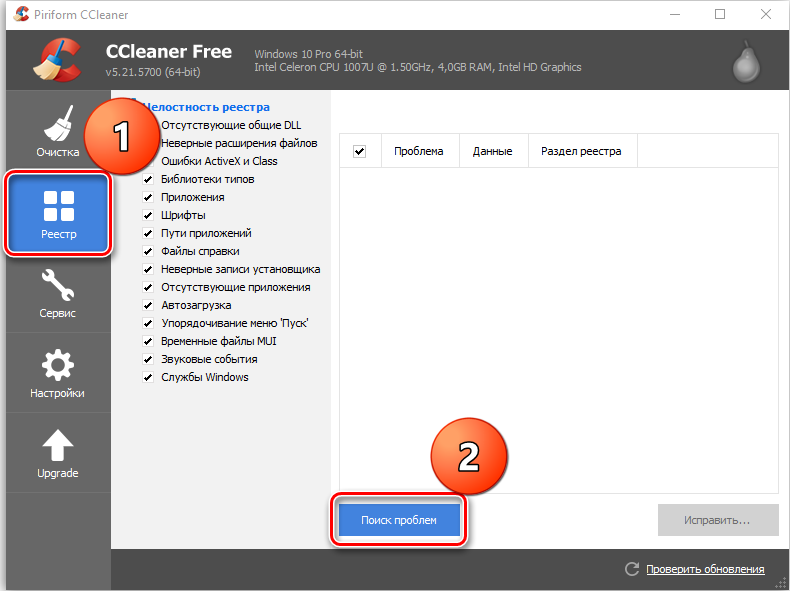
- At the top, specify “Select All” and “Fix Selected”.
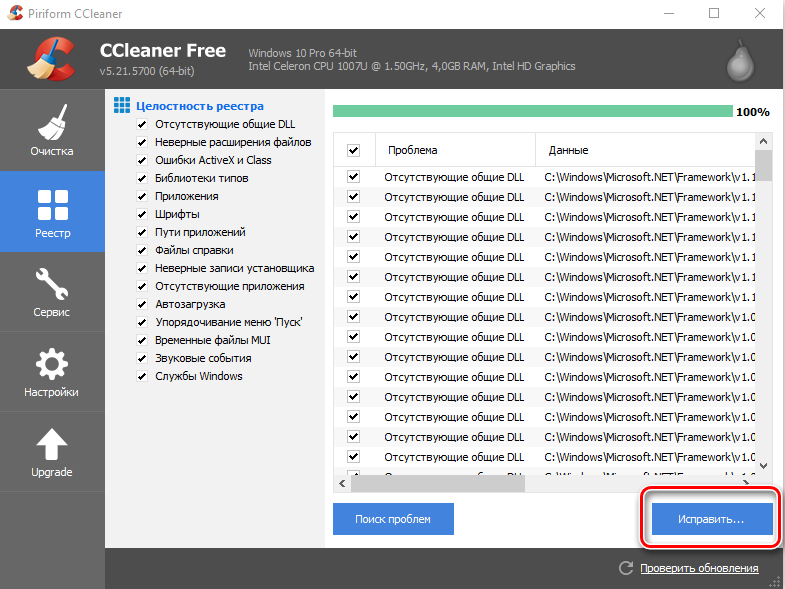
- The program will offer to make a copy of the registry – agree, just save it not in the “Documents” on the “C” drive, as indicated by default, but in a separate folder on the “D” drive.

- After cleaning, run “Analysis” again – and so on until the list of damaged elements remains empty.
Repair disk
Next, you need to check the system drive and fix some errors if they are found. For this:
- Find the Computer icon and expand the content.
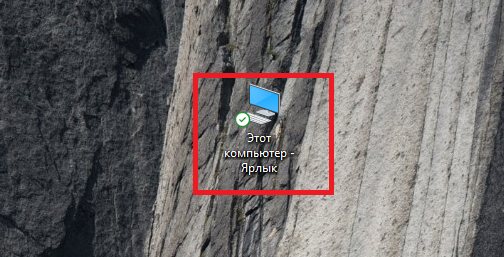
- Double-click the RMB on the “C” drive (you may call it something else – the main thing is, remember that we need a partition where the OS is stored);
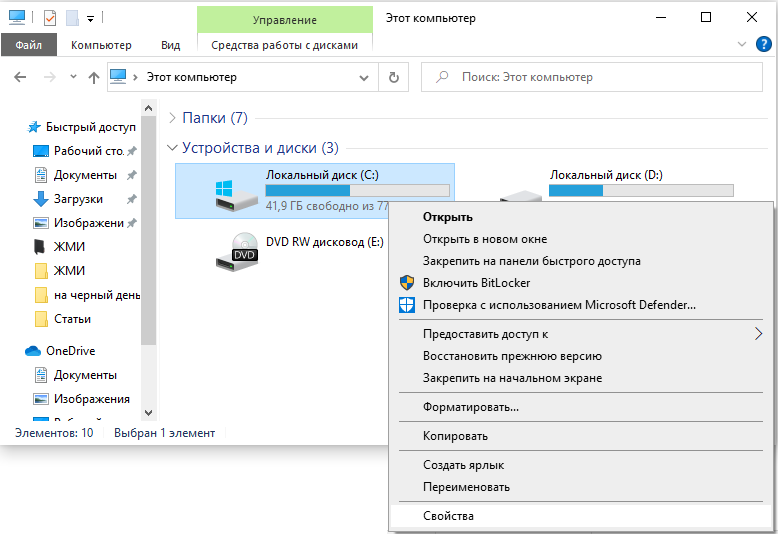
- Select the last item “Properties”, and then the sub-item “Service” and run the check.
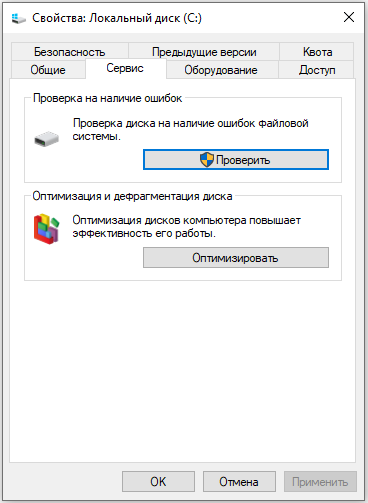
- The computer may reboot several times in the process – this is normal, don’t worry.
For the same purposes, we check the internal system files and fix the problems as follows:
- Press Win + R and wait for a small window with an input line to appear.
- Enter “cmd” in it.
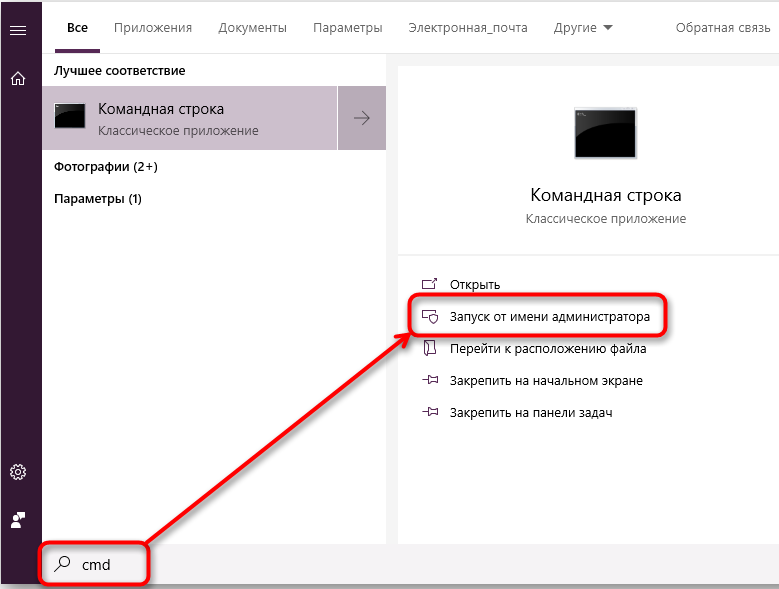
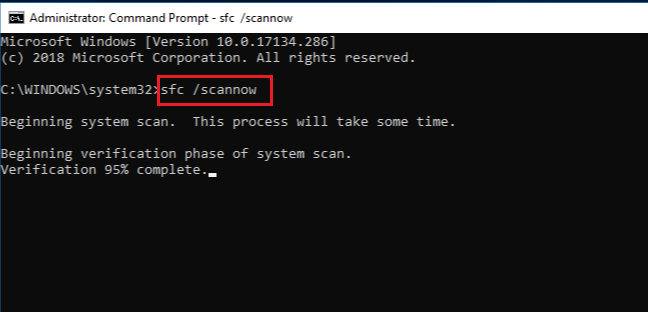
- Now a window with a black field will appear, where you need to enter: “sfc / scannow” and click “Inter”.
- You can also issue the “chkdsk” command.

Wait until a success message appears, and then restart your PC.
Virus check
Viruses often cause Windows to stop starting when they delete the Ntoskrnl.exe file from the Winnt_root System32 root folder. Do not discount this possibility and be sure to check the system:
- Install some good antivirus: Kaspersky, Doctor Web, Eset, etc.
- Run a full scan of all drives.

- Wait until the end of the procedure (this can take a long time, you can leave it overnight).
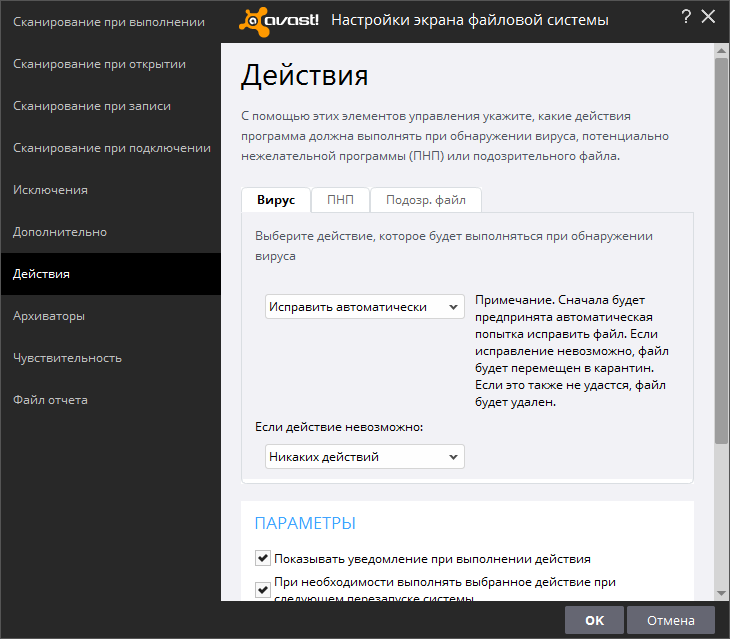
- Remove all malicious files or move to quarantine – it is better to do as the antivirus recommends.
- Check the file system for errors and restore everything damaged, as described above.
If the virus is introduced by some program, it must be uninstalled. Most likely, it will not want to voluntarily delete it – then the uninstaller (for example, the Uninstall Tool) and the “forced uninstall” option will help you.
Updating OS and Drivers
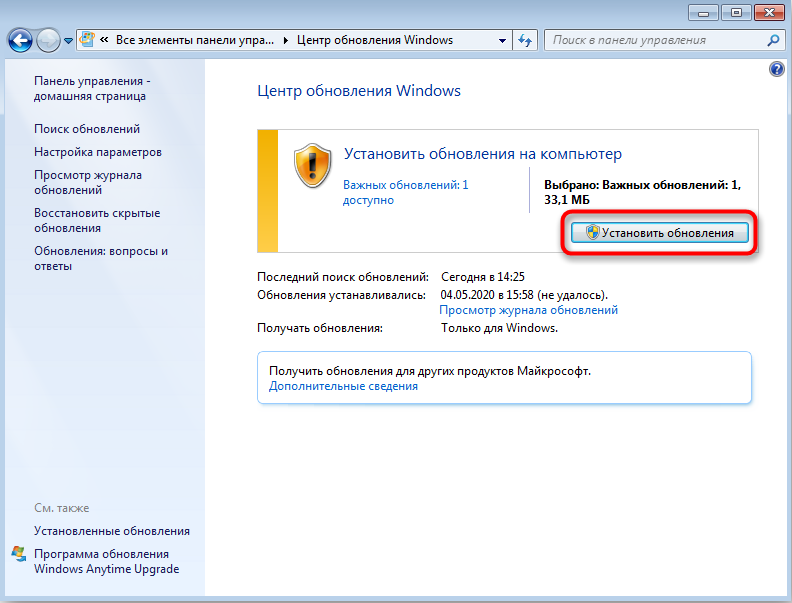
Sometimes problems with ntoskrnl.exe and a blue screen occur due to the fact that the system has not been updated for a long time: in Windows 10 it is difficult to disable automatic installation of packages, but in the seventh version this often happens – just go to the Update Center and run updates, and for drivers equipment, download them separately (just pay attention to the bitness: x64 or x86 for 64-bit systems). Remove all drivers for old, unused hardware: printers, graphic tablets, scanners, MFPs, etc. (“Control Panel” – “Device Manager” – right-click on an outdated device – “Delete” command).
System Restore
Finally, if all the previous steps were unsuccessful, you can restore the system to a state where everything worked fine. To do this, you need:
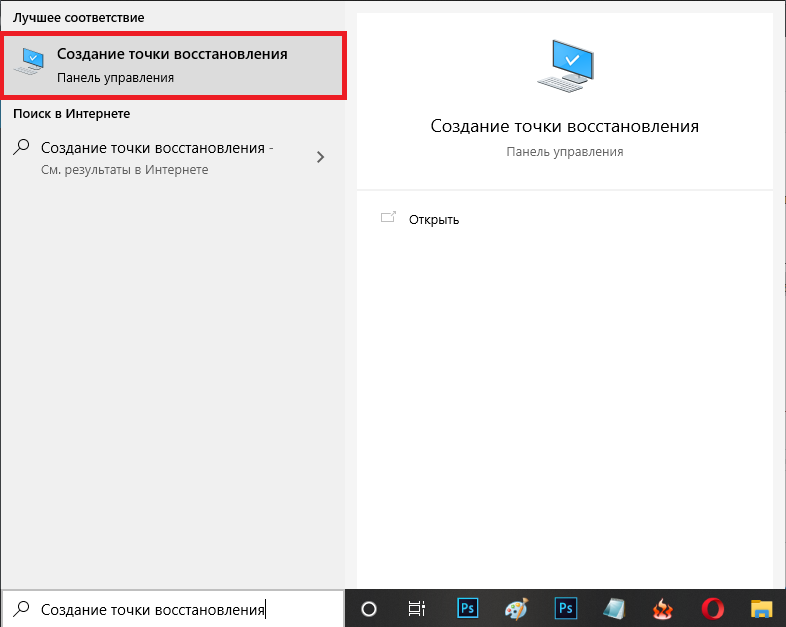
- On Windows 7, open in sequence: “Start” – “All Programs” – “Standard” – “System Tools” – “System Restore”, on Windows 10 in “Search”, type “Create a restore point” and open the corresponding icon.
- Click “Next” in the window that appears and select “Show restore points”.
- Select a date when the computer was stable.
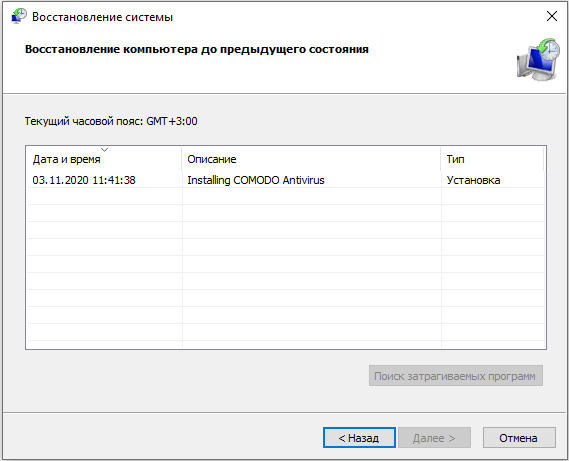
- Click Finish.
Wait until the end of the process – in no case turn off the computer from the network and take care that the laptop does not run out of battery.