Both when migrating to Windows 11 from Windows 10, and when installing a new OS cleanly, cases of hardware failure are not ruled out. Quite often you have to deal with such a phenomenon as a non-working microphone, and the problem can be global, at the operating system level, or local, when it refuses to function in individual applications.

As a rule, such a malfunction is eliminated quite simply, although there are many options for solving the problem. Today we will look at the most common cases, starting with trivial ones and ending with non-obvious problems.
Contents
Eliminate the lack of microphone sound through the “Options”
Often, the main reason for a non-working microphone in Windows 11 is the lack of appropriate permissions to access this device from the operating system or applications. What should be done:
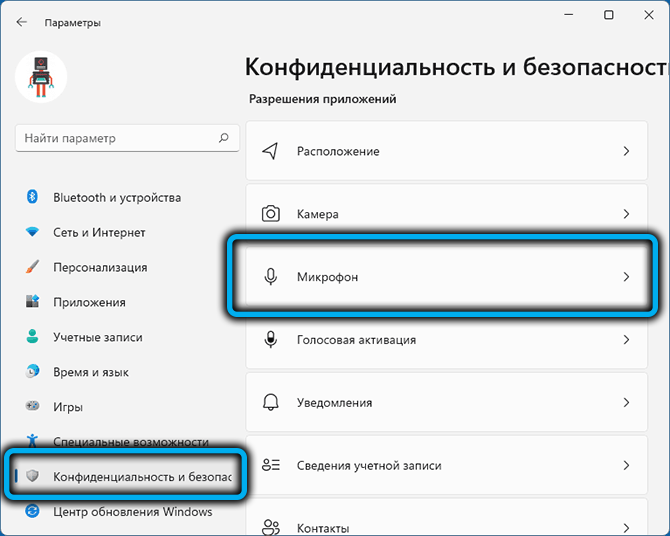
- go to “Settings” (combination Win + I or call through the menu of the “Start” button);
- click on the “Privacy and Security” tab;
- in the list on the right, select “Microphone”;
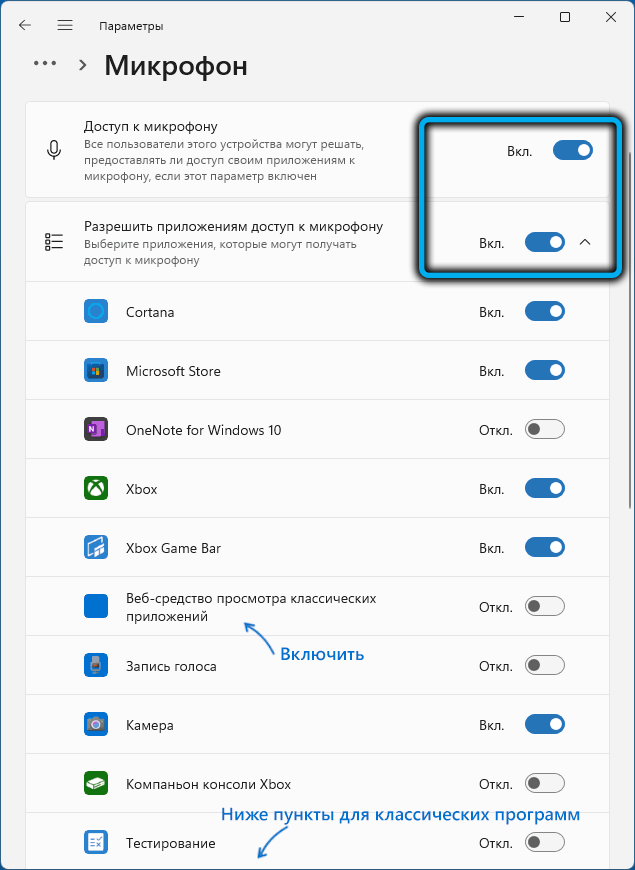
- activate the option switch “Allow applications to access …” (it should be in the “On” position), if necessary, perform the same operation with specific applications;
- we also activate the option switch “Allow desktop applications to access …”.
Pay attention to the option “Web application viewer” – it must be activated if the microphone does not work in programs that use online technologies.
Selecting another microphone from the connected ones
It is likely that the problem with the microphone is due to the fact that it is not the main one in the system. When installing Windows, it is usually detected correctly, but if you often connect or disconnect it, then another sound recording device may become the main one.
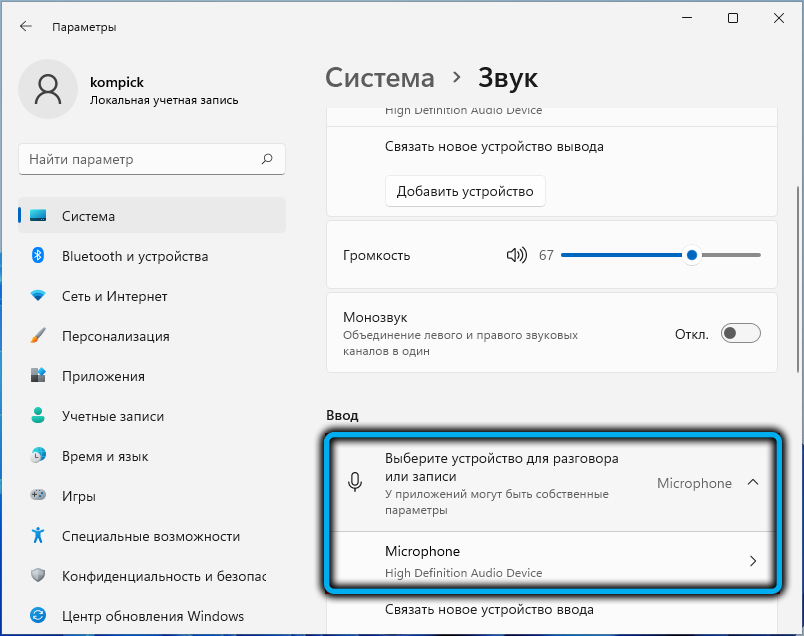
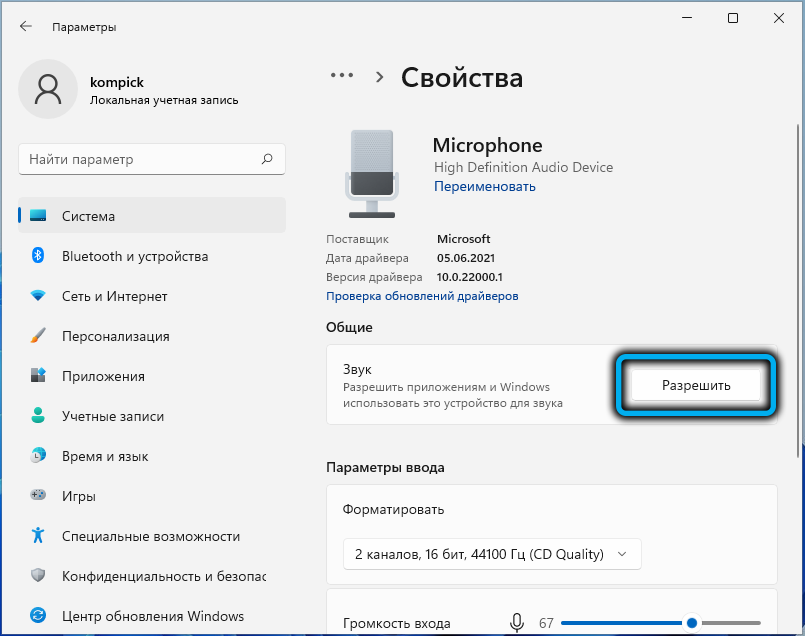
To fix the situation, you need to go to the “System” tab through the “Start” menu, select the “Sound” section and change the main device to the correct one. You need to look in the “Input” section.
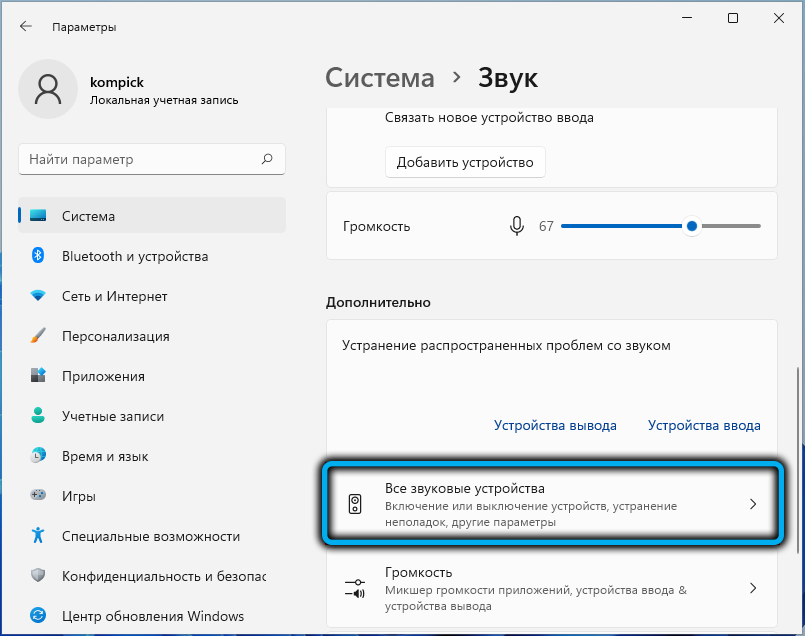
If the equipment for recording or broadcasting a conversation is selected correctly, make sure that the volume slider is not set to the leftmost position. Otherwise, as expected, no sound will be recorded. To adjust the microphone, simply slide the slider to suit your volume preference.
Hardware configuration update
A more serious problem is an incorrectly installed sound card driver. It is not our task to consider the reasons why this happens – believe me, there can be many. Let’s just look at how to update the audio driver to enable the microphone on the computer:
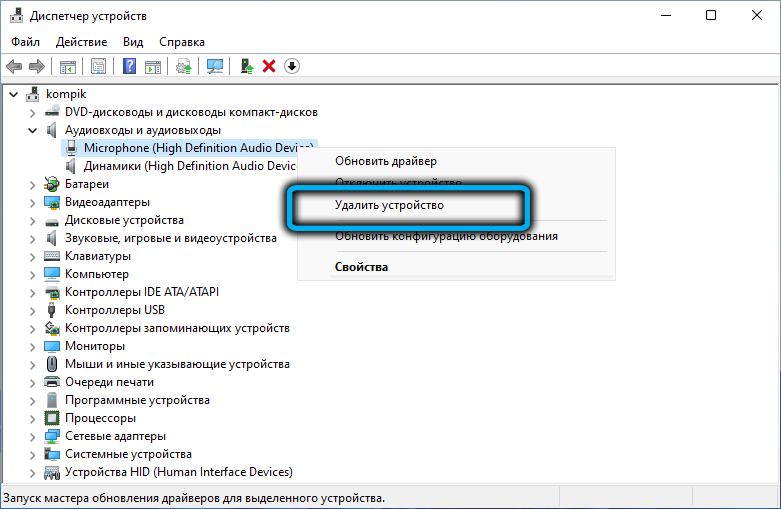
- launch the “Device Manager” in any convenient way (for example, by right-clicking on the “Start” icon and selecting the appropriate option in the context menu);
- open the branch “Audio inputs and audio outputs”, look for our microphone in it;
- if there is an icon with a yellow exclamation mark next to it, this is evidence that the drivers are installed incorrectly;
- make a click on the desired line, select the “Delete” item in the context menu;
- click on the “Action” item of the top menu, select the “Update hardware configuration” option.
As a result, the necessary drivers will be reinstalled, and the yellow icon should disappear.
Choosing a microphone as a single device for sound recording and communication
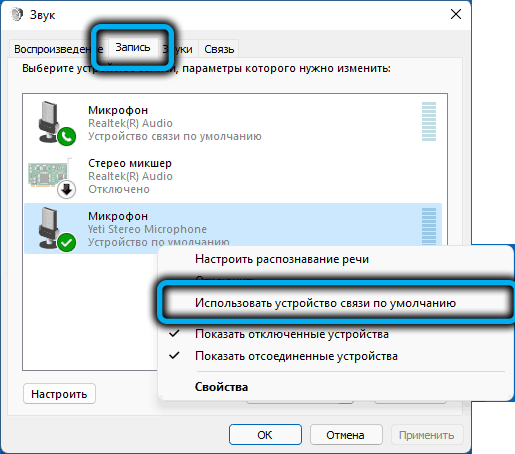
Inexperienced users are poorly versed in the ups and downs of setting up a microphone and other sound recording and reproducing equipment. For example, many simply do not pay attention to the fact that one microphone is indicated as a recording instrument, and another as a means of communication. This confusion can lead to the fact that in many applications the microphone will not work.
The situation is corrected as follows:
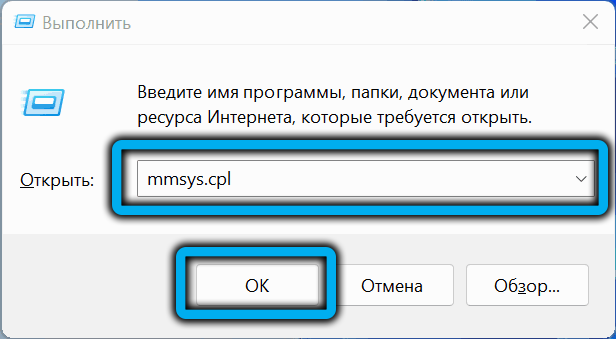
- in the Run console (launched by pressing Win + R), enter the mmsys.cpl command, confirm by pressing OK or Enter;
- in the sound settings window, go to the “Record” tab;
- if there is more than one microphone with a green checkmark in the list, you need to select the one that should be used as the main one by double-clicking on it, and in the new window in the “Listen” tab, set the value of the “Play from this device” parameter as the equipment used by default;
- if there is no green check mark next to the microphone icon, you need to right-click on it and select the “Enable” option;
- the presence of a red arrow near the microphone means that the computer does not see it. Possibly due to a problem cable.
It is also possible that in some applications the microphone does not work simply because this program has its own settings regarding the use of sound equipment. It is clear that it is impossible to give specific instructions in such cases – you will need to independently search for the sound parameters of the application and adjust the microphone in accordance with your preferences.
Manual driver reinstallation
If the steps to update the hardware configuration did not help, then the system incorrectly detects the sound card and / or microphone and automatically installs the wrong drivers for them.
The solution to the problem is the manual installation of the necessary specialized software. To do this, we determine the name of the equipment (in the same “Device Manager”), download the necessary drivers on the official website of the manufacturer, install them. On a laptop, you may need the name of the motherboard model, since all sound hardware is built-in here (unless you are using an external microphone).
Health check
If all the above methods did not help, try the following:
- open the sound settings window again (mmsys.cpl command in the Run console);
- go to the “Record” tab;
- select a microphone, click the “Properties” button;
- if microphone effects are enabled, turn them off;
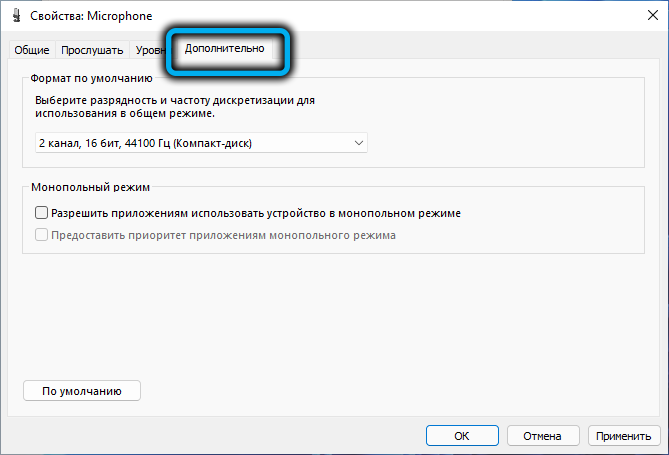
- in the “Advanced” tab, experiment with the bit depth and frequency of the device, as well as with two other section options.
If this did not work, you need to think in the direction of a physical malfunction. So, how to check the performance of the microphone. First, connect it to another laptop/desktop computer. If it works there, it’s most likely not in it, but in the settings. If not, then it is not working. Most often due to a damaged cable, this is the weak point of all wired audio devices.
And one moment. On older computers, the operation of a headset with a single combined 3.5 mm plug is not guaranteed, since it may turn out that the sound card does not accept such a connector. To turn on the microphone, you will have to use another headset, with separate jacks for headphones and a recording device.
How to amplify a microphone
Quiet sound can also be called a problem, especially if the slider in the settings of the recorder is set to the maximum. There is a fairly effective way to check the actual level of the sound, as well as increase it, reduce it or turn it off.
This applies to both built-in microphones and those connected to the sound card socket, via USB port or Bluetooth. So, the first thing to do is to right-click on the speaker icon located in the system tray area, that is, at the bottom right. In the context menu that appears, select Sound Settings.

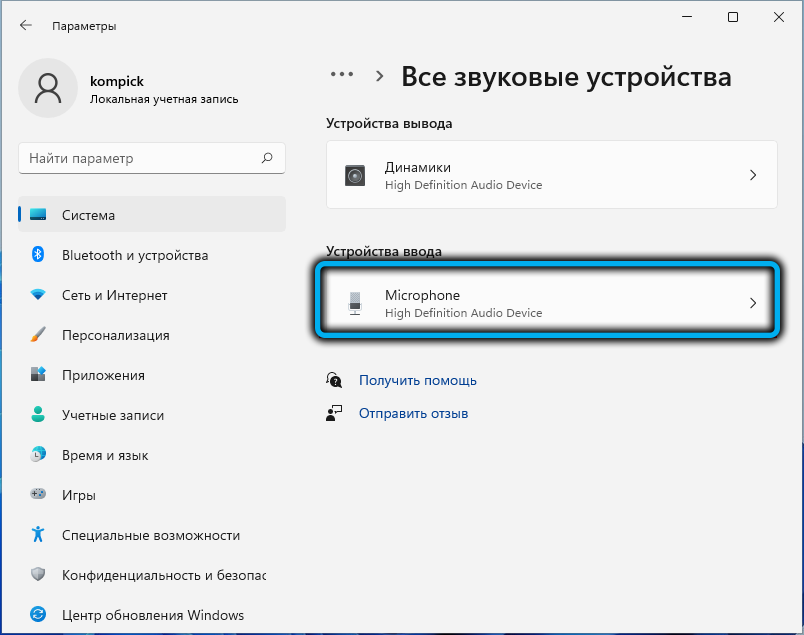
The sound settings page will open, scroll down to the “Input” section. Here, in the list of connected audio equipment, select the microphone whose operation you want to check, and press the right arrow (>).
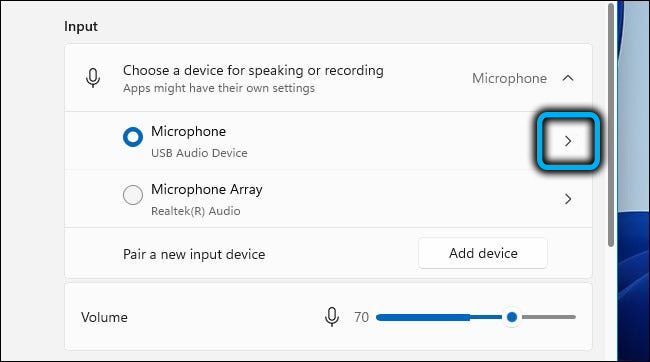
A page will open showing the current microphone usage mode and the set volume level as a percentage. In the lower section “Test your microphone” there is a button “Start Test” (Start Test), click it.
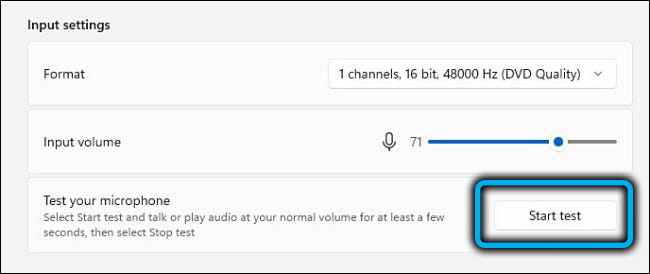
You will be prompted to start speaking. We make a small speech for the test at a normal volume. At the same time, the sound level bar should fluctuate left and right, which indicates that the microphone responds to your speech, which also sounds quieter or louder at times. If the bar does not move, then something is wrong with your microphone.
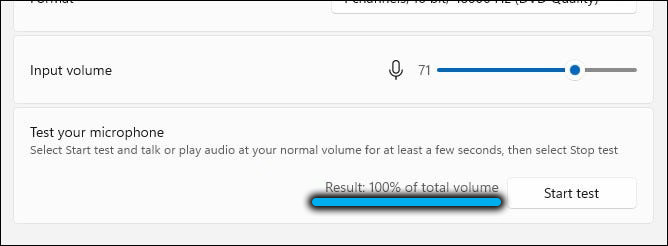
The test is completed by pressing the same button, on which the corresponding inscription appears. After that, the test result will appear next to the button, expressed as a percentage of the input signal loudness based on the results of the average test speech assessment. After that, you can increase the volume of the microphone by moving the slider to the right, or decrease (to the left).
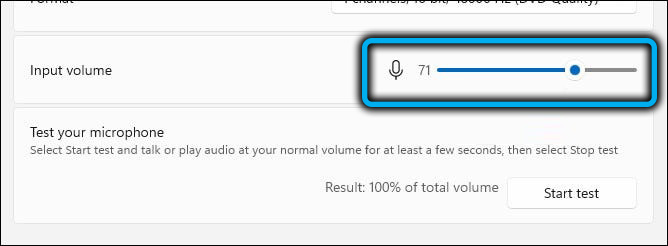
But the point of tuning is not to make the microphone louder. We need to get the right sound. If you set the slider too close to the right border, normal speech will distort the sound a lot, which is unlikely to be acceptable. Reducing the volume below 50% is also impractical – the sound will be hard to hear. The ideal option is in the region of 70-75%. In any case, after each change in the position of the slider, it is necessary to test again until the ideal sound is obtained.
Conclusion
In the vast majority of cases, the operation of the microphone in Windows 11 does not require user intervention, unless you are satisfied with the quality of the recording. How to increase the volume of the microphone, you already know. If you have problems with a non-working microphone, you will have to tinker longer, but if the device itself is intact, with sufficient perseverance, all problems can be solved.
