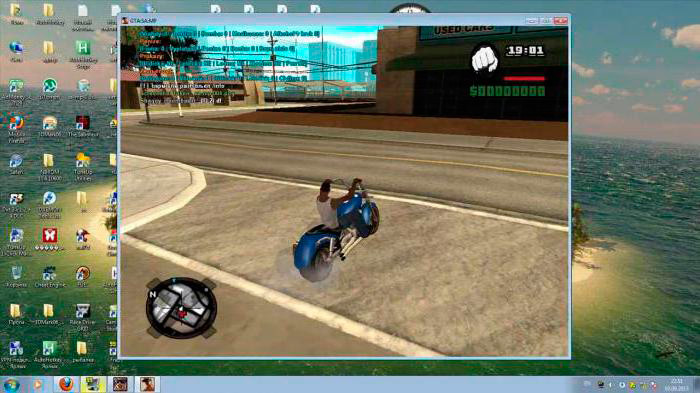
The usual practice of working on a computer involves using several programs at the same time. They are opened in windowed mode, then it is not difficult to switch from one to the other. But gaming applications are often launched immediately in full screen mode, which prevents them from working in parallel with other windows. Fans of old games are also uncomfortable with the full-screen version; at low resolutions, everything looks ugly, indistinct. It is inconvenient to take screenshots, if you exit the application, then you have to wait for the download again, time is wasted. Therefore, it is advisable for users to put windowed mode in games, for which there are different ways.

Contents
1. Keyboard shortcut
Combinations of certain keys help to solve the problem of how to switch the game to windowed mode. The simplest trick when the application is running in full screen is to press Alt + Enter. Similarly, you can press F11 in Windows or Ctrl + F, in MacOS Command + M. Perhaps in the settings you will find other combinations specifically for your application. The method is easy, effective, because pressing the keys again will open the full screen mode back.
2. Change settings
Perhaps in the settings there is an option to switch to another mode, check. Go to the section with settings (Options), view them, whether there is a “Screen mode” (Windowed mode) or a similar function: “Play in a window”, “Window mode”, other analogs.
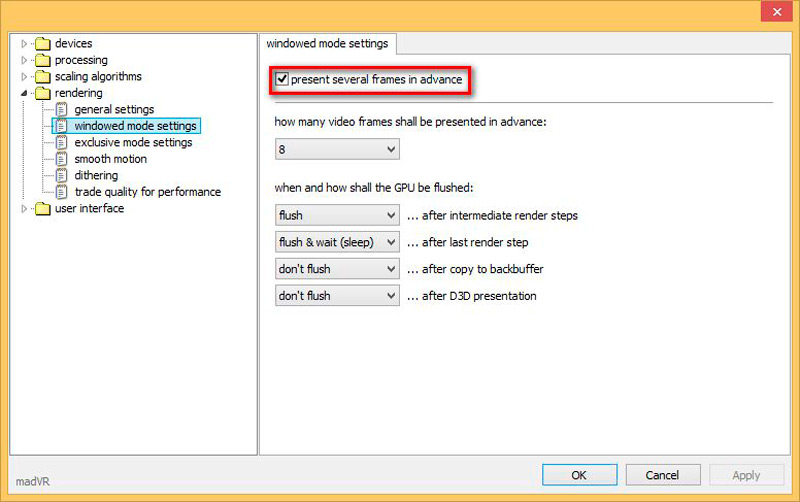
Most often, these options are found in the “Display” or “Graphics” section. When you find it, select by checking the box or by activating in another way provided by the program, save the change.
3. Applying a modifier
If there is no on-screen deployment option for the game, add it using a special modifier.
- Click on the launch shortcut with the right mouse button, click on “Properties”. You can also call the “Properties” window in the main menu of your OS.
- Go to the line “Object” at the end of the line (by pressing the End key).
- Put a space, write “–window”.
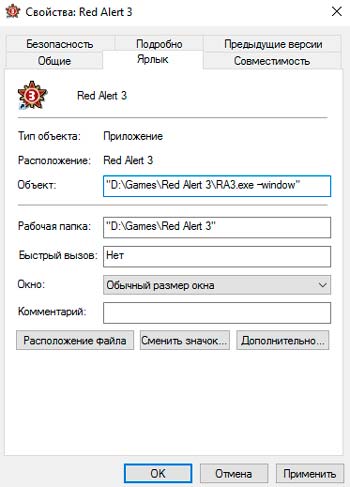
- Click “Apply” – OK, run the application.
In this way, the launch of various toys is edited, for example, the popular Warcraft, Counter Strike, Mass Effect. In other programs, a slightly different modifier may be used, in Sims2, for example, you need to assign “–w”, in some applications “–win” works. Try different versions of the modifier.
It will be possible to start the game in the windowed version; to return to the old settings, simply remove the inscribed modifier.
4. Settings file
You can also launch in a window by modifying the configuration file. However, you must first make hidden folders visible. Go to Control Panel and open Folder Options or use the search bar. In the settings window, in the “View” tab, scroll through the additional options to the very end and set “Show hidden files, folders and drives.”
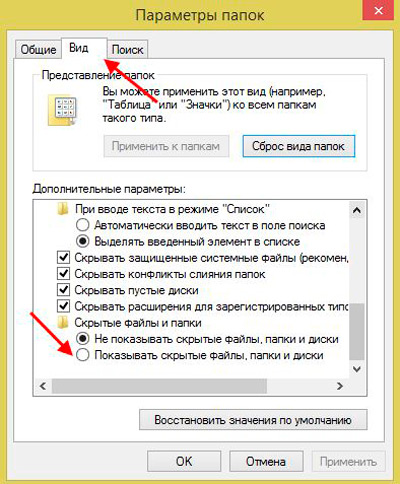
Now let’s go directly to the configuration itself:
- Go to the folder with the installed game.
- Either through the search, or find the file with your own hand, which has the name of the game and the resolution “.ini”.
- Start the document with a double click.
- Find in the text the items “Windowed” and “Fullscreen” (if you have Windows 7, in the Explorer in the search box, enter the text, in the right corner, click on “File contents”).
- Set Fullscreen to 0 to disable. Set Windowed to 1 to enable it. In addition, you can set the parameters for the height and width of the window by filling in the “Size W” and “Size H” lines.
- You can now launch the application.
5. Third party programs
The above methods are applicable if such capabilities are included in the settings. How do I run any game in windowed mode when the manufacturers haven’t foreseen it? Third-party programs will help. Let’s consider the most effective and popular ones.
D3DWindower
You can forcibly translate into the desired launch option in games by taking the old Chinese program D3DWindower, it copes with this task, although it is quite old. This can be done as follows:
- Download the application and install it in any folder (use only Latin letters in the name).
- After starting the program, in the toolbar, click on the blue plus sign. A window will appear in front of you, in which you need to specify the path to your game (the file must have the extension “.exe”).
- After these manipulations, the game will be displayed on the working window. Select it and click on the closed folder icon, or right-click on it and click on the “Options” item.
- The next step is to set the parameters:
- In the “Height” and “Width” fields, enter the desired width and height of the window.
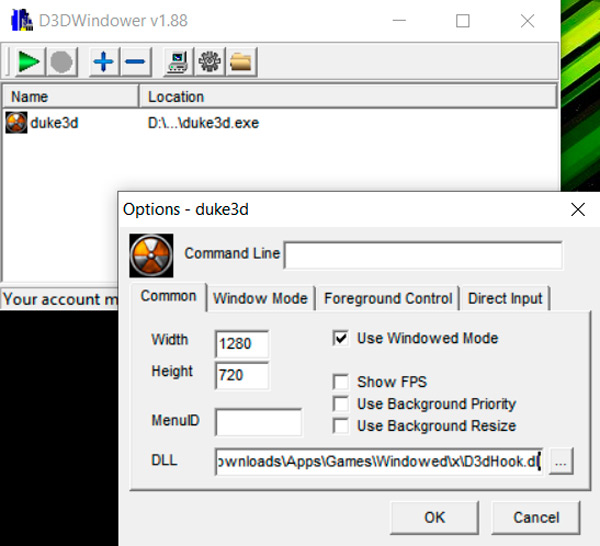
- Make sure there is a check mark on the right next to the “Used Windowed Mode” line. If not, put it on.
- At the bottom of the settings, click on “Browse …” and specify the path to the “dll” file located in the folder where the “D3DWindower” utility was installed.
- Save the changes with the “OK” button.
- In the “Height” and “Width” fields, enter the desired width and height of the window.
- After these manipulations, click on the “Run Program” button (the icon looks like a computer).
If you did everything correctly, the selected game will start. Each new game session should start with this program.
3D Analyze
In fact, this program was originally intended to speed up the graphics card on older PCs and get the right graphics settings. However, it also includes a windowed run function.
- After launching the utility, press the “Select” key and specify the path to the exe-file of the game you need. It is worth noting that a shortcut on the desktop will not work. It is necessary to go exactly to the root folder where the installation was made.
- Of the many different settings, we need only one – “force windowed mode”. Check the box next to this line.
- To start the game, click on “Run”.
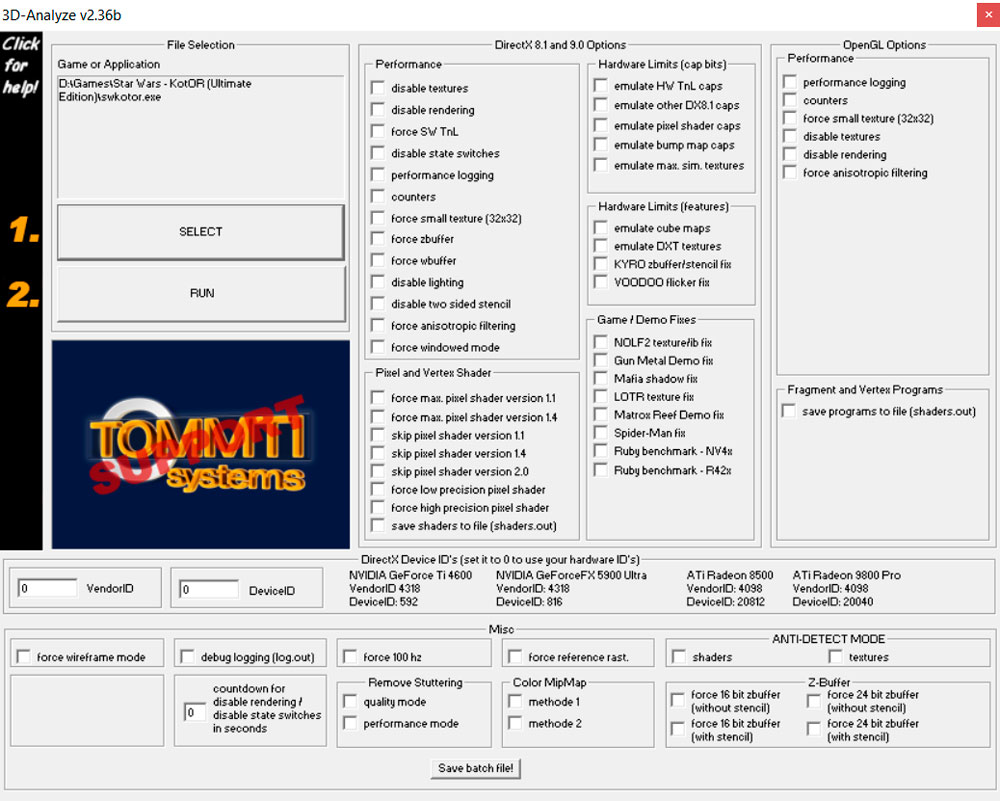
If everything worked out as it should, you can create a new game shortcut so as not to open the launcher every time. In the program window, click on the “Save batch file!” and you’re done! Now you have the ability to run your favorite game as before, without additional operations.
DXWnd
One of the most recent programs supporting DirectX11. In its arsenal there is also a useful debugging tool that allows you to determine the correctness of the operation of various games and to conveniently configure the parameters.
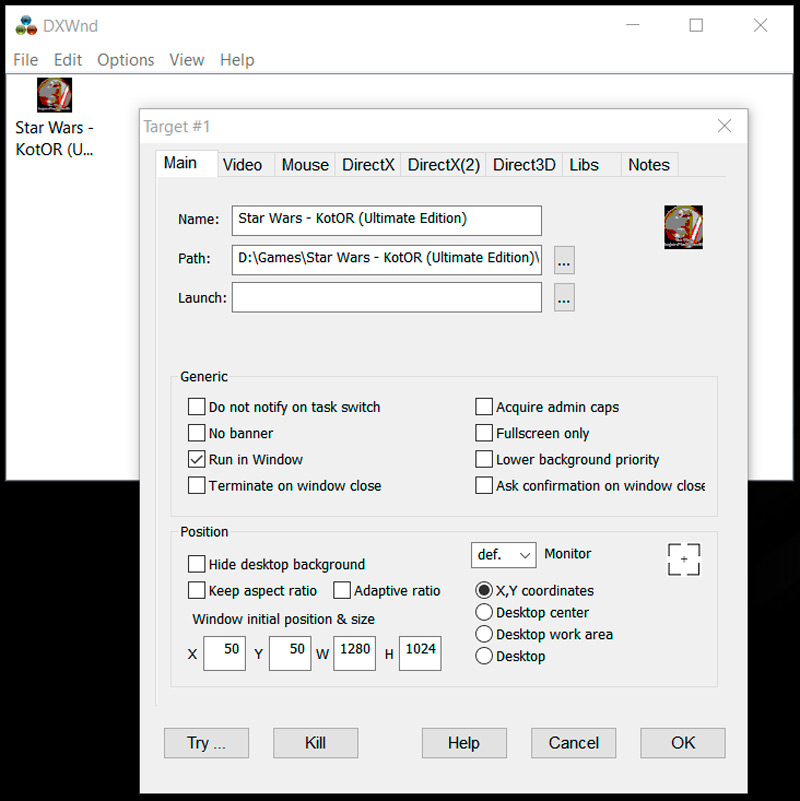
To run the game in windowed mode, follow these steps:
- We tell the program which application it will work with by simply dragging the shortcut into the window of this utility.
- If the debugging mechanism does not find errors or the need for additional settings, it remains only to set the resolution parameters (height and width).
However, remember that the game must be launched from DXWnd every time.
6. Emulators
Emulators do not work on all computers, they are resource intensive. Download, run emulator (Vmware, Windows Virtual PC). We recommend using the official sites. You create a virtual “computer in a computer”, working in the usual window size, and any program running in it will be within the emulator window.
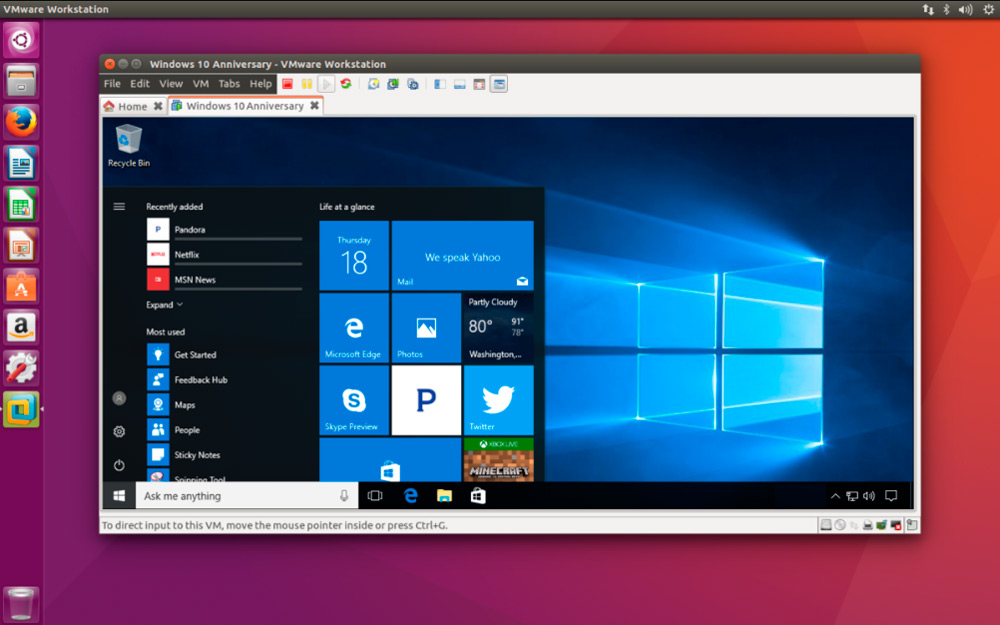
Vmware virtual machine on Linux
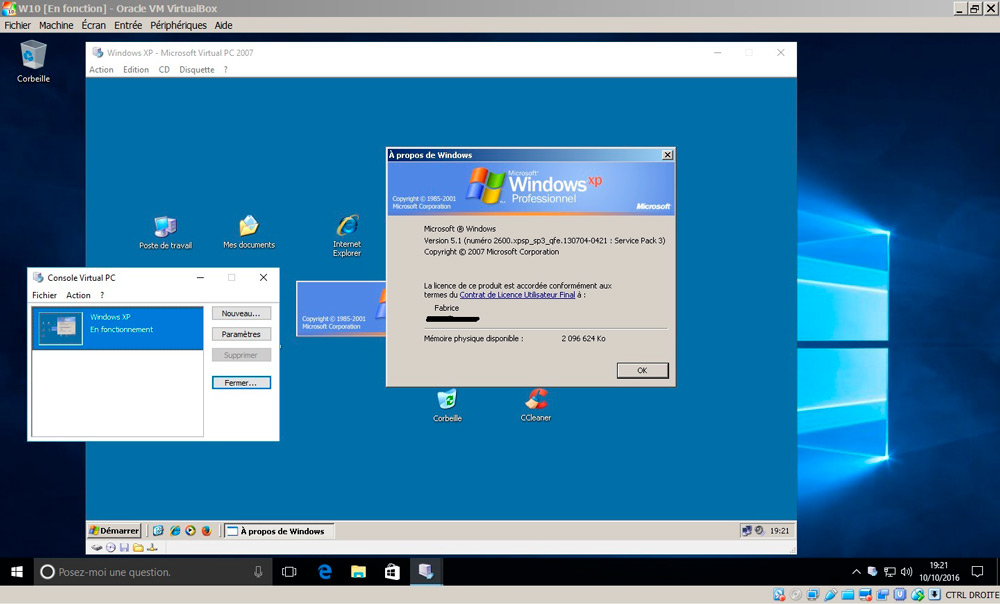
Windows Virtual PC program
The disadvantages are that a virtual computer requires a lot of disk space, it is time-consuming to configure it. Installing an emulator just to start the game is irrational, use the method if you need it for work.
However, if you nevertheless decide to try this method, we have prepared an instruction for you so that the whole process goes without error. This tutorial will work for any emulator, as the setup is pretty much the same.
- Immediately after launch, you must specify the path to the operating system image in order to install it on the virtual machine. In this case, you should set the amount of allocated memory for stable operation. Usually 20 GB is enough, but you should consider the size of a particular game.
- Then just wait for the OS installation to complete. This process is no different from the standard procedure if you were installing a new version of Windows on your PC.
- After completing the previous step, restart the emulator.
- Now load the desired game and all additional components on it, in particular, Visual C ++, DirectX and others.
- Start the game and enjoy windowed mode.
If the listed methods showing how to put the game in windowed mode did not help, try contacting the developers through the official website, support forum. In addition, when this option is not available in principle, we recommend minimizing the full-screen application to switch to another program by pressing Alt + Tab, then you can simply expand it.