If any problems arise with connecting a computer to the Internet, users most often resort to rebooting the system, setting up the router, and similar standard methods. However, sometimes problems are caused by errors in the installed network adapter, so the connection can only be restored to functionality by resetting the settings of this component. Let’s look at how exactly this operation can be performed on popular builds of Windows OS.
Contents
Reset features on Windows 10
Windows 10 has a built-in function for resetting network settings, which greatly simplifies the work and makes recovery procedures accessible even to less experienced users.
In this case, there is no need to resort to the command line or any other complex methods that involve manual manipulation of the settings.
Sequencing:
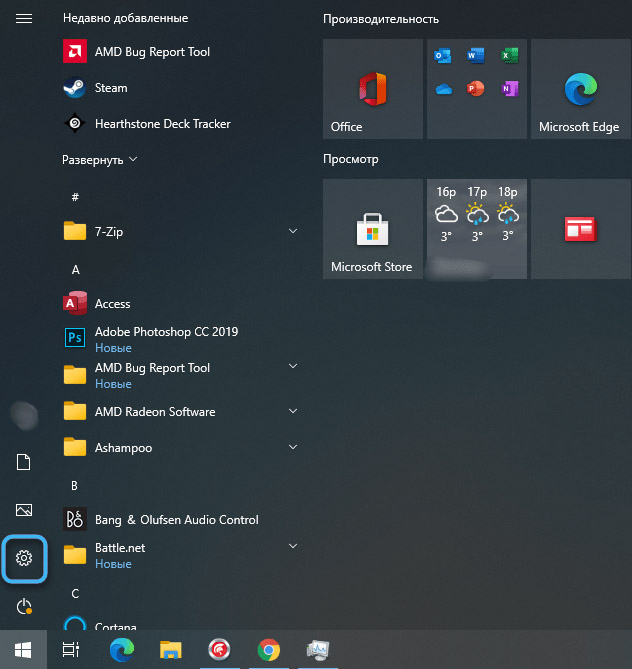
- Right-click on the “Start” button and then open the “Settings” window.
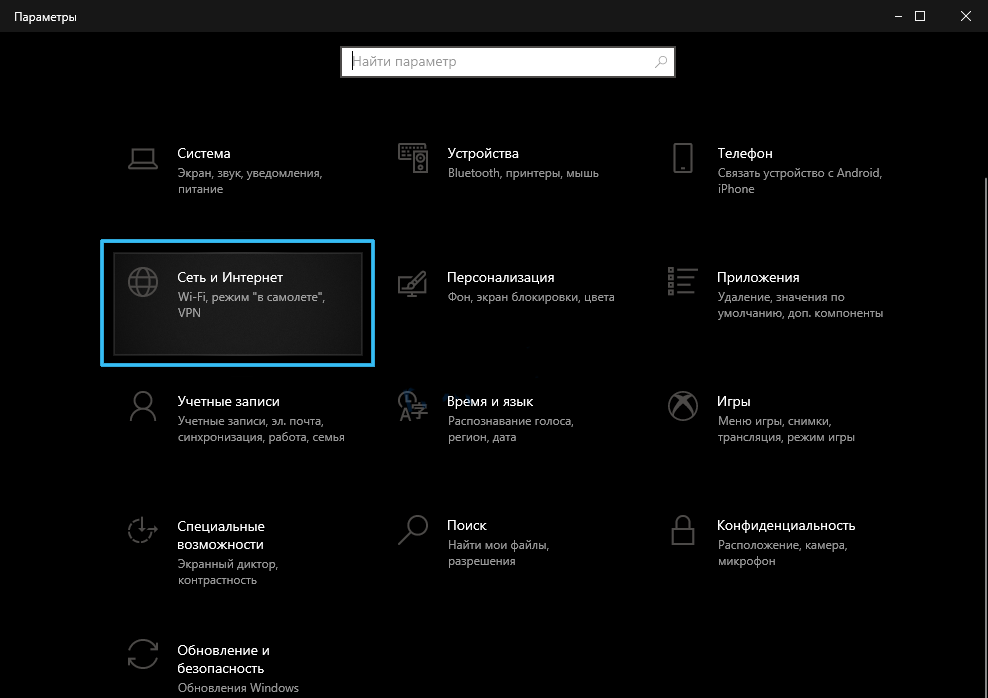
- Find the section called “Network and Internet”.
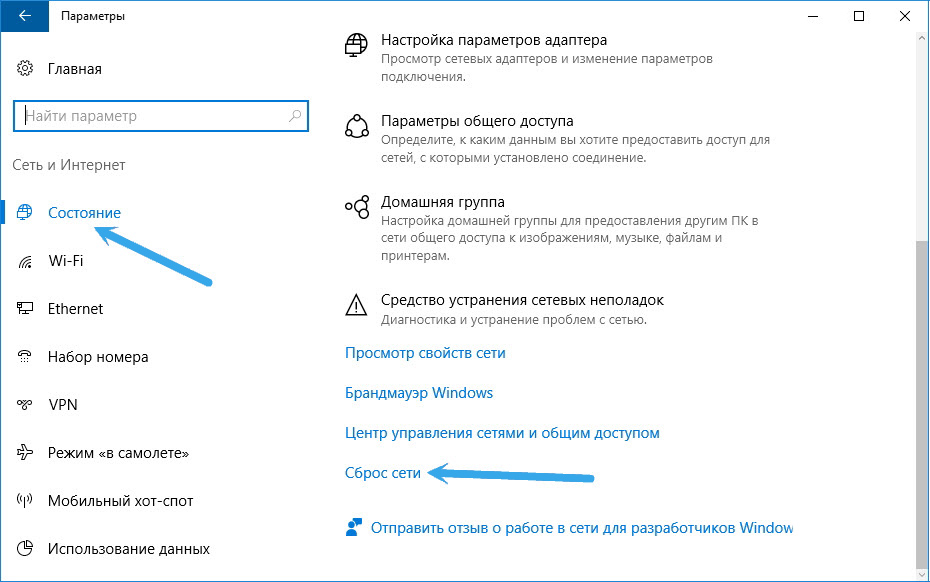
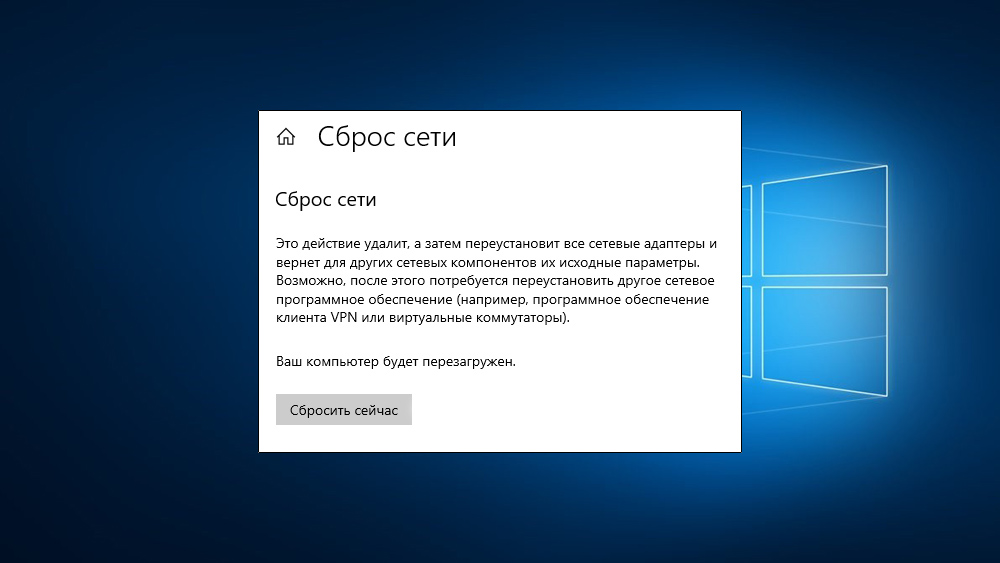
- At the bottom of the window, find the “Network reset” item and click on it with the mouse.
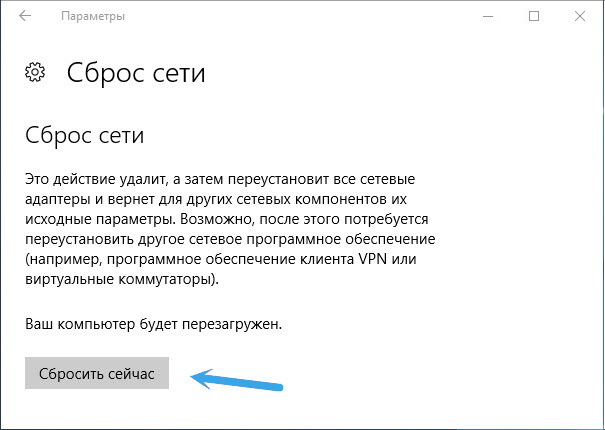
- In the window that opens, confirm the operation and then wait for it to complete. To restart a computer.
The next time you turn it on, the system will automatically set the network card settings to default values, so you can check the functionality of the connection. However, if difficulties with installing suitable drivers have previously made themselves felt, they may recur. Then you will need to independently find suitable drivers on some trusted resource and install them manually.
Resetting settings through the troubleshooter
The somewhat outdated, but still frequently used Windows 7 operating system provides a special utility called the “Troubleshooter”. It automatically identifies possible errors and corrects them using available methods.
The tool automatically resets the network parameters if the user experiences any difficulties while connecting. However, if there are no obvious problems, you will not be able to use this tool.
How to use the product:
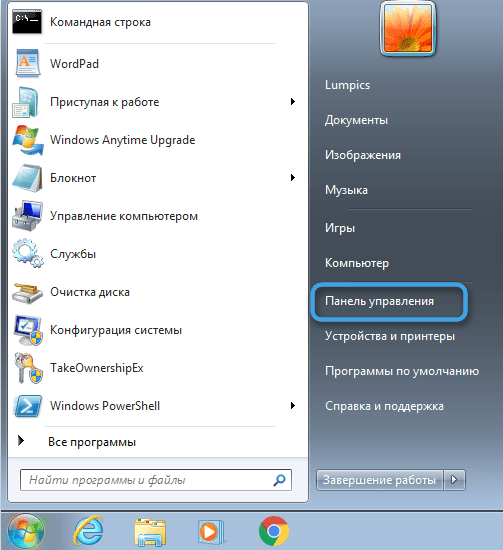
- Left-click on the “Start” button.
- On the right side of the pop-up panel, find the “Control Panel” item and go to it.
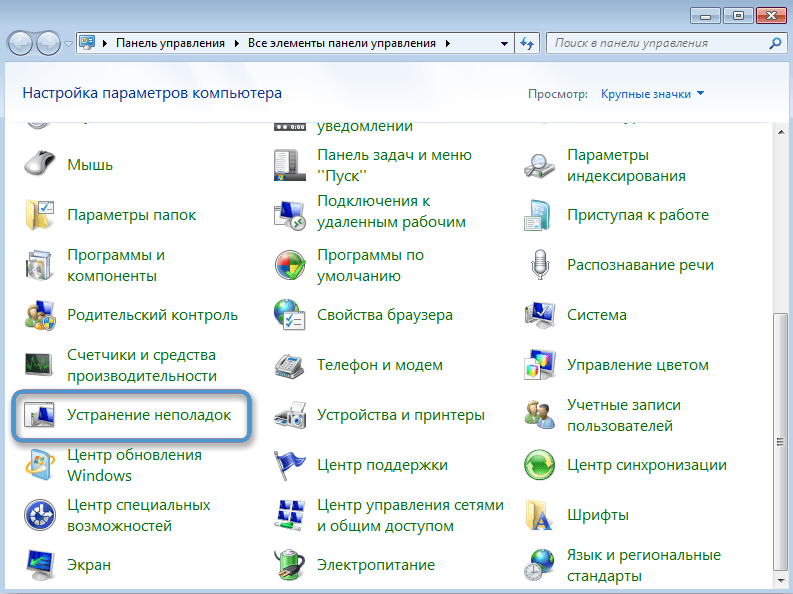
- Find the tile called “Troubleshooting.” At this point, you may need to switch the Control Panel display to Large Icons using the small setting at the top.
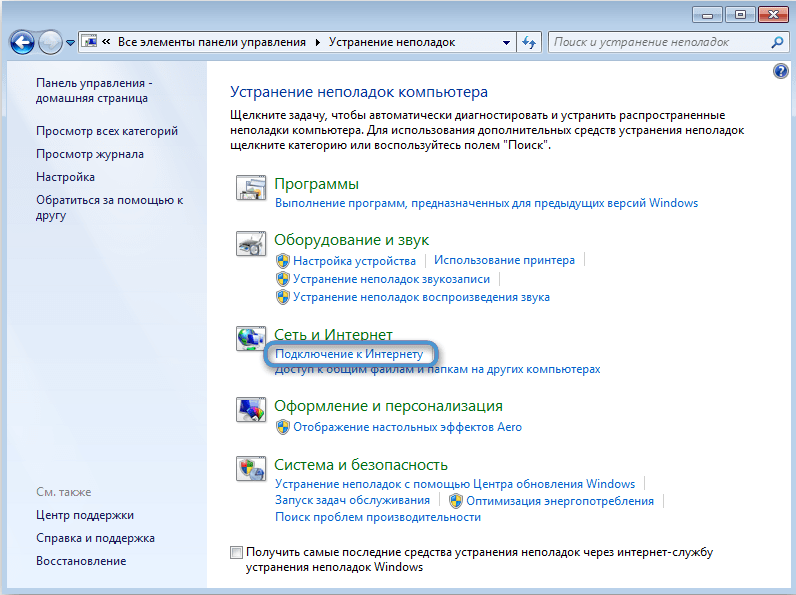
- Inspect the available recovery tools and open the “Network and Internet” subsection. In it you can already find the “Internet Connection” item.
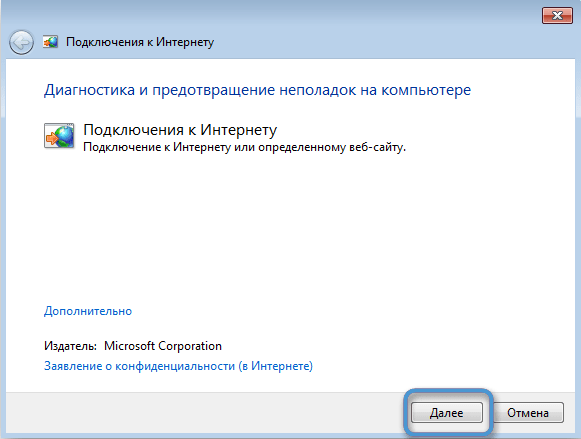
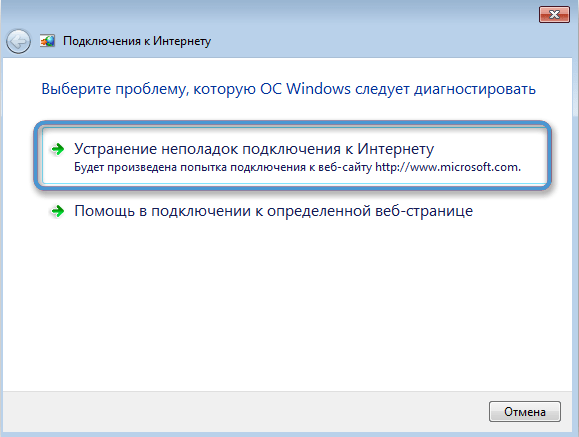
- A diagnostic window will open allowing you to begin the testing procedure.
- Click on “Troubleshoot Internet Connection Problems.”
- Wait until the utility automatically scans and starts recovery operations.
At the end of the process, information about the problems found, the actions taken and their results will be displayed on the screen. Thus, it will be possible to understand what exactly caused the problem. If additional conditions or recommendations appear, they must be met to complete the procedure.
Using the command line
All versions of Windows have a multi-tool called Command Prompt. It can hardly be called simple, but if all the rules are followed, even an inexperienced user can perform the operation of resetting the adapters.
It makes sense to resort to this method if the methods described above did not give the desired result.
Work algorithm:
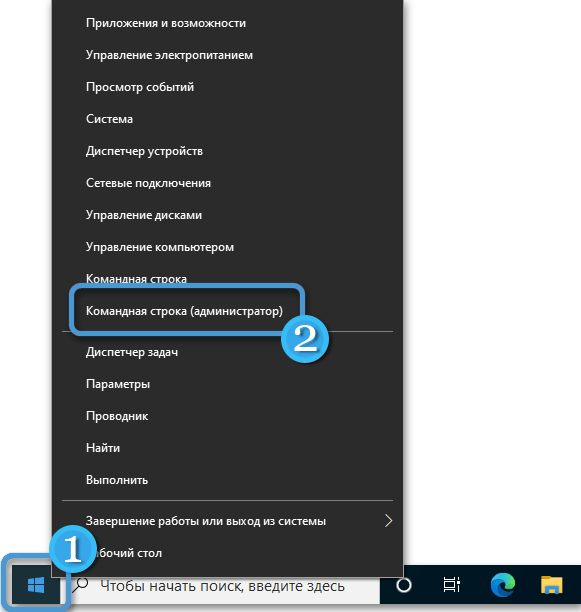
- Launch the command line using one of the available methods. The easiest way is to right-click on “Start” and select the section of interest from the pop-up menu.
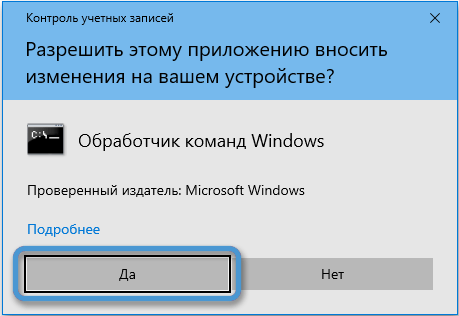
- A window will appear where you will need to confirm the opening of the desired tool.
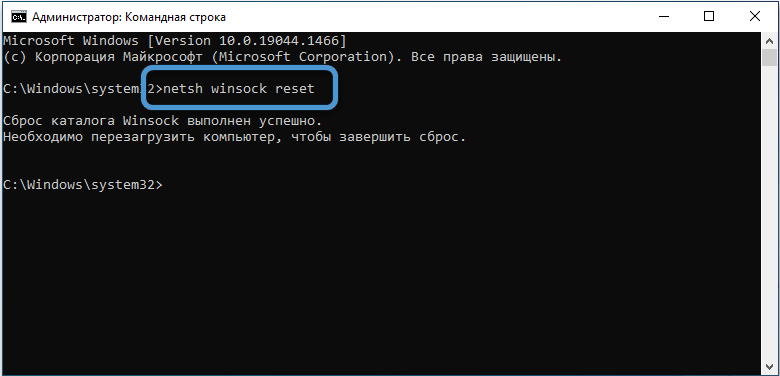
- Enter the command that restarts the firewall interaction service:
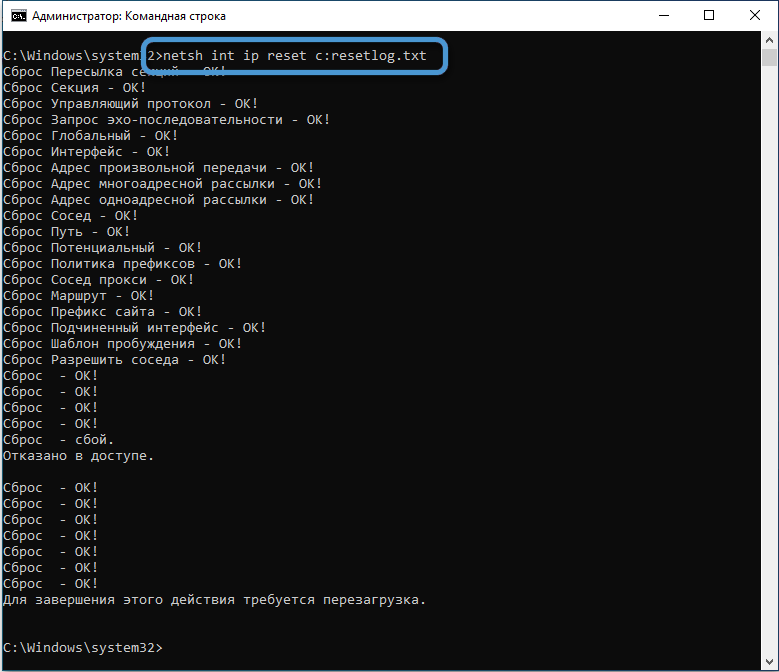
netsh winsock reset - Now you need to remove and restore the functionality of the TCP/IP protocols used when processing Internet batch files. To do this, use the command:
netsh int ip reset c:resetlog.txt - Next, the network cache is cleared by activating the following command:
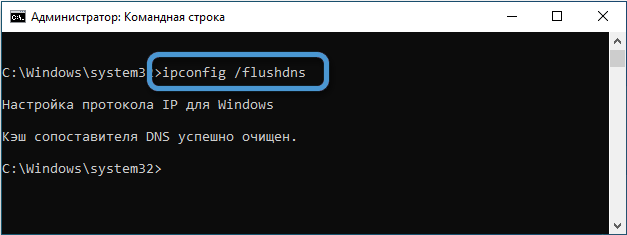
ipconfig /flushdns - As a result, the adapter settings will be reset.
When using the command line, it is important to enter all commands carefully, pressing Enter after each one. Upon completion of all stages, you will need to restart the computer for the changes to take effect.
Easy fix utility
If problems arise with the wireless network adapter, it makes sense to use the specialized utility easy fix. Previously, it could be downloaded on the official Microsoft website, but the developer stopped supporting this software. Now you can find the distribution on other resources. It provides support not only for new versions of the OS, but also for fairly old builds of Windows XP.
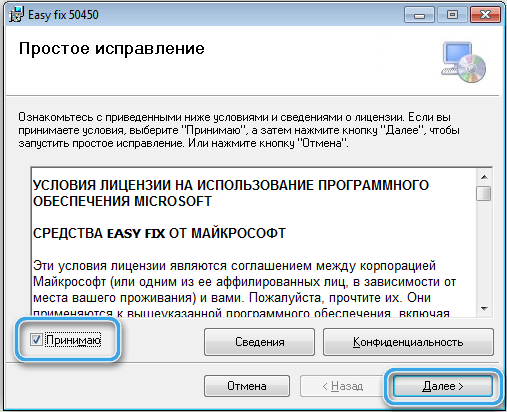
It is recommended to download the file only from reliable resources to avoid the penetration of various viruses and malware into the system.
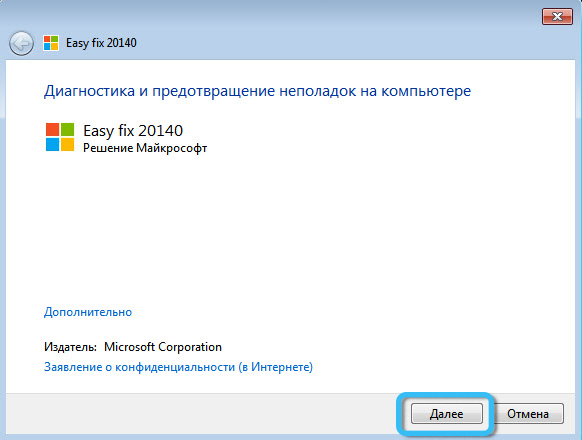
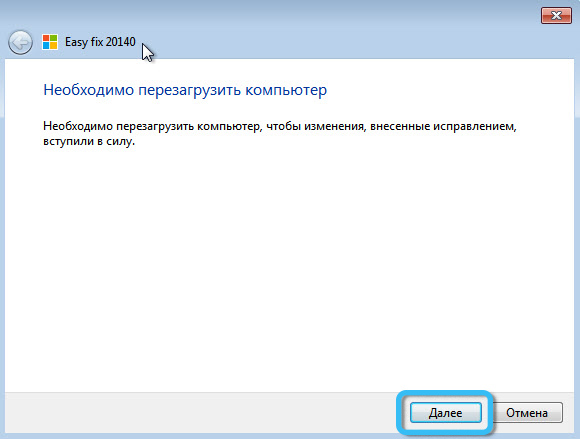
After downloading the distribution, all that remains is to launch it and wait until it determines the settings of the network adapters and reinstalls them. You will need to restart your computer for the changes to take effect.
Reinstalling drivers
Malfunctions in the operation of network adapters may be associated with damage to the drivers that control the operation of the corresponding hardware components. Usually the problem occurs due to the activity of malware.
You can determine the problem simply by looking at a specific network adapter in the list of available connections. The component name will be specified incorrectly or not defined at all.
The way out is to reinstall the network adapter drivers yourself using one of the available methods. The easiest way to do it is this way:
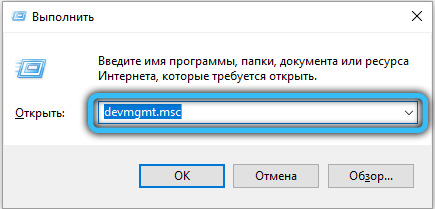
- Press the Win + R key combination to open the Run window.
- Enter the command devmgmt.msc into it.
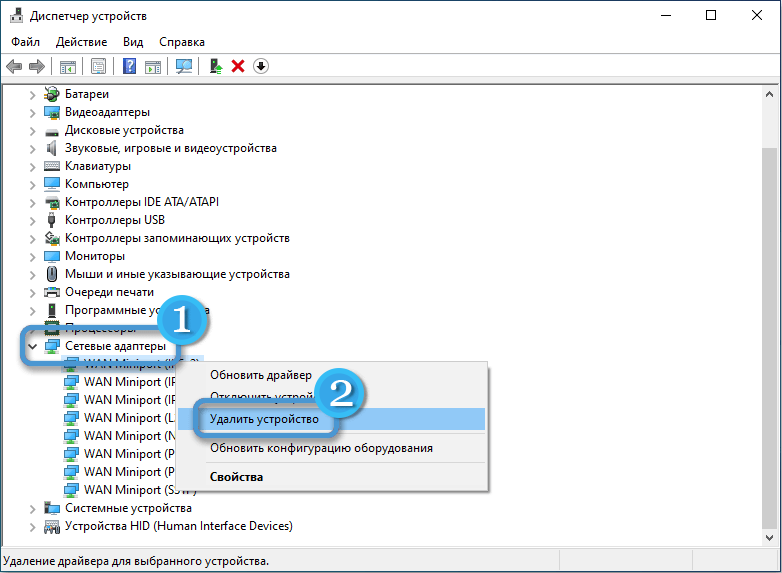
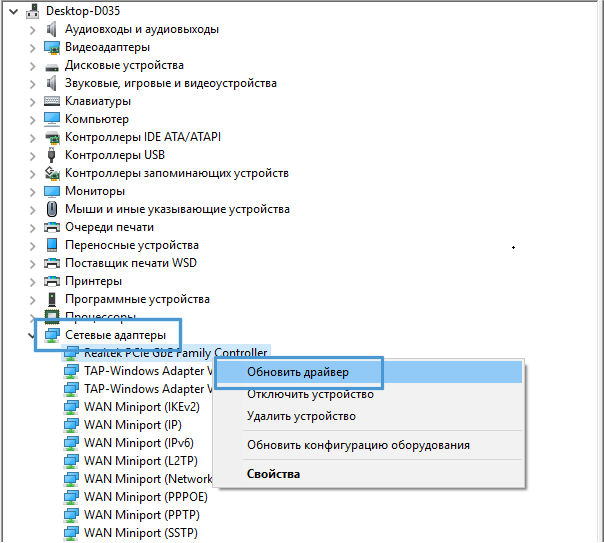
- In the list of connected equipment, find the category with network devices and select the item of interest by right-clicking on it.
- Go to the “Driver” tab, where you can see information about the version and release date of the installed software.
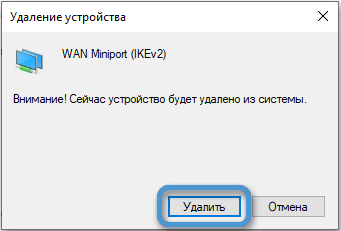
- Remove a device from the list by clicking the corresponding button in Device Manager.
- Reboot and open the desired adapter again in the Device Manager list.
- Try to update the driver using built-in tools by clicking the appropriate button.
- If this does not help, you need to download the driver for a specific network adapter manually and install it through the distribution kit. It is advisable to download the distribution from official resources to protect the system from possible viruses.
In some cases, after installing new drivers, you may need to restart your computer again.
The described methods are guaranteed to allow you to reset the network adapter settings on your PC. If after this, problems with the Internet connection persist, it is worth considering other reasons (software and hardware).
