Not always only one person uses one computer. Quite often, different people or family members can work on the same PC. In such cases, it is very convenient when each user has his own account. This way, no one else can mess with your files, view them, or delete them. This feature was originally present in all versions of the Windows operating system, starting with the very first, and the latest Windows 10 was no exception. This article will take a closer look at how to create a new Windows user. Let’s figure it out. Go!

There are two types of accounts in the top ten:
- A Microsoft account that requires an email address to sync files across devices.
- Local – an ordinary user account in its usual form.
Contents
Through the “Options” snap-in
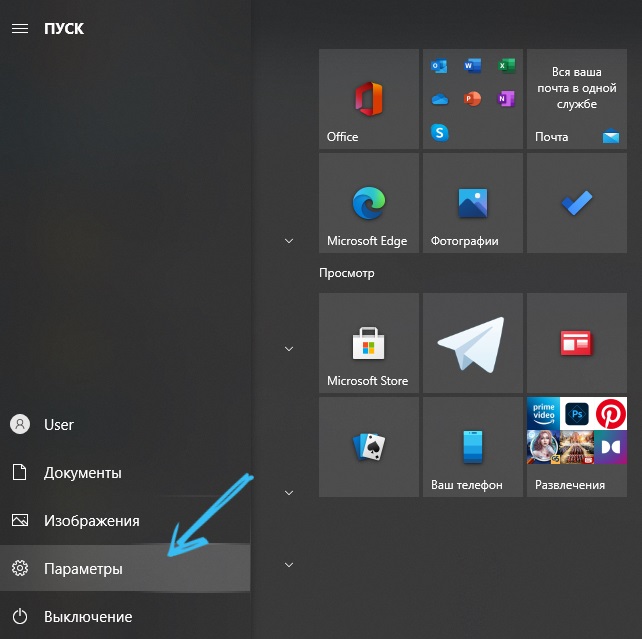
It is very easy to create a new account. In Windows 10, this is usually done through the “Settings” section:
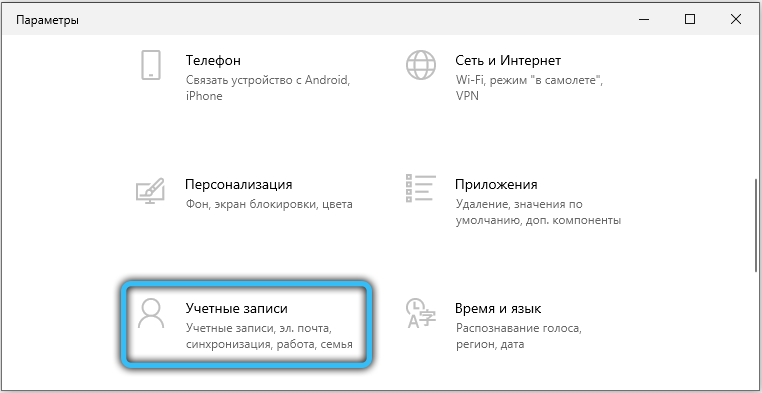
- Open the snap-in by selecting the appropriate item in the Start menu (or use the Win + I key combination for quick access). Go to the “Accounts” section.
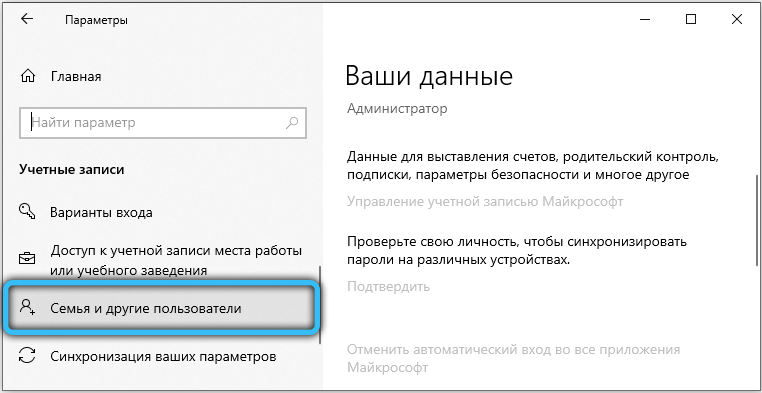
- Having opened it, we select “Family and other users”.
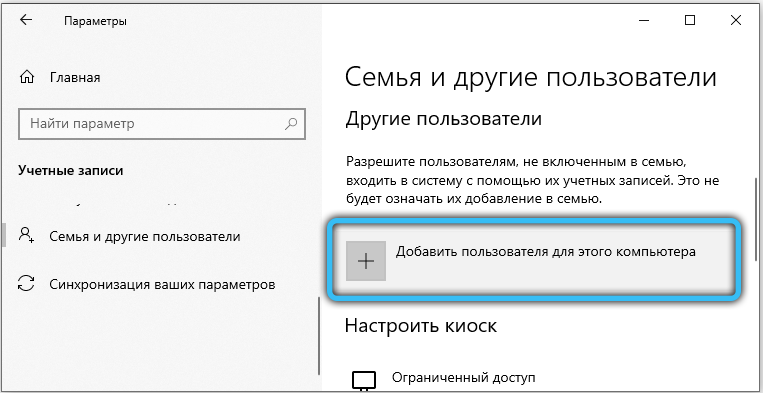
- You can add family members here if you have a Microsoft account. All their data will also be synchronized, in addition, it is very convenient to set up parental controls. For all other cases, use the “Other users” item.
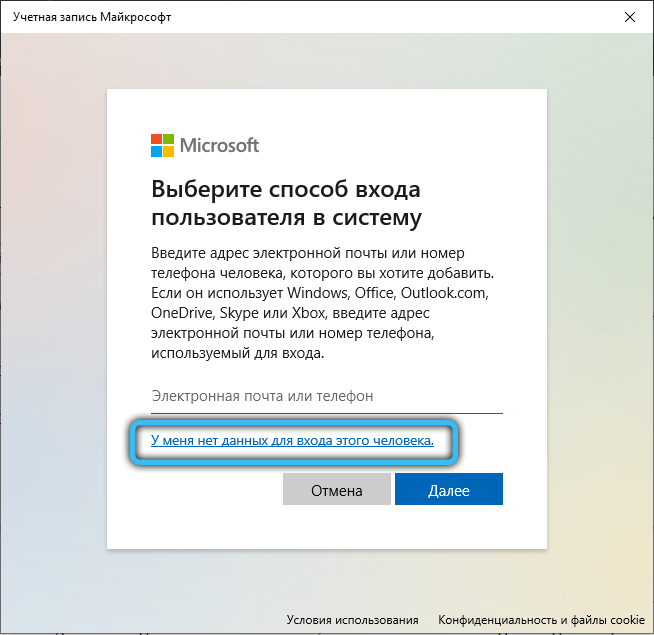
- Next, you will need to enter an email address or phone number. You can skip this step by clicking on the item “I do not have login details for this person.”
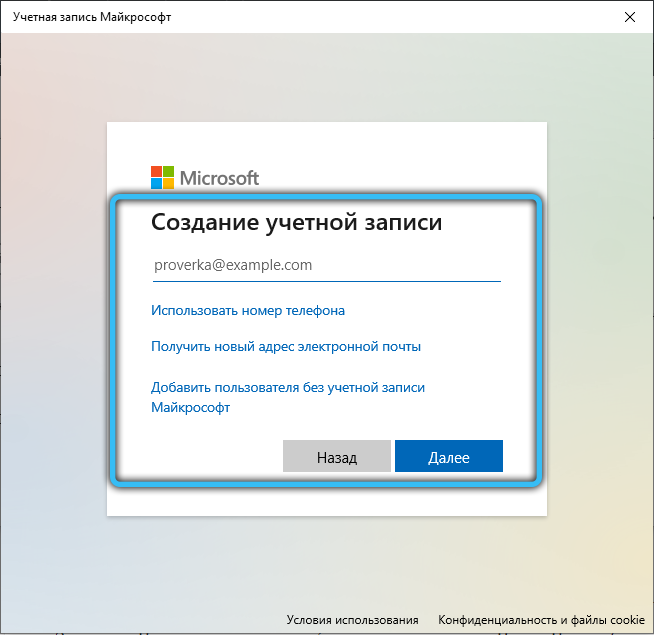
- In the next step, you are prompted to create a Microsoft account. Enter all the required data or click on the item below to proceed to the next step without filling in the fields. Further, filling in the fields is already mandatory. After you have entered the name and password for the user being created, click the “Next” button.
- If you want to give administrator rights, go to the “Other Users” section and click “Change …”. In the window that opens, set the appropriate type.


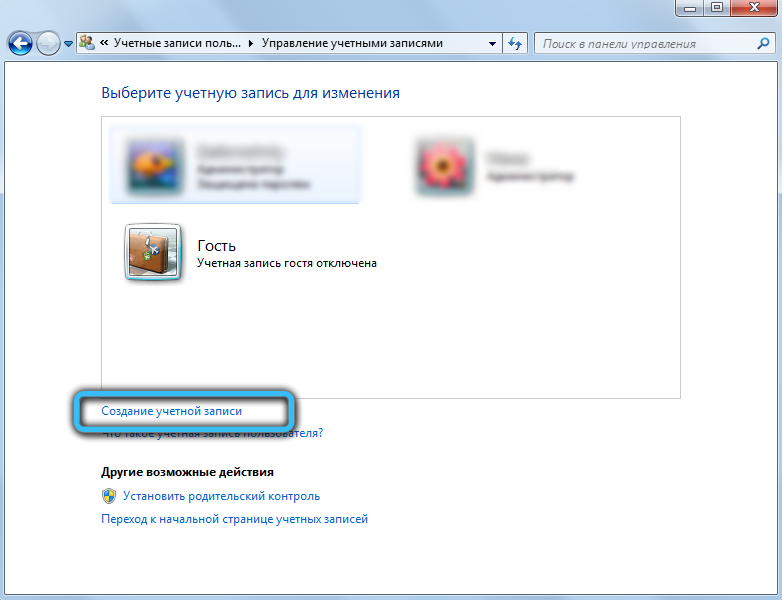
Through the “Control Panel”
The classic method available in Windows 8, 7 involves using the Control Panel:
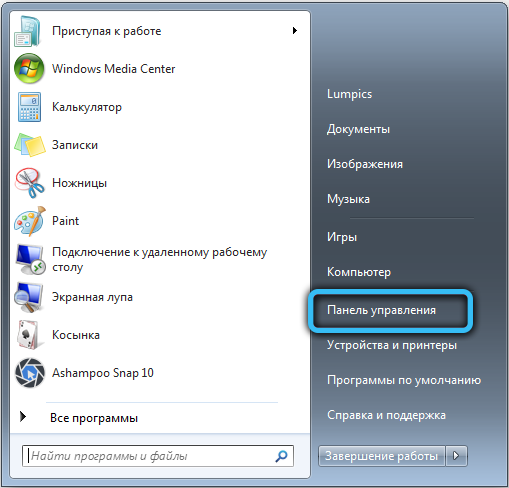
- We launch the Control Panel from the desktop, from the Start menu, Search (Control Panel request) or by another method convenient for you.
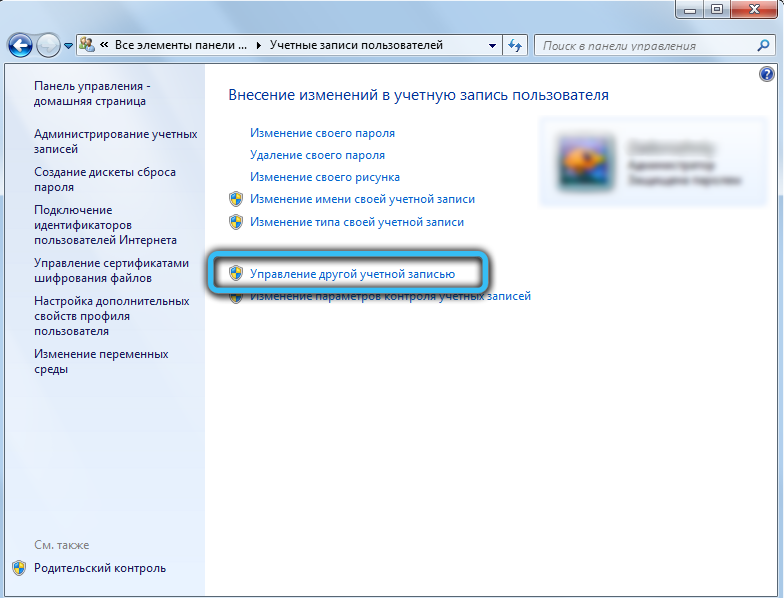
- We go to the section “User accounts”.

- We find the item responsible for adding and removing accounts. If the sections are not displayed by category, but the view “Small icons” is displayed, we find the section “User accounts”, after which we choose to manage another account.
- In the window, you can see the accounts already created in the OS. To add a new user, click “Create an account” (if you perform all the manipulations in Windows 10, then there will be an item “Add a new user in the” Computer settings “window – the link will lead to the” Settings “snap-in, see the instructions for this method above).
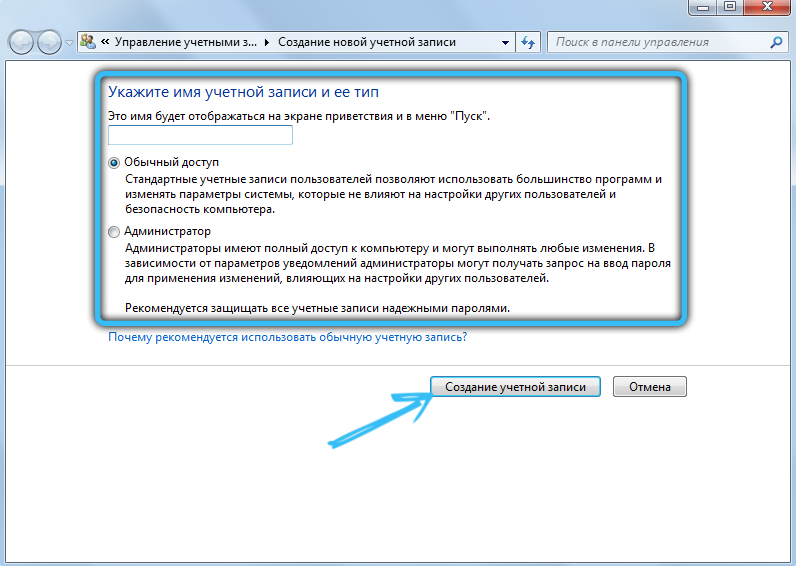
- Enter a name for the created account, indicate its type and determine the access level (administrator or regular user rights). When everything is ready, we confirm our intention by clicking the corresponding button below.
- The account has been created and can be used. If there is a need to set a password for it, you need to go to the “Change account” item, select the one you need from the list of available ones and click “Create password”. We come up with an access key and confirm our intention, after which an inscription will appear next to the account icon informing about the installed protection, which indicates the success of the procedure.
Through the account management utility
To add a user using the built-in Windows utility, perform the following steps:
- Open the “Run” console (hotkeys Win + R or from the Start menu) and enter the command control userpasswords2 into the line , press “OK” with the mouse or Enter on the keyboard.

- We press the button “Add …”.

- Next, we select how the login will be performed. Add an account with or without a Microsoft account. Further actions are similar to those described in the first method.

Through the Local Users and Groups snap-in
There is another way. To use it, do the following:
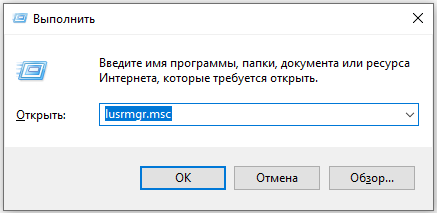
- We apply the key combination Win + R, and after the Run window opens, enter the lusrmgr.msc command and press Enter or click the OK button with the mouse.
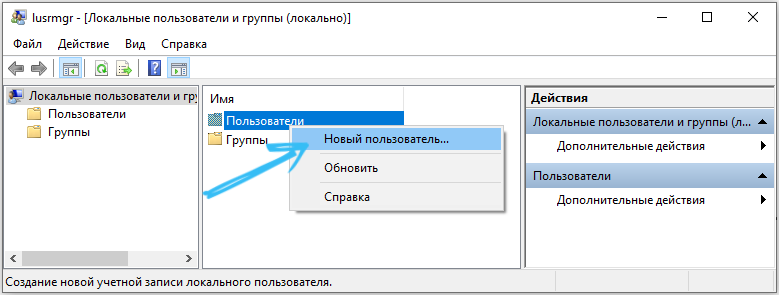
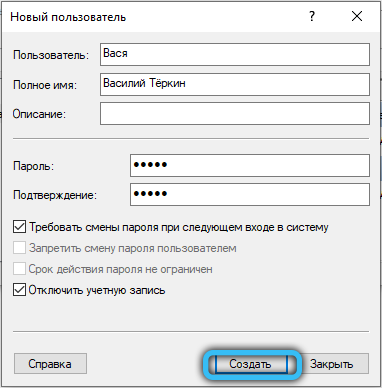
- In the window that appears, right-click on the “Users” folder and select the “New user …” item. Then you need to fill in all the required fields.
- Pay attention to the item “Require password change at next login”. Check or uncheck it based on what you need. Once created, go to the Properties section to give administrator rights if needed.
Through the command line
And finally, consider the method using the command line (the account will be local):
- Run the command line as administrator (for example, by selecting the appropriate item from the Start context menu).

- In the terminal, write the command net user username password / add and press Enter (if the name or password with spaces, use quotes in the request).

- Successful execution of the command implies the creation of a user with the specified name and password.
The method is suitable even if standard actions do not allow creating an account, for example, as a result of an unsuccessful system update.
Now you know how to create a new Windows account. As you can see, this is done very simply and even an inexperienced user can easily cope with the task. Write in the comments if this article was useful for you and ask any questions of interest on the topic considered, if something remains unclear.