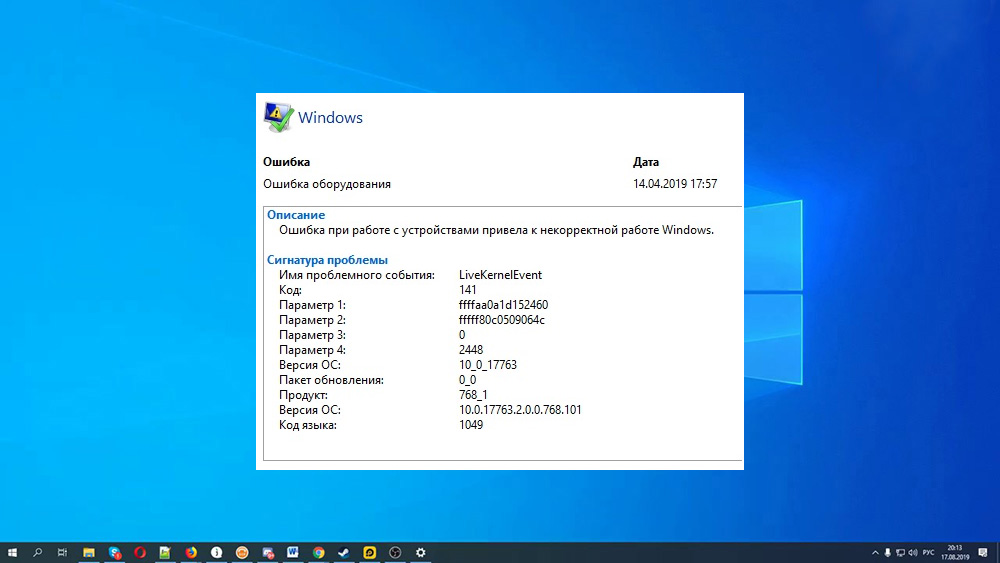
Keeping a computer in working order is not an easy task, especially for unskilled users. It is necessary to respond to various malfunctions, otherwise these events, which are insignificant at first glance, can turn into serious problems, up to the crash of the operating system, which is especially true for Windows 10/11. If you find a LiveKernelEvent error while viewing the reports generated by the stability monitor or the operating system security / maintenance center, you should study it in more detail and try to eliminate the cause of its occurrence.
Contents
Causes of the LiveKernelEvent Error
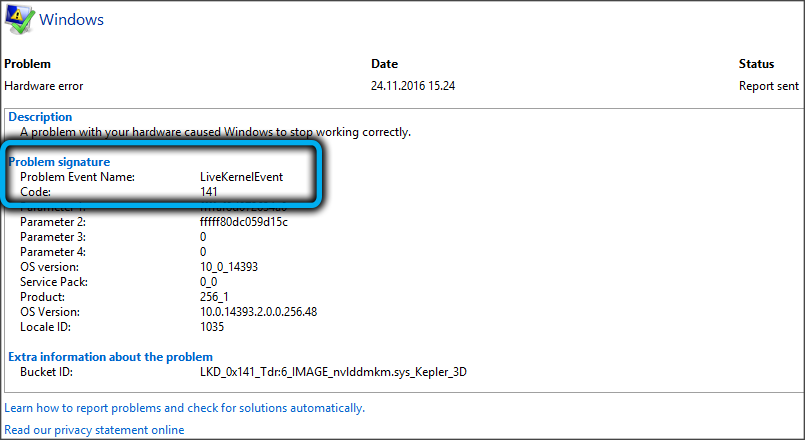
The literal translation of the name of the error is “live kernel event”. Therefore, we can immediately conclude that the specifics in this term are not enough. In fact, this is true: there are many reasons for the appearance of this error, as well as additional codes designed to somehow facilitate the search for the source, primarily for the developer.
But, judging by user reviews, most often the culprit of the problem is incorrectly installed graphics drivers in the system. They could also be damaged as a result of a hard shutdown of the computer (or during power failures). It also happens that the installation of video card drivers is correct, but the removal of the old driver was performed with errors, due to which a conflict of interest arises in certain situations.
Often, an error is generated on gamers’ computers: modern games often try to overclock the graphics subsystem, squeezing maximum performance out of the processor and video adapter memory. When working in such a loaded mode, the video card overheats, which is fraught with system freezes or computer reboots.
There have been cases when LiveKernelEvent appears when the watchdog.sys file, which is a component of the built-in Windows antivirus software, is infected with a virus. Finally, there are frequent cases of this error appearing due to incorrect configuration of the operating system, because there are a lot of such settings, and without knowing all the nuances, you can really “heap up” a bunch of problems. There are conflicts at the driver level, and the incompatibility of the installed software with the components of the operating system, and inconsistencies at the hardware level, and much more.
In some cases, after specifying the error signature, the report contains additional data that can narrow the scope of searches. For example, there is the name of the problematic driver. Let’s say if it starts with the characters nv, we can assume that these are files that are components of the Nvidia graphics subsystem.
But such additional information may not be available, and then you will have to try several options to fix the problem.
Here is a little life hack that can help you figure out what problem caused the LiveKernelEvent error to appear:
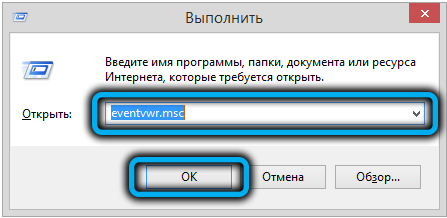
- press the combination Win + R and in the field that appears, enter the command eventvwr.msc, completing the input by pressing Enter. This will start the Windows service “Event Viewer”;
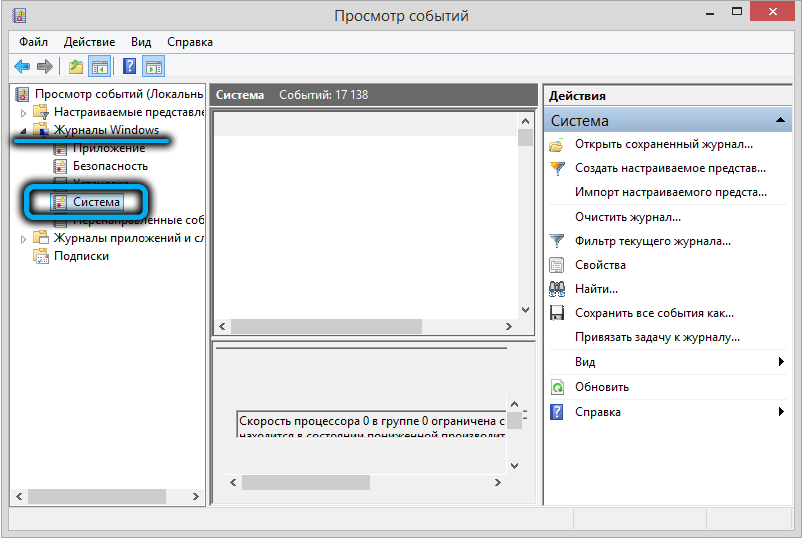
- in the window that opens, click on the “Windows Logs” tab and select the “System” menu item;
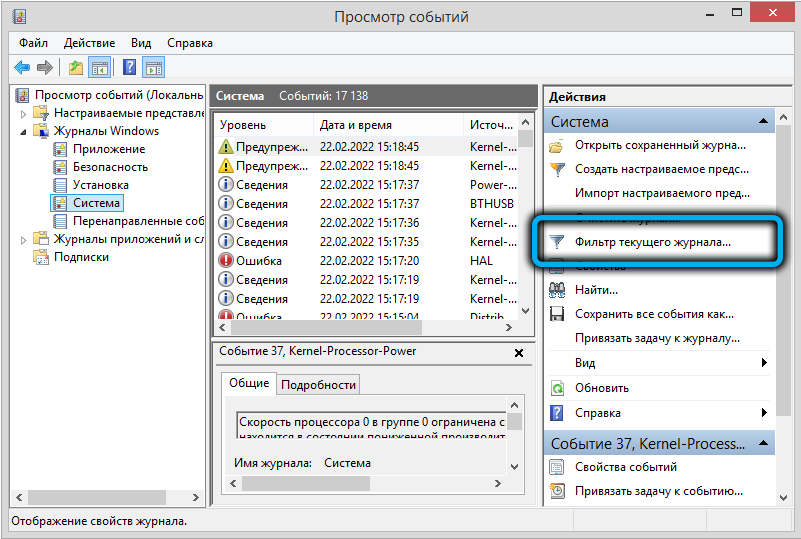
- in the right panel, click on the line “Current log filter”;
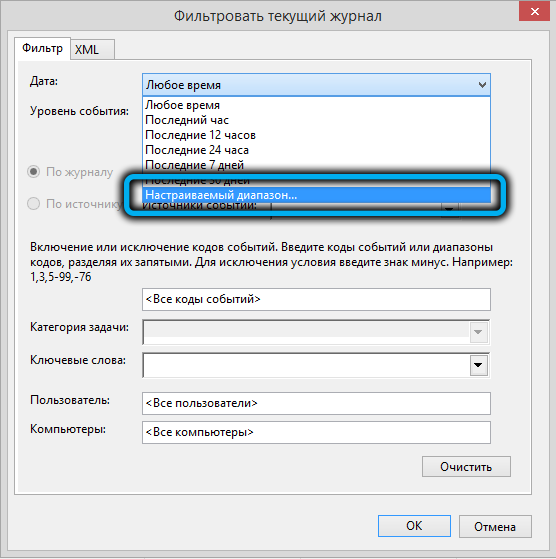
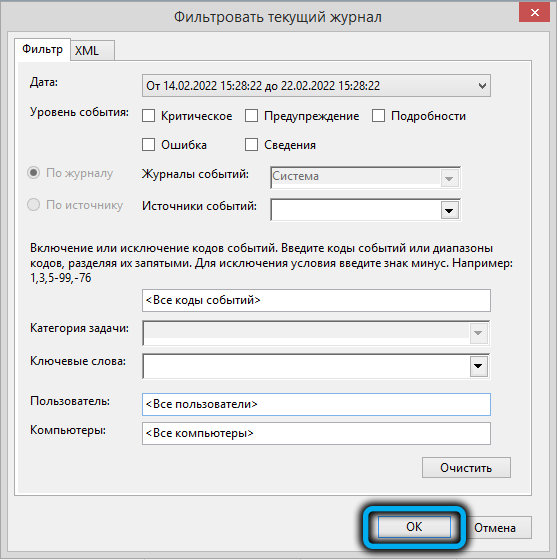
- select the time range in the “Date” field;
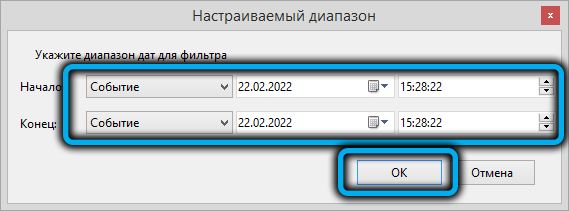
- for the “Start” and “End” fields, specify the value “Event”, and in the other two fields – the date and time the error occurred;
- by clicking the OK button, we will thereby filter out from the large list of events those that occurred on the date and time we specified;
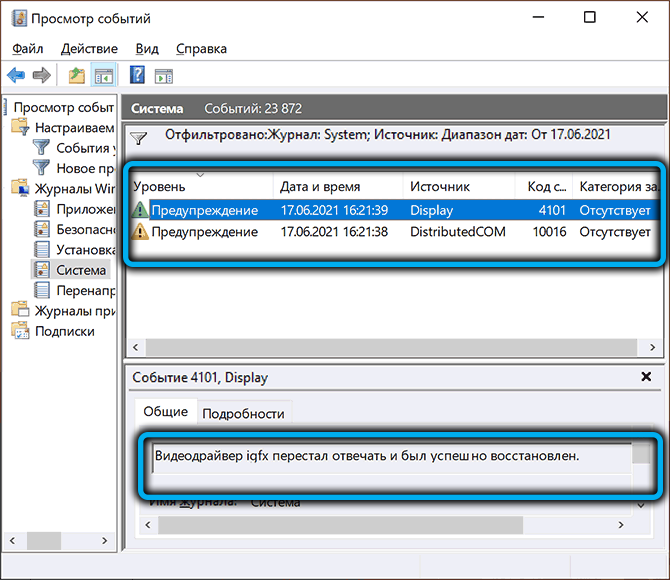
- as a result, a list of abnormal events that occurred in the specified time interval will appear, for each of which a clarifying text is provided in the lower part of the window.
In the example shown in the figure, it can be understood from the clarifying message that the error occurred due to a lack of response from the video card driver. It remains only to find out the specific cause of the failure – it can be, for example, an overheating of the adapter due to overclocking, or, conversely, an error caused by insufficient power supply at the time of peak load on the GPU.
It is also worth noting that in this particular example we are talking about integrated graphics, as indicated by the name of the driver (igfx). Meanwhile, many users, faced with such a problem, perform a set of recommended measures (deleting old drivers, updating to new ones downloaded from the manufacturer’s official website), mainly for discrete video cards.
As you can see, the same actions must be performed for integrated graphics.
How to Fix LiveKernelEvent Error
Consider the most common and effective ways to fix the problem.
Disabling external devices
One of the common causes of the LiveKernelEvent error is a conflict between drivers. It occurs especially often in Windows 10/11, since here the system core has many fundamental differences from its predecessors, and peripheral device manufacturers had to seriously update their product drivers.
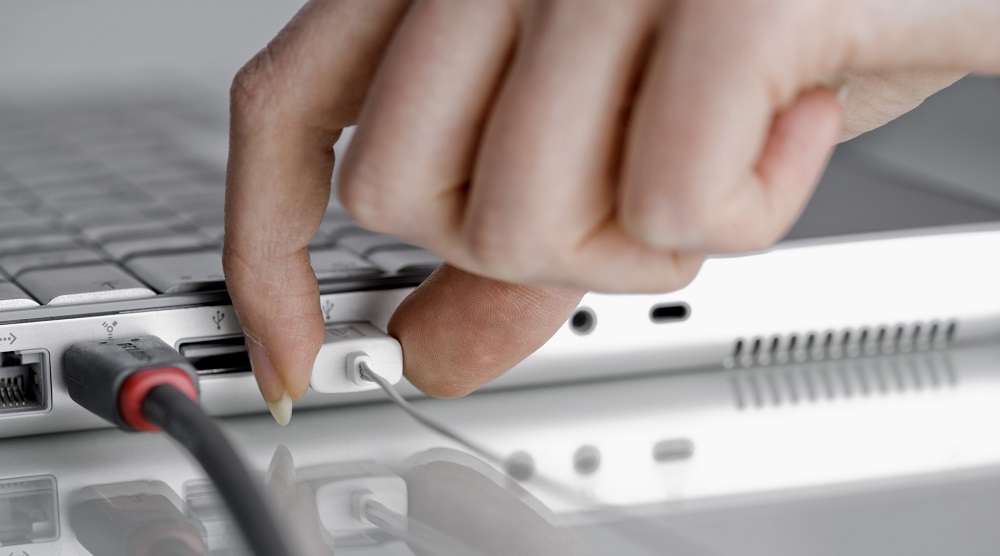
However, such errors appear in the “seven” and in the eighth version. The solution for them will be the same: you need to disable all peripheral devices and check the operation of the operating system. If there are no failures, you can try to connect peripherals one at a time and observe the results. If it really is a driver conflict, then you will eventually be able to determine the pair or specific device that is causing the error.
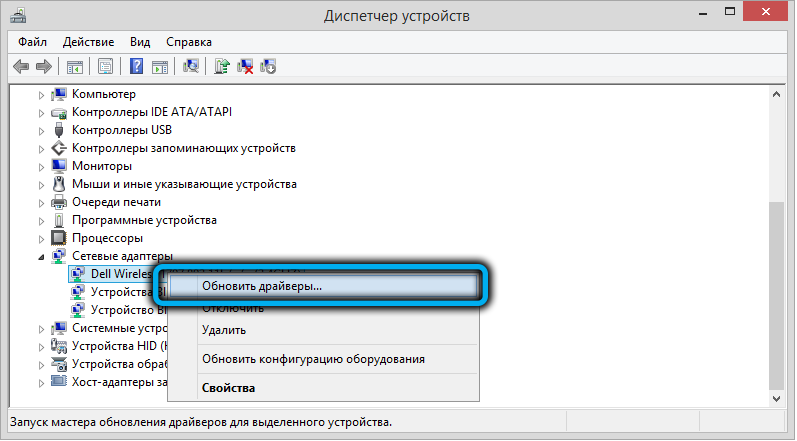
In this case, it is necessary for the problematic device to manually install the latest software taken from the official website of the developer, having previously removed the old conflicting drivers through the Device Manager or using a specialized utility from third-party developers.
Running delayed Windows 10 updates
Quite often, the error “Problem event name LiveKernelEvent” with code 141 occurs due to the fact that the user has disabled automatic download and installation of updates. They do this for a variety of reasons, but in the end it turns out that such behavior is an inexhaustible source of a wide variety of problems.
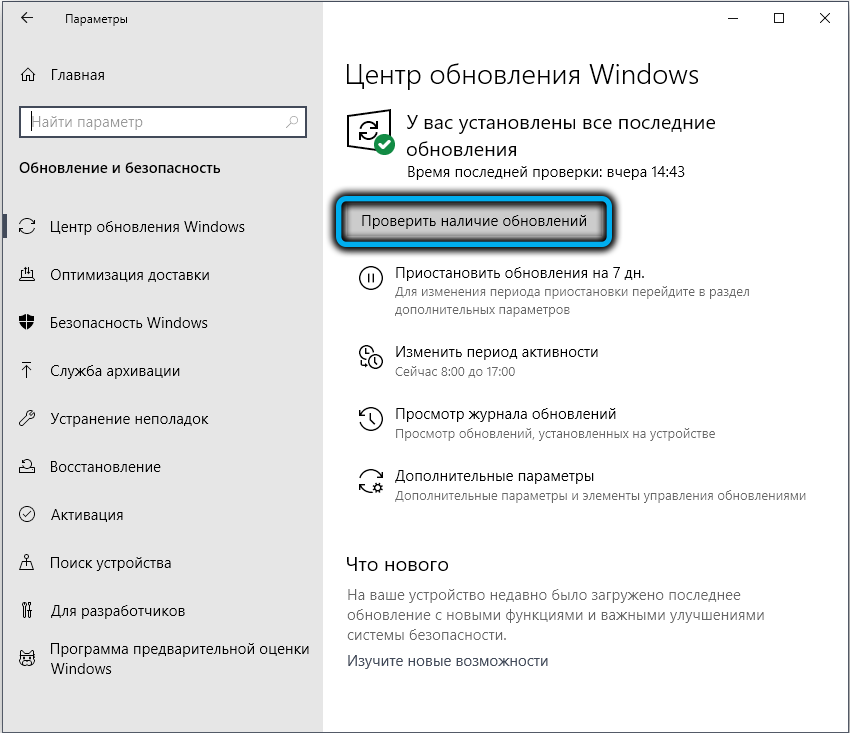
All you need to do to correct the situation is to check the list of updates that are in the queue and waiting for installation, and initiate their installation, even in the background.
An approximate sequence of actions is as follows:
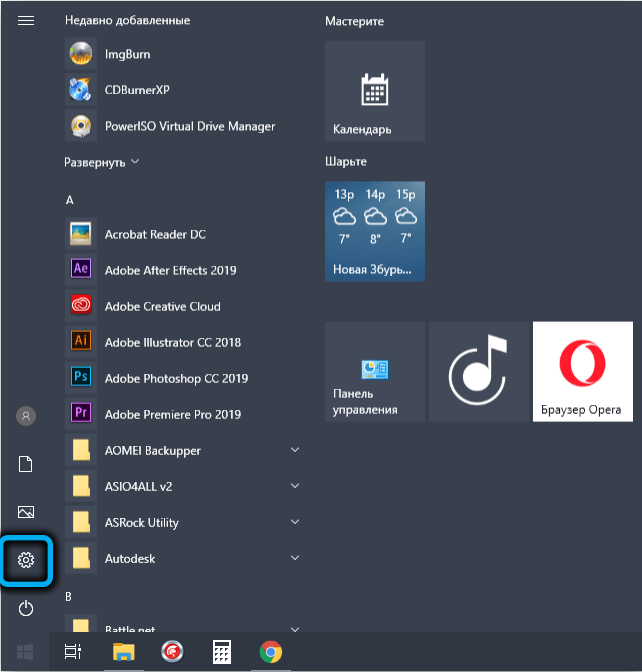
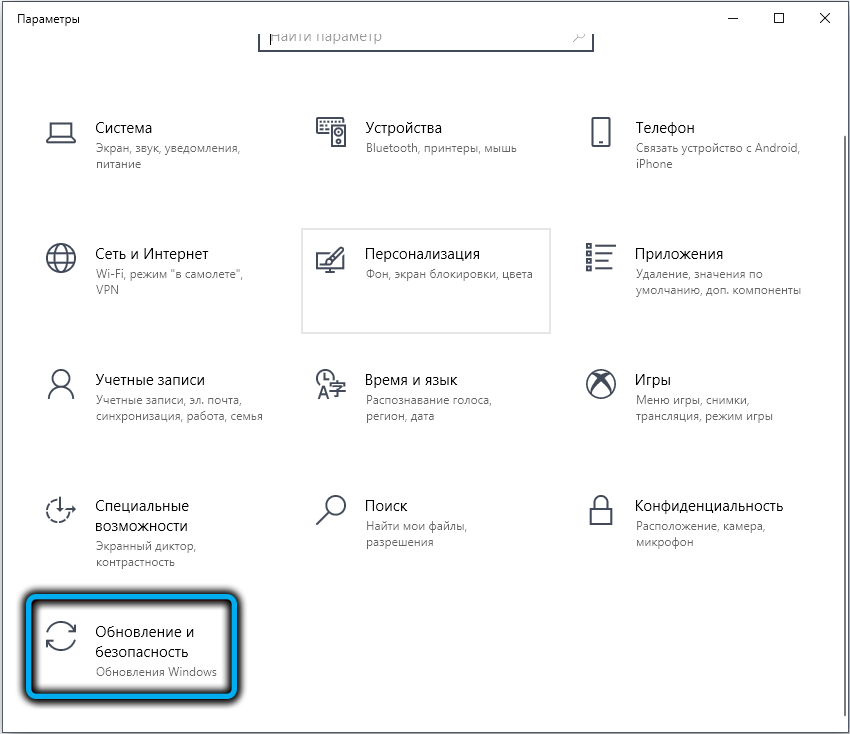
- use the Win + I combination to launch the System Preferences window;
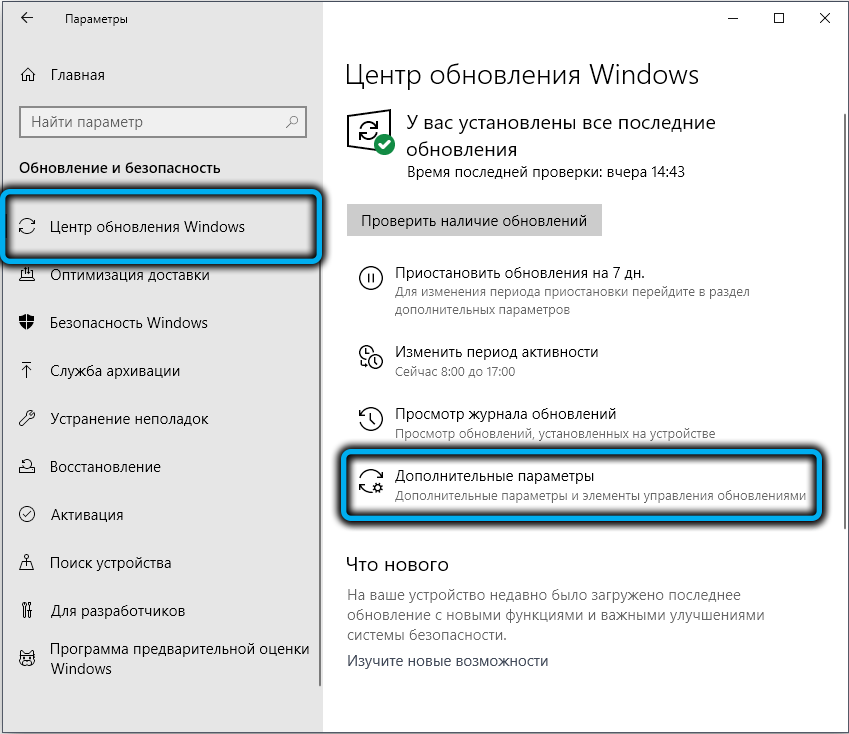
- select the tab “Update and security” (arrow in the form of a circle);
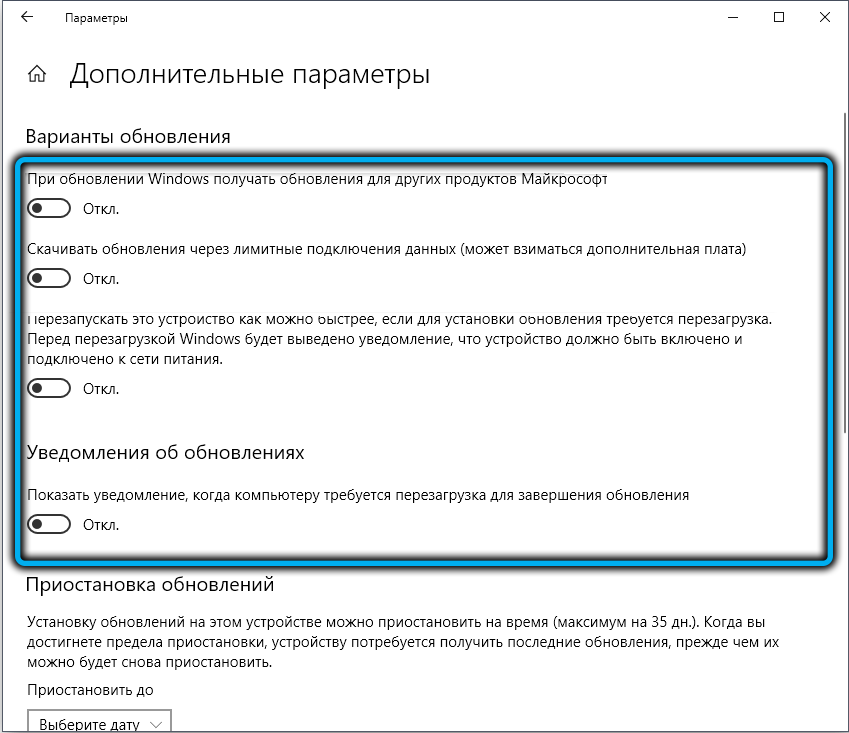
- in the window that opens, select the update method that is best for you and start the process with the necessary parameters (for the entire accumulated list or for individual patches);
- when the process is completed, and it can take a long time (if there are a lot of updates waiting in line), you need to restart the computer.
Verify that the LiveKernelEvent error no longer appears. Otherwise, go to the next item.
Checking with Clean Boot
If a crash, accompanied by the issuance of a LiveKernelEvent message, is caused after installing a third-party program, it is quite obvious that it conflicts with the operating system, and this situation needs to be “resolved” somehow. The obvious way is to remove the problematic software. But what if you need it? Then you can try to boot Windows 10 in the minimum configuration, which should help eliminate the incompatibility at the software level.
Such a boot is called a “clean boot”, and you can do it like this:
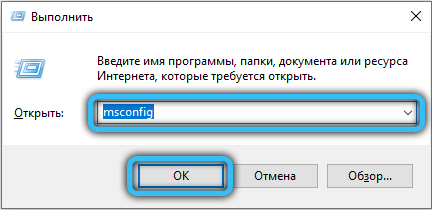
- press the Win + R combination, enter the msconfig command in the Run console field, confirm by pressing Enter;
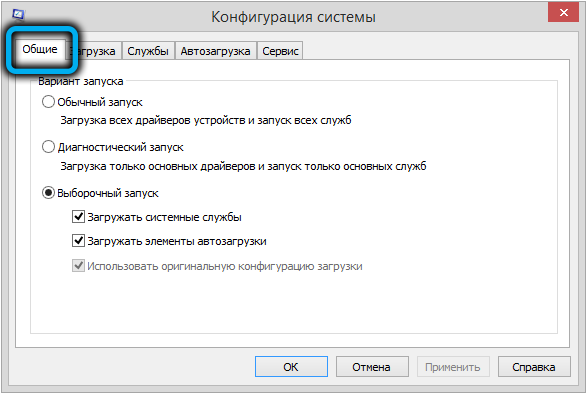
- select the menu item “System Configuration”, and in the window that opens – the tab “General”;
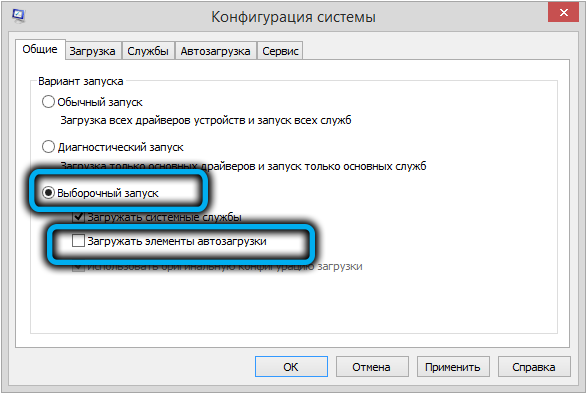
- look for the “Selective startup” section, uncheck the “Load launch item” option;
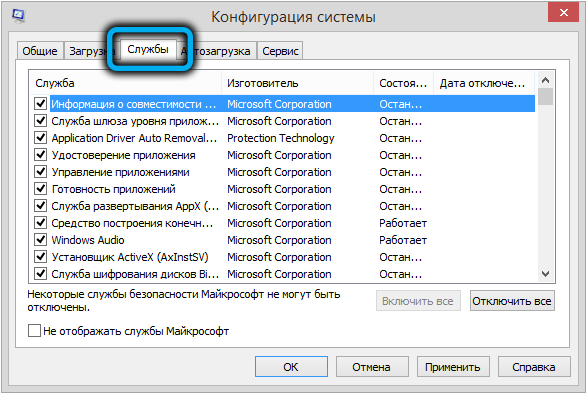
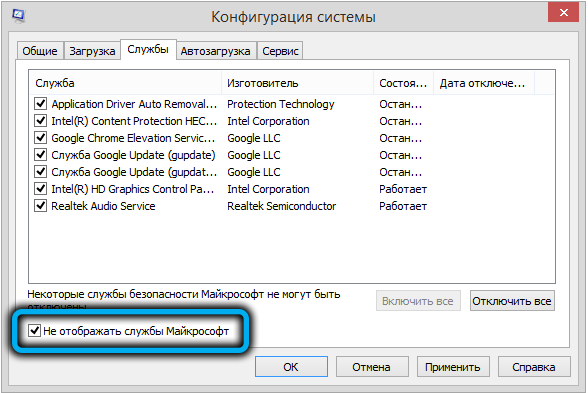
- go to the “Services” tab;
- check the box next to the “Hide all Microsoft services” option;
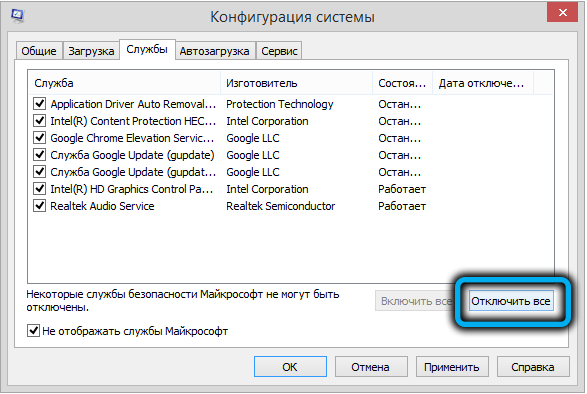
- click on the “Disable all” button;
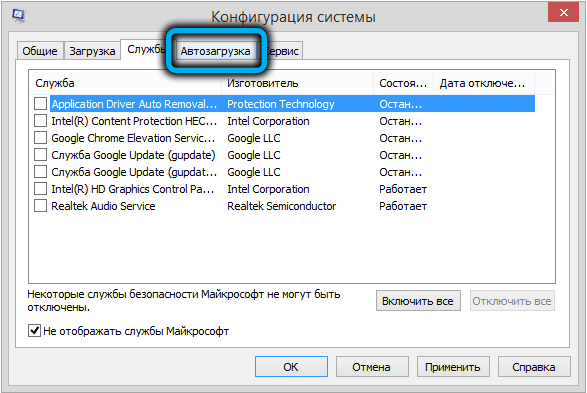
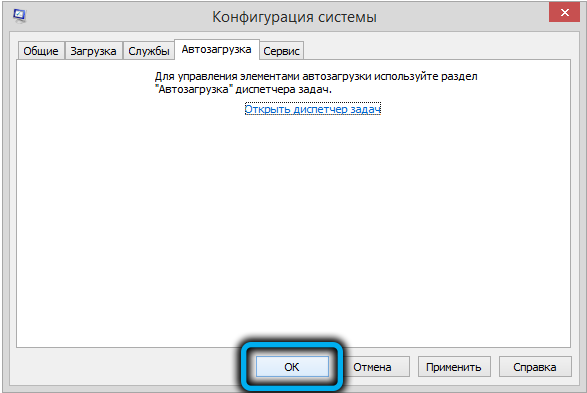
- change the tab again – go to the “Startup” section;
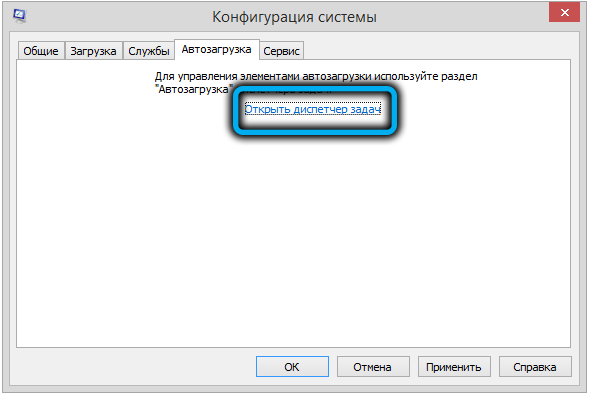
- click on the link “Open task manager”;
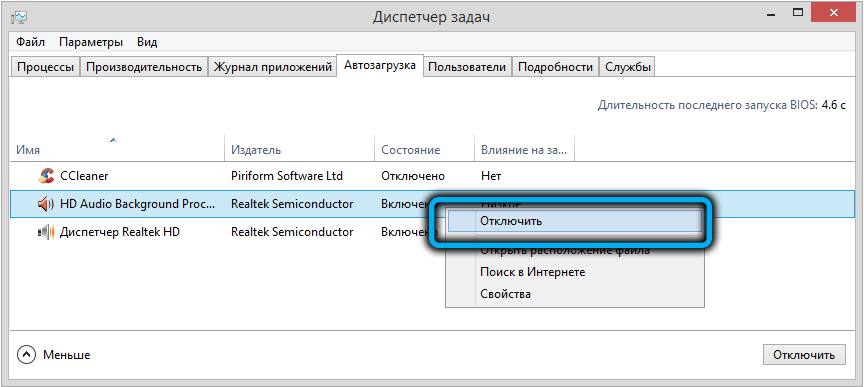
- in “Startup” we remove all the checkboxes, which will prevent the launch of programs installed by the user;
- We confirm all actions, close the windows, restart the computer.
Reinstalling the graphics card driver package
And yet, the most common reason for the appearance of the LiveKernelEvent error with code 141/144 in Windows 10 is the incorrect processing of the graphics drivers responsible for the interaction of the operating system with the video card.
The problem is solved by manually reinstalling the drivers with the obligatory removal of the old ones. Here’s how it’s done:
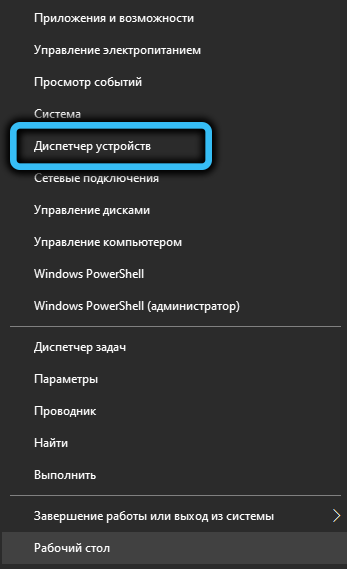
- press the combination Win + X;
- select “Device Manager” in the list that appears;
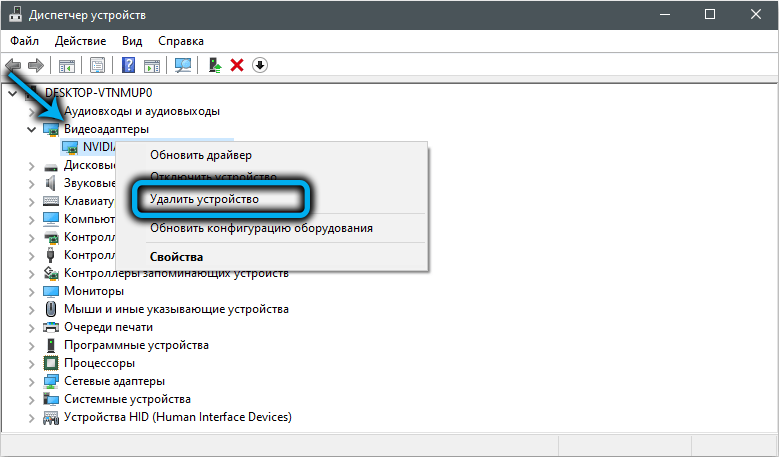
- look for a branch with a graphics adapter in the list of devices;
- click on it and in a new window, click the “Delete” button.
It is also advisable to remove all files associated with video card drivers by entering the phrase “Applications and features” in the search field and clicking on the line of the same name in the list of displayed results.
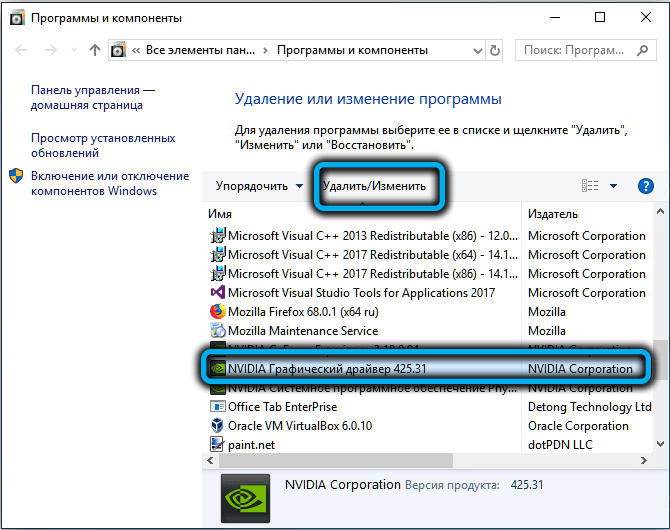
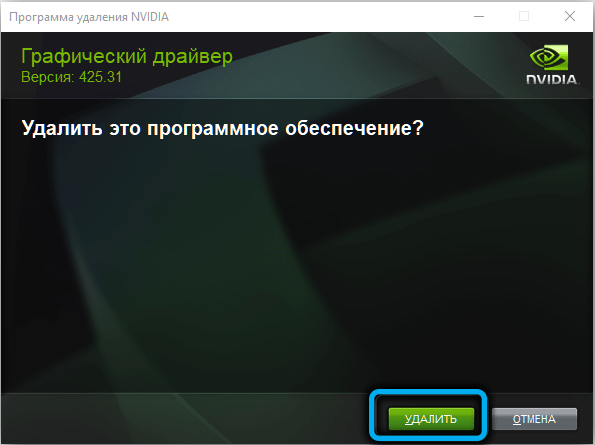
After that, in the browser, we type the address of the official website of the video card manufacturer and download the package of the latest drivers for your graphics adapter model from there. It remains to install the package manually by running the appropriate executable file.
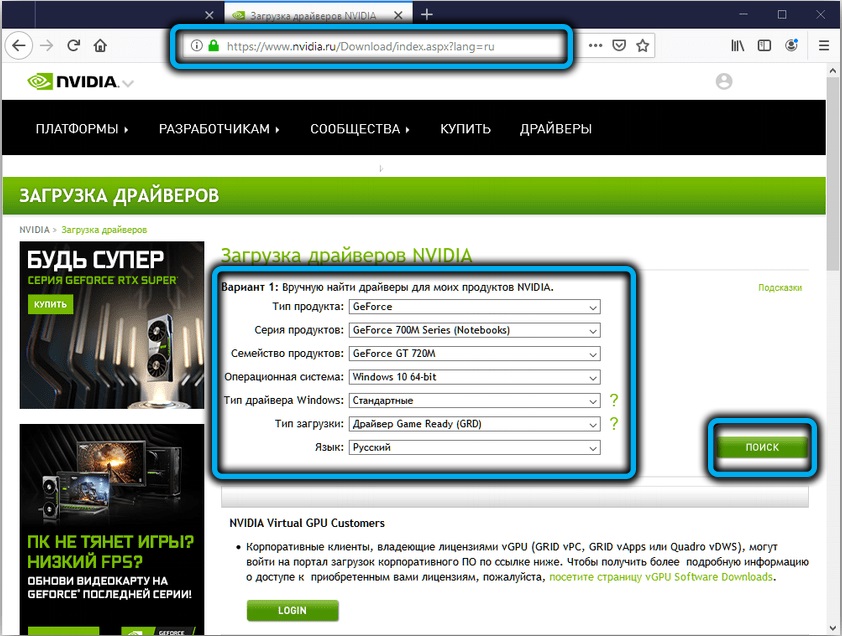

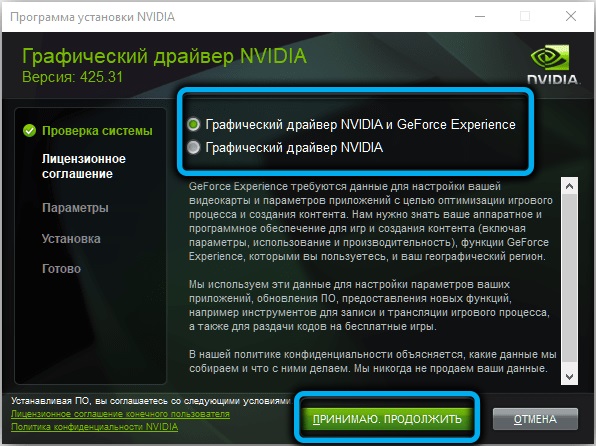
If this method was also unsuccessful, you can try to roll back the system to a date preceding the first appearance of the error. Usually a system restore solves most problems, it is important to know when the problems started. Of course, you will not be able to roll back the system if there is no backup in the list that precedes the desired date.
