Each user sooner or later faces the need to edit audio files, for example, it may be necessary to trim a recording, cut out a fragment from it, etc. Most often these are simple actions, but special software is also required to perform them. Among the popular audio editors that are not overloaded with unnecessary functionality, one of the most convenient programs is Audacity.
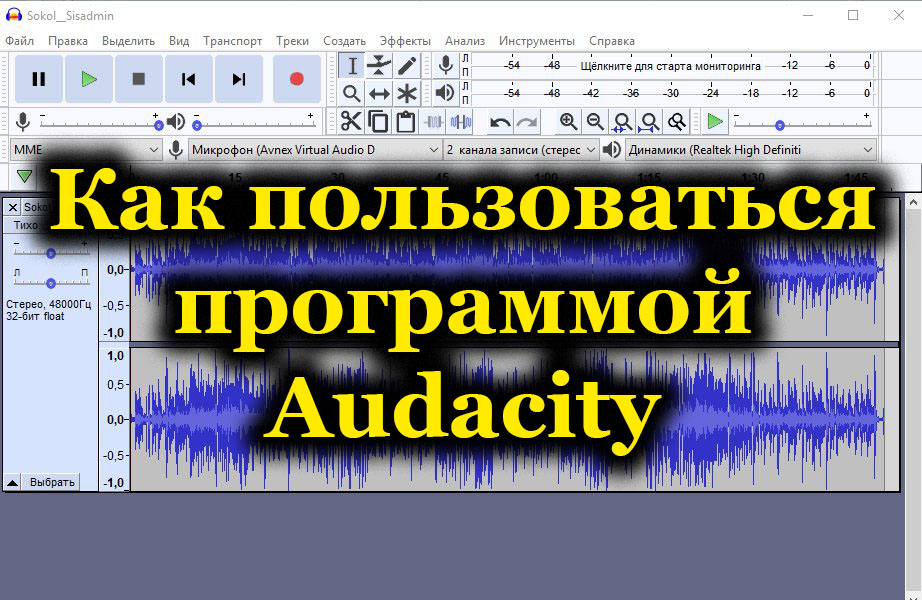
It is a free multi-platform editor, simple yet equipped with advanced tools for working with audio files. Using the functionality of the program, you can record sounds, add effects, trim tracks, merge audio, improve the quality of audio recording, and much more. With Audacity, users often create podcasts, mix musical compositions, digitize audio from analogue media, or simply cut music to make a ringtone.
Let’s consider the main features of the program, how to work with it and what you can do using the software toolkit.
Contents
Installing Audacity
You can download the program for Windows, Mac or Linux for free on the official website . The installer is also available for download from the official Linux distribution repositories.
The software is installed in a standard way – launch the installer, select the installation language and simply follow the instructions of the Audacity Installation Wizard.
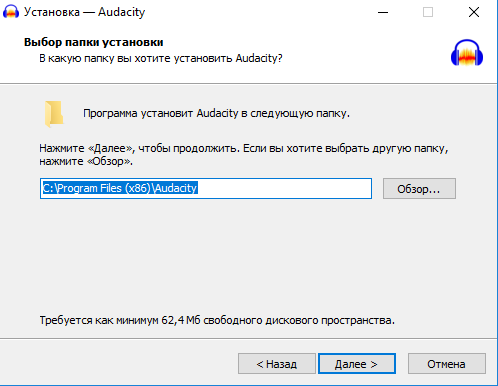
During the installation, we agree to the terms of use and choose a different path to install the application, if we are not satisfied with the default one.
Upon completion of the procedure, you can find the program in the menu, in addition, a shortcut will be created on the desktop, if this task was selected when the software was installed.
Program interface
The editor offers a simple and convenient interface in Russian, and, despite the large number of tools, explanatory labels appear when you hover the cursor, so in the case of Audacity it is not difficult to figure out how to use the software.
The main menu is traditionally located in the upper part of the window, which opens access to all the program’s options, below there are groups of tools, in the central part of the interface – the work area, where the tracks you are working with will be displayed, and in the lower part – the status bar.
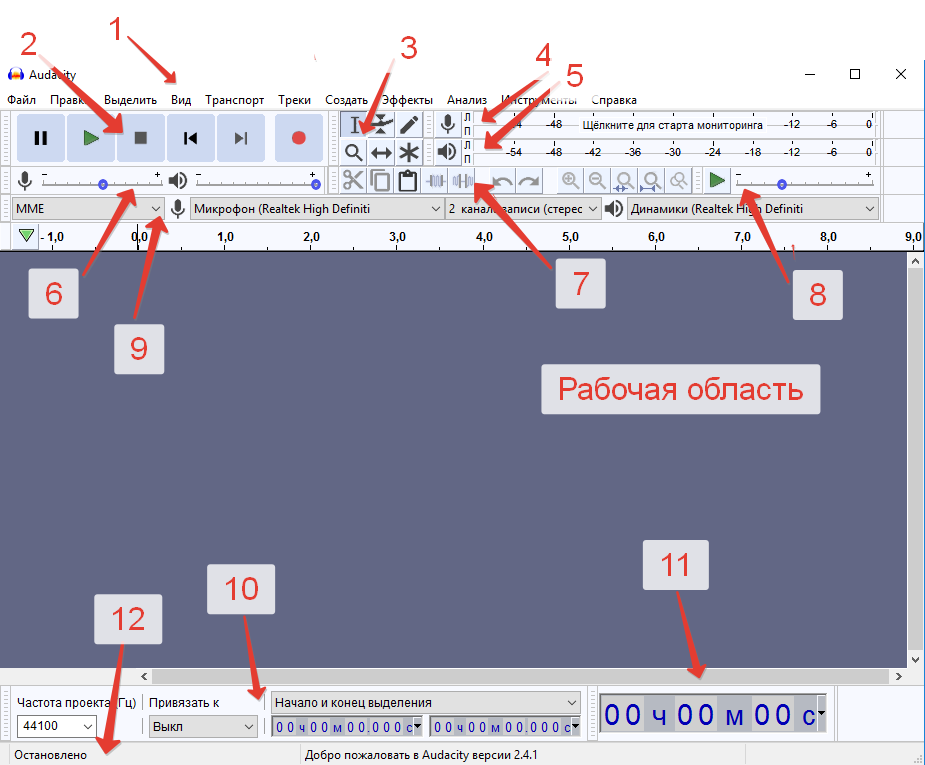
- Menu bar;
- audio control panel with buttons for record, play, pause, stop playback, rewind;
- processing tools – selection, envelope, drawing, scaling and others;
- recording level indicator (the ability to control the sound level with the left mouse button and change the refresh rate of the PCM);
- playback level indicator;
- the panel of mixers, adjustments allow you to control the input and output parameters of the sound card (the regulator on the right – to set the sound level at the input, on the left – at the output), from the drop-down menu you can select the input device for sound recording;
- a navigation bar from which you can quickly access frequently used tools (cut, copy, paste, scale, etc.);
- playback panel at a given speed;
- device toolbar (you won’t be able to switch between devices while one of them is in use);
- selection tools by means of which you can track the start and end time of the segment, if a fragment of the audio recording was selected;
- displaying the current position of the sound;
- a status bar that displays a message about recording, playback, and hints when you hover over buttons.
How to record audio
The program allows you not only to export and process audio files, but also to capture audio from a microphone, mixer and digitize audio from cassettes and vinyl. In the case of some sound cards, it is possible to record streaming audio from the network.
How to record audio from a computer using Audacity (using a microphone as an example):
- select the microphone in the recording devices tab, start monitoring it on the top toolbar;
- press the “Record” button (the button with a red circle) to capture sound from the microphone;
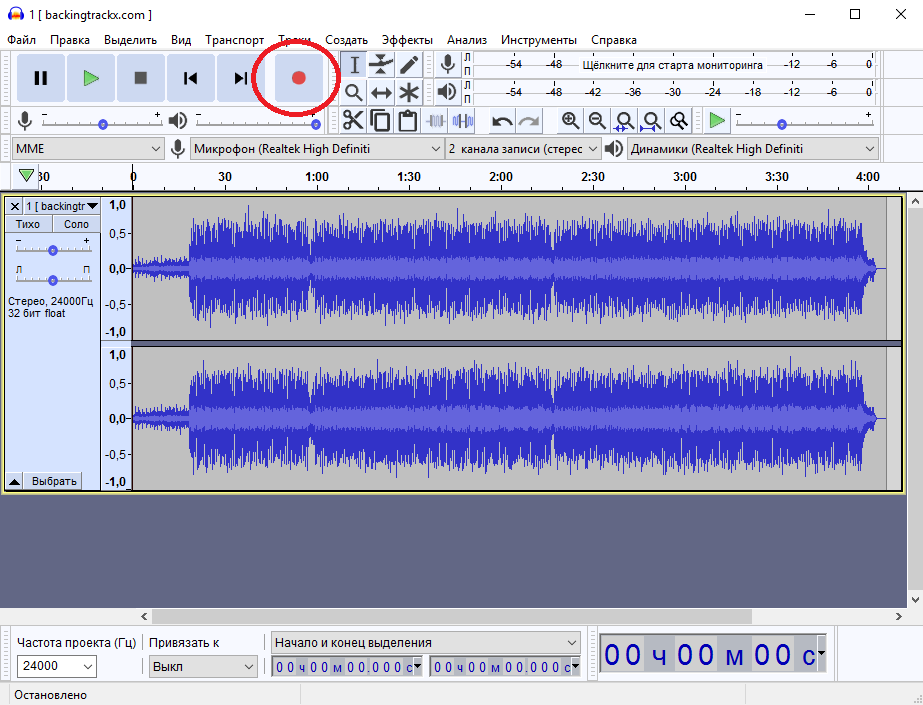
- to stop recording, press the yellow Stop button or the space bar on the keyboard. There is also a pause in case the recording needs to be paused.
Audio track processing
The audio track in Audacity visually reflects the audio recording, it consists of several elements:
- the timeline allows you to see the duration of the track and the selected fragments;
- properties of the audio track – here you can apply various actions to the audio recording (adjust the volume, balance, close the track, change the title, etc.);
- scrubber marking the current position;
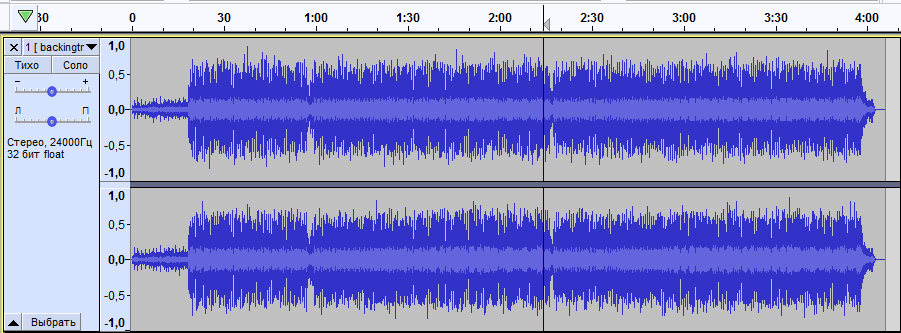
- the audio track shows the change in the audio signal.
Audacity allows you to create and edit a project with multiple audio tracks. The second and all subsequent ones will be located under the first, after they are opened in the workspace. Tracks can be moved and collapsed, if there are many of them, in the working window.
Кроме того, в Audacity вы сможете как убрать шум, ненужные звуки, паузы из песни, так и отредактировать уровни звуков (с помощью ползунков усиления и баланса), чтобы музыка не заглушала голос, или добавлять многочисленные эффекты. Возможности программы расширяют дополнительные модули.
Добавление музыкальных файлов в Audacity
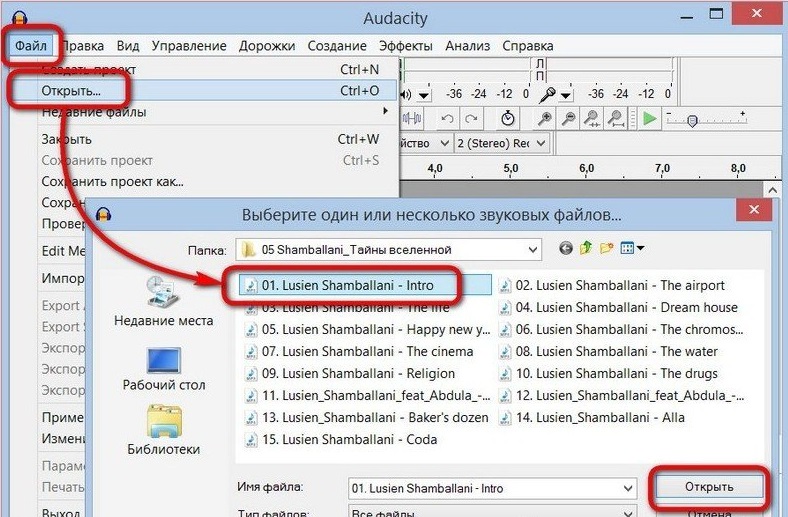
Перед тем как приступать к редактированию трека, его сначала нужно добавить. В этом Audacity мало чем отличается от любой другой программы, работающей с файлами разных форматов. Выполняем следующие действия:
- жмём «Файл» – «Открыть» (Ctrl+O);
- находим на компьютере через открывшийся проводник нужный файл, жмём «Открыть» или клавишу Enter;
- программа загрузит трек, после чего он отобразится в рабочей области в виде звуковой дорожки.
Если на монтажном столе уже есть один аудиофайл, для добавления второго следует использовать команду «Импорт» – «Аудио…» в меню «Файл» (или Ctrl+Shift+I), тогда элемент откроется второй звуковой дорожкой в том же проекте. Если повторно применить «Файл» – «Открыть», объект будет открыт уже в новом окне. Также можно добавить аудиофайл путём перетаскивания его из проводника в окно программы.
Как обрезать песню в Audacity
С помощью программы легко обрезать музыку, например, если вам нужно убрать долгое вступление или концовку, чтобы затем поставить мелодию на звонок, или в других целях.
Как обрезать музыку в Audacity:
- открываем в программе аудиофайл;
- выбираем участок, предварительно активировав инструмент «Выделение» (используя инструменты масштабирования или начало и конец выделения в строке состояния, это получится сделать точнее, менять масштаб можно путём прокрутки колёсика мышки с одновременно зажатой клавишей «Ctrl»);
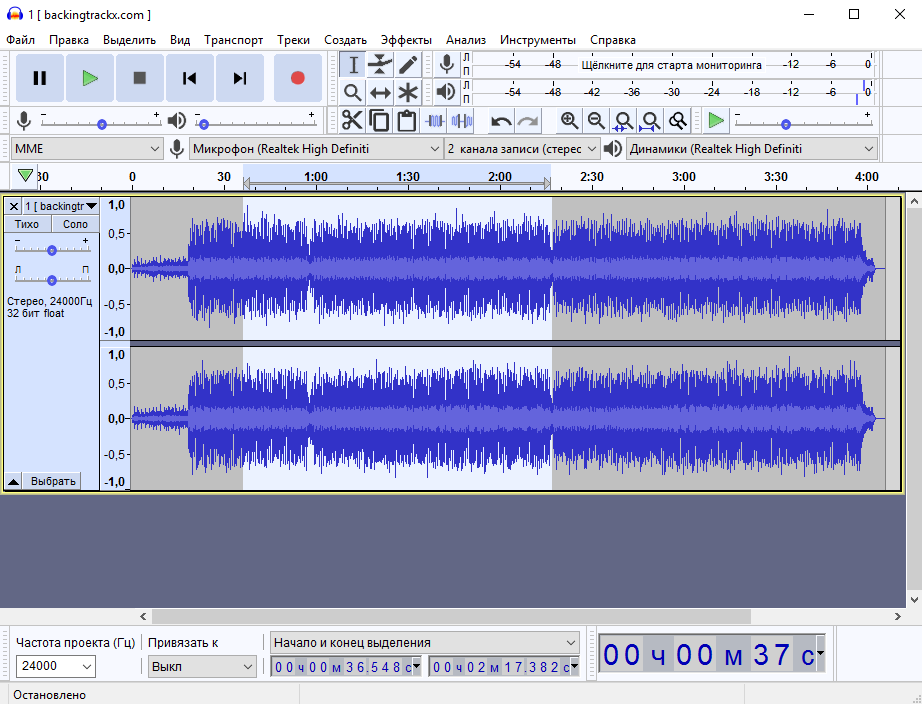
- выбранная область будет подсвечена, прослушиваем аудио, чтобы понять, что хотим оставить;
- жмём «Обрезать аудиоданные вне выделенного» (или Ctrl+T);

- в рабочей области останется только нужный отрезок аудиозаписи.
В Audacity можно как обрезать ненужные части, выделив нужный фрагмент, так и отметить, а затем просто удалить те, что не нужны, а сохранить оставшийся.
Как вырезать фрагмент из песни в Audacity
If you need to remove some extra parts from the track, to select it, repeat the steps that are described in the instructions for cutting a song in Audacity, only now we select those fragments that are not needed. Having selected the unnecessary part, use the “Cut” tool in the form of scissors (Ctrl + X) or press the Delete key on the keyboard.
Now let’s see how to split a track in Audacity into several parts:
- to break the track into parts, select the fragments one by one, cut out each of them;
- in the “File” menu, select “New Project” (Ctrl + N);
- in a new window of the application, insert the cut fragment using the “Paste” button (Ctrl + V);
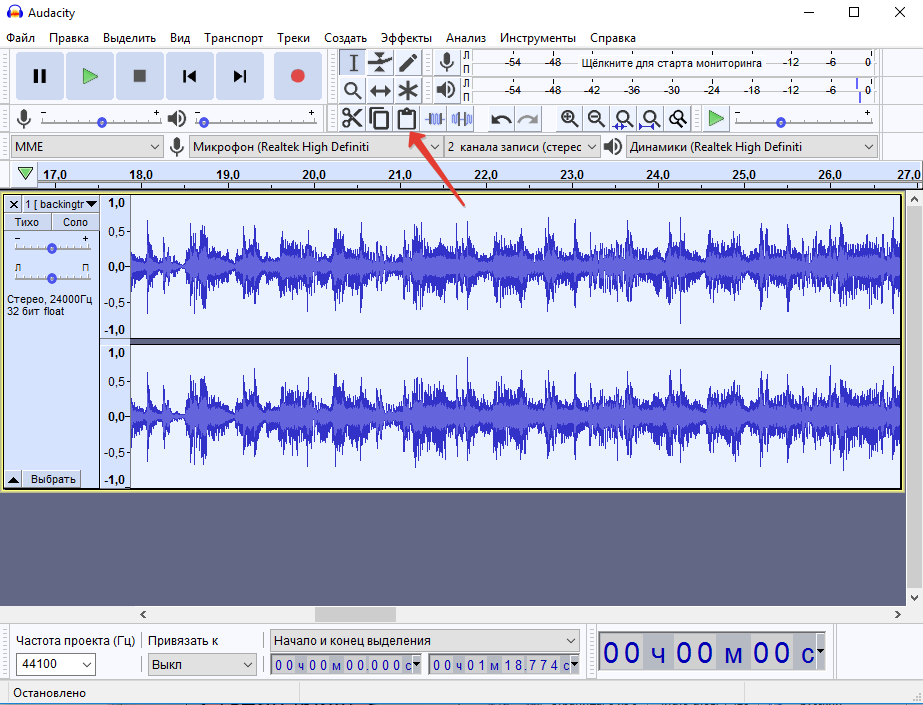
- each of the fragments opened in separate windows of the program is saved in turn or exported to an audio file.
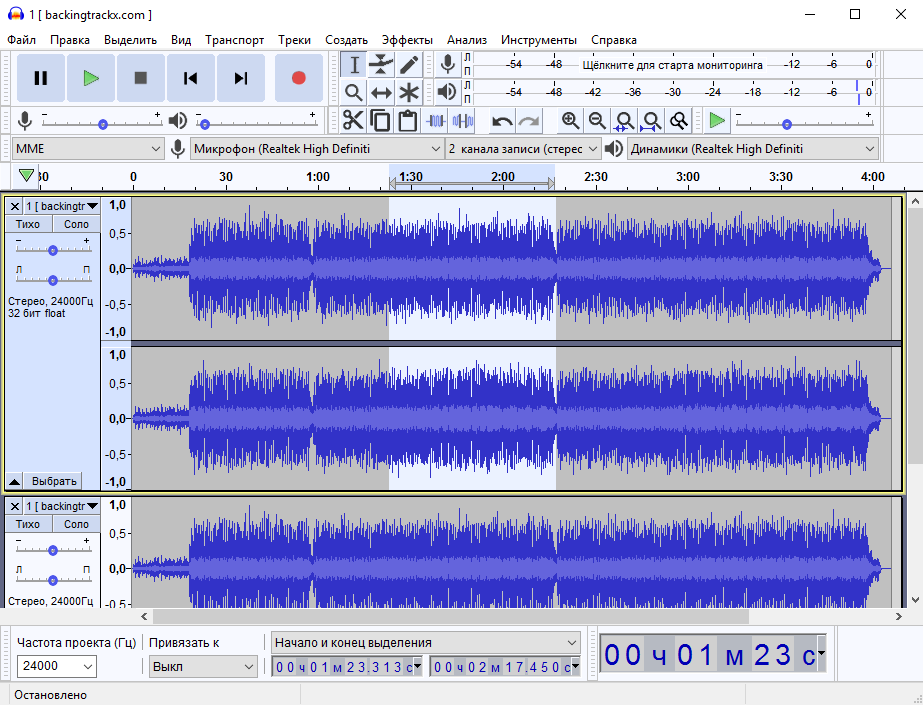
How to merge multiple songs in Audacity
Using the program, you can also mix from tracks or their fragments, as well as copy individual parts of the composition and paste them into the audio track, for example, to repeat the chorus of a song. Putting together different tracks or separate parts is easy.
How to join songs in Audacity:
- open two audio recordings in one window (we first import one file, then the second, the easiest way is to drag it from the explorer);
- copy the entire track or selected fragments and paste them into another composition using the Copy (Ctrl + C) and Paste (Ctrl + V) tools.
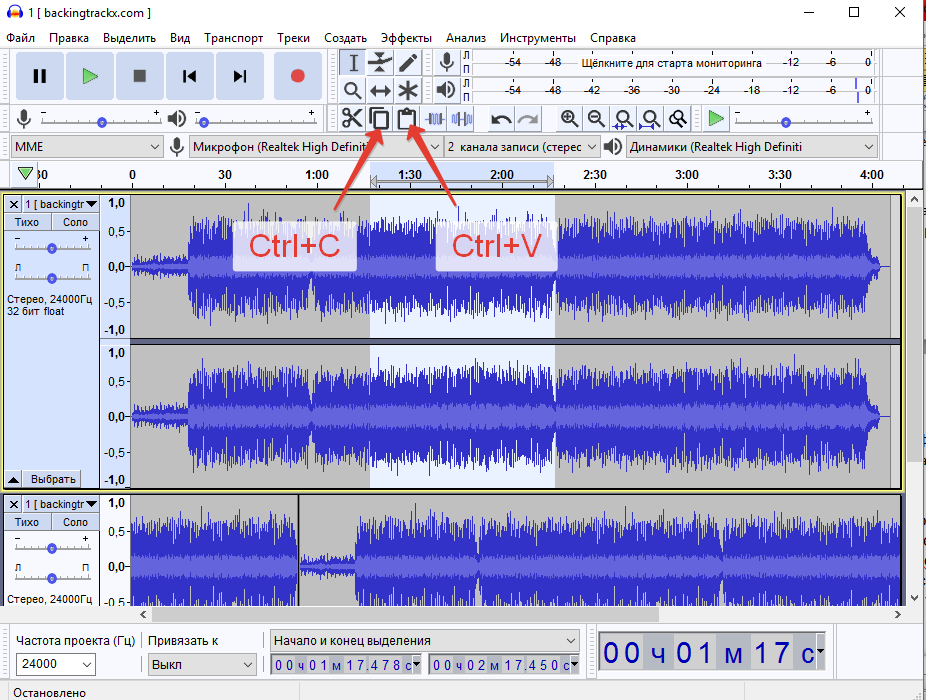
If convenient, you can use the Edit menu to perform actions.
Saving the result
If you just save the project, the result will be saved only as a program file, not an audio file. To get the finished file in audio format, you need to export it.
Let’s see how to save an object in Audacity:
- in the “File” menu, select “Export” – “Export to MP3” (or choose another of the available formats);
- choose the path for saving, assign a name to the file and specify other parameters, in particular the bit rate;
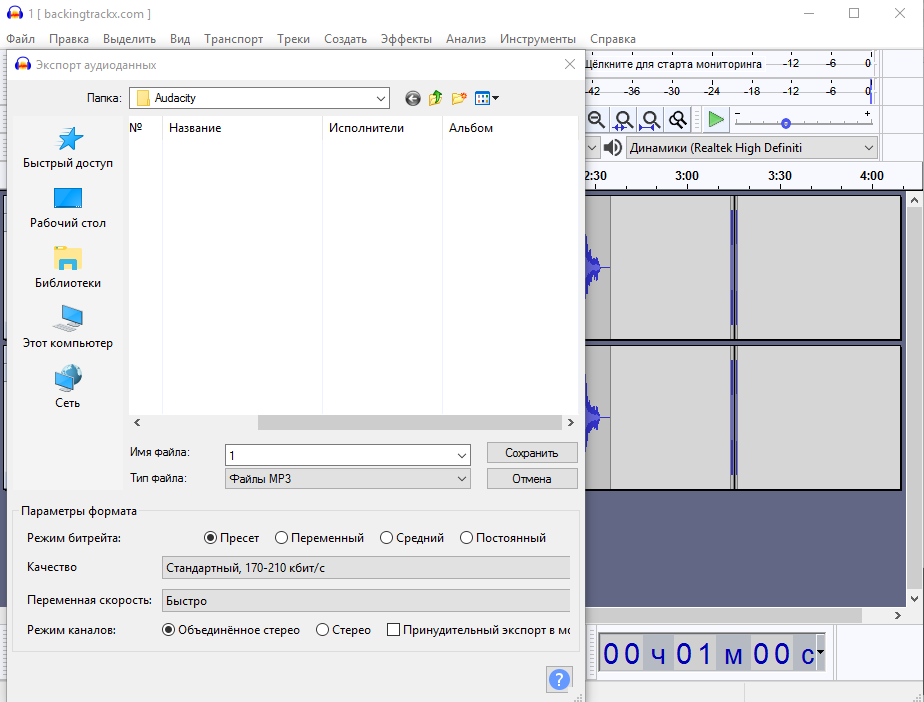
- press the “Save” button, edit the metadata if necessary (this information is displayed as a creeping line in the players) and confirm the action;
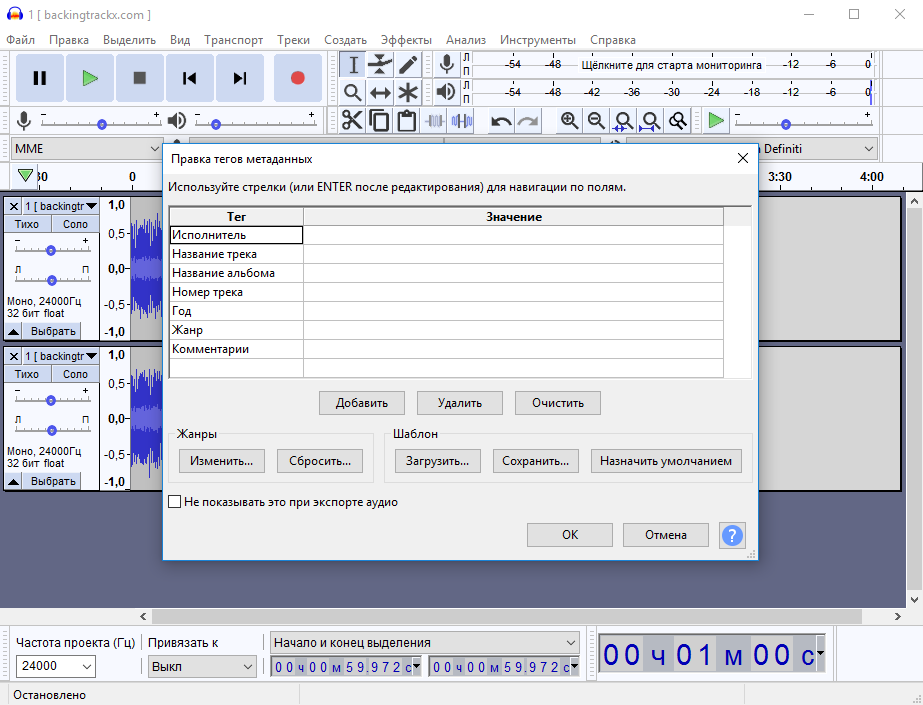
- the file will be exported to MP3 or whatever format you specify.
Despite the fact that Audacity is a fairly powerful audio editor and the program’s capabilities allow you to perform many interesting actions with an audio file, it is very easy to use. With all its advantages, the software is also distributed free of charge. Have you already appreciated the functionality of Audacity? What other good audio editors are you familiar with? Share this in the comments.