There are several possible scenarios in which we may want to view the photographs we have taken with our Android smartphone or tablet on a large screen, for which we try by different procedures to make these photos appear on the television or computer screen.
And the truth is that with the changes that the digital age has brought with it, during family gatherings or with friends it has become out of fashion to take out the huge and uncomfortable paper photo albums, which have been fortunately replaced by the galleries of digital photos that are stored even on the same device with which we have taken those captures.
Many users, in order to view these photos on the television screen, usually resort to complicated procedures, such as trying to get a cable that allows the connection between a smartphone or a tablet and the TV, something complicated especially when our TV does not It has an HDMI or USB connection. Then they resort to recovering the material with the PC and then transferring it to television, through various and complex processes.
Well, this is no longer necessary, since we can carry out the visualization of these photos in a really simpler way, and at the same time be able to have absolute control of the images that we want to show and those that we want to hide.
To do this, it is best to stream photos to the PC or laptop or use our Chromecast to view them on the TV screen , with which in just a couple of seconds we can enjoy our photos on the large screen.
Option 1: Streaming Photos from Android to PC
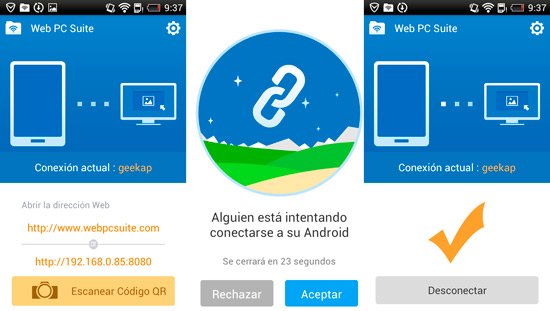
One of the best alternatives to be able to view the photos that we have stored on our Android device on the screen of our PC is through streaming, which we can carry out with the help of the fantastic Web PC Suite – File Transfer application, the which we can download for free from this link, and once installed on our smartphone or tablet perform the following steps:
Step 1: The first thing we must do is make sure that both the Android smartphone or tablet, as well as our desktop computer, laptop or smart TV, are connected to the same Wi-Fi network.
Step 2: Once we install the application on the device, we run it.
Step 3: From the PC or Smart TV, in the web browser, we go to www.webpcsuite.com .
Step 4: In order to authenticate using the QR code provided by the app, we must hold the camera of our Android device in front of the PC or Smart TV screen. This simple procedure will allow the smartphone or tablet to connect to the PC or the Smart TV, and we can start enjoying our photos on the big screen.
Step 5: On the website that we open in the browser, we must click on the “Gallery” icon , which will show all the images that we have stored on our Android device. Good news is that to view them we must select them from our smartphone or tablet, with which only the photos that we want will be seen on the PC or Smart TV screen.
It is important to note that the Web PC Suite app has excellent performance, since it allows you to view the photos really quickly, since they load quickly and you can navigate between the different images quickly.
Option 2: View photos on TV using Chromecast
In the case that we have a Chromecast device connected to our television, and at the same time the photographs are backed up through Google+, something you really should do, then we can use the Google Photos application to view them on TV through the Chromecast, in a totally direct way, of course with the Internet connection activated.
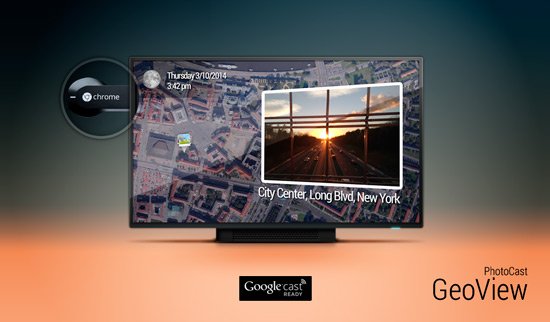
Now, in the case of wanting to view the photos that we have stored inside the Android smartphone or tablet on the TV, what we should do is use an extra tool, for which the ideal is to opt for the application called PhotoCast for Chromecast, which we can download from this link.
Of course, for this to work, the Chromecast device must be configured and connected to the same Wi-Fi network. For which, once the application is installed, we start it and connect it to the Chromecast.
After this, we only have to look for the image albums within the PhotoCast app, and press from our smartphone or tablet on the photo that we want to be displayed on the big screen on our television.
It should be noted that the application allows you to choose the display mode on the screen, so we can choose to display the images one by one in full screen or display them as a magazine. It also includes an option to start a slide show.
Option 3: View photos on PC or HTPC with XBMC
If we have an HTPC connected to the television in our home, or we want to view images through our PC screen, the ideal thing is to use the XBMC program, which allows us to have organized and quickly and easily access all the audiovisual content from our computer or HTPC. Best of all, we don’t need a Wi-Fi network in this case.
Now, in order to use this method, we must carry out the following steps:
Step 1: In principle, as we mentioned, we must have the XBMC program installed on our PC or HTPC, which we can download from this link.
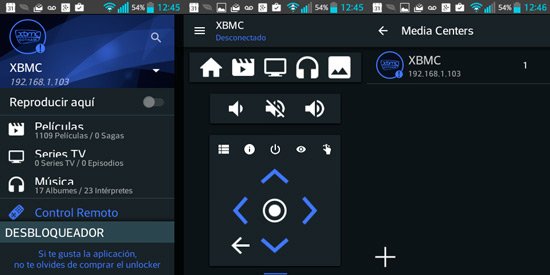
Step 2: On our Android smartphone or tablet, we must download and install the application called Yatse, which we can find for free at this link.
Step 3: Now it is time to interconnect the Android device with the PC or HTPC, for which it is necessary that both computers are connected to the same LAN network.
Step 4: What we will do is start Yatse on our Android device, and it will immediately ask us to enter the IP address of the home network , which can be found in the “Info” section of the XBMC, or through “Centro de Networks and Sharing Resources ” of Windows.
Step 5: Once the IP address has been entered, both computers will be interconnected automatically.
From this moment we can begin to enjoy all the content, including the photographs, that we have stored both on the smartphone or tablet, as well as on the PC, on the big screen of our TV or monitor, through the control remote provided by Yatse in conjunction with XBMC.