From time to time, there comes a moment when you get bored with the standard design of the Windows operating system. You can, of course, change the desktop wallpaper or put a different background image, but that really doesn’t change much. Replacing the cursor will become much more interesting, because the standard pointers built into the operating system are rather boring and monotonous. Moreover, for this it is not necessary to install various programs to change the appearance of the system. All you need to do is download the archive, unpack it, and apply the downloaded package in the settings. Nothing complicated at all. Fortunately, there is a huge number of modified cursors for every taste and color that can be downloaded from the Internet and installed on your computer or laptop.
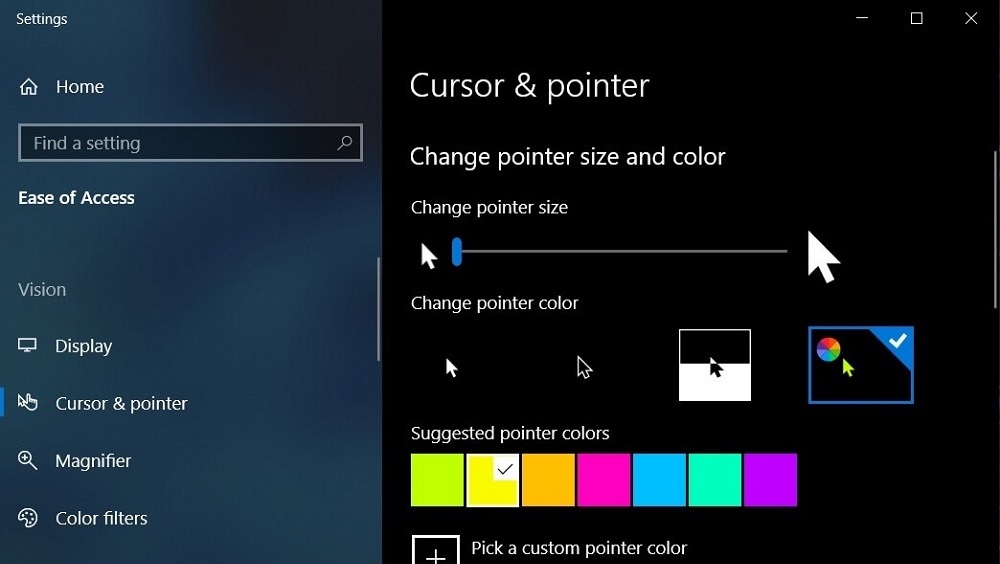
In this article, we invite you to take a detailed look at how to change the cursor in the Windows operating system. We will also provide instructions on how to change its size in Dota 2 and learn how to hide it in Dark Souls.
Contents
Replacing the system cursor
For starters, it’s worth mentioning that cursors can be animated and static. Animated files are distributed as .ani files, while static files have a .cur extension. Each individual arrow is a separate file. That is, you can change the whole package of cursors by installing, for example, such as in Lololoshka, while all the arrows in the system will change, or you can replace them one by one by combining several packages. You can download them as an archive with a special installer file, thanks to which you can integrate them into the system with two clicks of the mouse.
Now we will consider two options for replacing: replacing all cursors or each separately. The required files and software for each of the options are exactly the same, only the procedure is different.
Option 1. Replacing all cursors at once
The easiest and fastest way to change the look of your Windows. Just a couple of seconds of time, and your system will sparkle with new colors.
- Go to the site from where you download the archive you like with the arrows for the mouse. A very good resource is the WinScreen project, here is a link directly to the page with cursors (http://www.winscreen.ru/cursors/). It indicates that they are compatible with Windows 10 of all editions, but in practice they work well in Windows 8, 7 (the installation instructions are similar). But with Windows XP they are partially compatible. That is, the basic parameters will work, but shadows and anti-aliasing will not. But in most cases this is not even noticeable by eye.

- Download the archive with the package of cursors you like, unpack it into a folder convenient for you.
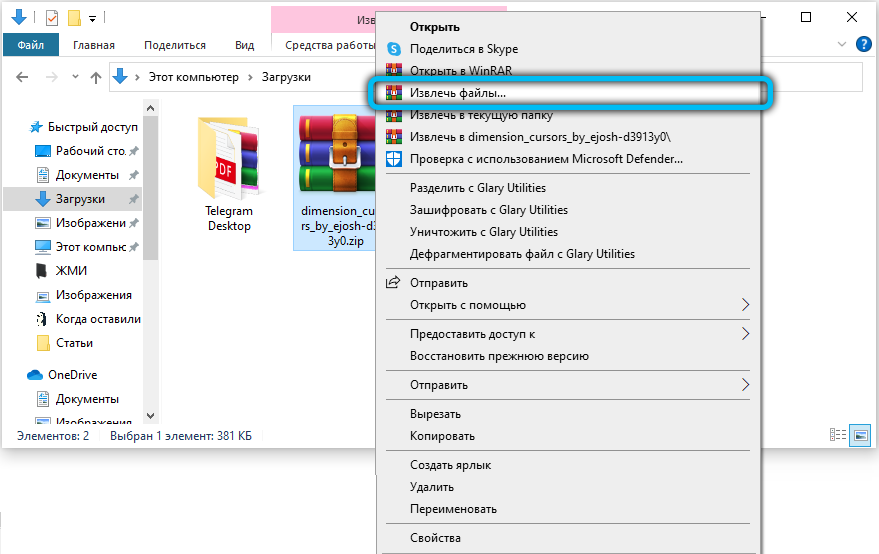
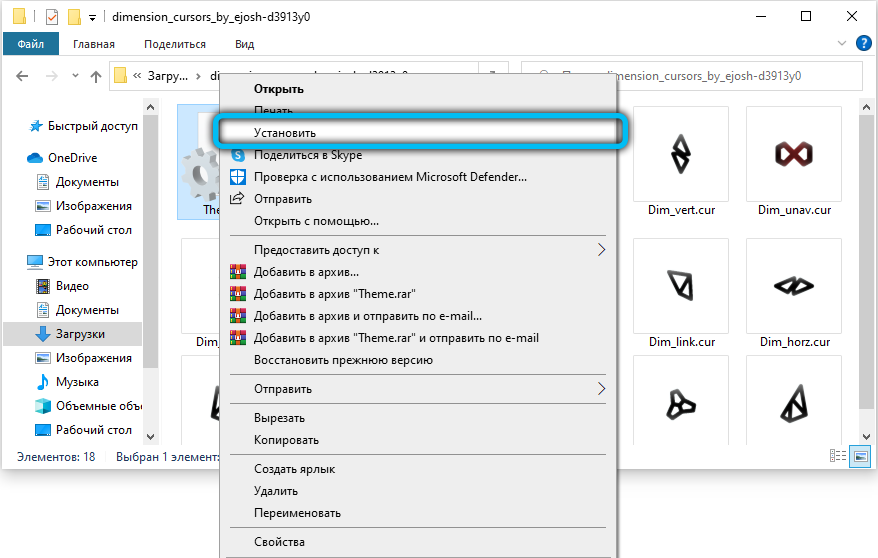
- Open this folder, in it you will see a list of files with the .ani or .cur extension, as well as files for installing them with the inf extension.
- Right-click the inf file and select Install. If the system asks to confirm the installation, agree.
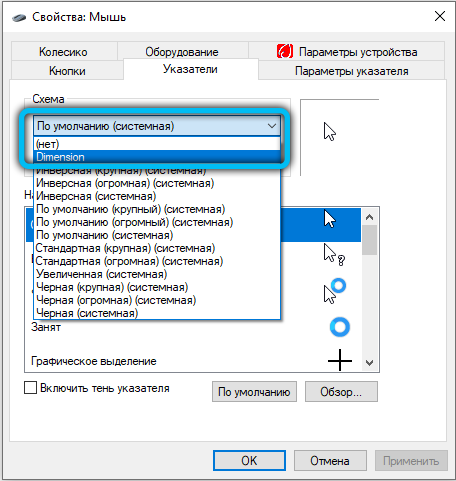
- Go to the “Control Panel” (depending on the version of Windows, click Start – Control Panel or right-click on the Start button and select the appropriate section) – Mouse – Pointers.


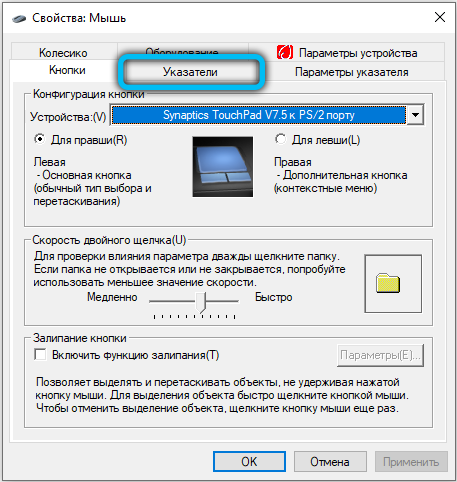
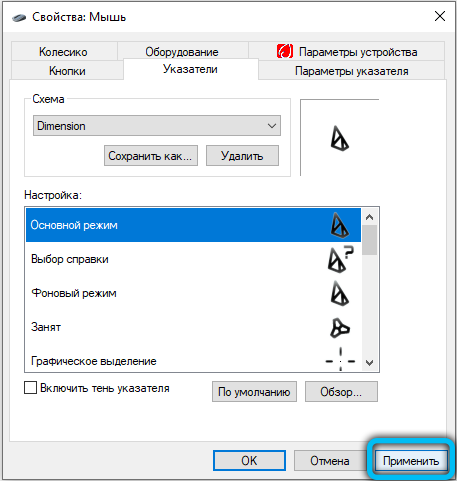
- In the “Scheme” pop-up window, select the package with the appropriate name and click Apply – OK.
- Enjoy your new cursor.
Option 2. Replacing cursors individually
A more painstaking option that allows you to create your own schemes and change only those items that are necessary. To do this, follow these steps:
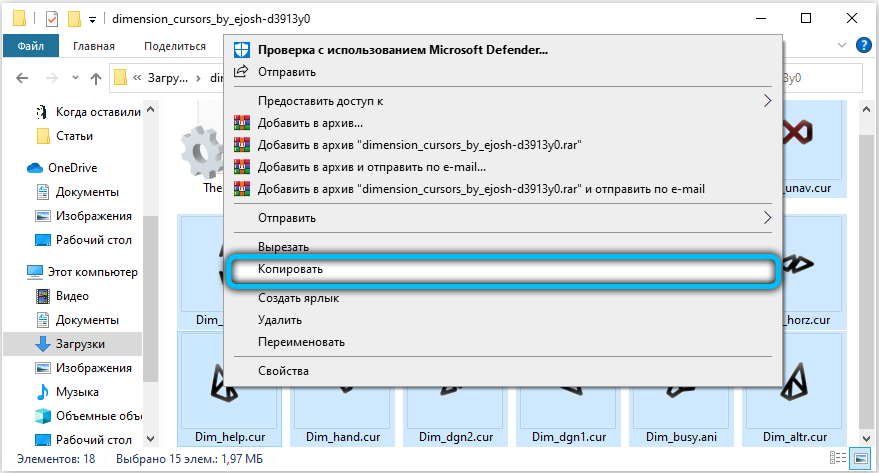
- Download the archive with cursors you like, unpack it to a convenient place on your computer.
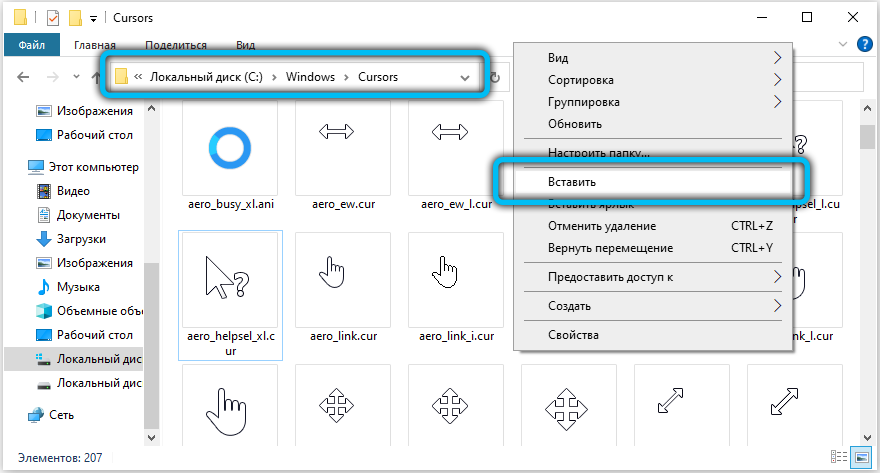
- Select all files in the folder and copy them to C: Windows Cursors.
- Go to Control Panel – Mouse – Pointers, where in the “Settings” window you can see the current cursor settings.
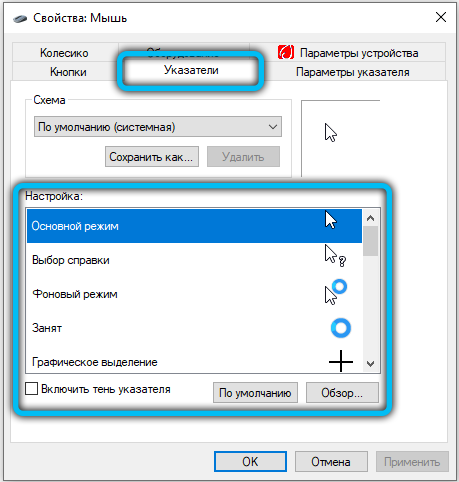
- Highlight the item you need, for example, “Main mode” or “Graphic selection”, after which the “Browse” button is activated.
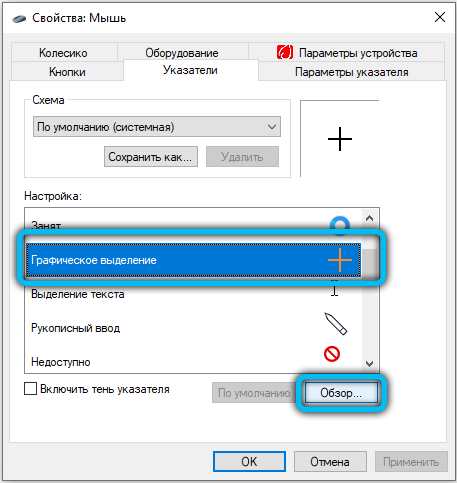
- Click on it and select the desired cursor in the folder that opens; confirm your choice by clicking the “Open” button.
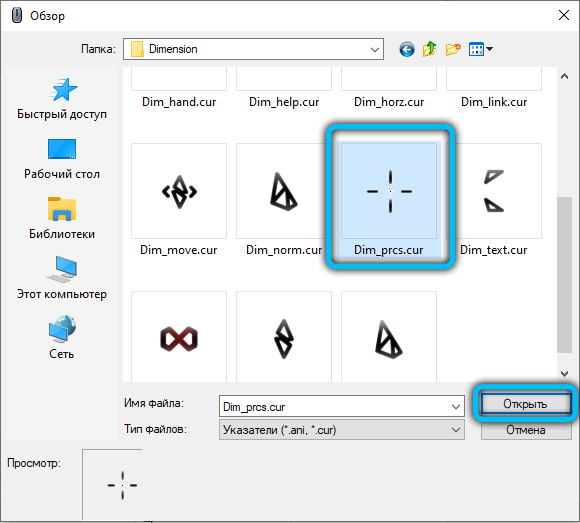
- Change the items that interest you the most.
- If you want to save the current settings scheme, click the “Save as” button, enter the name of your scheme. You can also just click Apply – OK.
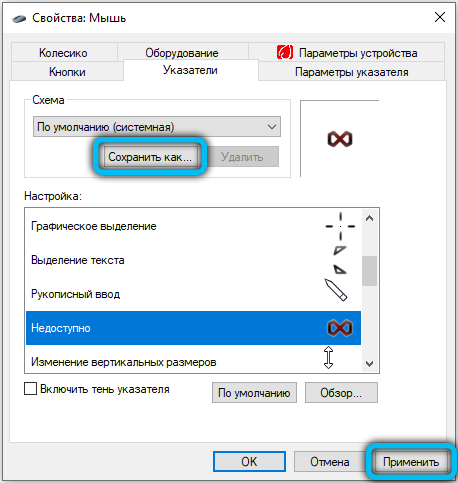
- Enjoy the new cursors.
Option 3. Replacing the system cursor using the registry
Before making any changes to the Windows registry, it is recommended to create a system restore point (“Control Panel”, then – “Recovery”, then – “Create a recovery disc” or “Customize system recovery”).
Replacing the cursor is done as follows:
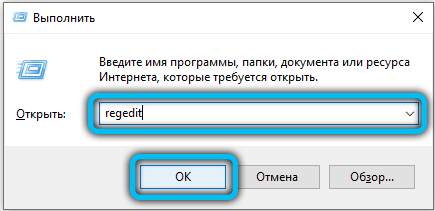
- open the registry editor (in the command line, enter “regedit” and press the Enter key);
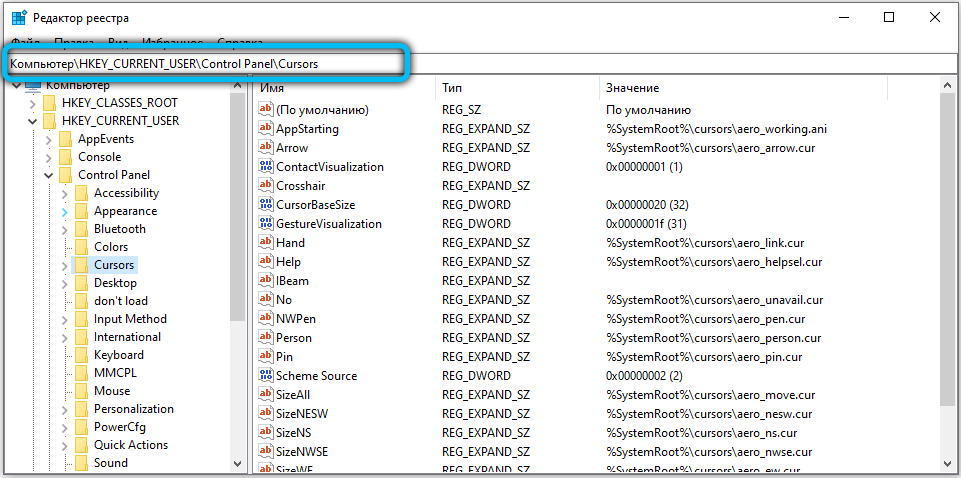
- go to the section HKEY_CURRENT_USER Control Panel Cursors;
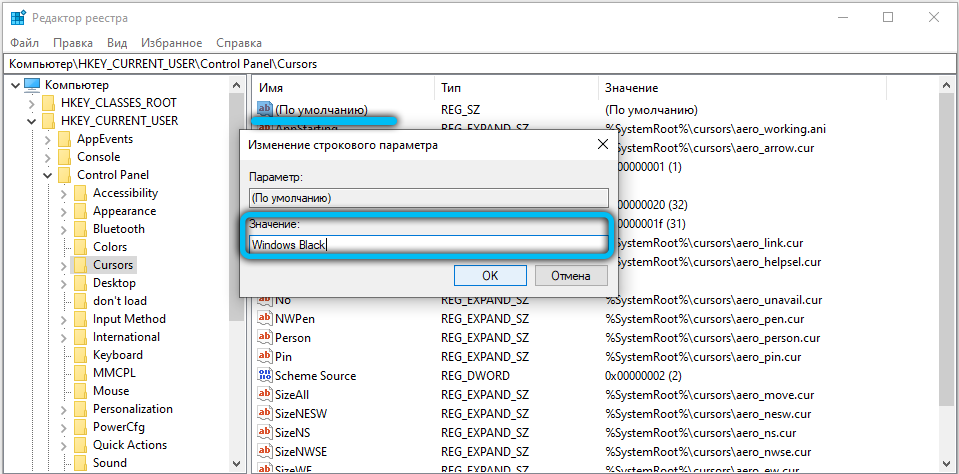
- in the Cursor section, open the “Default” item and in the “Value” field manually enter the name of the scheme for the mouse cursor (only from those installed in the system), then click “OK”;
- if the new setting does not take effect immediately, you will also need to restart the PC;
- if you need to change the pointer only for certain cursor modes (for example, when entering characters or in the background mode), then in the “Value” field, enter the full path to the file with the .cur extension (and in the same way, you can set a cursor that was not previously added to system).
In the “Values” field, for example, you can specify the following names for arrows:
- Windows Default – standard pointer;
- Windows Black – black system mouse;
- Windows Inverted – inverted (changes color, depending on the background);
- Windows Default (large) – standard enlarged pointer (for high resolution screens).
The names for all cursors installed on the system can be viewed in the C: Windows Cursors folder (by the name of the files with the .cur extension).
Option 4. Using CursorFX
This method will appeal to those who want to fine-tune the cursor behavior in Windows. For example, adjust the animation speed, add a trail from the shadow, enable the change in the appearance of the mouse arrow on a schedule, and so on. The app is available in two versions:
- 16, suitable for Windows 7, Vista, XP;
- 03, suitable for Windows 10, 8.1, 8, 7.
Version 2.16 is free, but at the moment it is no longer supported by the developer. However, it works fine in outdated Windows editions. CursorFX 4.03, on the other hand, is a paid application with a 30-day free version (license cost – $ 4.99). You can download both versions of the program on the official website of the developer https://www.stardock.com/products/cursorfx/.
The application is also available in Russian. After installing it, you will need:
- download an archive with new arrows that the user wishes to use;
- open the program, go to the “My cursors” section;
- select “New package”;
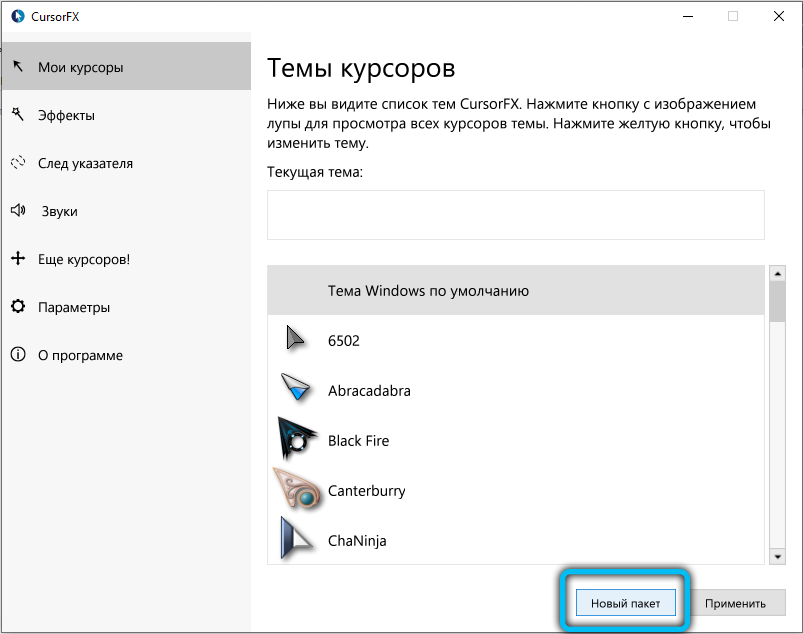
- specify the path to the file with new cursors (you can even use an archive that contains more than one mouse theme – the program recognizes them adequately and immediately integrates them into the general Windows list);
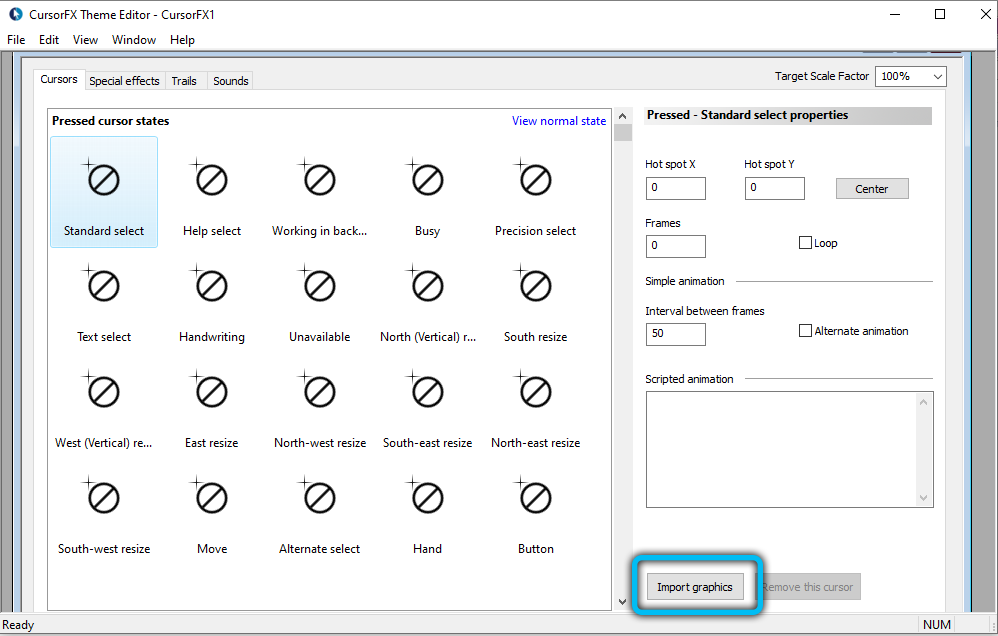
- change the settings as desired in the “Effects” and “Pointer Trail” sections, click “Apply”.
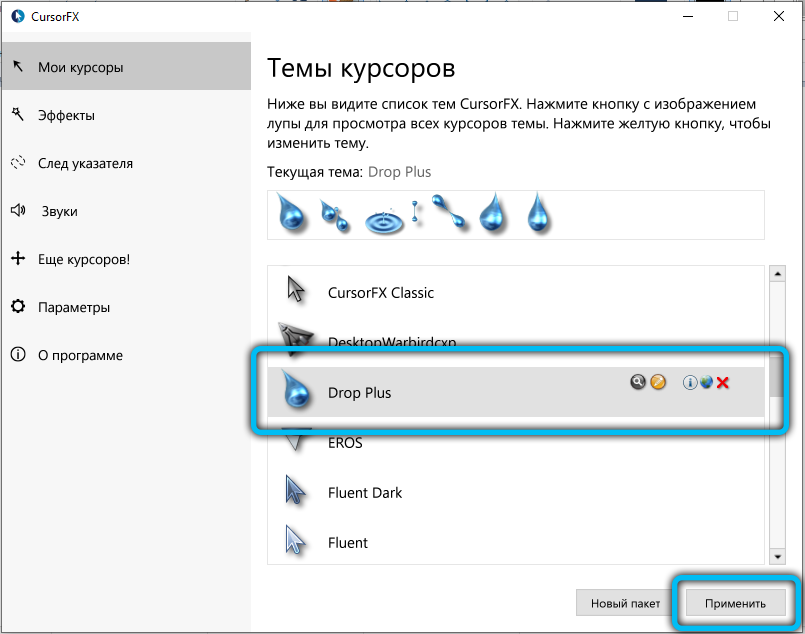
The program also has a “More cursors” tab – when you switch to it, a list of popular topics for pointers among CursorFX users opens. You can immediately download the ones you like for free.
Removing the cursor in Dark Souls
Dark Souls is one of the most popular and most advanced RPG games. It is played by a huge number of players from all over the world. The game attracts with its well-thought-out game world and process, but from time to time there can be very annoying bugs in it. One of these bugs is a white mouse cursor in the middle of the screen, which cannot be eliminated using standard methods. Almost every Dark Souls player sooner or later thinks about whether it can be removed without a trace so that it does not interfere. To do this, several patches are distributed on the Internet, with which you can configure the game so that the cursor is not displayed. What do I need to do?
- Download the archive with the fix configuration file. You can download it on our website or find it on thematic forums (at the request of DSFix for Dark Souls, it also works in the remaster of the game with updated textures).

- Unpack the archive into the game folder and agree to replace the configuration files.
- Start the game and make sure the cursor is hidden.
- If the cursor is still visible, then you must press F9 (to enable the fixes from the patch).
Decrease cursor in Dota 2
Dota 2 is another incredibly popular game with millions of fans around the world. After one of the game updates, the cursor became about 4 times larger than it was before. This is due to the fact that the developers in the update set the arrow scale value to about 400% to make it convenient to play on a 4K monitor, and since a relatively small number of users have such displays, the cursor looks huge on a regular screen. Is there any way to fix this bug and reduce its size?
To do this, you need:
- Launch Steam, select the Dota 2 game, right-click on the name, select Properties – Set launch parameters. In the line that opens, enter the following command: -cursor_scale_percent 100, then click OK and start the game.
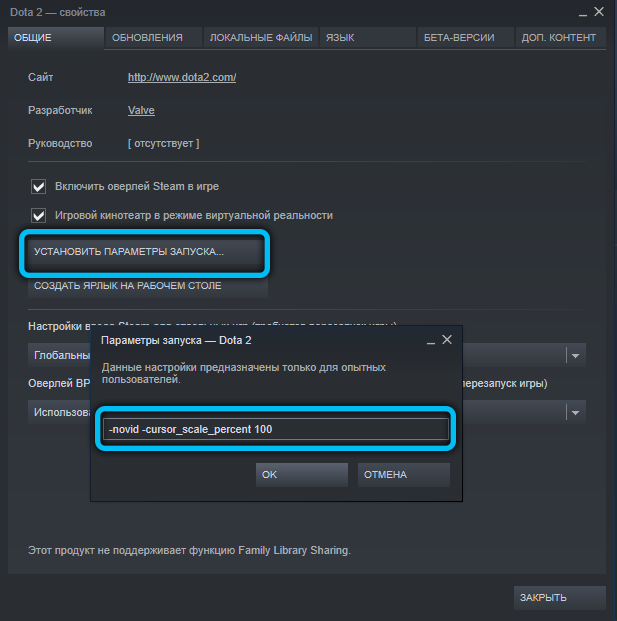
- The arrow will return to its previous appearance.
Conclusion
After reading this article, you now know exactly how to change the cursor in the Windows operating system, how to make it smaller in Dota 2, and how to remove it in Dark Souls. You can make sure that there are absolutely no difficulties in all these operations and it will take literally a couple of minutes to make a cursor, like in Lololoshka or in any other style.
We hope you succeed. We also invite you to leave comments with feedback.
Attached files:
Archive for Dark Souls: https://disk.yandex.ru/d/laOp7uc7XbtCmg