To safely run little-known applications, Windows 11 developers have provided a special virtual environment – a sandbox, which does not allow tested programs to harm user data and the operating system. In fact, when it starts, a virtual copy of Windows 11 is created on the PC. The sandbox is disabled by default, so to safely test software, you need to know how to enable and disable it. The article will describe in detail the instructions for activating and deactivating it.
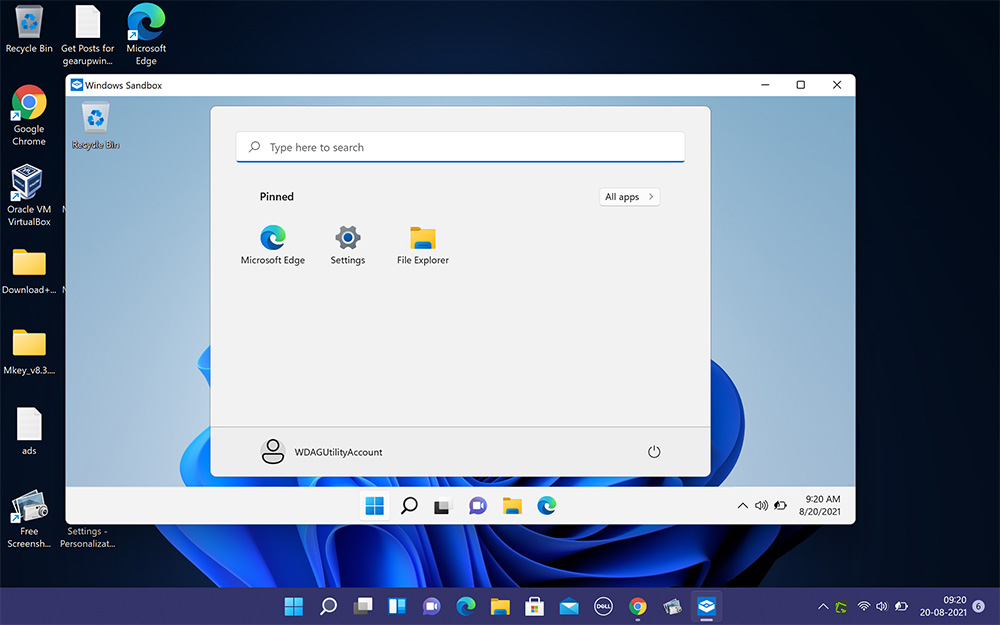
What is a sandbox in Windows 11
This is a test virtual environment that allows you to safely run and test little-known software. This allows you to check its performance and the presence of threats in it. In fact, the sandbox is a virtual machine with a very limited functionality, after exiting from it, all data is automatically erased. This is very convenient, because no malicious files can remain on the PC.
Sandbox advantages:
- It is part of Windows 11 Pro, Education and therefore no additional download or installation is required.
- Emulates a clean copy of Windows every time you run it.
- After use, the data of the tested software does not remain on the PC. After closing the program, they are automatically deleted.
- Uses hardware virtualization to isolate the core. Therefore, the tested software cannot cause any harm to the main system and PC.
Activating the sandbox in Windows 11
To use the sandbox in Windows 11, you need to enable it. This is done in the following way:
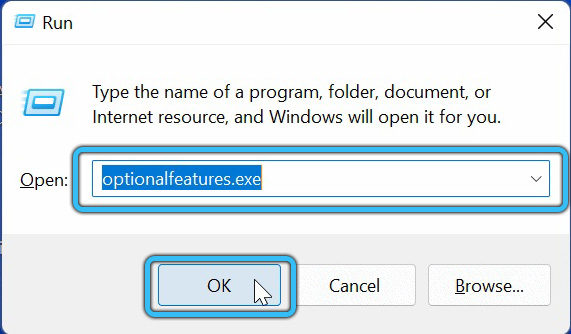
- First, the Start menu is opened using the Win+R keys to launch the Run system tool.
- Then it is entered into the optionalfeatures.exe dialog box and Enter is pressed.
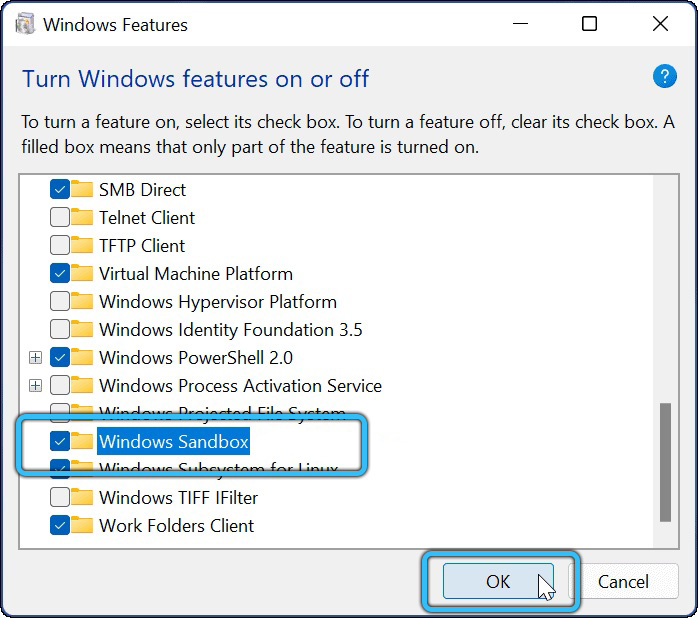
- Then, in the list of system components, a checkbox is selected opposite the “Windows Sandbox” folder. Next, the “OK” button is pressed.
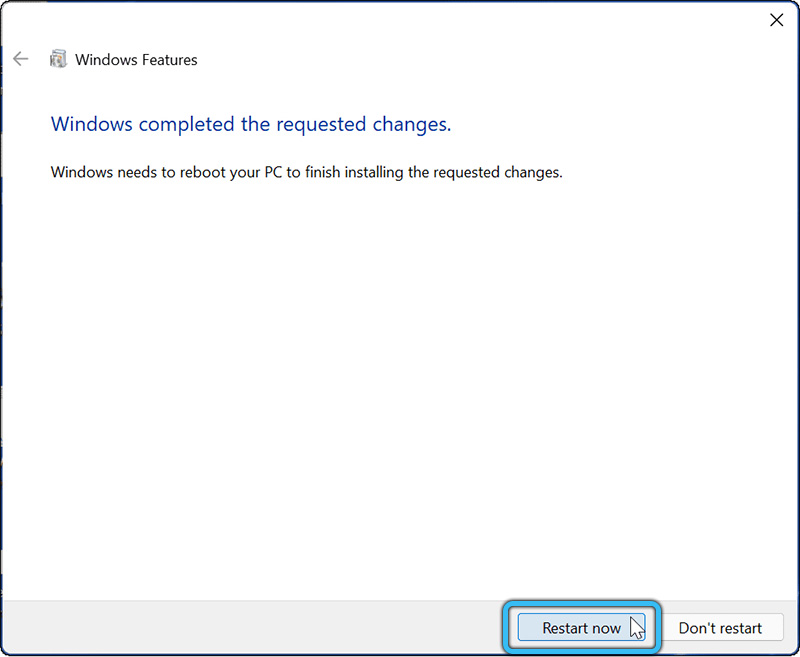
- After completing these steps, you must click the “Restart now” button in the dialog box that opens to activate the sandbox.
You can also enable or disable the Windows Sandbox using PowerShell. For this you need:
- Open the Start menu and select All Apps.
- Select “Windows Tools” from the list of programs that opens.
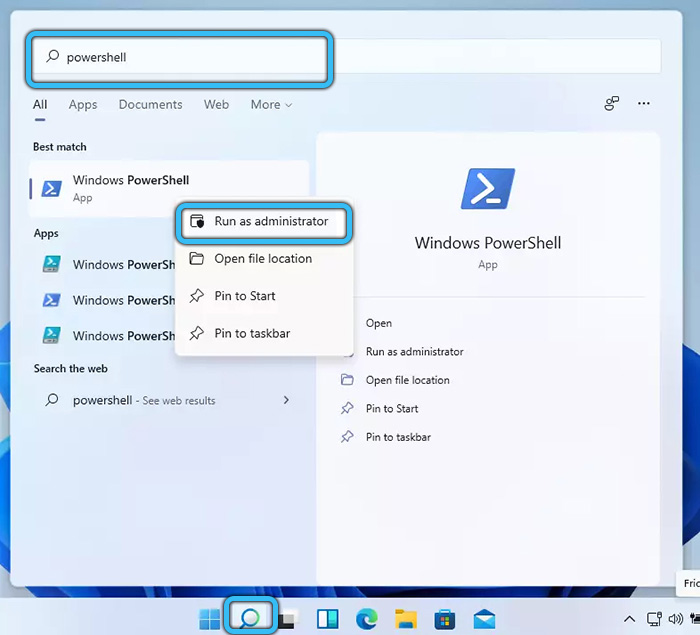
- Next, find “PowerShell” in the system tools, and then run it with administrator rights using RMB.
- Then, to enable the sandbox, you must enter the command Enable-WindowsOptionalFeature-Online -FeatureName “Containers-DisposableClientVM” -All in PowerShell, and then press Enter.
To disable this tool, use the Disable-WindowsOptionalFeature -Online -FeatureName “Containers-DisposableClientVM” -Online command.
- Then you need to enter the English letter Y in PowerShell and also press Enter to restart the PC to activate this tool.
You can also enable or disable the Windows Sandbox using the command line. This is done as follows:
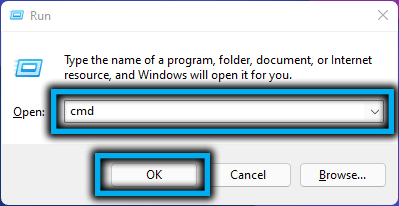
- Press the Win and R keys.
- Type cmd in the Run box and click OK.
- Then type Dism/online /Enable-Feature /FeatureName:”Containers-DisposableClientVM” -All at the command prompt to enable the sandbox.
To disable it, you need to use the Dism /online /Disable-Feature /FeatureName: “Containers-DisposableClientVM” command.
- After entering the desired command, you must enter the English letter Y to restart the OS.
Working with the Windows 11 sandbox
To launch this tool, you need to sequentially open the Start menu → All applications → Windows Sandbox.
- If you want to install and run any application in the sandbox to test its performance, you need to copy its installation file using the Ctrl+C keys from the main system and paste it on the sandbox desktop using the Ctrl+V keys.
- After checking the operation of the software, you must close the virtual environment. All data will be automatically deleted.
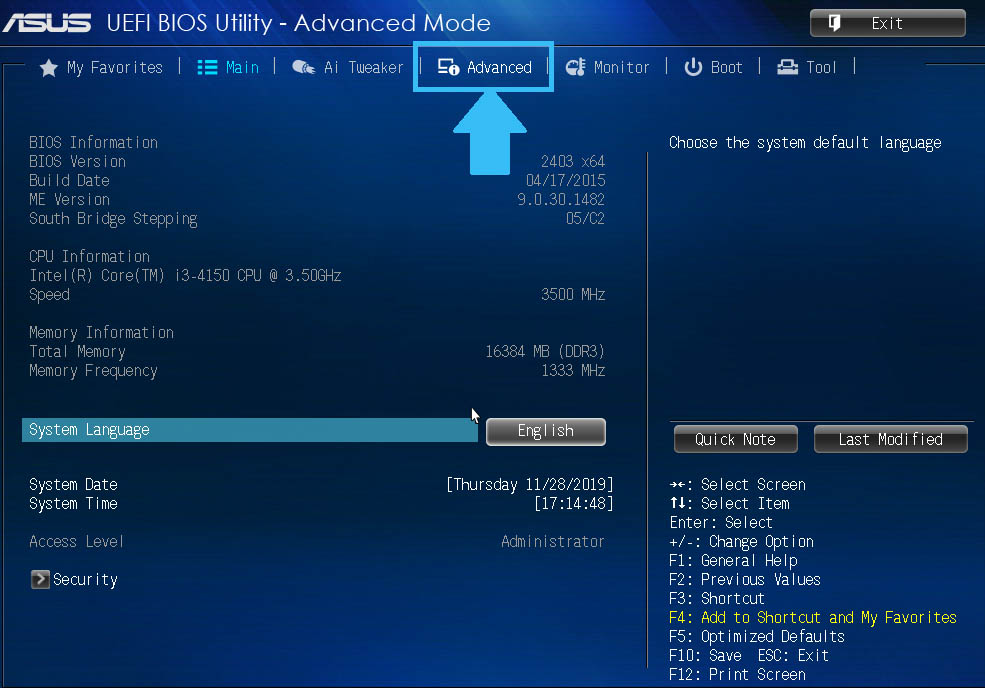
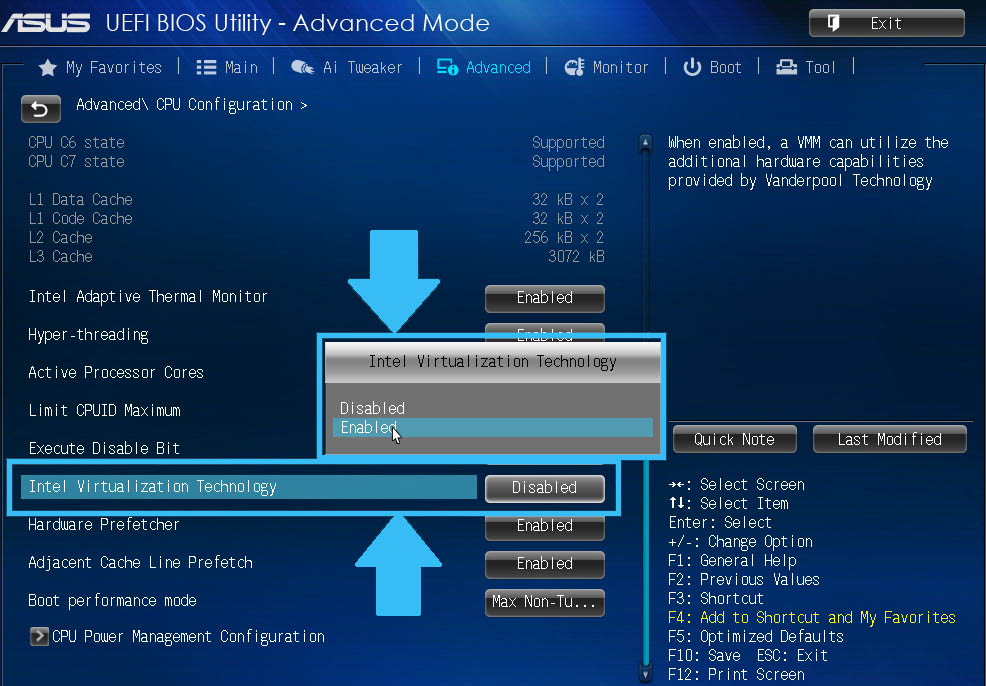
If the message “Hypervisor not found” appears when starting the sandbox on Windows 11, then you need to check if virtualization is activated in the BIOS. This is done on a PC with INTEL processors in this way:
- The computer restarts.
- During the startup process, the F2 – F12 or Del key is pressed. PC manufacturers use a specific key to launch the BIOS.
- After starting the BIOS, you need to find the item “Advanced” or “Integrated Peripherals”.
- Next, you need to find the sub-item “Intel Virtualization Technology” (most often located at the bottom). On the right side of it, “Enable” should be indicated. If there is a value of “Disabled”, then you need to change it.
- Then you need to save the BIOS settings by pressing the F10 key.
Do you use the Windows Sandbox? What do you think, is there any significant benefit for the user from it? Leave your answers in the comments.
 To disable this tool, use the Disable-WindowsOptionalFeature -Online -FeatureName “Containers-DisposableClientVM” -Online command.
 To disable it, you need to use the Dism /online /Disable-Feature /FeatureName: “Containers-DisposableClientVM” command.
