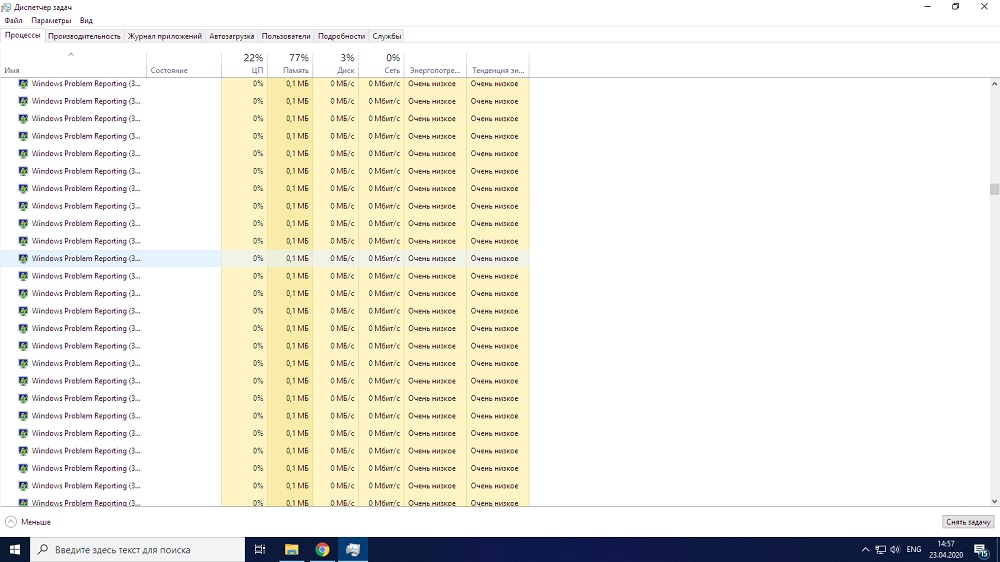
Most users are familiar with errors in Windows. The developers have foreseen the reaction of the operating system to such events, which consists in sending a report about the problem on the Microsoft server in order to analyze it and fix it in future updates. We do not undertake to discuss how well programmers cope with this task, but this service itself is far from perfect, sometimes leading to computer freezes. Today we will look at how Windows Error Reporting works and what to do if it starts to load the CPU and disk.
Contents
Windows Error Reporting Features
The fact that the WER service can load the computer is not surprising – it is a rather complex mechanism that should be able to correctly respond to all problems that arise, regardless of whether they are a system failure or occurred during the operation of user processes.
The principle of the service can be described as follows: when a system failure occurs, a special mechanism is triggered to catch such cases (in technical language, they are called unhandled exceptions). In this case, all possible attendant factors are recorded (for example, the values of the stack and registers at the time of the exception), after which the WER component is launched, which analyzes the state of the crashed application. Its functions also include notifying the user about the problem. Typically, this is the WerFault.exe process, which is launched with the authority of the computer user, and by default it is he who displays the window informing about the failure.

If the default settings have not changed (and there is such an opportunity for this service), then the report generated as a result of the work of the parsing module with the included error data (a memory dump and a small file in XML format, which contains some details of the type of DLL versions used by the aborted process) is sent to the Microsoft servers.
The user is then notified of the problem and presented with options for action that can be taken to try to resolve the problem. Which, of course, does not guarantee the desired result. This same message is duplicated in Windows Support Center. Finally, all the necessary data about the state of the application and the operating system are recorded in the Reliability Monitor service (translated as “System stability monitor”).
How to disable Windows problem reporting
It is not uncommon for an application to crash and crash, but when Error Alert comes in, it becomes the source of the problem itself. If such cases occur frequently when performing tasks of the same type (for example, when inserting a large array of data into a document), the simplest solution is to disable the WER service, since it cannot cope with its direct responsibilities.
Let’s consider the main ways to disable Windows problem reporting if the service loads the disk, processor, and the system as a whole.
Cleaning up the WER folders
Dumps with descriptions of errors are usually small, but sometimes a memory dump, which is necessarily included in the memory.hdmp file, can reach significant sizes, on the order of many hundreds of megabytes. If there is not much space on the system disk, a dozen of such dumps can simply exhaust free space, and there will be no more space for the next report – here you have problems and freezes.
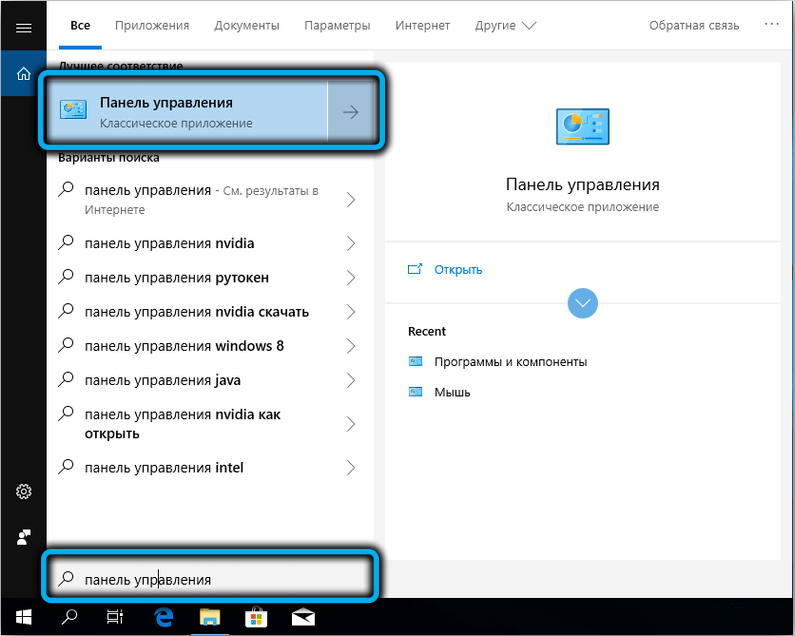
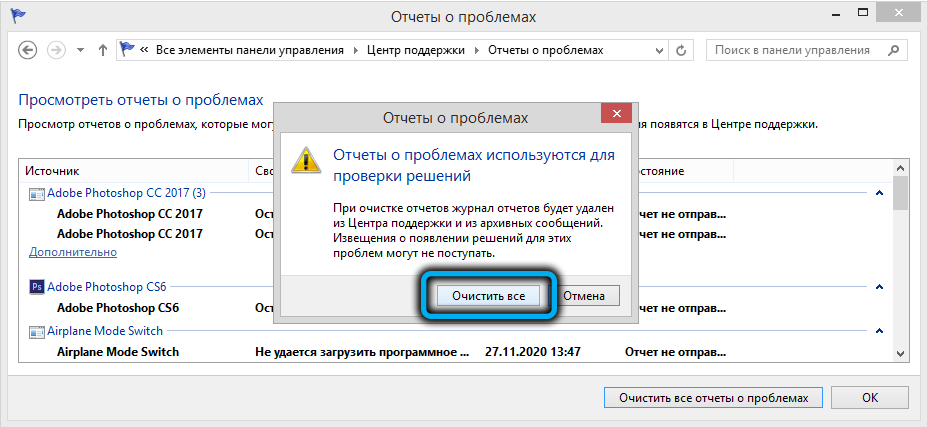
To clear the service logs, launch the Control Panel and type the text “View all reports” in the search bar, select an item with the appropriate name from the list, and in a new window, click the “Clear all problem reports” button.


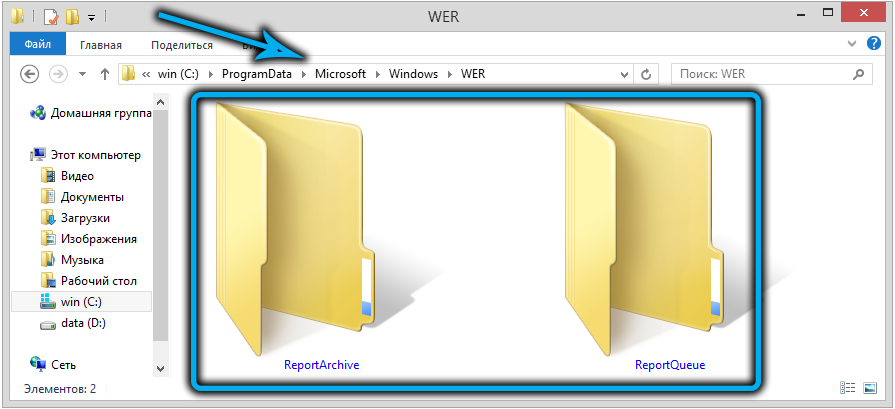
The same operation can be performed manually by clearing the two folders, WER ReportArchive and WER ReportQueue , located in the ProgramData Microsoft Windows directory, from all content (there may be hundreds of subdirectories).
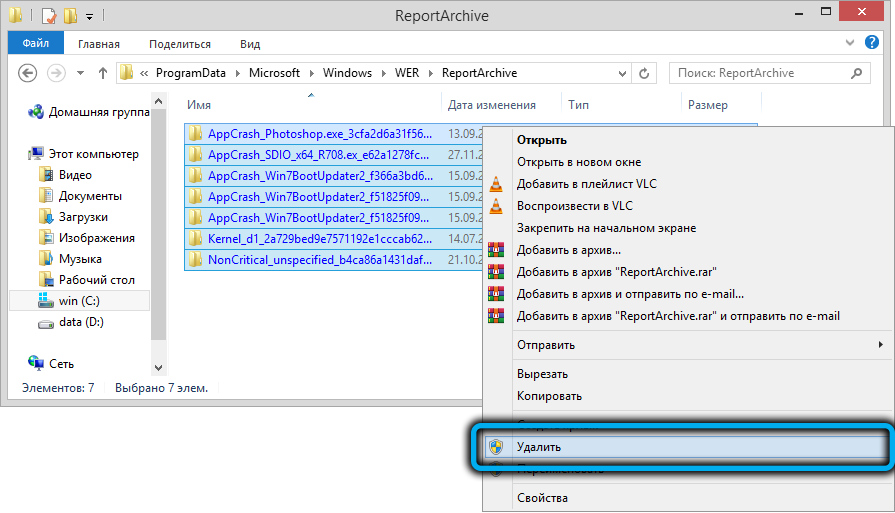
Finally, there is an alternative option that allows you to delete only old files from the Windows Error Reporting directories, and the interval in days is specified by the user. These are the commands executed through PowerShell:
 Get-ChildItem -Path 'C:ProgramDataMicrosoftWindowsWERReportArchive' -Recurse | Where-Object CreationTime -lt (Get-Date).AddDays(-30) | Remove-Item -force -Recurse
 Get-ChildItem -Path 'C:ProgramDataMicrosoftWindowsWERReportQueue' -Recurse | Where-Object CreationTime -lt (Get-Date).AddDays(-30) | Remove-Item -force –Recurse
In this example, all logs older than one month will be deleted.
Disable WER in Windows 7/8
But clearing the service logs is not quite the right decision, because over time the situation can repeat itself. It’s easier to disable the service, because there is little sense from it. This is done as follows:
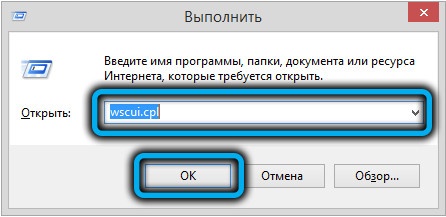
- press the combination Win + R;
- in the “Run” console, type the wscui.cpl command, click OK;
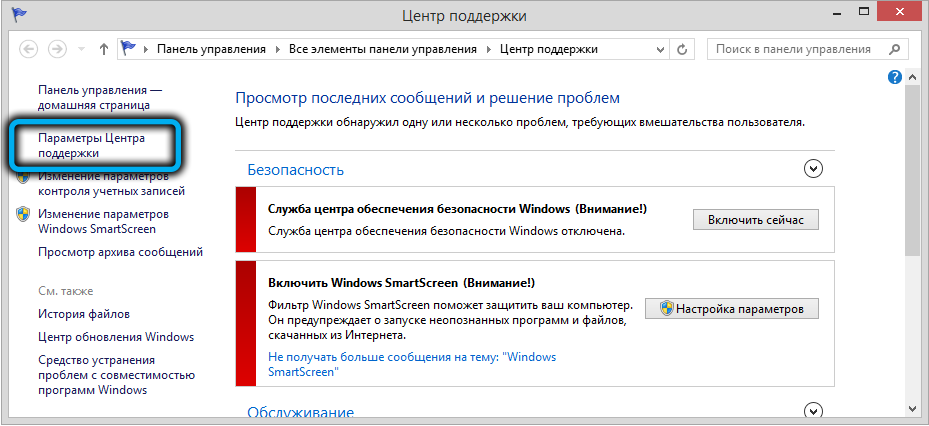
- the “Support Center” window will open, select the “Support Center Settings” tab (or “Support Center Settings”) in it;
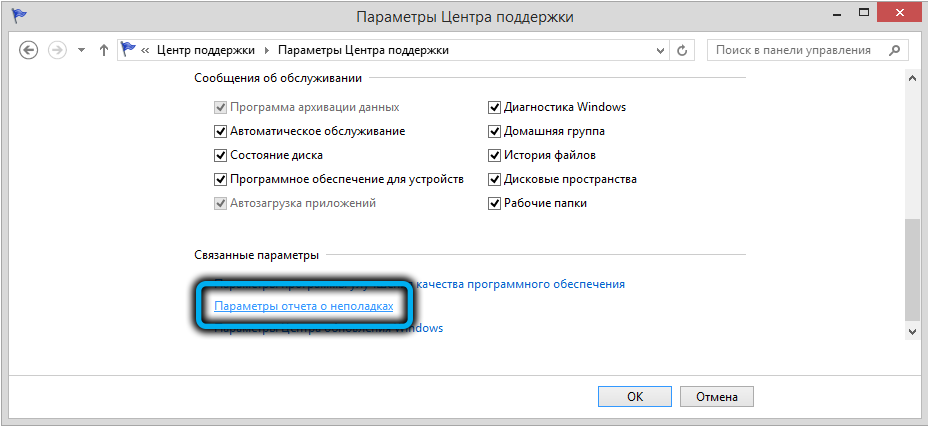
- in the new window, click on the link (located at the bottom of the page) “Problem report parameters”;
- we make the item “Do not check for new solutions” active, ignoring the warning that this action is not recommended;
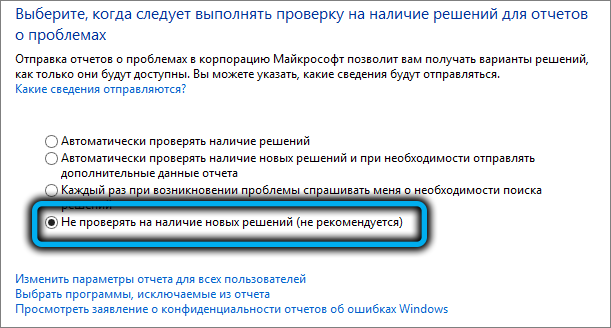
- confirm by clicking OK.
In the same way, using the Control Panel, you can disable the WER service in server versions of Windows (2019/2016 / 2012R2).
Disable the output of error reports through the system registry
Unfortunately, this simple method does not work in the top ten. Here you can only check the status of the service (the “System and Security” tab, go to the “Security and Service Center” item, select the “Service” sub-item). Although the “Problem Report” parameter itself is here, and it is in the enabled state, there is no button to disable the service here – obviously, on purpose, so that you can always receive error reports.
Nevertheless, if Windows Error Reporting loads the computer from time to time, there is a necessary solution – to disable the service, you will have to edit the system registry.
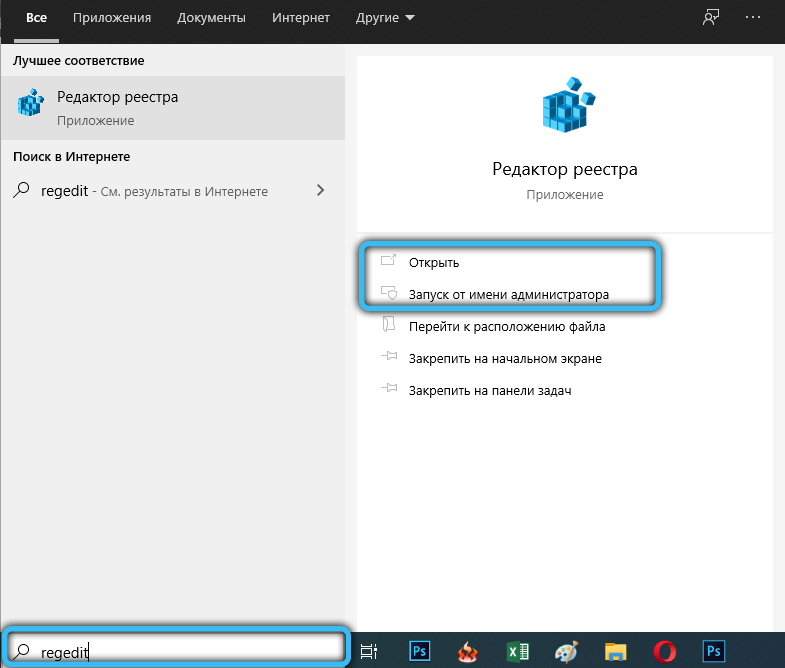
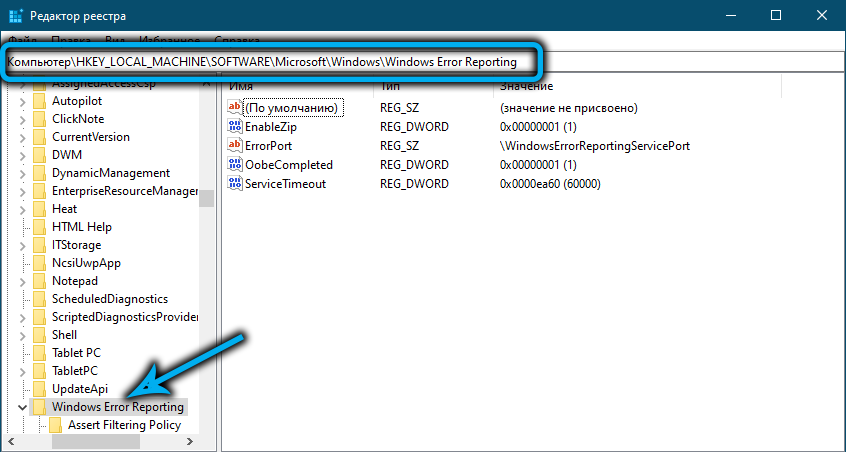
To do this, go to the HKLM SOFTWARE Microsoft Windows Windows Error Reporting branch.
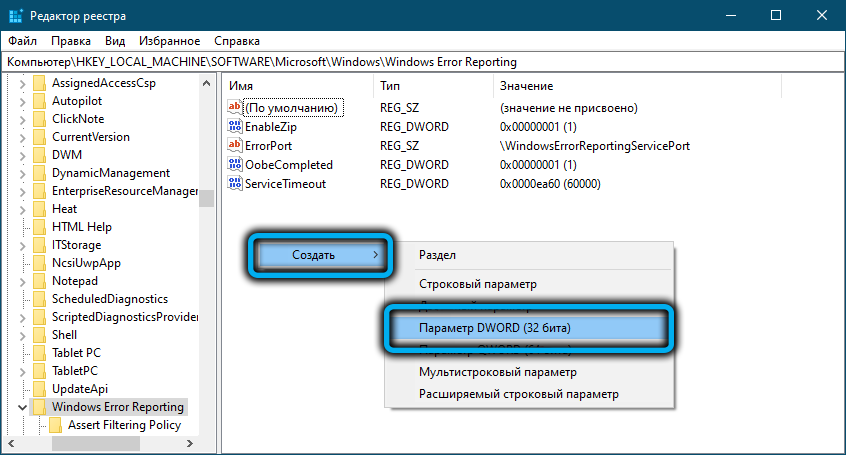
Click on an empty space in the right window and create a new parameter (select the DWORD 32-bit type), assign this parameter to the Disabled type, and enter 1 in the “Value” field.
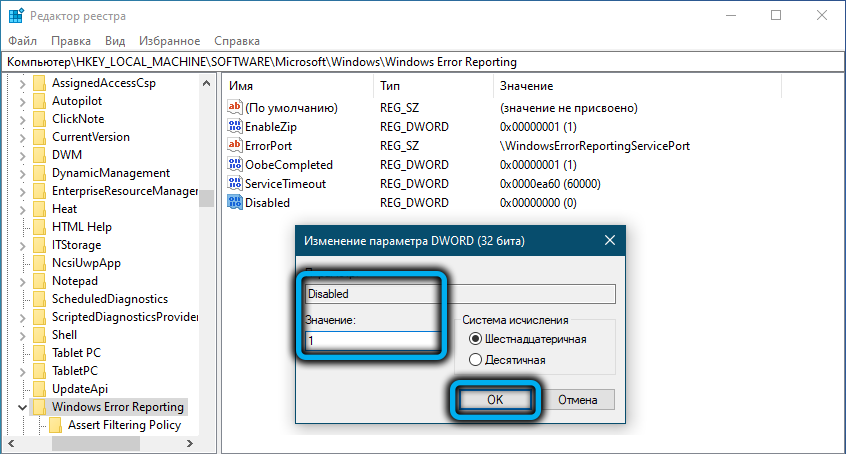
The following commands can be used to disable the collection and sending of error logs for some or all users:
 reg add "HKCUSoftwareMicrosoftWindowsWindows Error Reporting" /v "Disabled" /t REG_DWORD /d "1" /f
 reg add "HKLMSoftwareMicrosoftWindowsWindows Error Reporting" /v "Disabled" /t REG_DWORD /d "1" /f
Now, if you go to the Control Panel to check the status of the service, instead of On you will see Off, that is, we managed to disable the service designed to solve problems, but sometimes creates them.

If desired, this status can be duplicated on all computers within the same domain using the GPO.
Disable error reporting via Group Policy Editor
Indeed, if you have a network with several computers (and in an average office there may be a dozen or two of them), instead of performing all these manipulations a certain number of times, you can use a proven tool – the Group Policy Editor.
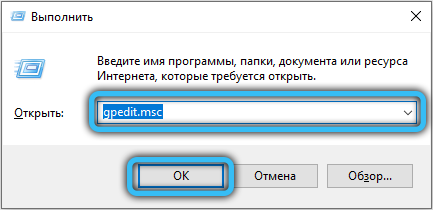
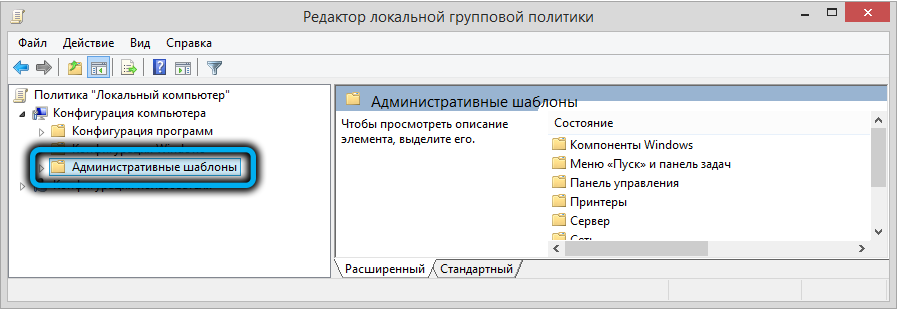
Using the Run console, we type the gpmc.msc or gpedit.msc command (the first is for the domain GPO editor, the second is for the local one). Find and open the Computer Configuration branch, then select the Administrative Templates sub-item, go to the Windows Components branch, and finally, click on the Windows Error Reporting line.
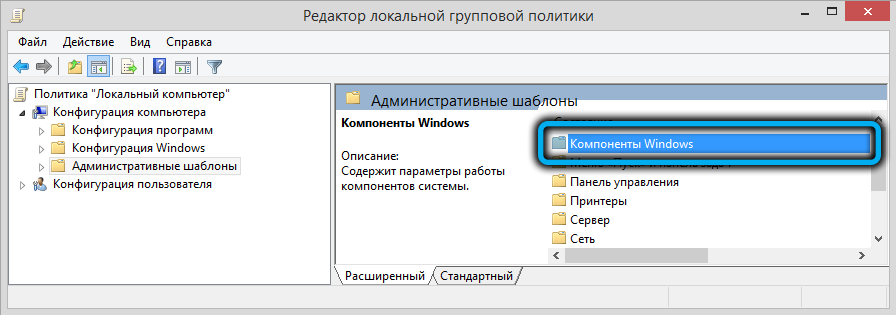
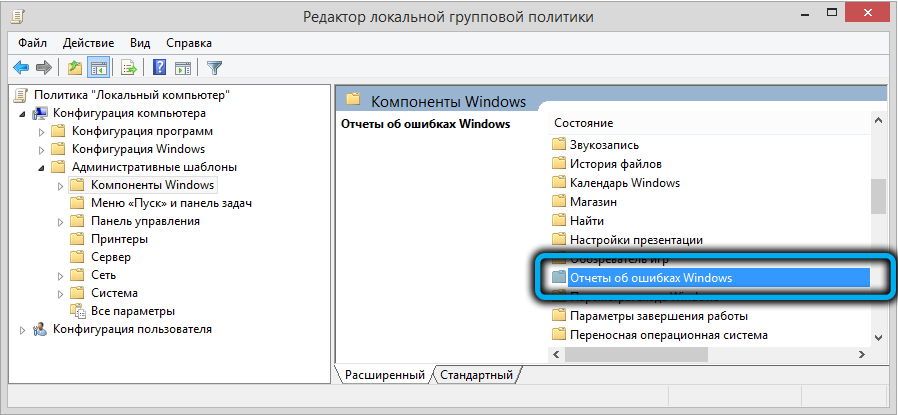
If in the right window opposite the Disable Windows Error Reporting parameter there is the Disabled value, click on this parameter and in the window that opens, change its value to Enable.
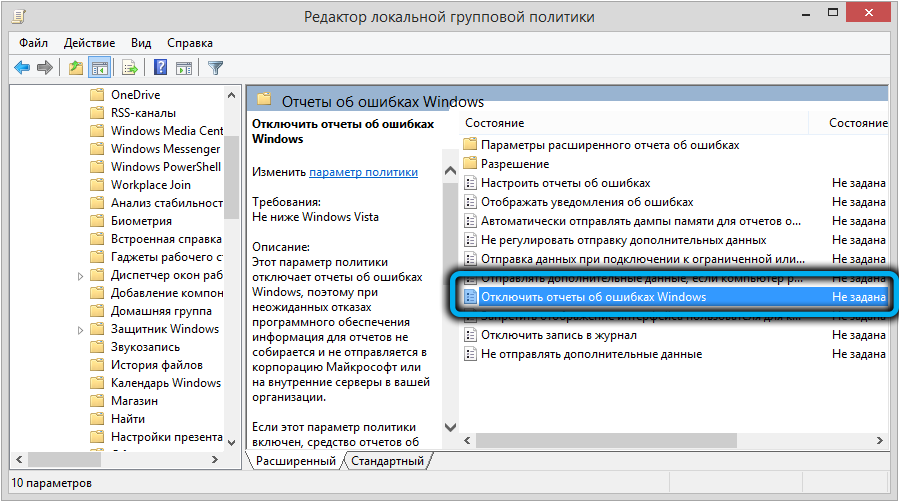
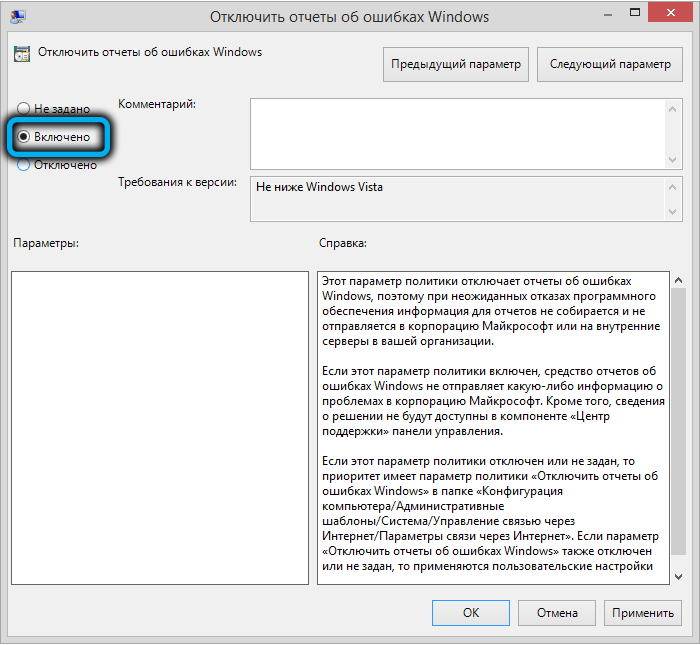
That’s all, now this rule will apply to all computers within the domain. By the way, the exact same policy is available in the User Configuration section.
As you can see, to disable the Windows problem reporting service, you need to perform a minimum amount of manipulations, and only in Windows 10 you will have to edit the registry.