Sometimes, when working with a computer, you may notice that the performance has decreased, it takes a long time to wait for the command to complete, and the cursor now and then turns into a spinning circle. If you go into the Task Manager to find out what is going on, you will see System Interrupts in the list of processes that consume an unmeasured amount of resources.

Contents
What is the process “System interrupts”
A process called System Interrupts does nothing by itself. It only reflects the problems that have arisen: the system does not have enough power required to run one of the programs, so it takes a lot of resources from the CPU to compensate for the shortage. In this case, all other processes are postponed, and the system concentrates only on the problematic program. It is clear that this state of affairs interferes with normal work, so any user wants to get rid of the “System interrupts” as soon as possible. However, if you just use the “End task” option, nothing will change – the resources will not be released, and the process will soon be displayed in the general list again.

What to do if system interrupts load the processor
When System Interrupts overload the Windows processor (and this can happen in any version from 7 to 10), this indicates:
- that the device connected to the PC is not working correctly;
- or that some drivers are malfunctioning.
Remember:
- whether Windows or drivers were updated before the system malfunctioned – you can return to the old version;
- Are the new components working properly: mouse, keyboard, printer, scanner, USB modem, etc.
Finding drivers causing the load from “System Interrupts”
Sadly, it is impossible to disable “System interrupts” in Windows 7, 8, 10. But you can find the reason why they load the processor, and eliminate it. The most common problem is that the drivers are not working properly. To find out which ones, you need a special program, such as Driver Fusion. When you run it, a table will be displayed that resembles the interface of the “Task Manager” – you will see a list of all drivers, the quality of their work, the version of updates and the degree of load on the system. Pay attention to those that have the highest rates and those that the program has identified as problematic. See which devices they belong to and turn them off. This is done like this:
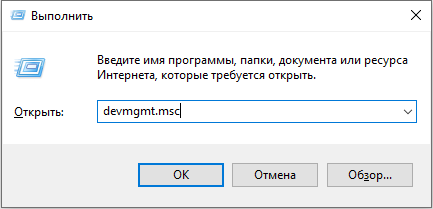
- Press Win + R, in the window that appears, enter: “devmgmt.msc” and click “OK”.
- The “Device Manager” will open with a list of all the hardware that is connected to your PC or laptop.
- There is a down arrow opposite each heading – click it to see a specific device.
- Find the one with the problematic driver, right-click on it and select “Disable”.

The object of your attention should be devices connected from the outside: printers, scanners, removable keyboard, graphics tablet, external speakers and additional sound cards, webcams, Wi-Fi, etc. If after disabling them “System interrupts” stopped loading the CPU, then you are on the right track – you need to do something with the drivers of these devices: update them or, conversely, install an old version. Do not download a package like “100 drivers in one archive”, and even from unknown sites – go to the manufacturer’s resource.

Problems with USB devices and controllers
Also, the reason may be faulty hardware or the USB cable that connects it to the PC. You have probably already noticed the “Controllers” section in the “Task Manager” – you can try to disable them one by one and monitor the load on the CPU. But if you do not have special knowledge about computers and are just an ordinary user, then it is better to leave this method and turn to another.
Try to get rid of “System interrupts” by physically removing the devices: unplug the mouse cord and check for changes, if the resource consumption rate drops. If not, go to Wi-Fi, speakers, flash drives, tablet and further down the list. Also try connecting the problematic device to another PC and make sure that something is really wrong with it. Change the cord and check the readings again: maybe everything is in order with the device itself.

The option to recognize faulty hardware is occasionally triggered. To get to it, press Win + R, enter without quotes: “perfmon / report”, click “OK”, and a list will appear in front of you.
Other causes of high load from “System interrupts” in Windows 7, 8 and 10
Occasionally, other reasons can provoke a malfunction.
- Go to the “Control Panel” (in Windows 10, type in the search “Control Panel: classic application”), change the view mode to “Large icons”, find among them “Power supply” – “Action of the power buttons” – “Change unavailable parameters”, and then uncheck Quick Launch. It can cause “System Interrupts” with a load on the CPU.

- When disconnecting different devices one by one, do not forget about charging the laptop – if it is broken or intended for another model, then it can also provoke the described error.
- Right-click on the sound icon in the System Tray and make sure you have the Spatial Sound option turned off.
- Press Win + R, type in the line “mdsched.exe” (without quotes) and click “Inter”. Agree to the suggestion to restart the OS and run a RAM check. Perhaps the problem lies in her.


- Open “Computer” – “C drive” – ”Service” and click the “Check disk for errors” button.


- Check your PC for viruses with some powerful utility. See if you have two antiviruses installed at the same time.