The “Interface not supported” error occurs when you try to open any program or personalization settings (for example, customizing the screen). Most often, this happens with Windows 7 and 10. Next, you will find out why this happens and how to fix it.
Causes of the error in Windows
The “Interface Not Supported” error is caused by corrupted Windows 7 or 10 system files or just a crash. This happens after making changes to the registry, using tweakers, work accelerators and other additional utilities that interfere with the operation of the OS. Sometimes this can happen if the software was installed incorrectly or viruses entered the computer.
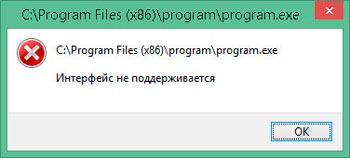
There are several errors with the same text, but different markings:
- sending C: WINDOWS refedit.exe means that the problem lies in the registry and manifests itself when the software is started;
- if the numeric code “2147467262” is written on top of the window, this may mean that the failure occurred at the stage of installing the software;
- and, finally, the appearance of the inscription when opening the personalization parameters indicates the need to re-register the system libraries.
Now that we have figured out why the problem occurs, we can begin to combat it.
Correction of the error “Interface is not supported”
Let’s start with the simplest thing: when you call the personalization settings by clicking the additional manipulator button and receive a response from explorer.exe that “The interface is not supported” – this most often happens with Windows 7. Do the following:
- Enter in the system search: Command Line.
- Right click on the icon and select Run As Administrator.
- Write under the cursor CD and press “Inter”.
- Now write DIR * .dll / s / b> regdll.bat and click “Inter” again.
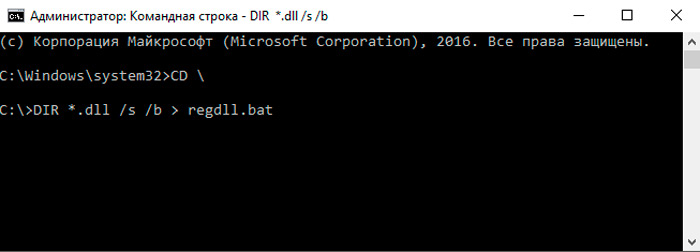
- Type in notepad regdll.bat, click “Inter” – a Notepad window with data will appear.
- In the Command Line, enter path, click “Inter”, you will see an expanded branch of sections and files – copy everything that is written in it and paste it somewhere to have quick access (for example, in a text editor).
- Go back to the Command Line, type in: path = c: windows; c: windows Command; c: Windows Program ~ Accessories, click “Inter”.
- Paste what you copied earlier and click “Inter”.
- Write: C: WINDOWS System32 Regsvr32.exe / s C: and click “Inter”, and if you are notified that there is no such branch, then type in another: C: WINDOWS System Regsvr32.exe / s C : .
- We recall the file with data in Notepad and change the branches indicated there to C: WINDOWS System32 Regsvrexe / s C: or to C: WINDOWS System Regsvr32.exe / s C: – depending on whether which path turned out to be correct. Don’t forget to commit your changes.
- Go back to Command Line and set regdll.bat.
- Now a long re-registration will begin, during which windows will pop up where you need to click OK. When the process is finally complete, go back to that copied text from the sixth paragraph and write it in the Command Line.
This is quite troublesome, but it helps to fix the error. After removing it, do not forget to remove the tweaker – the program for “fine tuning” the OS you are using. Most likely, it was she who turned out to be the culprit of the trouble.
Now let’s consider another option: when the newly installed program does not start from the Windows context menu, showing a window with the code 2147467262 and information about the unsupported interface.
- Type in the system search: System configuration.
- Select and expand msconfig.
- Open the General tab.
- Uncheck Normal Boot and move it to Selective Boot.
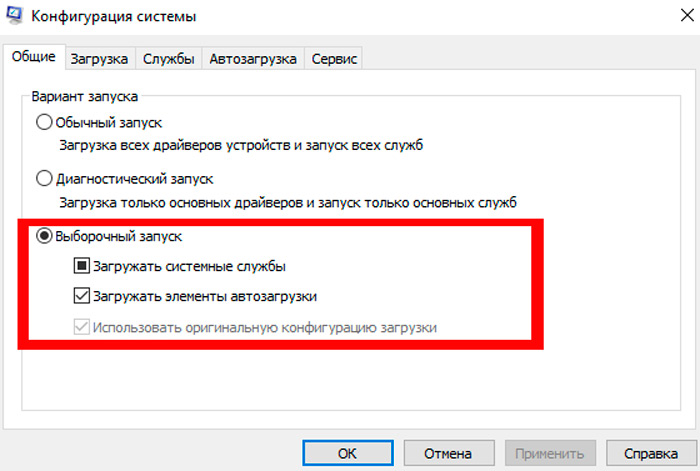
- Also uncheck Load startup items.
- Now at the top, open the Services tab and check Don’t display services.
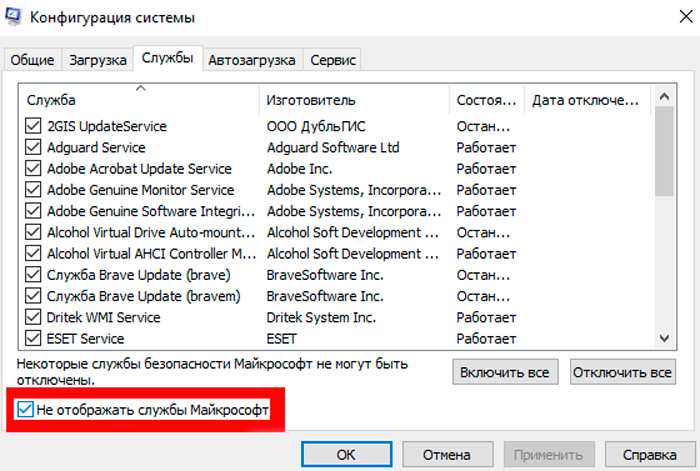
- Click Apply.
Now let’s move on to the case when a long-installed program does not want to start. First, let’s try using restore points:
- Open Start and sign out of your account.
- Press the icon with the On / Off switch on the display, hold down the Shift and select Restart.
- In the window that appears, click Troubleshooting – Advanced Settings – System Restore – Restore From Restore Points.
- Log back into your admin account and see if there are any suitable restore points. If available, run Restore Points and wait for the process to finish.
If all else fails, using the registry from another computer may help:
- Open a normally working PC and insert any removable media into it.
- Type in the search: “Run”, click on the RMB icon and select Run As Administrator.
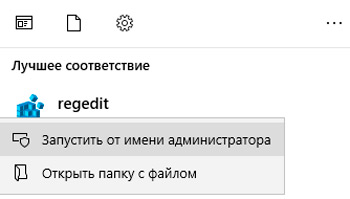
- Enter in the line: regedit and click “Inter”.
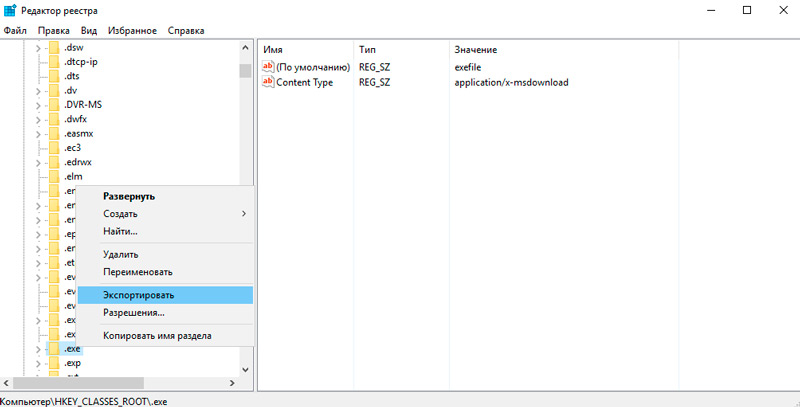
- Find HKEY_CLASSES_ROOT .exe on the left, right click and start exporting.
- Call it what you want, the main thing is to make it clear to you, and specify the extension as .reg.
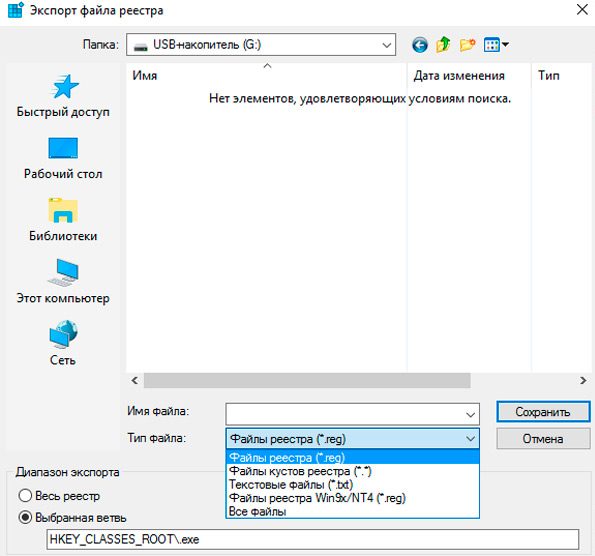
- Save the HKEY_CLASSES_ROOT exefile section the same way.
- Turn on the problem PC, connect the media to it and run the copied files with a double click.
- Answer in the affirmative to the question of the system, do you really want to change the registry.
- Restart your OS.
Perhaps this is the best option, but more advanced users can try manually creating a reg file to restore the exe startup. This is done if you firmly know in which section the malfunction lies and are able to compose codes (or you have a ready-made one):
- Traditionally, “Notepad” is used as a platform for compiling a reg-file. Run it and paste the code or compose your own.
- Click File-Save As.
- Specify the file type as All files and put the extension .reg, click OK.
- Now it can be started, and it will automatically go to the registry.
The latter measure is quite risky and carries a certain threat – if you make a mistake, a major failure can occur in the system, so be careful.