If you want to burn the Windows installer on a separate medium, and your computer is running Linux, there will be no problems – despite the competition between the two operating systems, this is not a difficult task at all. There are several ways to record: using the Linux functionality and through third-party applications. Let’s analyze the four simplest options with sequential instructions.
Contents
Terminal and Gparted
To create a bootable USB flash drive with a Windows 10 image, we need the “Command Prompt” in Linux – the so-called terminal, or the “Partition Editor” – Gparted. Let’s start with the first one.
- Connect the flash drive that will be the carrier of the distribution.
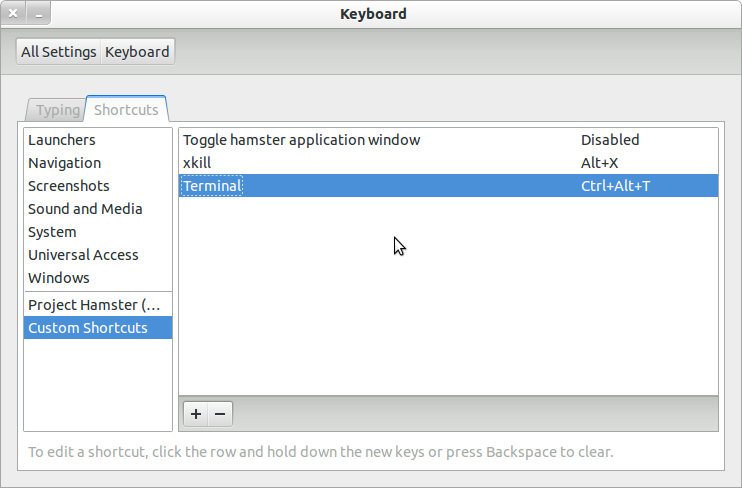
- To get to the terminal, press Ctrl + Alt + T or open the menu, find “Settings” – “Devices” – “Keyboard” in it and set your own keyboard shortcut to call the “Command Prompt”, and then click it.
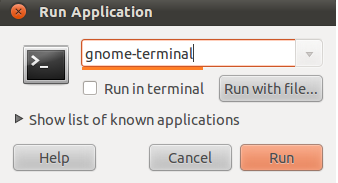
- You can also press Alt + F2, and the Run window will appear in front of you – exactly like in Windows. You need to enter either: “$ gnome-terminal” (with a space between the $ sign and the command, but without quotes), or: “$ konsole”.
- In the first case, you will see the classic version of the “Command Prompt” without any graphics, and in the second – a small, eye-pleasing window located right on top of the screen saver. You can choose what you like more – it doesn’t matter, everything will work the same way.
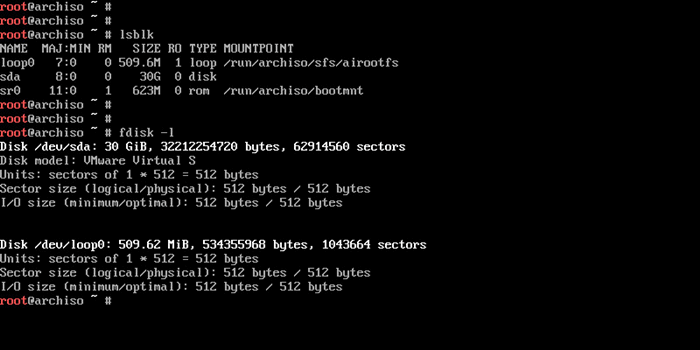
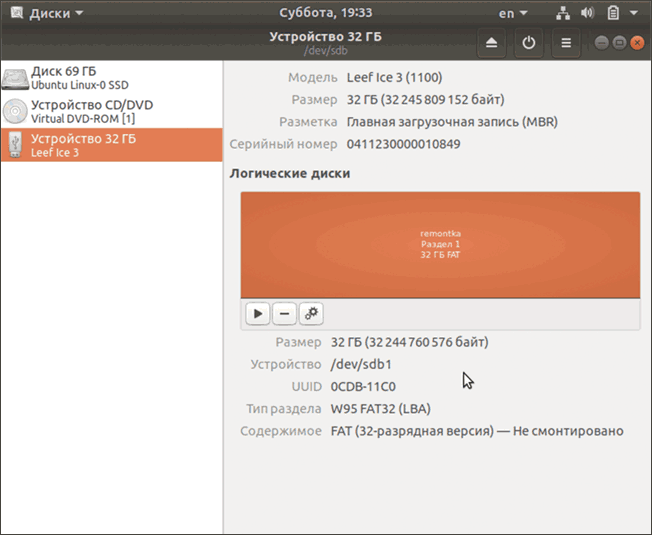
- Next, you need to find out the name of your flash drive. For reliability, enter in the “Command line”: “fdisk -l” (without quotes), press “Enter” and save the result – now it will come in handy for us.
- Now enter the command: “$ sudo mkfs.ntfs /dev/your_drive_name” and press “Enter” – the media will be formatted and will be ready for further work.
- Enter into the command line: “# dd if=windows.iso of=/dev/sdx” (without quotes, x at the end of the command is the letter of your flash drive). Thus, the system “understands” that it is expected to write the boot disk.
Now we will do the same through the “Partition Editor” Gparted.
- Install a bootable USB flash drive that is supposed to burn the image via Linux for Windows.
- Call “Command Prompt” again and ask the system to open Gparted – enter: “$ sudo apt install gparted ntfsprogs”, press “Enter” and wait for the result.
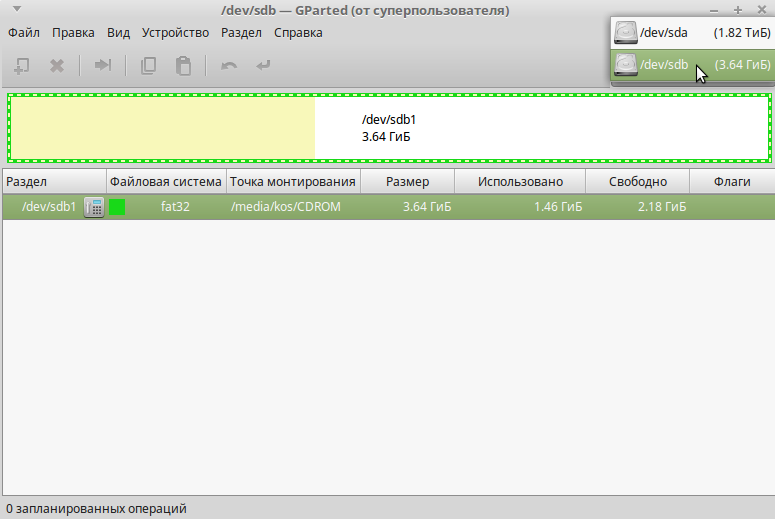
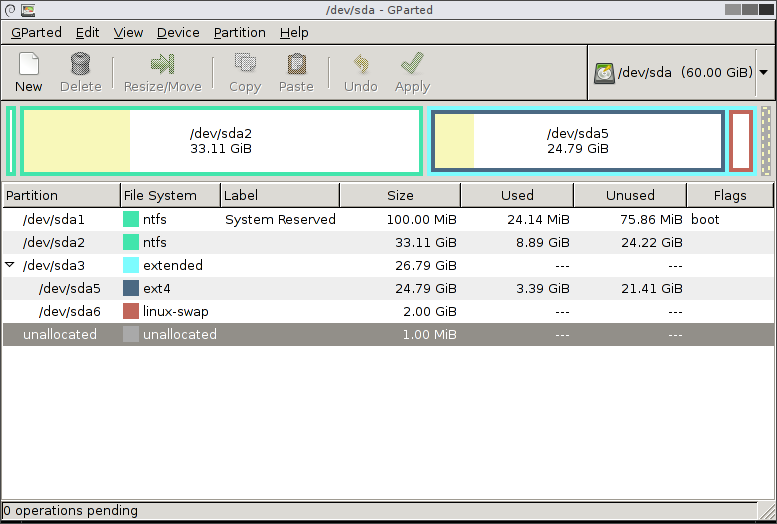
- When the Editor window opens, you will see a small image of a disk in the upper right. Click it and select the desired flash drive.
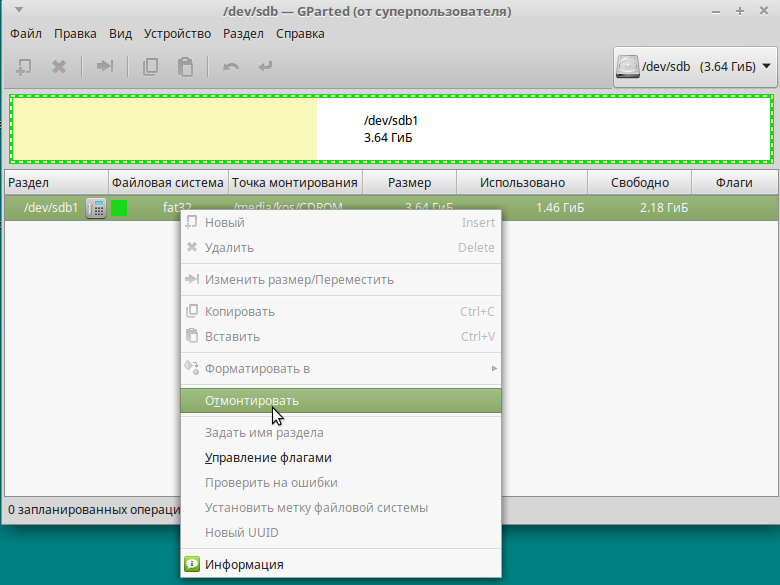
- Now the drive with information about it is displayed below, in the main window. Right-click on it and click Unmount. After that, unavailable commands that were displayed in gray will become clickable.
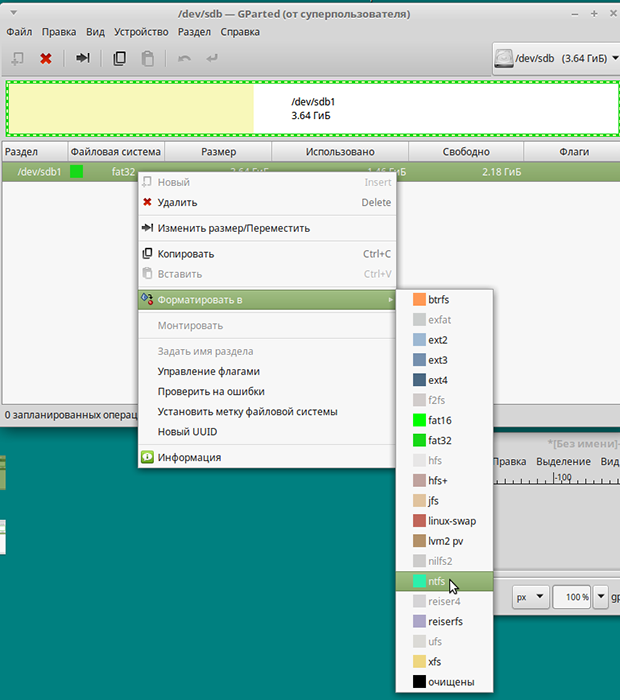
- And again, right-click on the name of the flash drive – this time select “Format to …”. A lot of multi-colored squares with inscriptions will appear – we are interested in bright blue with the inscription: “ntfs”.
- We agree with the formatting.
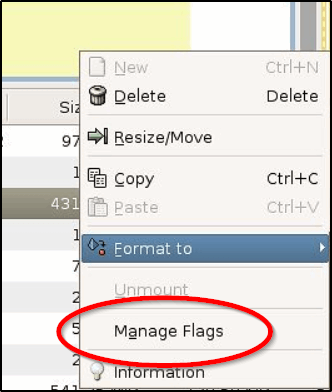
- Again, right-click on the name of the flash drive and select the Manage flags option with the label opposite boot. Apply the changes.
- We return to the “Command line” and enter in order: “$ sudo mkdir /media/iso” and “$ sudo mount windowsiso /media/iso -t udf -o loop” to find the image files.
- Be sure to check the mount point through the command: “ls / run / media” and remember the result.
- That’s it, we start the recording process with the command: cp -R / media / iso / mount_point_of the flash drive.
As you can see, you can handle the OS on your own, but if this is not for you, read below on how to automate everything.
WINUSB Utility
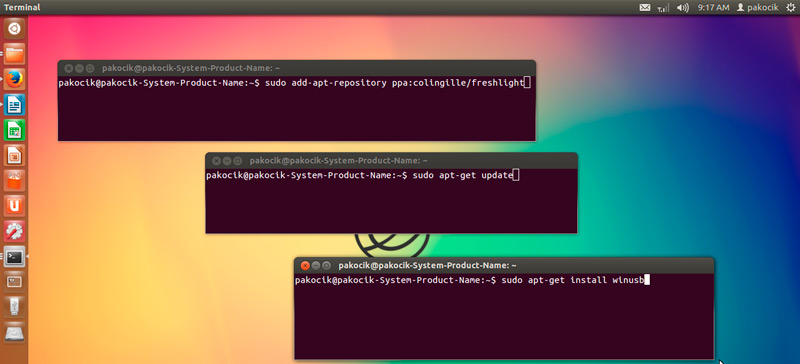
You can also create a bootable USB flash drive from Windows 10 on Linux using a special program – it’s much faster than all the previous steps. You probably already know that Linux programs can be installed directly from the Command Line. Let’s use this nice option and set the values:
$ sudo add-apt-repository ppa:colingille/freshlight
$ sudo apt update
$ sudo apt install winusb
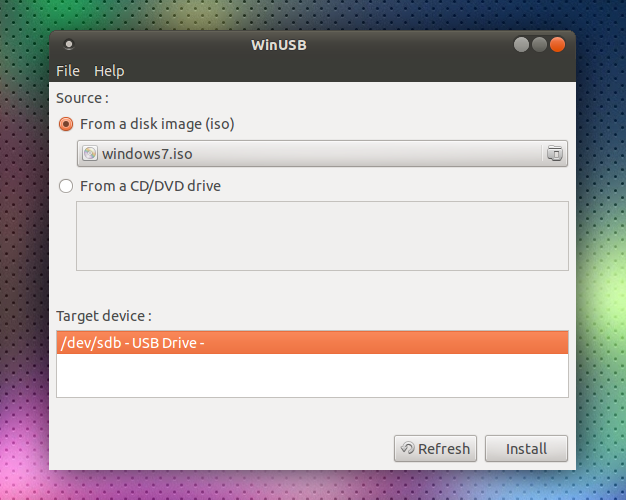
You can also install this application by simply searching the repository, without any command line at all. When the program window opens, you will see two suggestions:
- burn OS from iso image;
- burn OS from disk.
Choose the first one and confirm the start of the process. No more manipulations are required – you can remove the USB flash drive and use it.
Etcher Utility
The previous program is very simple and good, but, unfortunately, it is not compatible with all varieties of Linux and does not always run, because developers do not often provide the public with current updates. If this is your case, then try Etcher. Like all applications for Linux, it is distributed free of charge. With the help of Etcher, you can burn an image of Linux and Windows 7-10 in just a few clicks. Just before downloading, pay attention to whether the software fits your build. And now let’s figure out how to make a bootable USB flash drive:
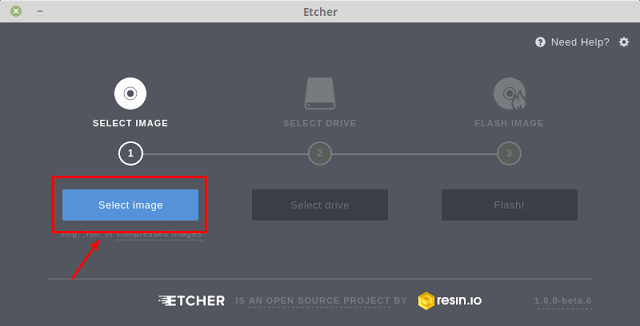
- Run the program and click the first highlighted button: “Select Image”. Specify the one you need.
Etcher
- Next, connect the drive and start recording – after completing the first step, the second button will light up – select the flash drive on which the Windows image will be written.
- Upon completion, you will see an inscription indicating that the flash drive is ready for use.
Creating a bootable Windows USB flash drive in Linux without programs
Based on all of the above, you can generally do without the mediation of third-party software and create a flash drive with an installer in Linux much faster. For this:
- stock up on a Windows optical disc image (you can download it or write it off from a working system);
- flash drive with enough memory.
Next, the procedure is as follows:
- The flash drive must first be configured for ntfs or FAT32 format (see above how to do this).
- The optical disk image must be turned into installation files. To do this, open it through an archiver and extract the contents from the repository.
- All elements are simply dragged onto the flash drive.
It should be noted that this method will be effective only for the updated intermediary between the OS and firmware – UEFI with the GPT partitioning system and 64-bit bit depth. For an earlier version of BSVV, this method will not work – you simply will not find the files you need. To use a flash drive, it is very important to configure UEFI in such a way that the drive is recognized as an OS launcher. To do this, restart your PC and press the key combination that matches your version of BSVV (usually F2 or Del, but there may be other options) and call the intermediary. You will see a window with images of hard drives, which are numbered in order. Select your flash drive (it must be connected beforehand) and drag it to the first place (fortunately, UEFI allows you to use a mouse and has a more or less clear appearance).
