With the release of the Windows 11 operating system, users were able to evaluate the functionality of the new improved version of the OS from Microsoft. But, in addition to the advantages in the form of numerous useful options, including those migrated from the “Ten” and brought to perfection, the operating system inherited such a detail as regular updates that are performed regardless of the user’s desire. The implementation of files provided by developers is aimed at fixing bugs and improving system performance, but in reality often creates problems for users.
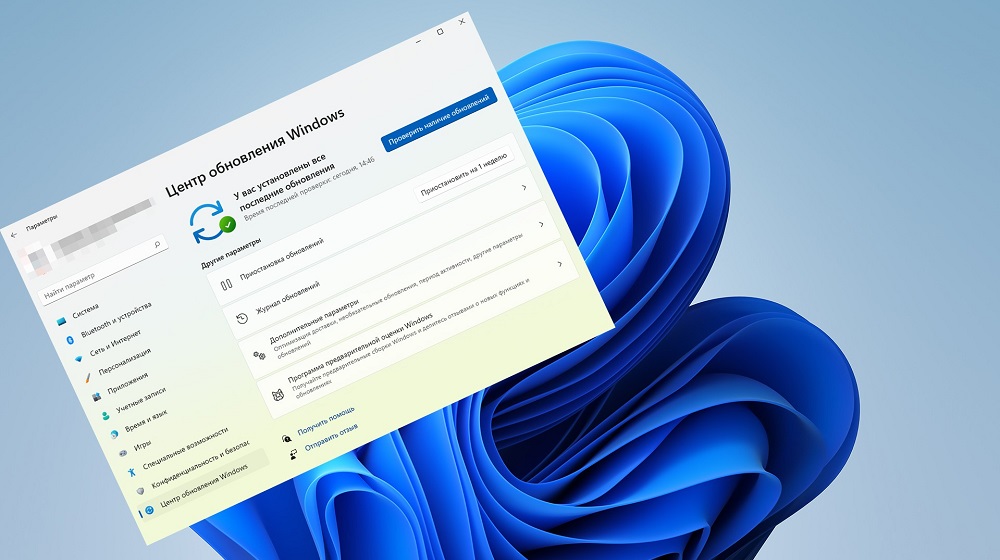
Because updates are automatic by default and Microsoft does not provide an option to opt out of downloading packages, there are some methods to delay or disable installations that you can use while waiting for a new, more stable build or for other reasons.
Contents
Disable automatic updates in Windows 11
There are several methods to disable automatic updates of Windows 11 using built-in system tools or third-party tools. All of them have their pros and cons.
To get rid of unwanted automatic download of packages, you can proceed as follows:
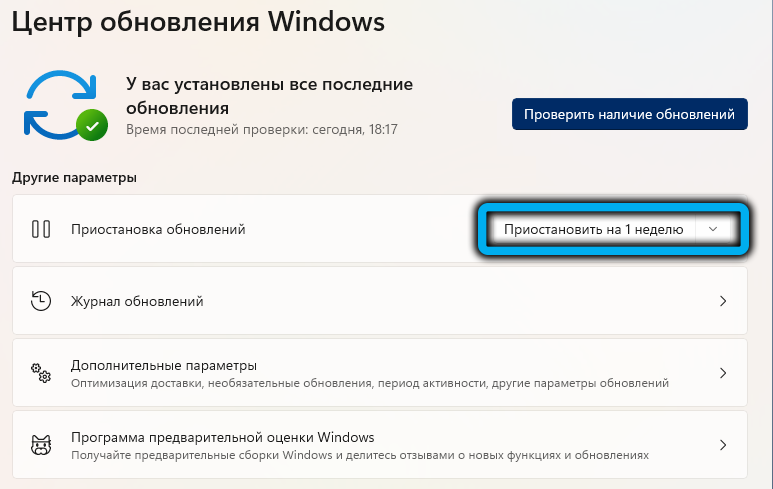
- Pause Windows updates temporarily for 7 days in the “Update Center” (after a week, the packages will be downloaded if the user does not repeat the steps that prevent the installation).
- Deactivate the Windows Update service. Disabling the Update Center will allow you to get rid of the problem of automatic installation of packages for an unlimited period, while the action will affect the operation of other related software. For example, you will not be able to use the DISM tool to check the integrity of system files.
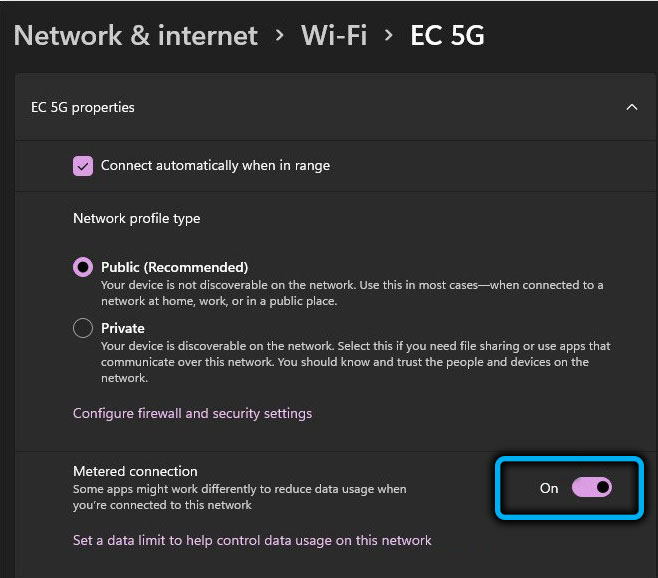
- Set up a metered network connection by limiting the ability to download packages. By analogy with mobile devices, downloading data without the user’s permission will not be performed, not only for system updates, but also for other automatic software updates installed on the computer. However, the rule does not apply to critical security updates.
- Use the system registry to disable downloading updates automatically. The user is required to be familiar with the registry.
- Disable the installation of packages using the regular tool “Local Group Policy Editor”. This feature is not available in every version of Windows 11.
- Use third-party special software that allows you to disable Windows updates.
Let’s consider each of the options in more detail.
Pause Windows 11 updates for a week
In the event that a temporary solution is required, there is an option to disable updates for a 7-day period. It is carried out simply:
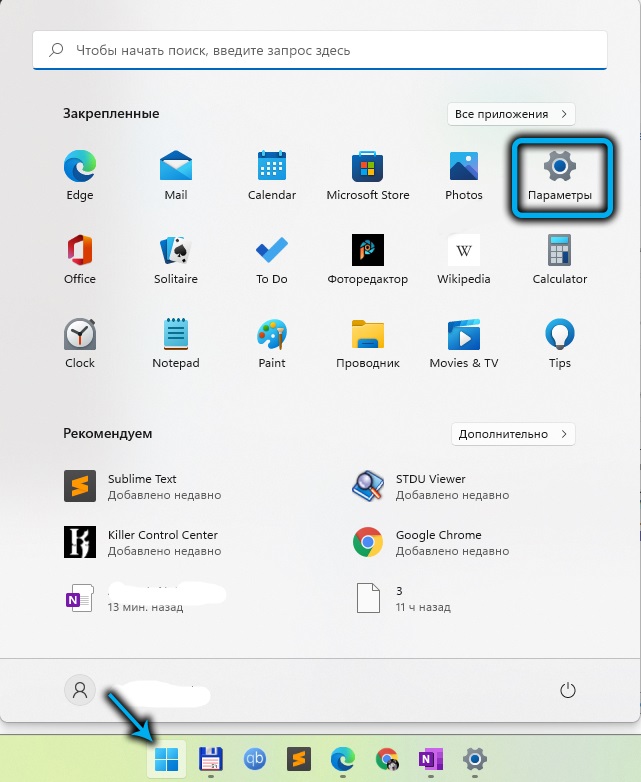
- go to “Settings” (Win + I);
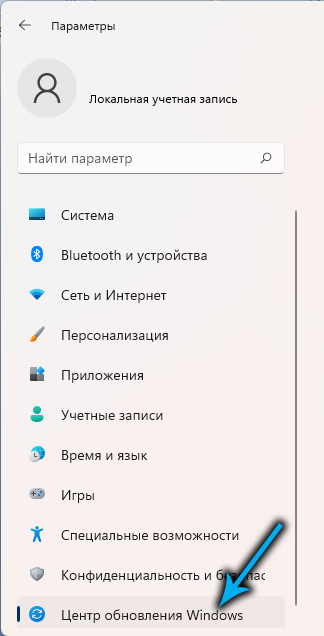
- in the menu on the left, select the item “Windows Update”;
- Click “Pause for 1 week”.
The method can be used repeatedly if there is a desire to continue blocking the receipt of packets, but to disable it indefinitely, it is better to consider other solutions.
Disabling the Windows Update service
As a permanent solution that allows you to disable the delivery of Windows updates forever or for a certain time, you can use the ability to deactivate the regular application responsible for installing updates.
The task is performed as follows:
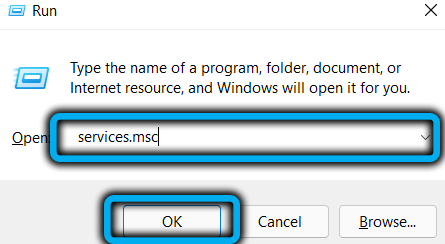
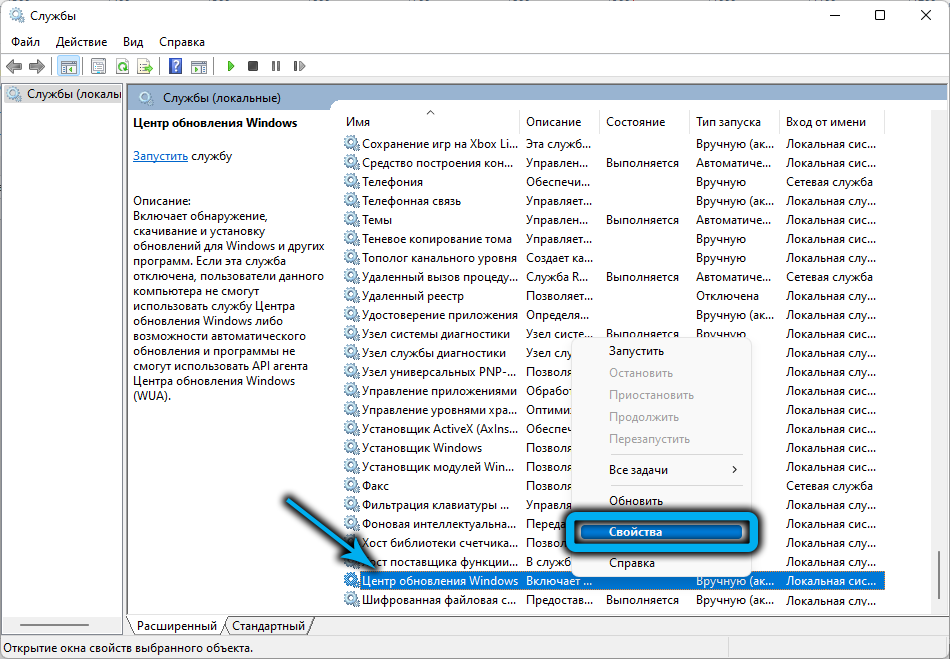
- to go to Windows services, open the Run console (Win + R), where we enter the standard request services.msc in the line and press Enter. To grant administrator access, we agree with the offer to manage user accounts;
- in the “Services” window that opens, scroll the list of local services in the right menu and select Windows Update;
- press RMB, from the context menu go to the properties;
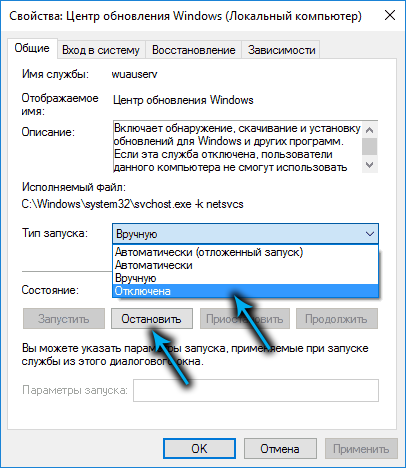
- on the “General” tab of the properties window, click the “Stop” button to stop the execution of the service, set the “Startup type” option to “Disabled” in the “Startup type” line and apply the changes by clicking the button at the bottom of the window.
You can activate the service at any time by following the reverse steps.
Internet connection limit
Another effective way to disable automatic updates in Windows 11 is to set up a limited Internet connection. This solution is suitable for limiting package downloads when using Wi-Fi.
To set a limit on the incoming amount of data (files over the established limits will not pass), in particular updates to the current build of the operating system, perform the following steps:
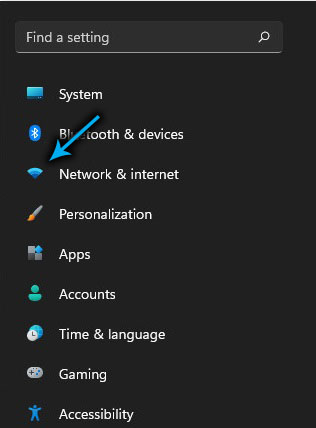
- by pressing the Win + I keys, open the system settings;
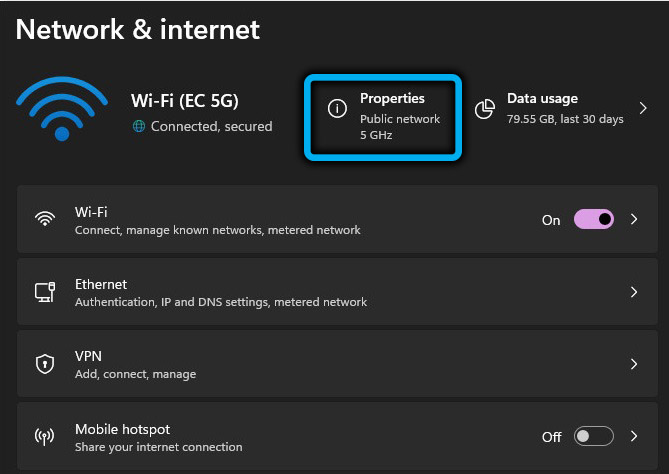
- on the “Network & internet” tab, click “Properties” next to the name of the Wi-Fi connection used;
- in the limit connection block, turn the toggle switch to the active position.
Disabling updates through the system registry
We remind you that in order to work with the registry, you must have certain skills, this method is not suitable for inexperienced users. Inadvertently making changes to the registry can cause problems with Windows and even lead to a system crash.
The method will allow you to disable Windows updates by creating a new partition with the NoAutoUpdate parameter, which prevents the loading of components (you can undo the changes by deleting the created partition and parameter).
To prevent the system from updating automatically, perform the following steps:
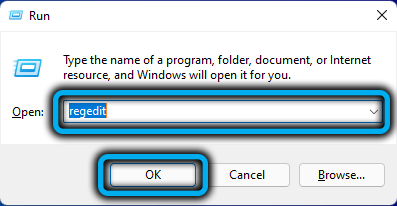
- open the registry using the Run console and the regedit command (Ctrl + Shift + Enter keys will allow you to open the editor with administrator access, agree to the offer to manage user accounts);
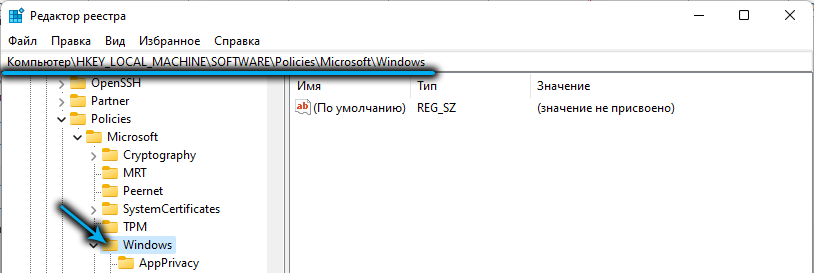
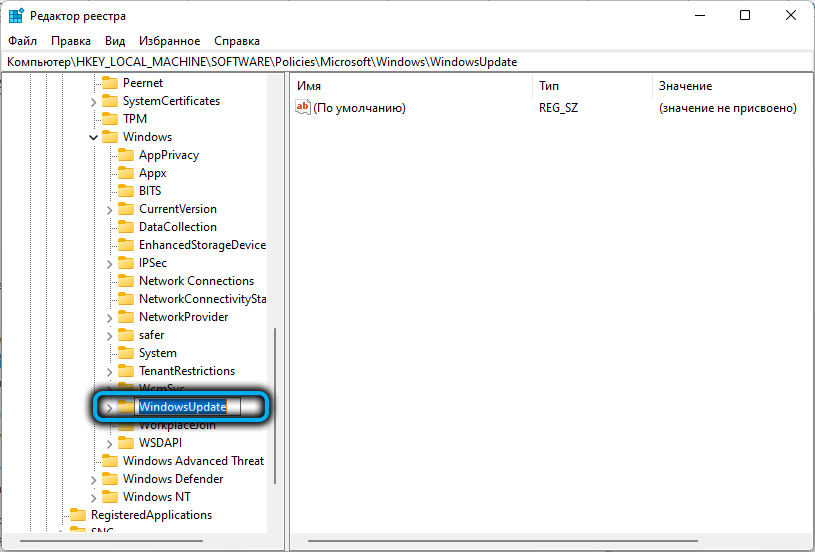
- in the registry editor, go along the path HKEY_LOCAL_MACHINESOSTWAREPoliciesMicrosoftWindows (copy to the address bar of the system snap-in or go manually);
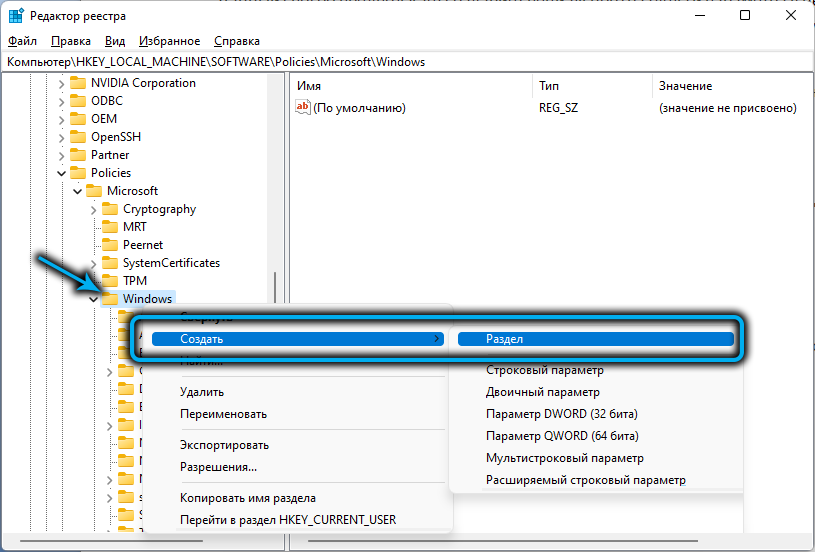
- create a partition in the Windows directory (right-click and select “Create” – “Partition” from the context menu);
- rename the created section with the name “New partition # 1” to “Windows Update”;
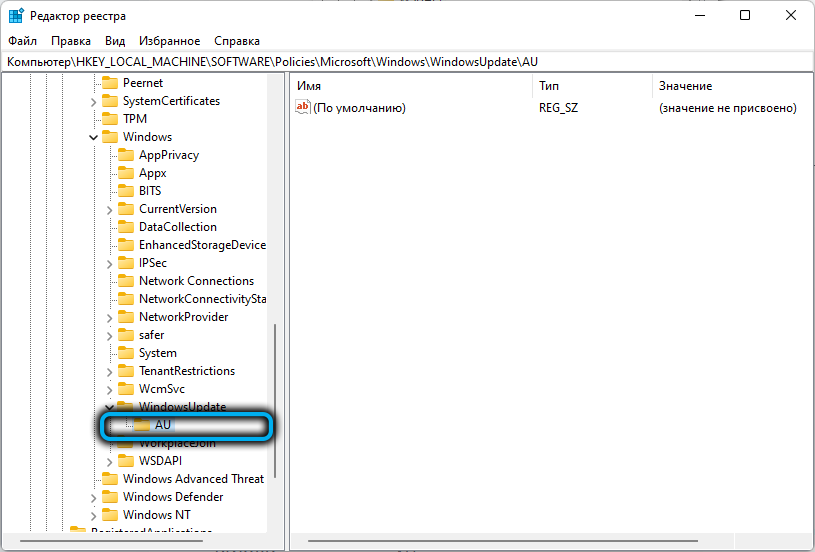
- click on the created RMB section and create a key with the name “AU” in it;
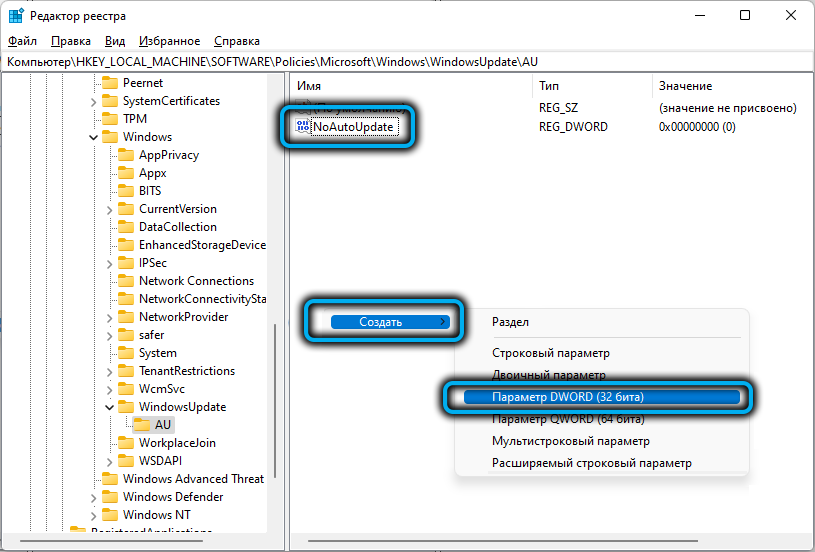
- go to a new section to create a value inside the key, for which we click on the free field in the right part of the RMB window, select “Create” – “DWORD (32 bit) Value” from the menu, rename it by assigning the name “NoAutoUpdate”;
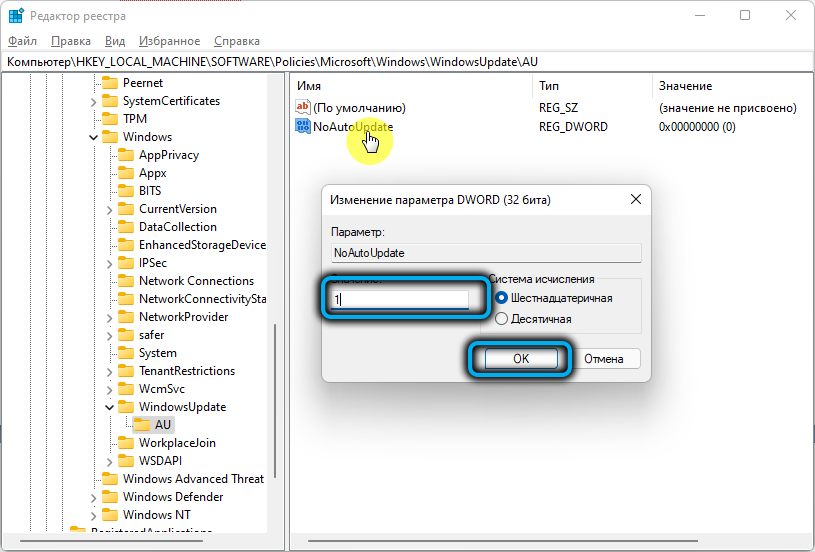
- double-click on the created parameter to open a window for changing its properties, here in the “Value” field enter the number 1, the calculation system is hexadecimal (Hexadecimal) and click “OK”;
- close the registry editor and reboot so that the changes take effect and the updates are disabled at the next system start.
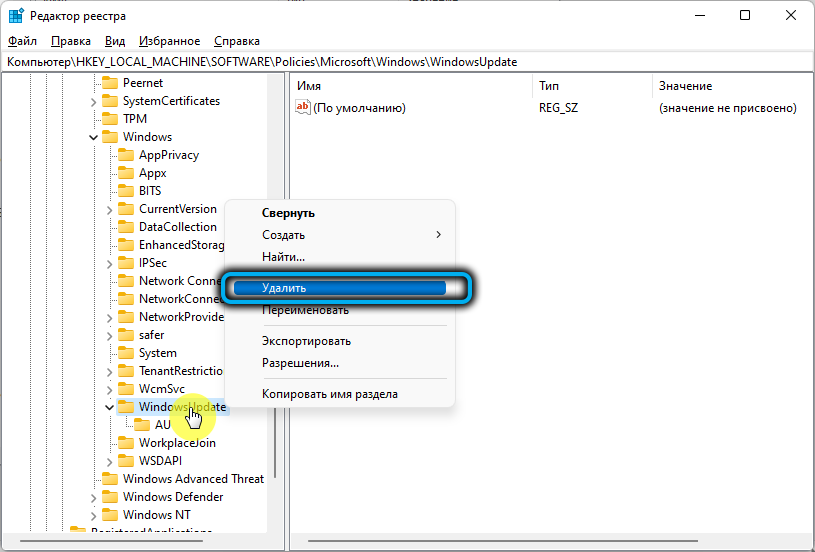
If it becomes necessary to return automatic Windows updates, simply delete the previously created “WindowsUpdate” section.
Disable updates from the Local Group Policy Editor
With the support of the Windows 11 build of the built-in system service “Local Group Policy Editor”, you can also cancel the automatic receipt of updates using this tool.
Using the standard service, you can remove the option to automatically install update packages by doing the following:
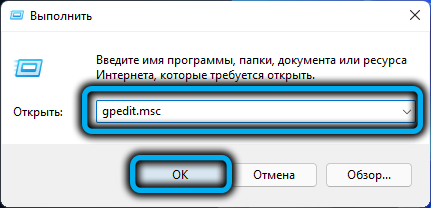
- open the Run console (Win + R) and enter gpedit.msc in the line, press the enter key. We agree to the offer of user account management;
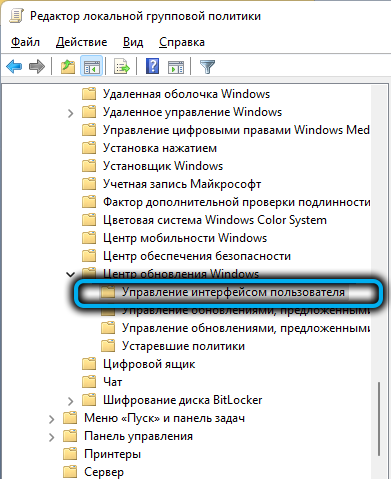
ATTENTION. The appearance of an error with the text “Unable to find gpedit.msc” indicates the absence of a service in the system. - in the left menu of the utility window, go along the branch: “Computer Configuration” – “Administrative Templates” – “Windows Components” – “Windows Update” – “User Interface Management”;
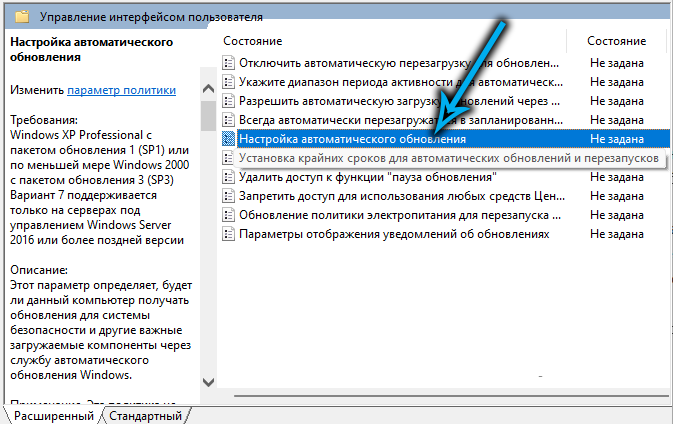
- in the right area, double-click the mouse, select “Configure automatic updates”;
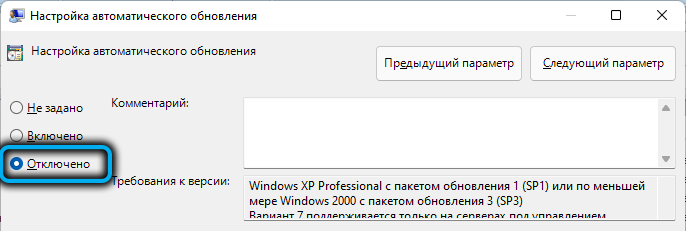
- in the window that opens, check the “Disabled” item and click “Apply” at the bottom;
- restart the computer (laptop) to apply the changes. After the system is restarted, pending updates will not be installed.
Using a third-party Windows Update Blocker app
You can also disable the automatic download of updates using third-party software, which allows you, among other things, to prohibit upgrading to Windows 11 if you want to stay on the “Ten”. One such tool is the Windows Update Blocker. The utility was developed for Windows 10, but it is also successfully used on Windows 11.
Completing the task is simple:
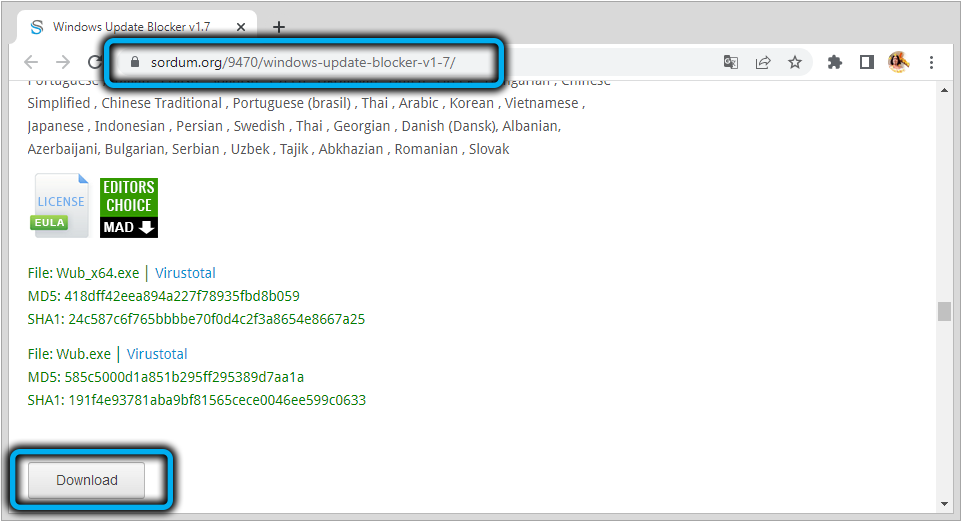
- download from the official resource Windows Update Blocker ;
- on the download page, click the “Download” button and after downloading the file, extract the contents of the archive to any convenient directory on the disk using an archiver program (WinRAR, WinZip, 7Zip, etc.);
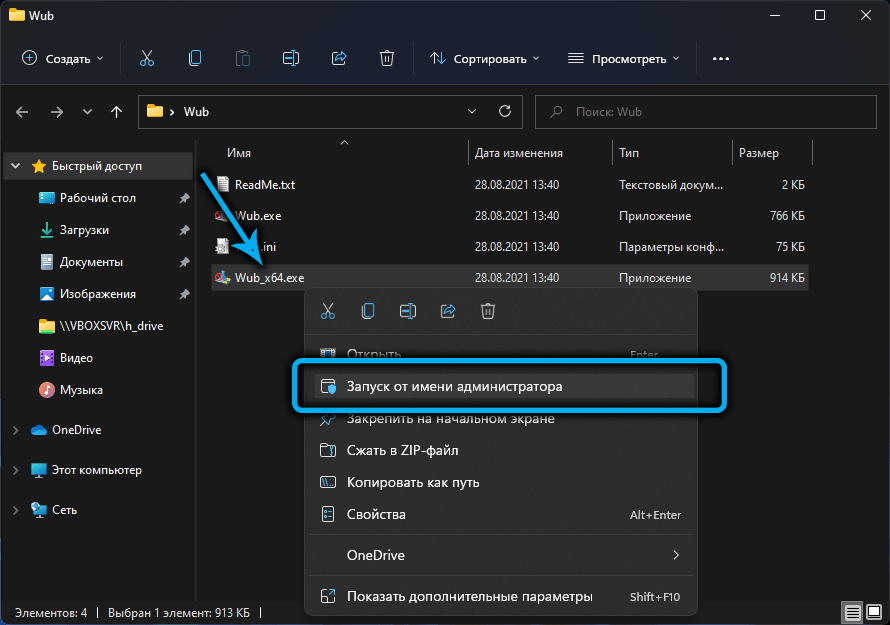
- we launch an executable file from the unpacked archive, taking into account the bit depth of the system (in the case of Windows 11, this will be an “executable” named Wub_x64.exe);
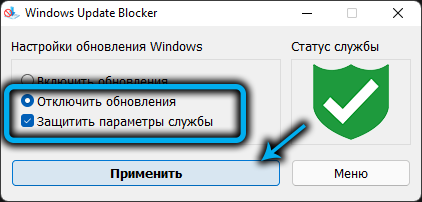
- to deactivate the option, change the checkbox to “DisableUpdates”. On the item “Protect Services Settings” (“Parameters for protecting services”), leave a checkmark. Click the “Apply Now” button below to apply the settings.
In such simple ways, you can stay on the Windows assembly that is convenient for you and bypass the forced loading of system software. If you know more ways to prevent the installation of updates, write about them in the comments.
