Like any new operating system, Windows 11 cannot boast of stability in operation. Both bugs in the system itself and inept actions of users who need time to get used to the new interface can lead to failures, especially when switching from versions smaller than “tens”.
In any case, the new OS has more advanced tools designed to restore performance. These include rollback from checkpoints or, for example, resetting to factory settings. But both methods are not ideal, because when using them, many programs will have to be installed again.

Creating a full backup, if automated, will solve this problem, but using this tool requires you to be aware of what you are doing.
Contents
Ways to create a backup in Windows 11
There are several ways to create a backup: using a regular tool or third-party software products. Let’s start with the first one.
Backup with built-in tools
The easiest way to protect your system from possible problems is to use the built-in backup tool. Let’s see how it works:
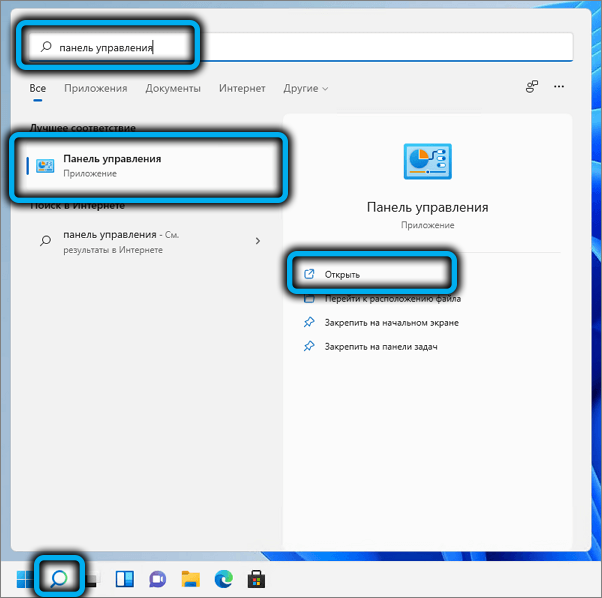
- open the “Control Panel” in any convenient way (for example, through the search console in the taskbar);
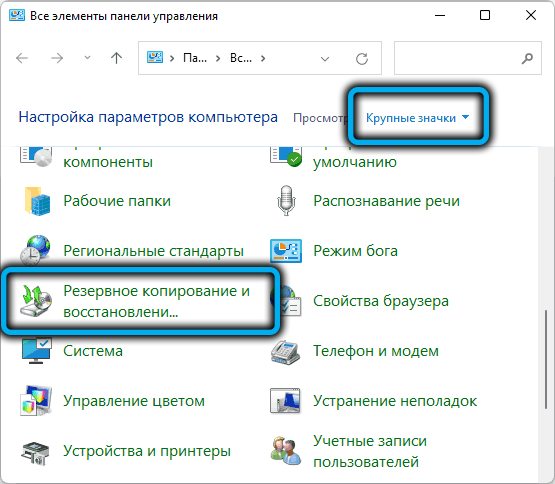
- set the “View” parameter to “Icons” (large or small, if only not “Category”);
- Click on the “Backup/Restore” option. If there is no such parameter in the Control Panel, you will have to use the search console (Win + R) by entering the text control / name Microsoft.BackupAndRestoreCenter and pressing the Enter key;
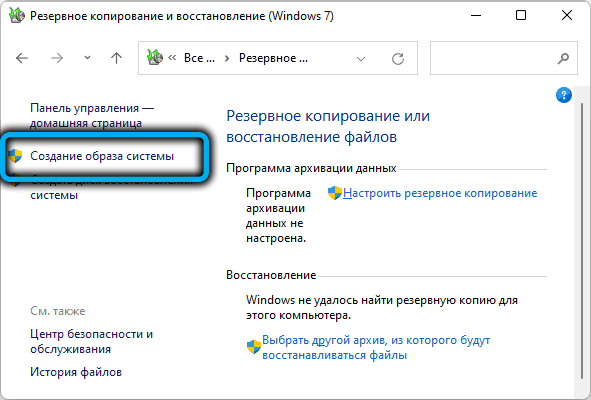
- a new window will open, in which we click on the option “Create a system image”;
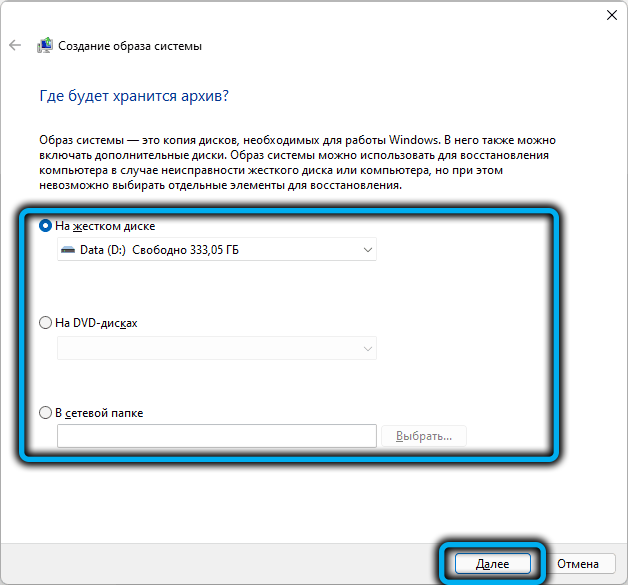
- in the next window, you must specify on which media the backup will be written. It will not work to place a backup on the system drive, it must be another partition, flash drive or network drive. Since all important data will be copied, there should be a lot of free space on the selected media;
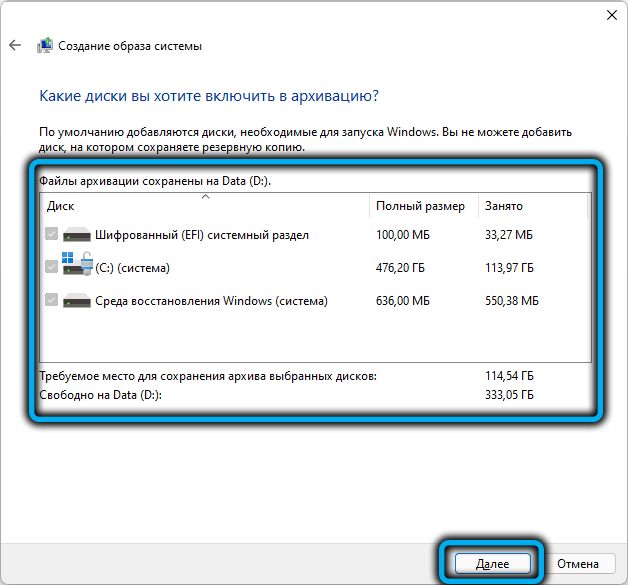
- the next window will display a list of all components of the operating system required for its successful boot, indicating their size, including the total, and the amount of free space on the media selected for storing the backup;
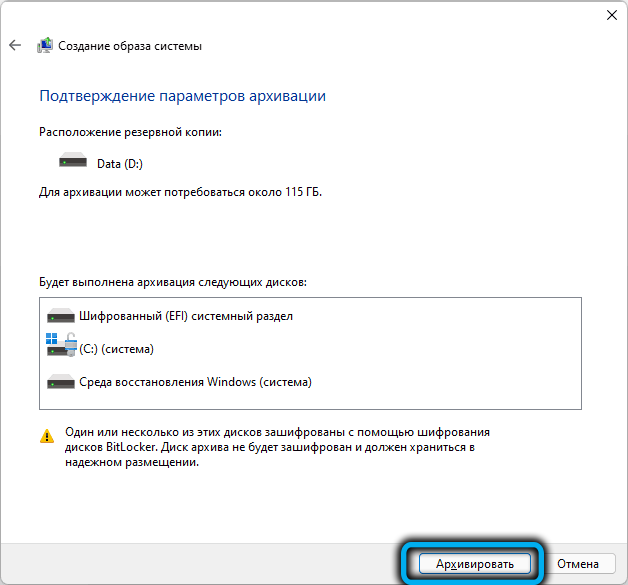
- if there is enough free space, confirm the operation by clicking the “Archive” button. Since the amount of data to copy is significant, the procedure for creating a system backup can be quite lengthy.
Using the Macrium Reflect utility
It is believed that the use of third-party software in Windows instead of standard software allows you to perform tasks more efficiently. We are not going to confirm or refute this opinion, but we consider it necessary to give an alternative solution as an example. To do this, download from the official website of Macrium Reflect (free version). Next steps:
- run the utility;
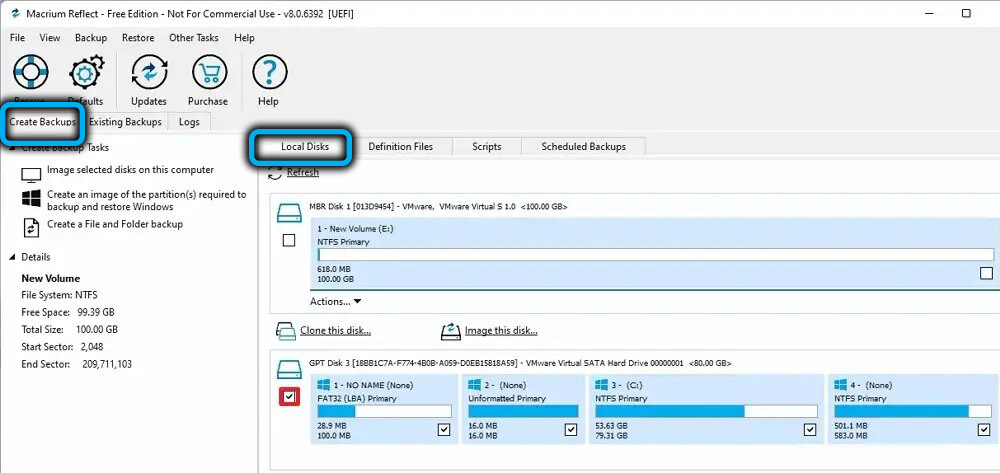
- in the top status line, select Create Backups;
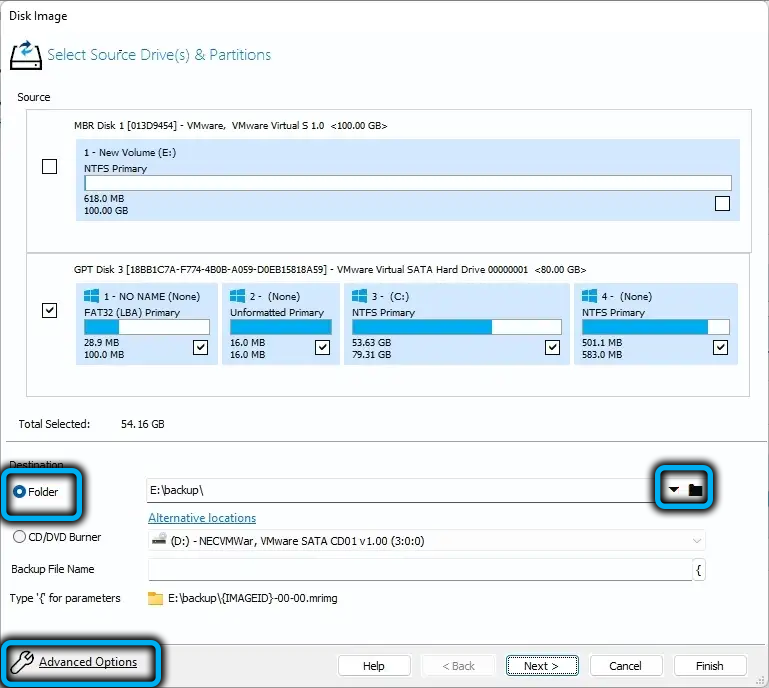
- in the right panel in the upper block, click the Local Disks tab;
- a list of disks in the system will appear, select those that need to be copied;
- make sure that there is enough space on the target media to save the backup;
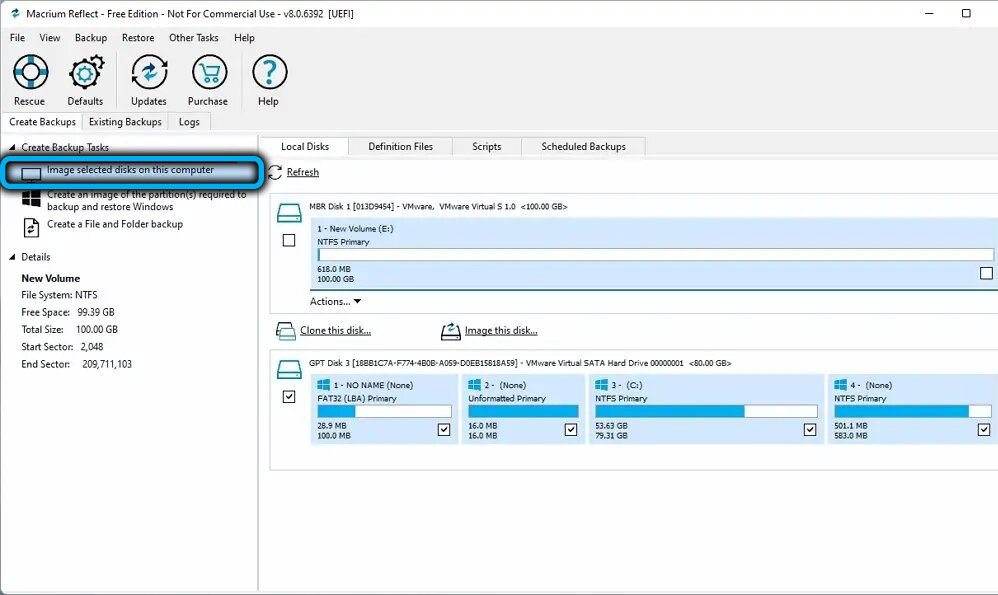
- in the left panel, click on the item Image selected disks …;
- in the right panel below, a block will appear for selecting the target drive, select the Folder option;
- to the right of the button, select the target disk;
- click on the icon with the image of a wrench located at the bottom;
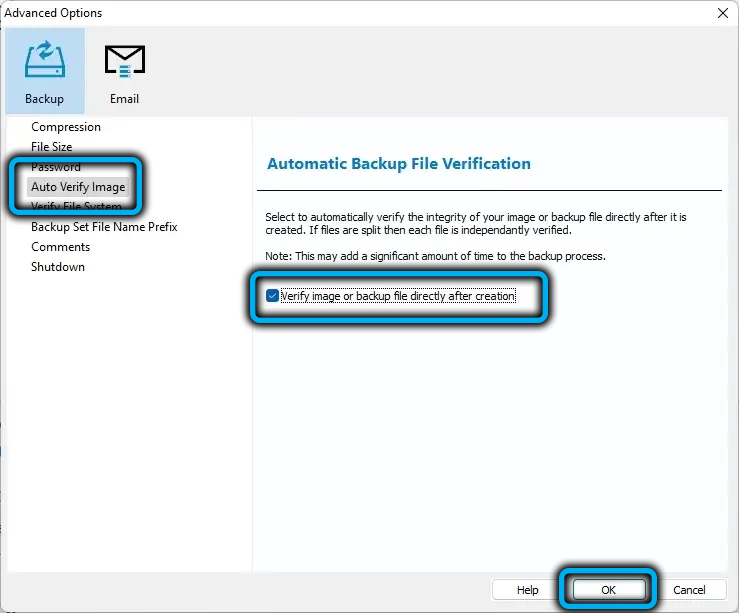
- a new window will open, in the left panel of which we select the item AutoVerify Image (it is responsible for verifying the backup after it is created) – check the box in the right panel;
- here, on the advanced settings page, you can also make some other settings (for size, compression, password protection of the archive, etc.);
- click OK and then the Next button;
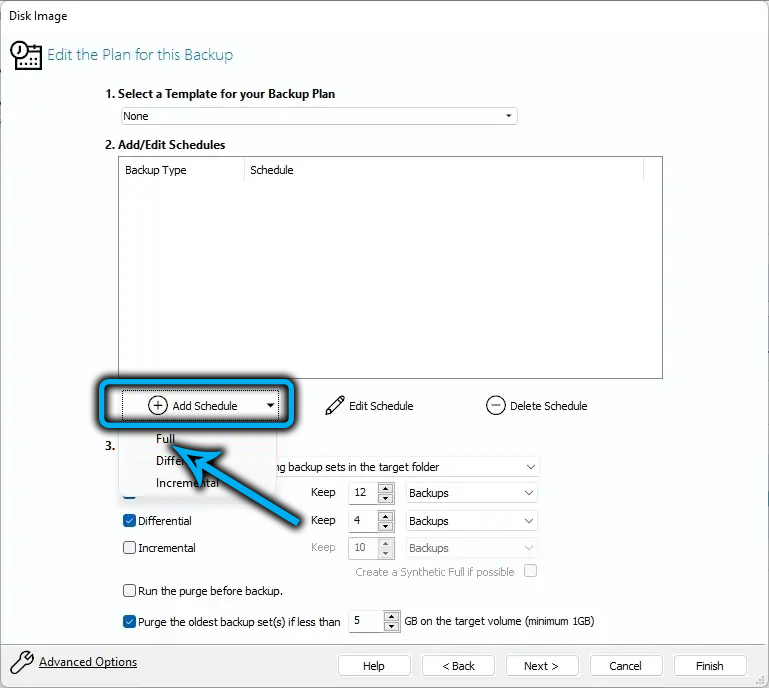
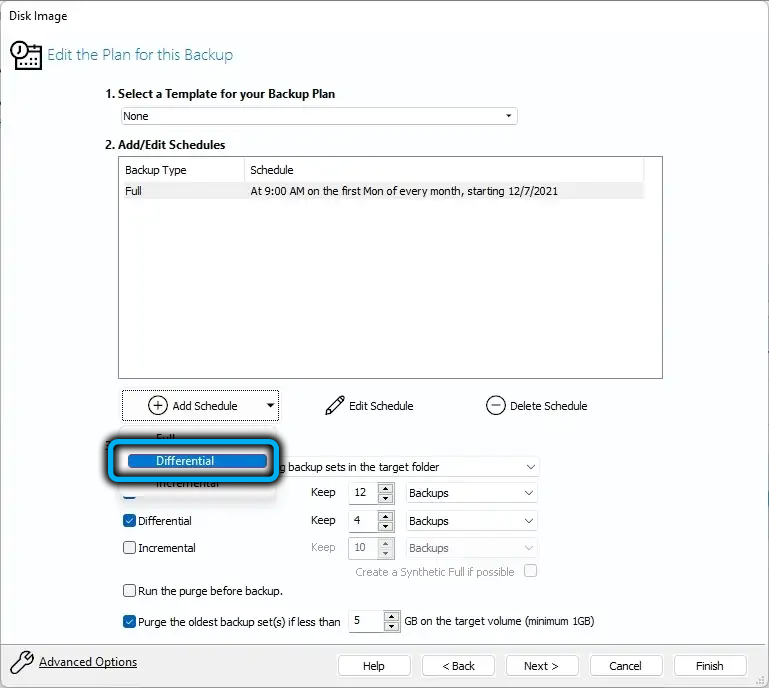
- a window will open where you can configure the Windows 11 backup execution plan – click on Add Schedule, select the Full value for it (creating a full backup);
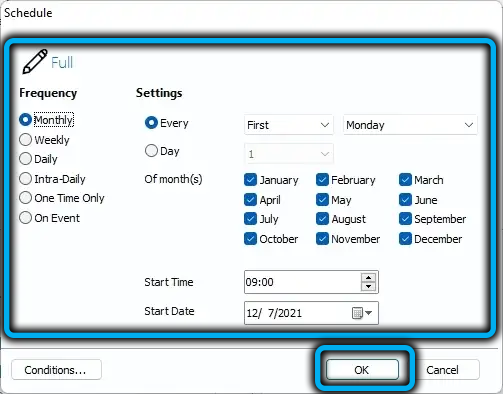
- by clicking the Edit Schedules button, you can set the frequency of the full backup operation, for example, every week;
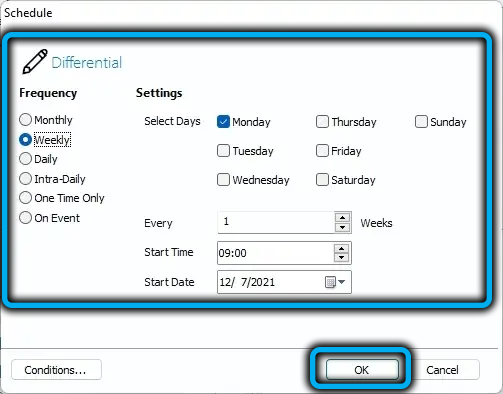
- if you check the Differential option, then all changes on the computer that have occurred since the creation of the last full backup will be added to the backup, so enabling this feature can be invaluable when restoring the system;
- for a differential backup, you can also set up a schedule, preferably a daily backup;
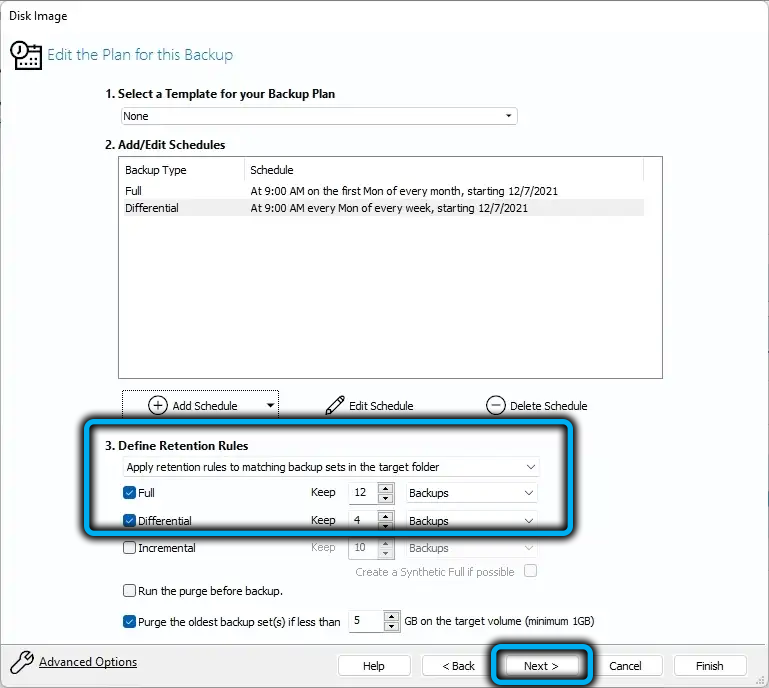
- it remains to set the numeric values for the Full and Differential options on the right – they will indicate how many days old backups need to be deleted to write new ones;
- press the Next, Finish buttons, close the utility window.
As a result, backups will be created according to the schedule set by the user. If a system restore is required, the latest backups of the full and differential plans will need to be used.
Restoring from a backup
Here, as you understand, you also need to consider both options, both regular and using Macrium Reflect. To get started using the Windows 11 Recovery Environment.
System recovery with built-in tools
Strictly speaking, you can try to restore Windows using a bootable USB flash drive, or using a recovery disk, as well as from the recovery environment, but since the principle of all three options is almost identical, let’s consider the first one.
Step by step algorithm:
- connect a removable disk to the computer, if the backup is written to it, insert a bootable USB flash drive, change the boot order;
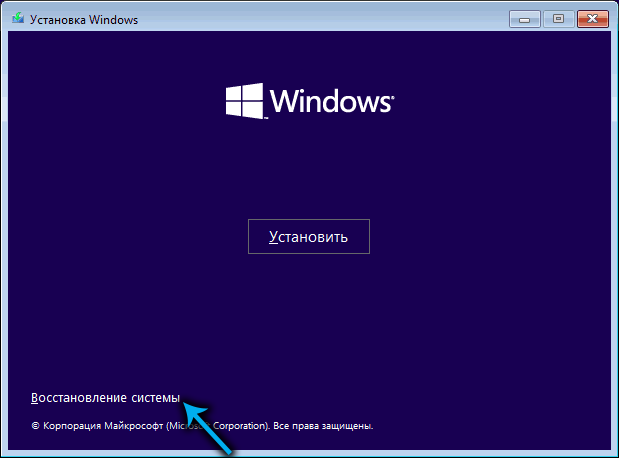
- we load Windows from a USB flash drive, after the language selection stage, click on the “System Restore” button located at the bottom left;
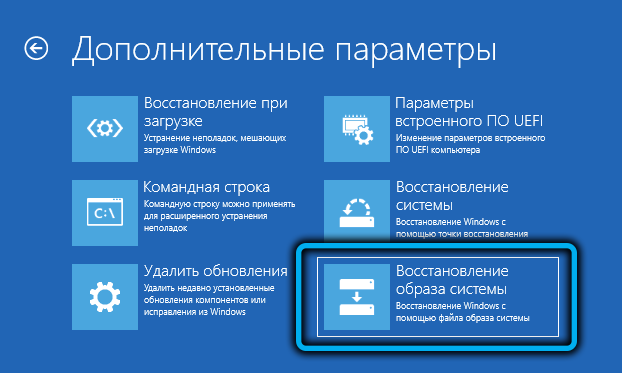
- in the new window, click the “Troubleshooting” tab;
- on the next screen, select the “System Image Recovery” tab;
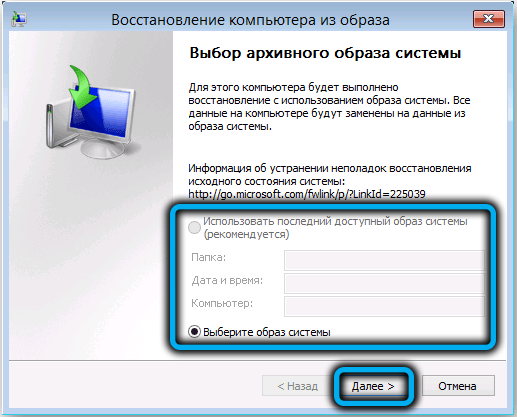
- a search for Windows 11 backups will start on all connected media (they can be an external drive, a flash drive, and a partition of a non-system drive);
- select the latest backup, start the recovery procedure;
- We are waiting for the end of the system restore.
To boot recovered Windows from the system HDD or SSD, you should use Boot Manager to restore the previous boot order, or simply remove the bootable USB flash drive. The first option is more correct, although it will require entering the BIOS settings.
Restoring from a backup created by Macrium Reflect
When choosing this method of restoring the Windows 11 system from a previously made backup, we again need a bootable USB flash drive and a change in the standard boot order in UEFI. The BIOS call can be done in different ways. The most common options are the Delete, Esc, F2, F12 keys.
So, the sequence of actions:
- after booting the system from the flash drive, launch MacriumReflect;
- click on the Existing Backups button (located next to Create Backups);
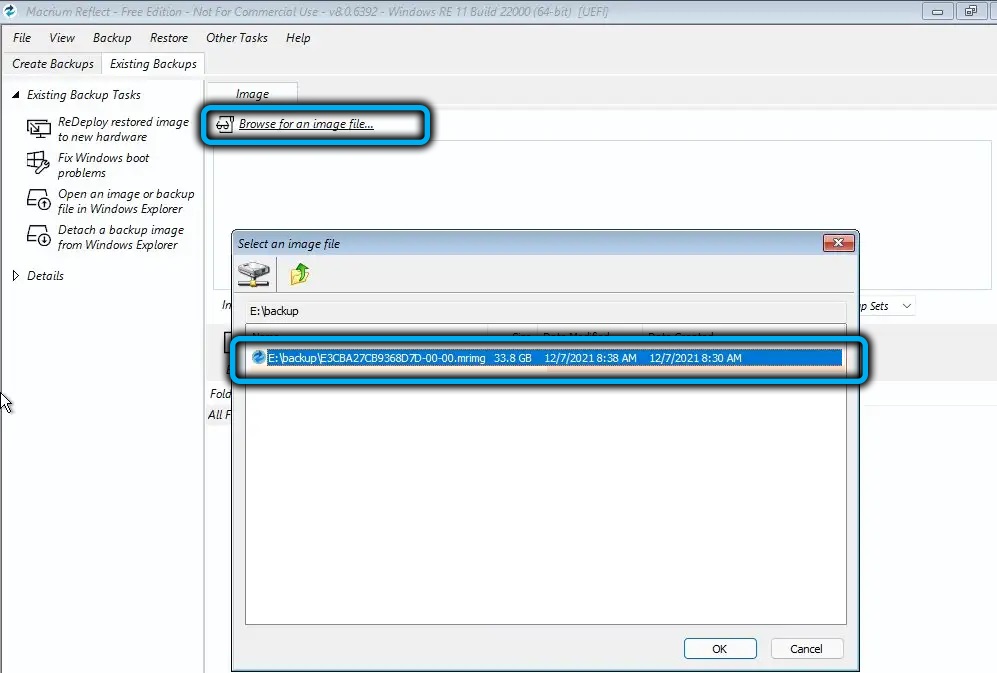
- in the right block, click on the Browsefor an image file parameter;
- an explorer window will open, in which you need to specify the path to the full backup, which will be used to restore the system;
- click OK in the explorer and return to the main window of the utility;
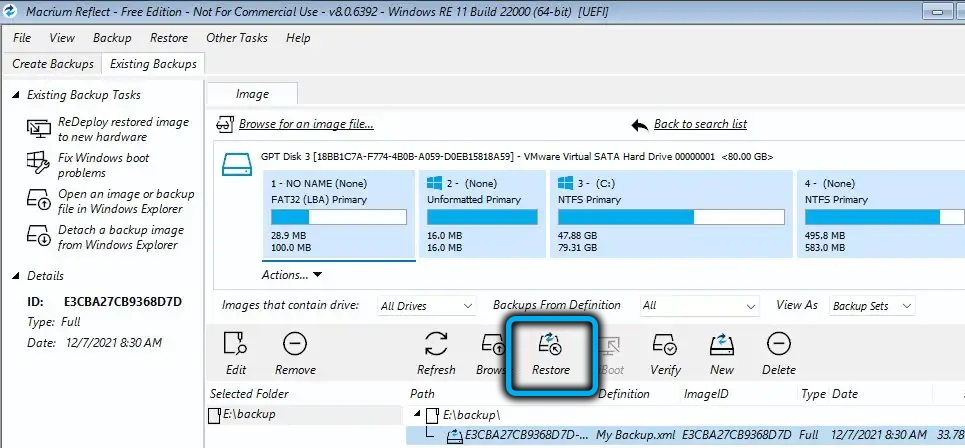
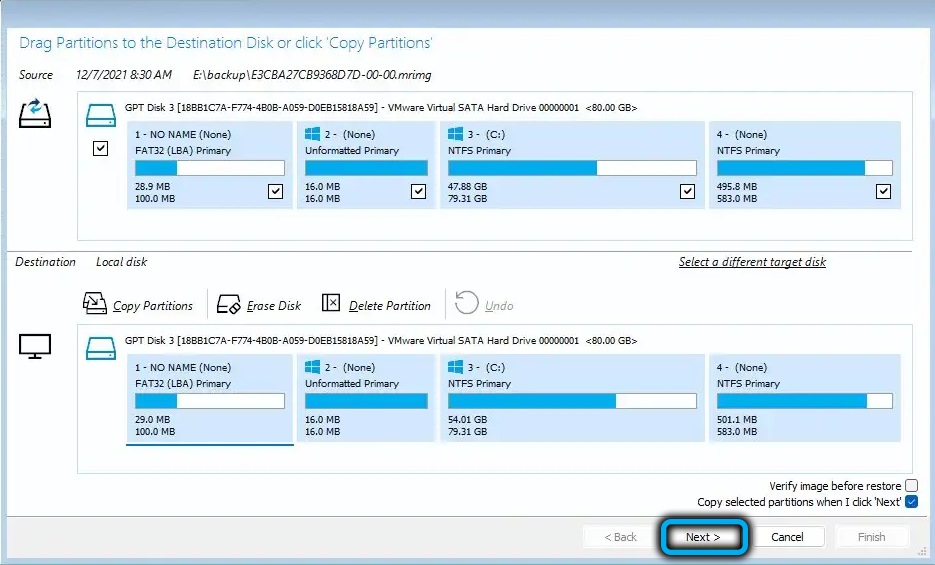
- a list of partitions to be restored will appear in the right block, in the menu bar below, in which we select the Restore tab;
- a description of the system partition will appear, on which the Windows 11 image will be overwritten, if everything is correct, click the Next button;
- if a partition is missing on the target disk (for example, it was formatted), the missing partition must be dragged from top to bottom, and only then click Next;
- successively press the buttons Finish, Continue, OK, Close;
- to restart the computer, click on the Power icon located in the lower left corner of the utility, and select the Reboot menu item, confirm by clicking OK.
This will start the restore procedure from the latest full backup made with Macrium Reflect.
As you can see, the only significant inconvenience of creating a backup copy and subsequent restoration is the duration of the procedure, which significantly exceeds the time when applying a system rollback from a checkpoint.
