About 15 years ago, the attitude towards cloud services that began to appear was skeptical – the computer community doubted their reliability. Although the same mail servers, in essence, were also a remote way of storing information, including media data. Over time, the attitude began to change, and then the giants entered the game, competing among themselves for providing customers with a greater range of services. Among them was Microsoft with its SkyDrive service, launched in 2007. In 2014, the cloud storage was renamed OneDrive, and the service is still available under this name.

Contents
Features of OneDrive file storage
For a long time, the service existed separately, but then it was decided to integrate it into the operating system, which turned out to be Windows 8. Gradually, cloud storage clients were released for almost all common operating systems, including mobile versions.
Currently, new registered users of the service are allocated 5 GB of disk space, but if you registered a long time ago, the size of your personal “cloud” may correspond to the rules of that time (15 or 30 GB). Office 365 subscribers get 1 TB of storage, and family members get 6 TB.

Of course, 5 GB by modern standards is nothing, so those who wish can purchase additional space on the servers of the service in accordance with current tariff plans (maximum – 25 TB).
In Windows 8/10, the service is integrated into the system, which allows you to use it in almost all standard applications, including office suite components, as if you were working with a regular local drive. Users of devices with other operating systems can install OneDrive using the appropriate client.

Note that tight integration with the operating system has a downside:
- the client process or application takes up space in RAM, reducing the amount of available computer resources;
- files to be synchronized are uploaded to the cloud for a rather long time (according to some estimates, an order of magnitude slower than Google Drive);
- cases of hosting censorship are described, when user files were deleted from the cloud drive;
- disabling sync causes some data to be available only in OneDrive.
Needless to say, frequent crashes on Microsoft servers can cause nothing but irritation. Unloading the client from active processes will do nothing, since it will appear there again in just a few seconds.
Ways to disable OneDrive
So what can disgruntled Windows 10 users do to disable the service? Since it is integrated into the operating system, it will not be possible to remove it using standard methods. But you can turn it off and remove the client’s autoload, and in many ways.
Using the settings of the service itself
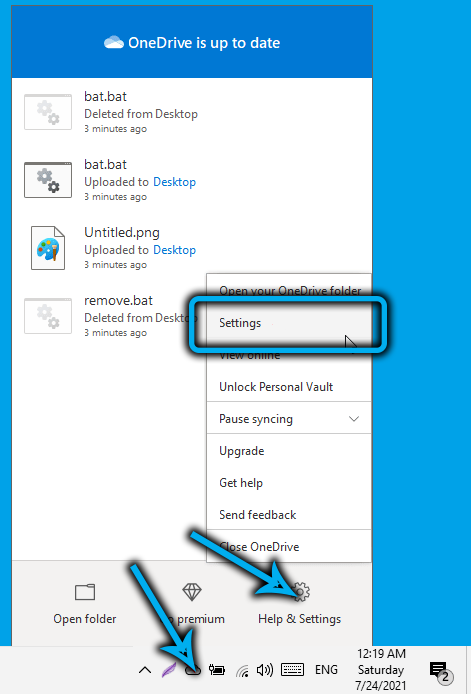
Let’s see how to disable OneDrive on Windows 11/10 using the settings of the client application:
- right-click on the program icon, in the context menu that opens, select the “Settings” item;
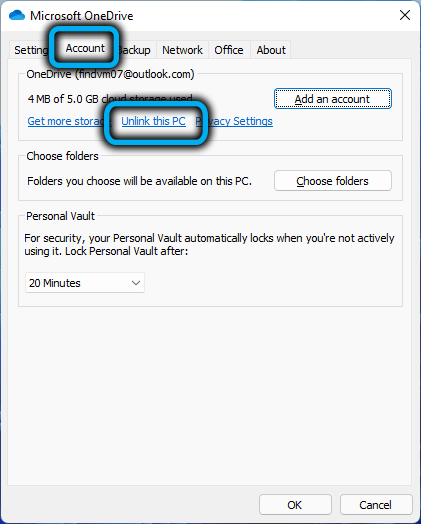
- in the tab of the same name, remove all the checkboxes;
- in the “Account” tab, click on the link “Delete connection”;
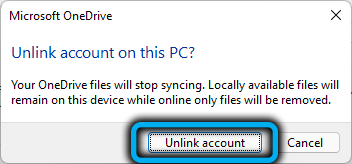
- in the window that opens, confirm your actions by clicking the appropriate button.
Such a disabling will avoid starting the service when the computer is turned on, and if desired, it can be activated again.
By editing the registry
You can also stop the synchronization and operation of OneDrive through the system registry, but we recommend this method only for advanced users.
Step by step algorithm:
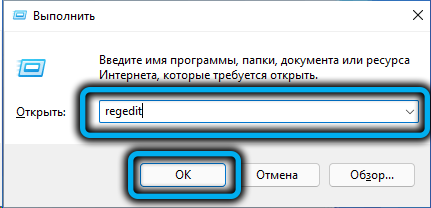
- we launch the registry editor using the regedit command entered in the “Run” field (called by the Win + R combination);
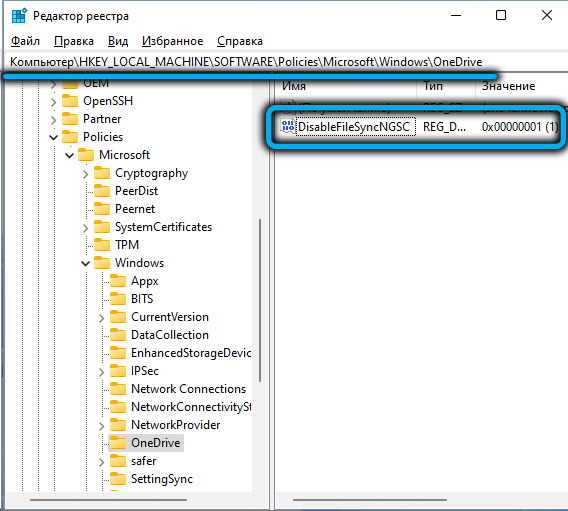
- go to the branch HKEY_LOCAL_MACHINESOFTWAREPoliciesMicrosoftWindowsOneDrive;
- if there is no OneDrive highlight, you need to create it;
- in the right block of the OneDrive branch, right-click on any empty space, select the “Create” item, and then – the 32-bit DWORD parameter section;
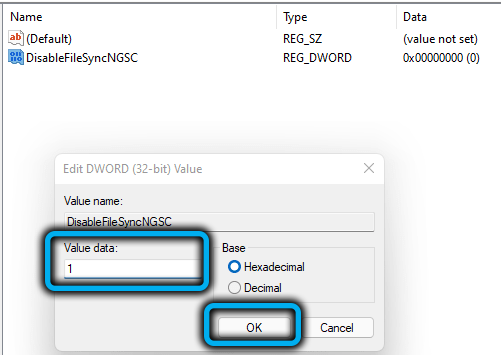
- assign the created parameter the name ” DisableFileSyncNGSC ” and a numerical value of 1;
- click OK, close the registry editor, restart the computer.
Using the Group Policy Editor
You can also disable OneDrive synchronization in Windows 11/10 through the Group Policy Editor, but only for owners of the Professional / Ultimate version.
In this case, there are no risks to “screw up” the system, so this method is preferable to editing the registry:
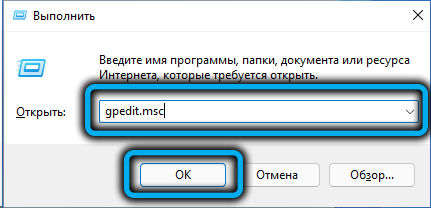
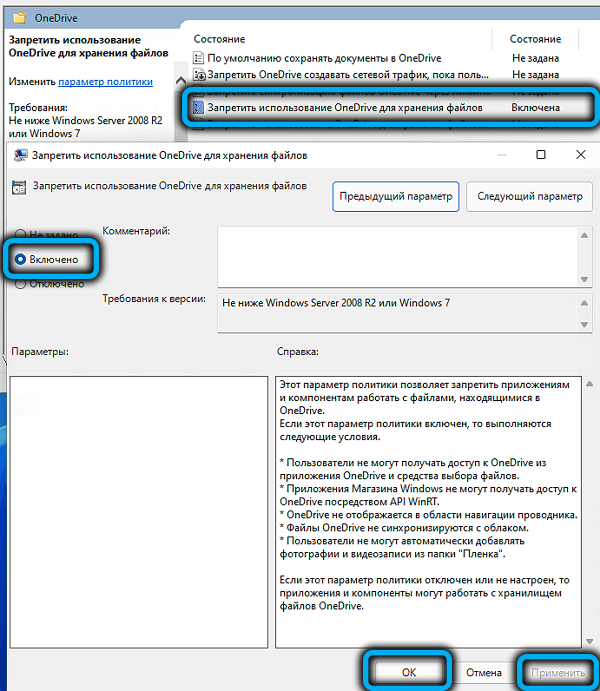
- call the Run console again and type in the gpedit.msc command;
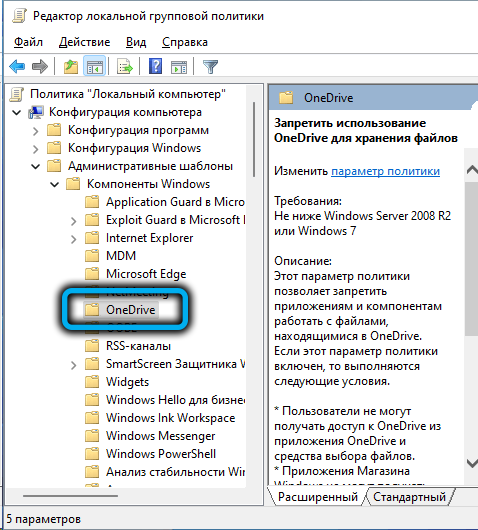
- in the window that opens, click on the “Computer Configuration” tab;
- open the “Administrative Templates” branch, and then the “Windows Components” branch;
- in the right block, select OneDrive and double-click on the component;
- click on the option that prohibits the use of OneDrive for remote file storage, move the switch to the “On” position, click OK.
For the changes to take effect, restart the computer.
Remove OneDrive
The methods listed above perform the main task: they disable the service from starting at system startup. But it remains on the disk, taking up a certain amount of space, and this annoys many users. For them, we provide effective ways on how to remove (uninstall) OneDrive from a disk in Windows 10/11.
Using the command line
Not the easiest method, but quite effective:
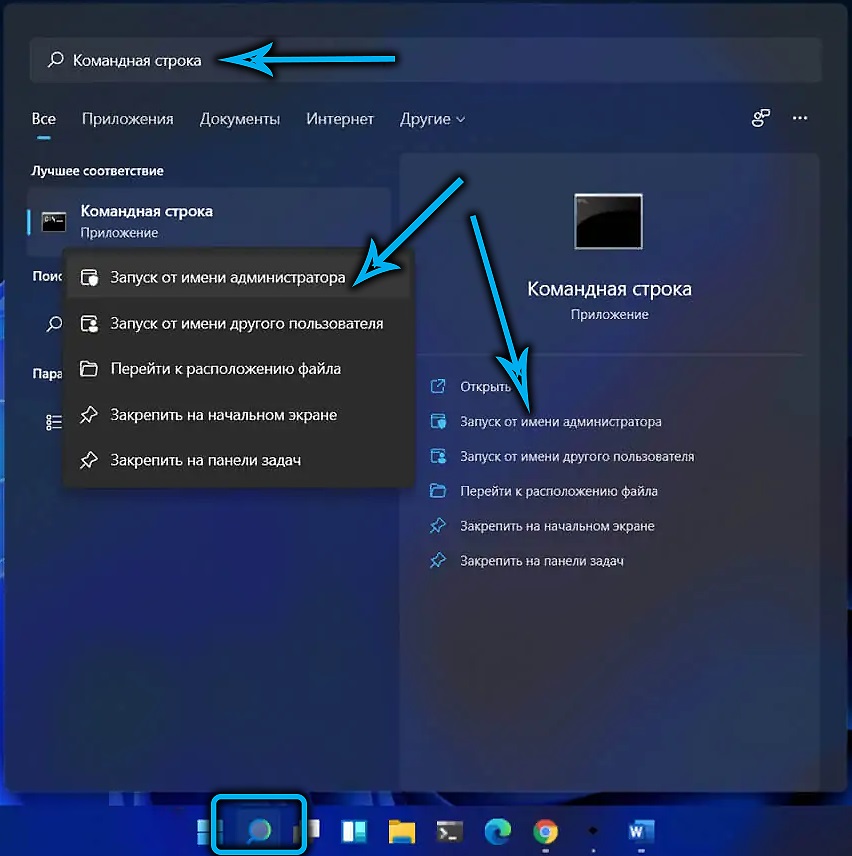
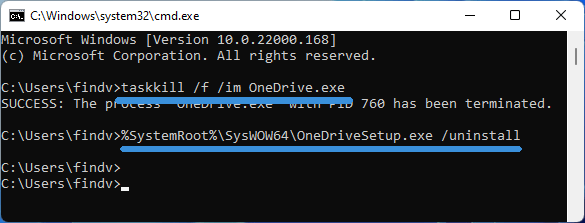
- open the command line console;
- enter a command that unloads the process from memory
taskkill/f /im OneDrive.exe - to remove the program use the command
%
SystemRoot%System32OneDriveSetup.exe/uninstall(version for 32-bit systems, in the case of a 64-bit version of Windows, instead of System32, enter the SysWOW64 folder;
- close the command line window.
Uninstall via control panel
You can also use the standard way to uninstall applications:
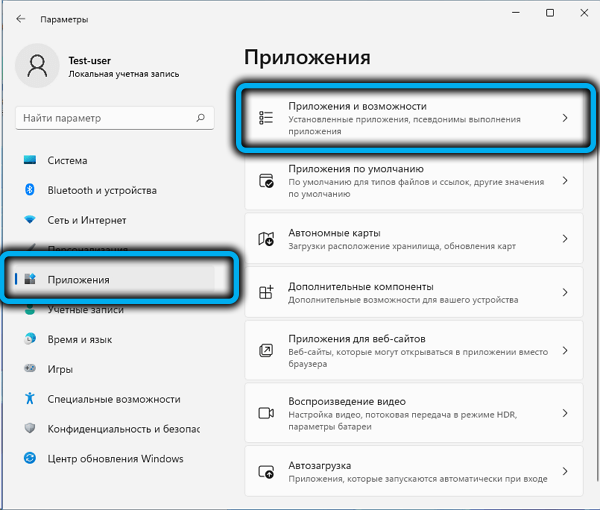
- right-click on the “Start” icon;
- launch “Programs and Features”;
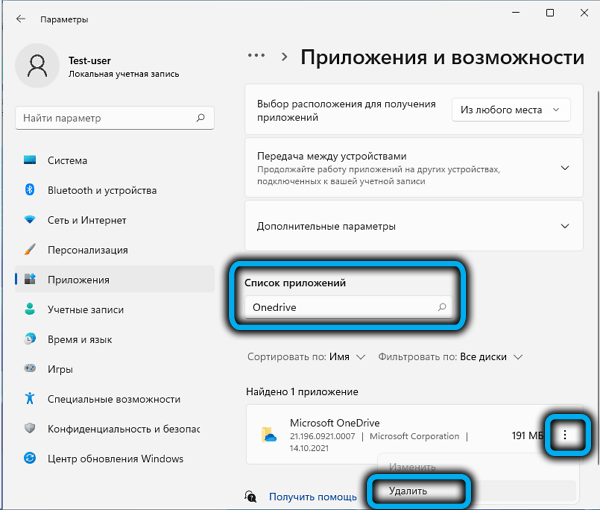
- We are looking for OneDrive programs installed on the computer in the list that opens, click on this line and click the “Delete” button.
The regular Windows uninstaller will start, which will remove the application from the system.
Remove the OneDrive icon from the Quick Access Toolbar
Both of the above methods are not finalized, leaving the service icon in the quick launch bar. Naturally, this interferes and annoys because it eats up space on the panel. To remove the icon, you must follow the steps in the “Using the Group Policy Editor” section.
Removing traces of a cloud service
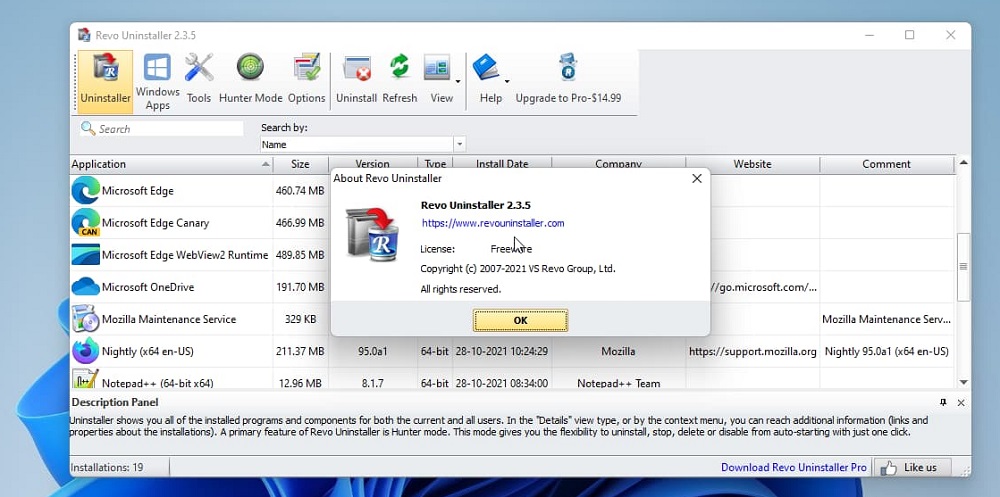
The standard way to remove OneDrive, as already noted, does its job incompletely, leaving some folders untouched. In principle, there is nothing to worry about, since the service itself is uninstalled, but for those users who keep order on their computer (meaning the file system), we can recommend using an uninstaller from a third-party manufacturer, for example, Revo Uninstaller. Such programs can search for traces of uninstalled applications and clean the disk and registry from them. This is the best way to completely and permanently get rid of OneDrive.
Remove a cloud service from your phone
Competition in the field of cloud storage has forced Microsoft to develop appropriate applications for all common mobile operating systems, including Android. The mobile client, of course, does not have such close integration with the office suite as in Windows 8/10/11, but in all other respects its functionality is almost identical to that provided by the web version.

However, no one forbids installing proprietary office applications on a smartphone, and then it will be possible to work with documents from the Office package.

Of course, all these features become available only with a Microsoft account. But we should not forget that synchronization with cloud storage will require a significant increase in the consumption of mobile traffic, and for users with tariffs that do not require unlimited Internet, this is a significant drawback.
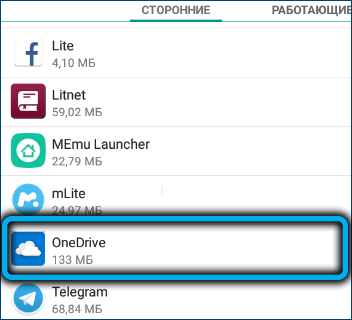
Removing the OneDrive application from your phone is as simple as any other, for this you should use the standard uninstallation method through the settings of your mobile gadget.

Well, our material has come to an end. We hope that our article helped you figure out how to install, disable or remove OneDrive in Window 11.
