Nowadays, almost every modern person has a digital camera that allows you to take high-quality pictures. However, even such modern devices can provoke disappointment when the desired photo is accompanied by visible flaws, which include noise.
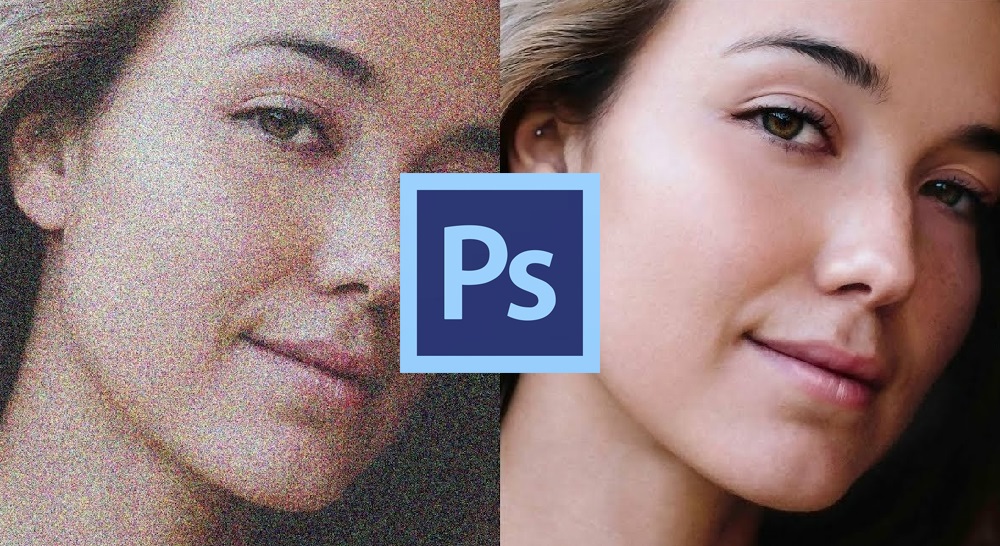
Of course, if there is the slightest opportunity to take a second shot with the correct settings, the person will take advantage of it. Unfortunately, in life it often happens that you simply cannot take advantage of the chance of re-shooting, so it is most reasonable to study the information on how to remove noise in a photo in Photoshop.
Contents
Solving the problem at the stage of photographing
So that the user does not have to sit for hours at the computer and fix numerous problems in the photographs taken, it is better to simplify the task for yourself initially.
That is, try to take photographs so that the noise on them is minimal. It is unlikely that it will be possible to completely avoid the noise. But at least you can help yourself in reducing the editing work.
To do this, you should adhere to a few fairly simple recommendations.
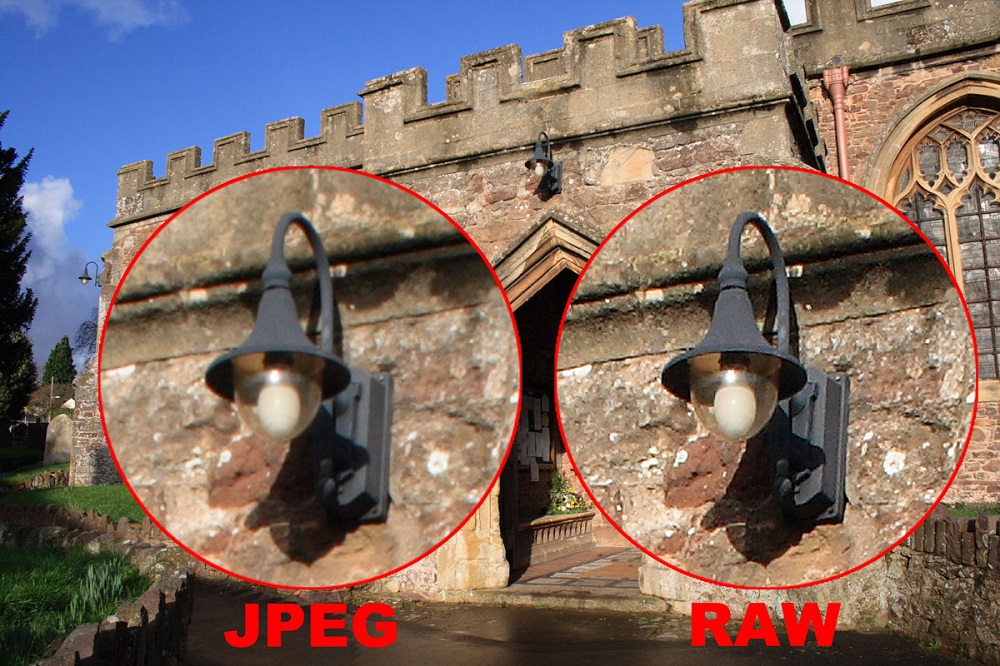
- Choose RAW mode. Shooting with the camera is really better in this mode. As a result, the files will be saved in RAW format. They differ in that they are more informative than the standard JPEG format. Such files are not compressed. But it is compression that leads to the appearance of noise and artifacts in the images.
- Use a low ISO. The ISO parameter indicates how sensitive the film or matrix is in relation to light. The lower this sensitivity is, the more you will have to expose frames during filming. You will have to work harder to get the image with the desired level of brightness. Using a high ISO will shorten the exposure time and you can tighten the aperture. The problem is that at high ISO, the effect of graininess is formed in the frame, or black volcanic evenly scattered sand. And this is already bad from the standpoint of noisy photography.
- Expose to the right. The technique is called the abbreviated ETTR. In the process of shooting, it is recommended to overexpose the image by literally 0.5-1 stops. In this case, the histogram should not fly out and lead to the appearance of knocked-out areas in the finished photograph. But then a slight overexposure is easily compensated for by developing RAW. It looks a little tricky, but experienced photographers know exactly what this is about. And they actively use this technique.
- Don’t take long exposures. The longer the exposure when photographing is, the more the matrix on your camera will start to warm up. This leads to the appearance of a hot pixel effect on the images.
And here some will have a logical question. Why stick with the last tip when ETTR requires a slower exposure. It’s simple. In this situation, ETTR is indeed somewhat preferable. With this approach, there will be less noise.
In any case, you need to try, experiment and use different techniques.
Since noise cannot always be avoided, the next task will be to edit the photos. And here the most important assistant for most users is the popular Photoshop program.
Noise reduction in Adobe Photoshop
Not every digital photo has noise. If the process of photographing takes place in the daytime with excellent lighting, you can safely avoid the occurrence of such aesthetic imperfections.
Also, the quality of the picture depends on what kind of device is used to shoot, what sensitivity parameters can be set on it. Professional photographers can also adjust shutter speed and aperture to pre-set conditions for high-quality photography. Unfortunately, the owners of simple cameras do not have such opportunities, so they are the ones who most often encounter low-quality photos, in this regard, they strive to gain practical experience on how to remove noise in Photoshop.
Eliminate noise
To enhance the aesthetics of the photo, the user must download and install Adobe Photoshop in advance, as well as, in some cases, download the necessary plugins.

It is also very important to pay attention to the format in which the photo was saved, which is planned to be corrected. It is very good if the photo was saved in RAW format, as this increases the chance of more successful adjustments.
So, feeling the need to eliminate noise in a photo, you need to:
- open the image in Photoshop;
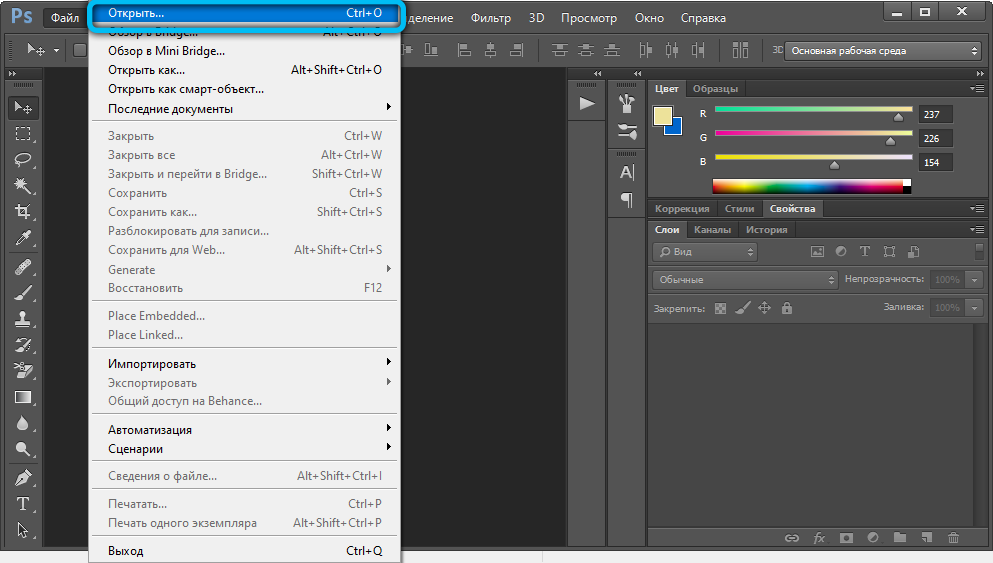
- after that, on the toolbar, click on the “Filter” menu;
- after expanding the additional menu, you should find the item “Noise”;
- when you hover over it, an additional list with suggested operations will open, among which the last in the list is the item “Reduce noise”;
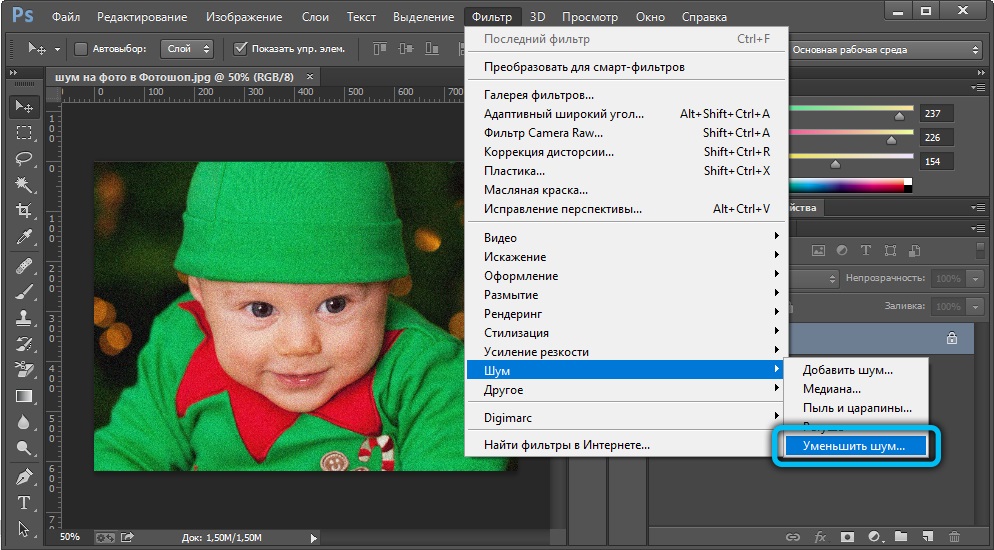
- if you click on this item, a dialog box will appear on the screen, in which tools will be located that allow you to edit the image;
- also on the left side of the dialog box will be opened for viewing the photo in 100% scale.
All the proposed tools are equipped with sliders, by moving which, the user will personally observe the change in the quality of the photo. If in the process of such actions it is possible to achieve the desired result, remove all noise, all that remains is to save the changes made.
On the same toolbar, you can check the box next to “Remove JPEG artifact”, which also contributes to improving the quality of the photo, but only if the defect occurred earlier when compressing the image.
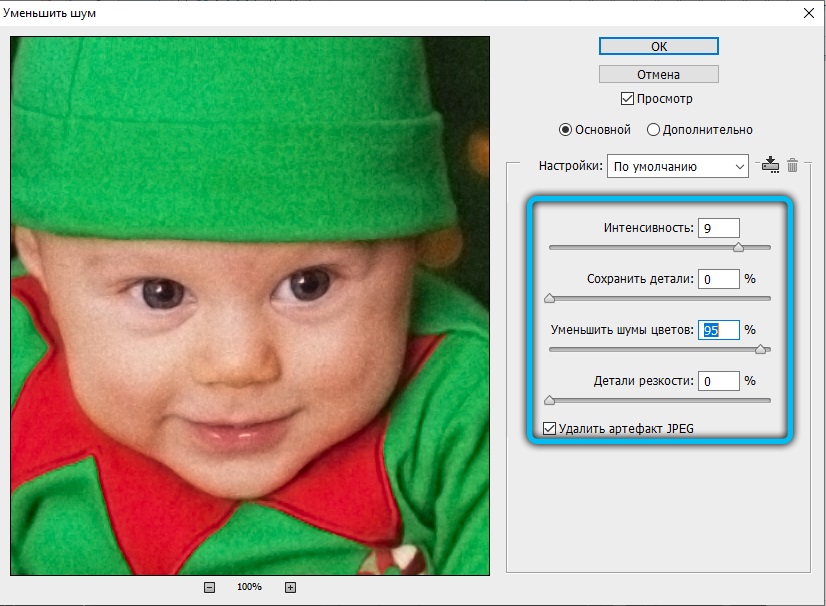
This completes the noise elimination process, but the user is not always satisfied with the result, since it is necessary to ascertain the loss of sharpness, which those who corrected the photo are not always ready to accept.
Using built-in filters
There are 2 more effective filters in the image editing software Photoshop that will help to cope with the resulting problem in the form of noisy photos.
We are talking about filters for dust and scratches, as well as noise reduction.
Each of them deserves a separate consideration.
Dust and scratches
It’s worth starting with a simpler filter integrated into Photoshop. It’s called Dust and Scratches.

Its peculiarity is that using this tool, you can remove noise from the image without unnecessary settings. Just keep in mind that the filter is not able to cope with highly noisy images. But it will remove a small part of the interference without problems.
To use the capabilities of this built-in filter, do the following:
- run the program;
- open the edited image;
- go to the “Filters” section;
- select the “Noise” option here;
- then click on “Dust and Scratches”;
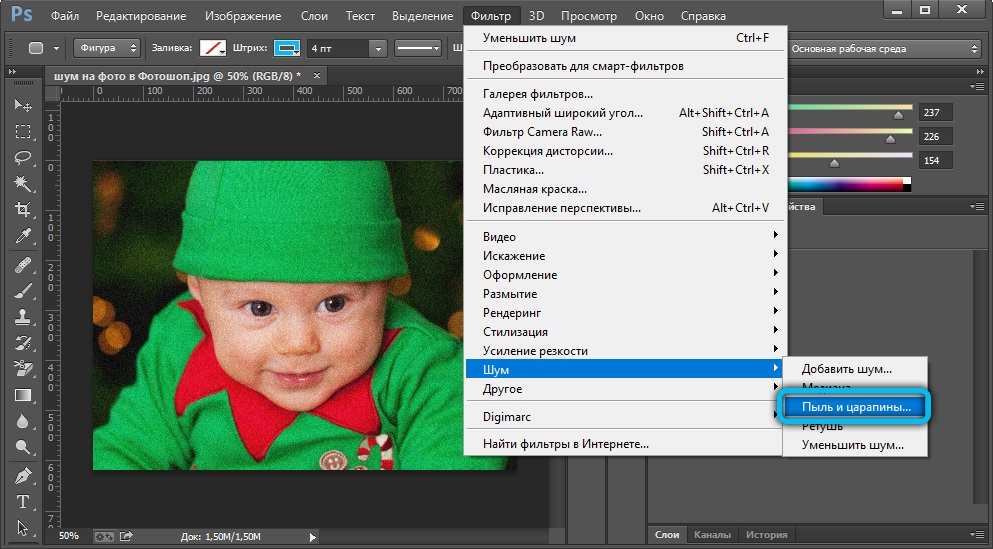
- play with the available settings.
Try increasing the radius values first. The larger it is, the softer the final processed photo will be.
It is important to find a line and a compromise between noise removal and image haze. If bent to remove noise, the image will not be clear.
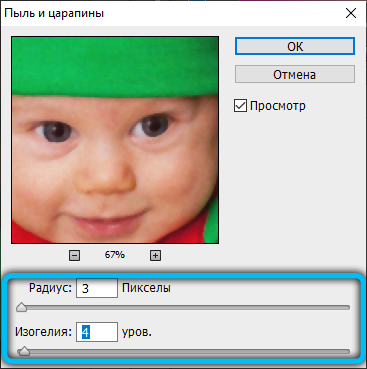
To improve efficiency, it is recommended to work on the photo with two filters at the same time.
Reduce Noise features
Photoshop has a built-in filter used to reduce noise. Moreover, it reacts to 2 different types of noise. This is luminance, it is also light, as well as chromatic (color).
Color noise is the random variation in color for a pixel. This is a characteristic of high ISO images. In fact, these are numerous multi-colored specks. This noise doesn’t pose many editing problems. By removing it, the main small elements in the picture are not particularly damaged.
But the luminance noise is much more unpleasant. This is a random variation of pixel brightness. If you remove it, then small details in the photo will disappear. And between noise and blurry small details, it is better to choose something in between.
You can combat noise in images using the standard and advanced settings.
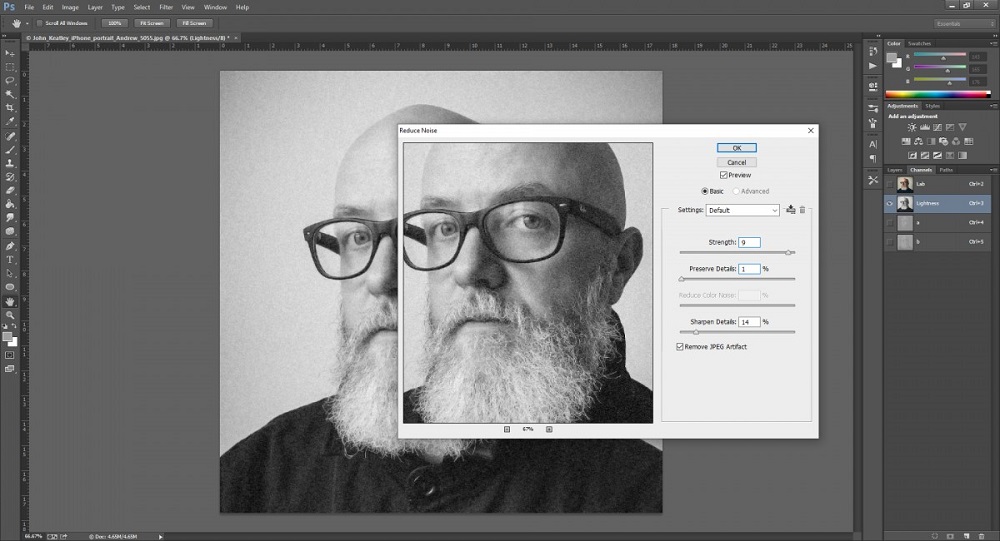
What’s available in standard and advanced settings
Here are 4 parameters in the Reduce Noise filter that users can work with.
- Strenght. Indicates the amount of noise reduction. It removes complex luminance noise. Practice has shown that it is optimal to set this parameter at 7-8 units. If you do less, the result is unlikely to please you. But it is not recommended to bet anymore. Otherwise, the photo will be blurry.
- Preserve Details. Translated as the degree of preservation of details. Remember that in the process of noise removal, there is a loss of sharpness in the fine details of the image. To limit these losses, the corresponding parameter is used. The optimal value is considered to be an indicator from 40 to 60%. If you increase it, then the performed noise reduction will be ineffective on small elements of the photo.
- Reduce Color Noise. Or color noise suppression. The higher this value is, the less saturated the color will be in the end. Therefore, this parameter is adjusted based on the personal taste and preference of the editor.
- Sharpen Details. This is the sharpening of images. This setting helps bring back the sharpness to the lost details. This happens due to the fact that the contrast of the contours is enhanced. But such a value should not be misused. Otherwise, noises will start to creep out again, plus the contours will turn out to be too unnatural.
As for the advanced settings, then the user can examine the noise in the image through different channels. Namely, in red, green and blue.
Practice shows that one of these channels is usually noisier than the others. It is worth trying to find a balance between preserving detail and the intensity of noise reduction.
There are no specific recommendations for values. It depends on the characteristics of the edited image.
Reducing noise through Reduce Noise
It is often impossible to notice noise during the initial cursory review of the image. However, it is enough to increase its scale, as all aesthetic defects immediately become visible.
The graphics editor Adobe Photoshop is equipped with a special application Adobe Camera RAW, which allows you to work with images saved in RAW format.
- To remove noise, the user should go to the “Detail” tab, then enlarge the image.
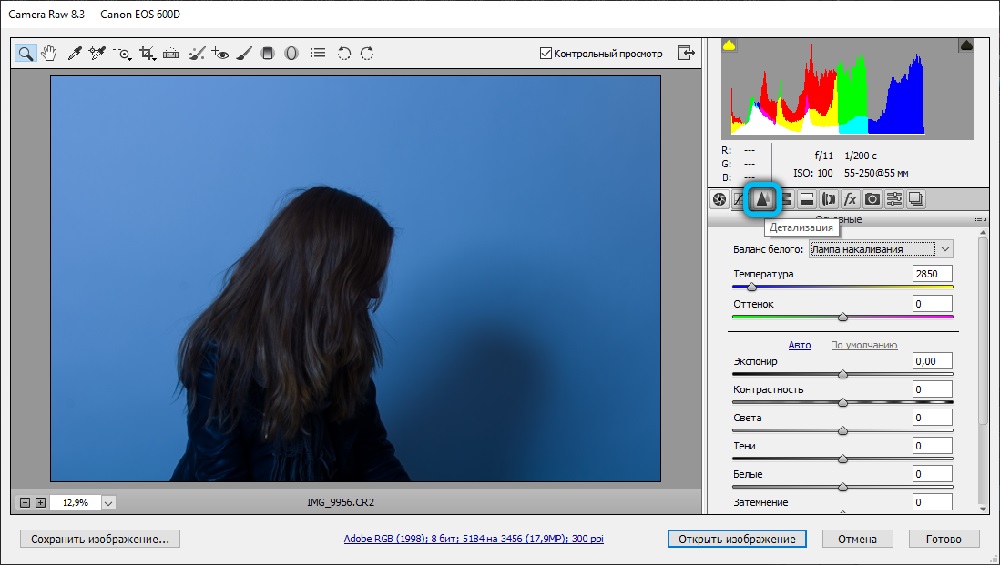
- On the right side of the open window, there is also a toolbar equipped with sliders and divided into two sections.
- The first section focuses on adjusting sharpness, and the second on removing noise.
- It is necessary to start working from the second subsection, where the sliders are located, by moving which it is possible to adjust the brightness, chromaticity and luminosity.
- Sometimes only adjusting the luminance already allows you to remove all visible noise and improve the image quality. For this, it is quite enough just to increase the luminosity parameters.
- If, when working with the parameters of the second subsection, the sharpness has decreased, it is necessary to adjust it in the first subsection.
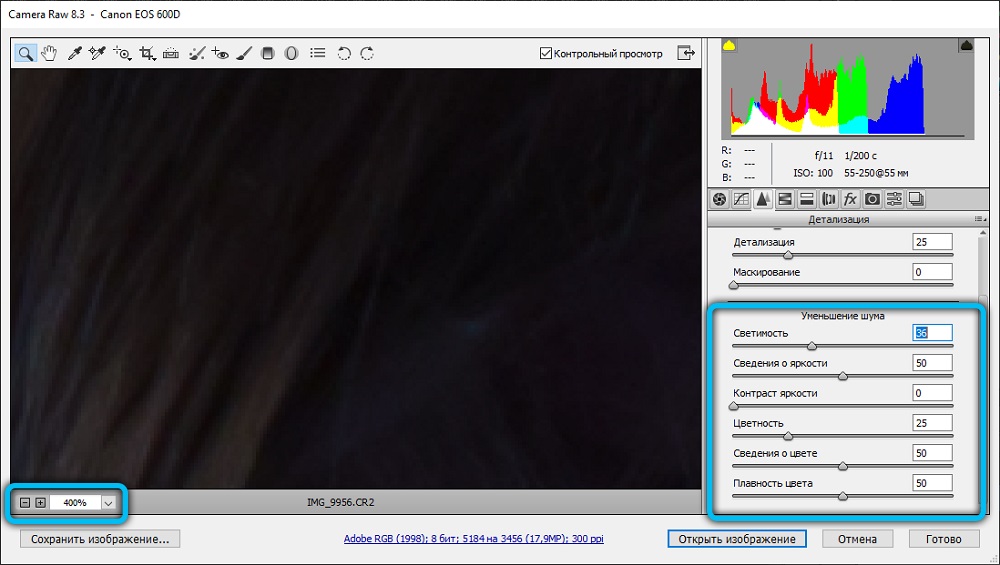
Experienced graphic designers recommend first adjusting the two settings, Effect and Brightness Info. Unfortunately, it is impossible to get ready-made digital indicators, which are recommended to be set on these parameters, since each photo differs in its original parameters, therefore, it needs to be individually adjusted.
The level of complexity of the adjustment, as well as the level of aesthetics of the finished result, depends on which version of Adobe Photoshop the aspiring graphic designer decided to use. At the moment, the version of Adobe Photoshop CS5 significantly outperforms the version of Adobe Photoshop CS3.
Using plugins
Although the noise reduction filter, that is, Reduce Noise, built into Photoshop is quite effective, there are still third-party products to solve the problem of image noise.


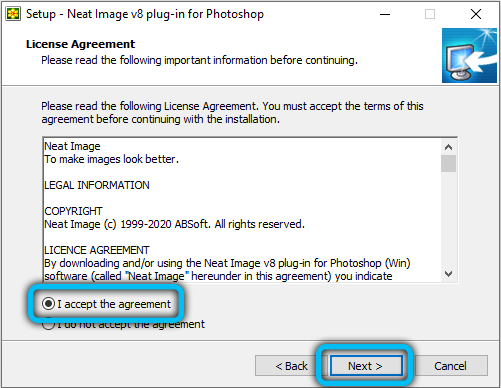
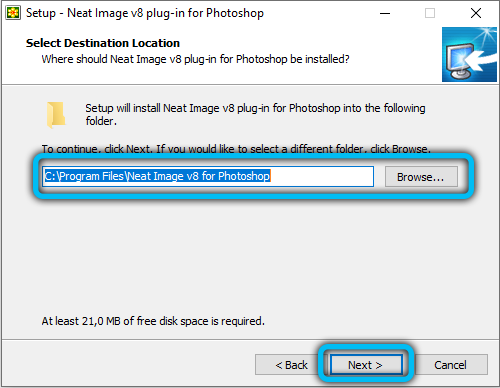
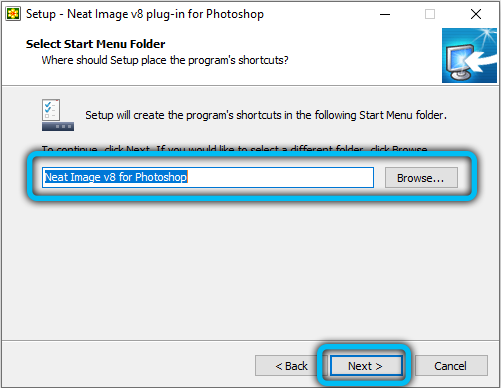
Moreover, they can be integrated into Photoshop itself, or used as a separate tool.
But each plugin has its own characteristics.
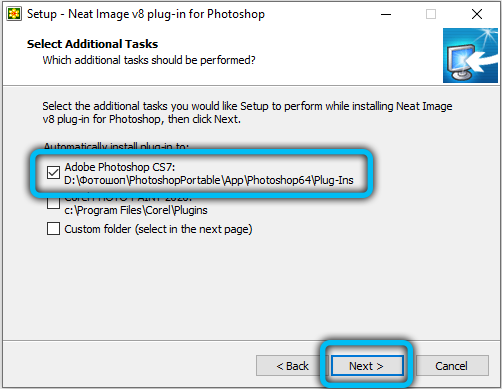
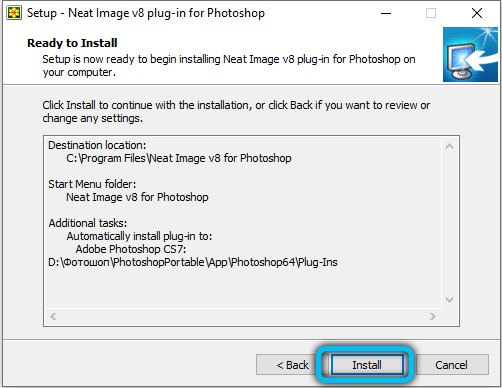
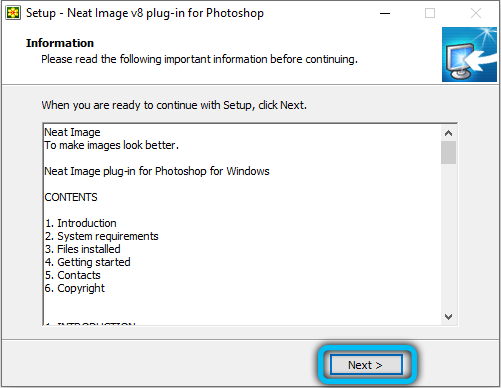

Among the most popular and capable of integrating into Photoshop are the following:
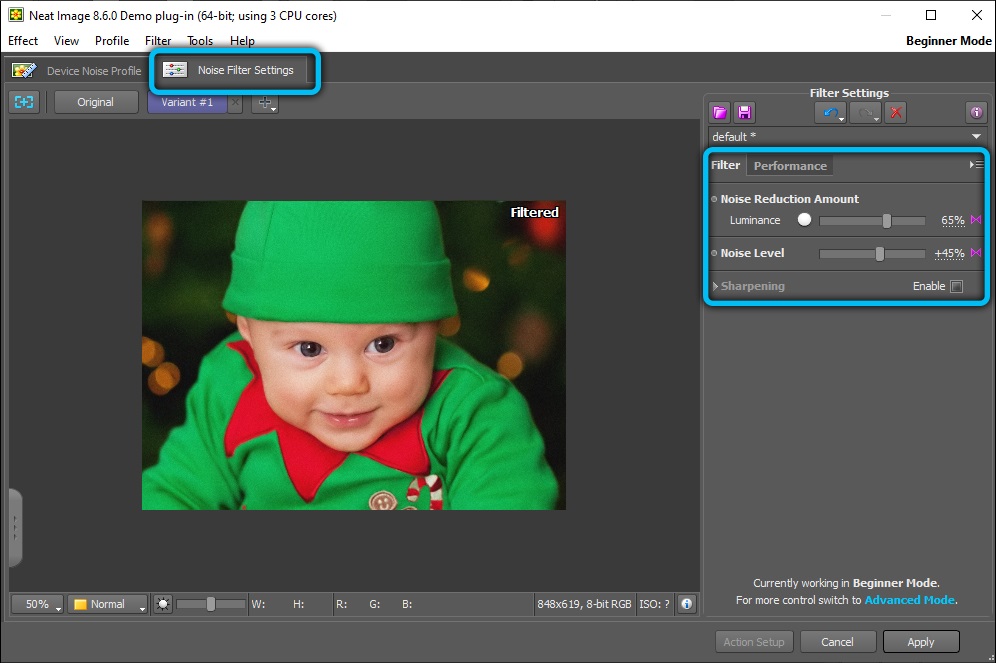
- Neat Image;
- Noise Ninja;
- Nik Multimedia Dfine;
- Digital GEM, etc.
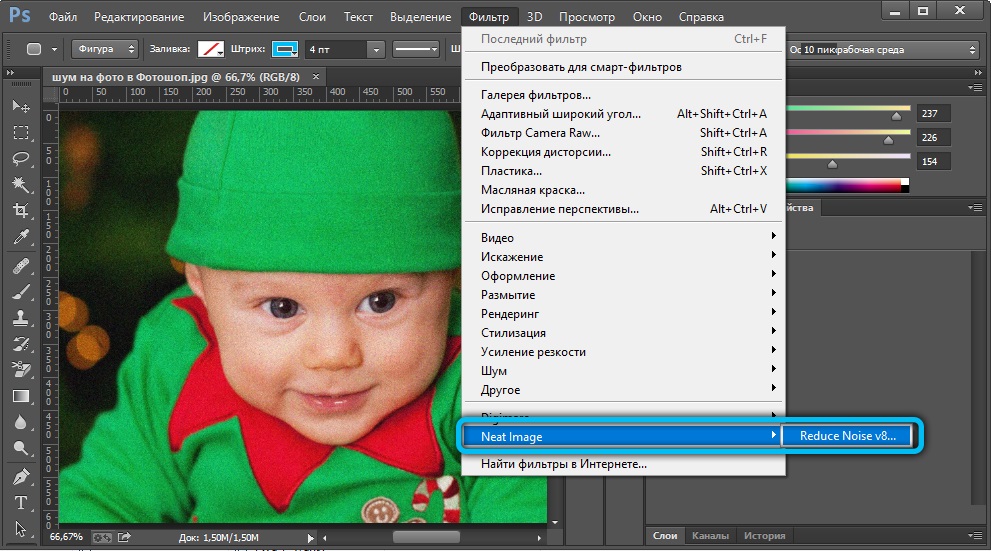
Which of them to use, here each user will decide for himself. You can try several options and choose the most convenient, understandable and effective one.
Adding interference
Sometimes it becomes necessary to simulate that the image was taken on a smartphone, respectively, the user must, on the contrary, make an image from a high-quality picture, accompanied by a low quality. This can be achieved if you read the recommendations on how to make noise in Photoshop.
Noise Adding Process
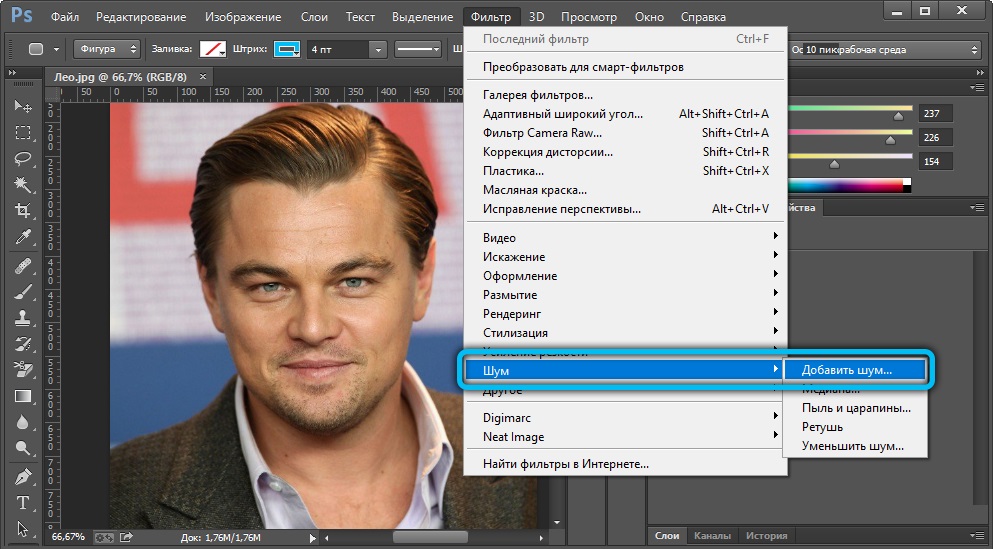
To add noise, initially the photo should be opened in a graphics editor, then find the “Filter” menu on the toolbar. In the list that opens, find the item “Noise”, move the mouse cursor over it, provoking the opening of an additional list, in the first position of which is the item “Add noise”. It is on this item that you should click.
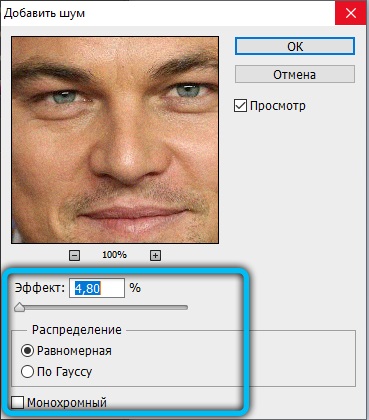
After that, a new dialog box opens, in which the user can select the type of noise distribution, as well as their level. In this case, you cannot rely on the advice of the masters, accompanied by specific indicators for correcting photographs, since the same noise indicators can affect the image quality in different ways depending on their resolution.
So, it is not so difficult to remove interference and noise from any image if you first install a graphics editor on your computer. The newer the version of Adobe Photoshop, the easier it will be to remove noise, the better the image will be.