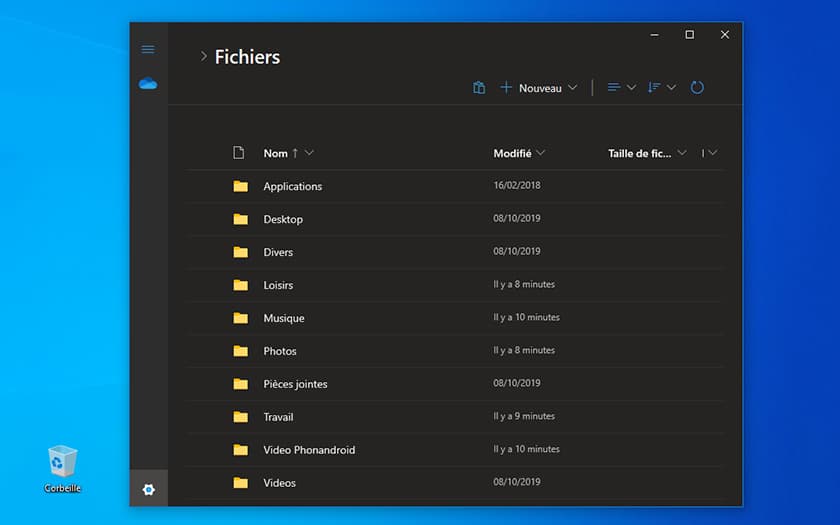
Very recently, Microsoft has unveiled its brand new, more “modern” file explorer, to use the publisher’s term. This is intended for Windows 10X, a version of Windows 10 specially designed for dual screen devices. But there are ways to install the new file explorer on a classic Windows 10. Here’s how.
Last February, Microsoft released its Windows 10X emulator , which launches the new operating system within Windows 10 itself . Primarily intended for developers, it offers a good way to get acquainted with the new OS and with some of the features and new design of Windows 10X, which will most certainly arrive on the classic version of Windows 10 in the coming months.
Earlier in the week, Microsoft also unveiled the new Windows 10X file explorer . If it is less provided than the usual explorer, it is however simpler and clearer to use . The good news is that it is not intended only for this version of the OS. It is also possible to enjoy it under the classic version of Windows 10 . This does not replace the Windows 10 file explorer and does not allow you to navigate the entire tree structure of your hard drive.
Warning and prerequisites to install the new explorer on Windows 10
First, note that the procedure described below is not official. The installation of the new explorer requires a pack of files which come from the Russian site Thecommunity . We analyzed the behavior of these files, also submitted them to Windows Defender and Bitdefender antivirus, and found nothing suspicious in the end. But we cannot guarantee that the method described below is 100% secure, even if it is taken up by American sites which are well established, like MSPoweruser.
Second, installation requires two conditions:
- you must have a version of Windows 10 in 64 bits
- you must be connected to your OneDriv e account within the classic OneDrive application (the one installed by default in Windows 10)
That’s it, that’s all for now, we can go.
How to take advantage of the new file explorer on Windows 10
- From the Windows 10 Start button , click the Settings icon or press the [Windows] + [I] keys simultaneously .
- Then go to Update and security , then to Developers area .
- In the Developer Mode section , set the slider to On .
- You will be asked for permission to activate Developer Mode. Accept it.
- Then download this file pack . Uncompress it on your main hard drive, in a directory of your choice (in our example, we decompressed it on C: \ Explorer).
- Open the directory that contains all the files you just recovered. Click on the install.ps1 file and choose the option Run with PowerShell .
- Once the installation is complete, the new Windows 10 / Windows 10X explorer is accessible from the Start menu. It is simply called File Explorer and has a small icon indicating that it is still in the beta test phase.
