The need to format the media can arise for various reasons: from buying a new device and creating partitions to completely erasing information, which may be required in various circumstances. There are several ways to perform formatting, which will be discussed in the article.
Contents
What is formatting
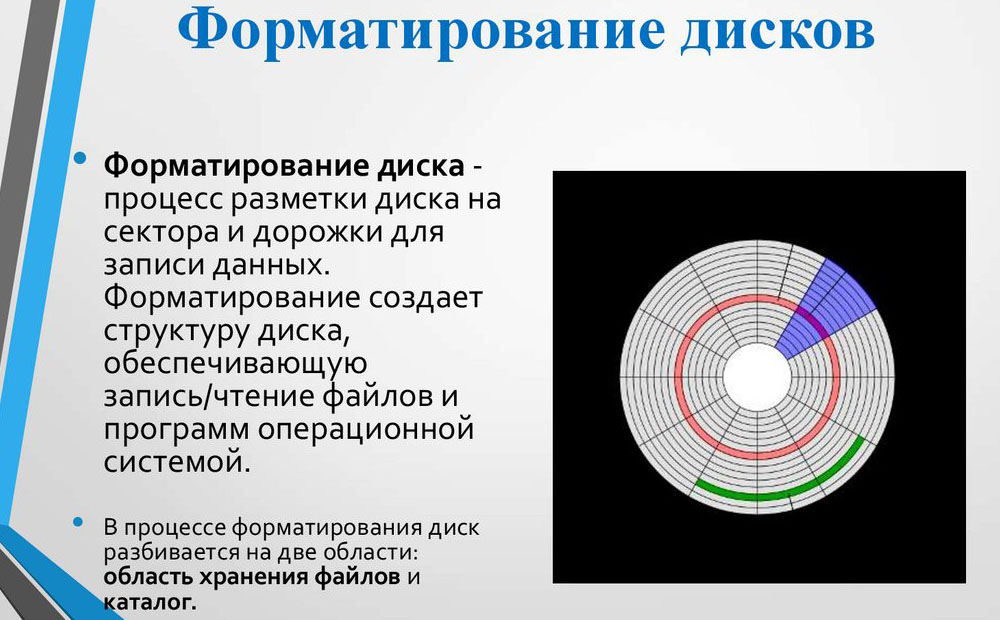
First, let’s figure out what it means to format a disk and why you need to do it. The process is programmatic and consists in marking up the data storage area. During the procedure, its logical structure (file system) is built on the media, which is necessary for the correct work with information on the disk.
The data is deleted during the formatting process, while depending on the chosen option for carrying out the task, the files can be returned using special software or erased forever. Since the file system determines the way in which information is organized, stored and named, these characteristics will depend on the choice of file system.
The procedure is divided into the following types:
- Low-level formatting involves performing markup at a basic level, and for modern media, due to their complex structure, it is done once at the device manufacturer using special equipment, the ability to perform the task is no longer available in the BIOS. In the area of information storage during the procedure, physical structures are created, which completes the process of manufacturing the drive.
- High-level formatting is available to the user and involves the creation of a file system and tables, after which the media is ready for use. Before performing the procedure, it is necessary to partition the disk into partitions (C, D, E, etc.), while the data is erased, but can be partially or completely restored by software.
The user can do:
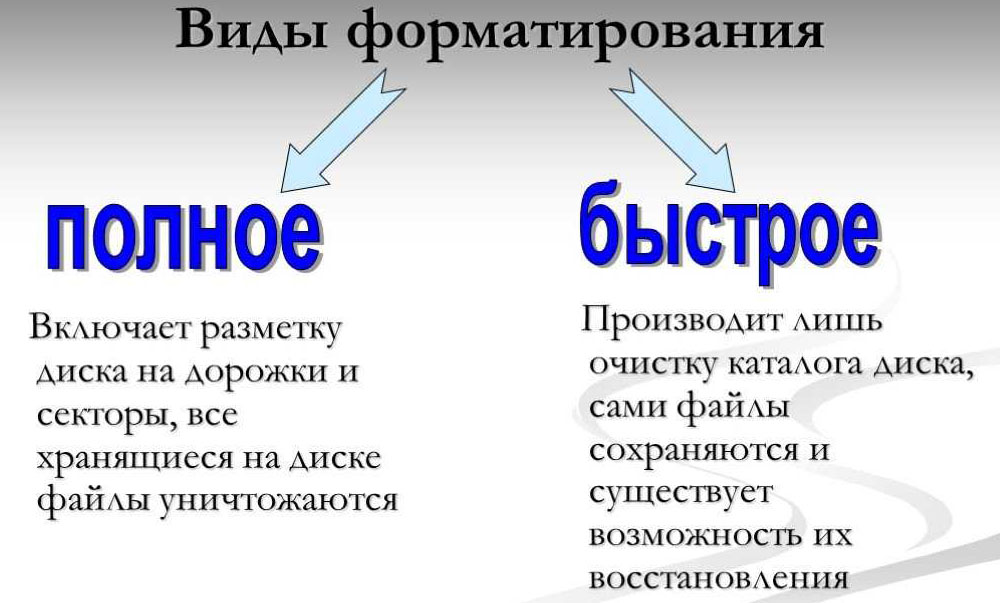
- A quick format that takes a minimum of time and involves the removal of data on the location of files, while the disk space will be marked as unused. The information itself is not deleted and can be returned. In the future, it is possible to record new files over the previously recorded data. The process takes only a few seconds and does not involve optimizing the media structure.
- Full formatting means that all information from the disk will be erased – all sectors are overwritten with zeros. At the same time, it also searches for and eliminates errors, bad sectors. If it is impossible to restore the operability, the latter are marked as unsuitable for recording and storing data, and then they are not used. The process takes a longer time depending on the media and can get rid of many disc problems.
Why format media
The reasons for doing the task can be very different:
- You need to create a markup for the new HDD to interact with the device, otherwise you will not find it among the local drives.
- It is required to completely clear the media of all data on it (for example, for the purpose of selling, optimizing the disk, getting rid of junk files, or for other reasons).
- It is planned to reinstall the operating system, and for its correct operation, you need a clean media.
- The device needs to be fixed. Bugs and malware can be fixed by generating new markup.
What file system to format
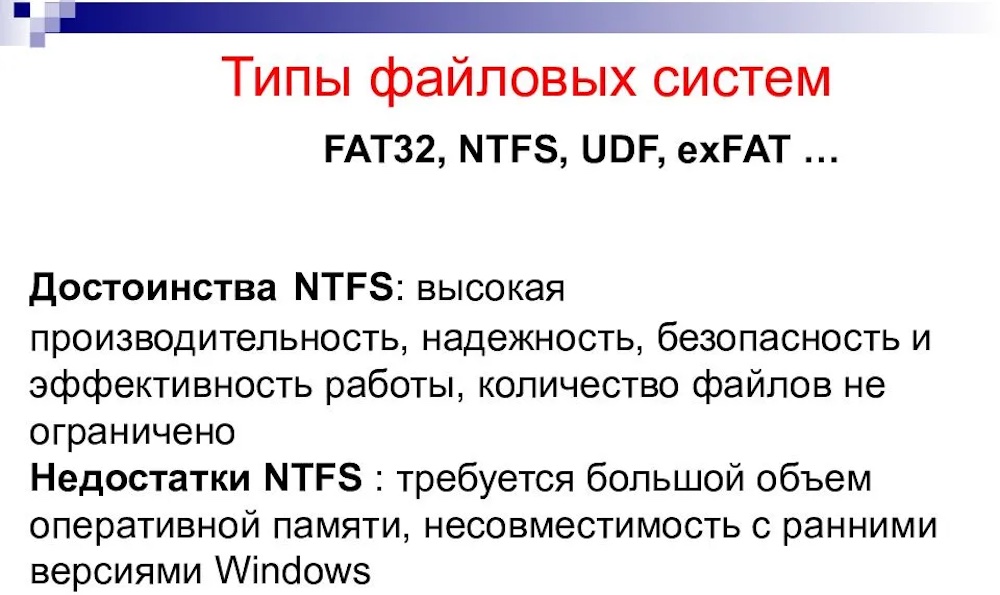
Despite the large number of file systems, only a few of them have become popular. On Windows computers today, NTFS is most often used (the most relevant option for modern drives), for Linux, Ext4 is used for formatting. To provide support for any of the known systems, universal variations are chosen: FAT32 and exFAT.
Format SSD
Solid state drives are widely used and can be installed in devices from the factory or purchased by the user for installation as primary or secondary media. They are more advanced and fundamentally different from hard drives, but just like HDDs, they require attention.
There are fewer reasons to format an SSD than with hard drives due to differences in the device and the way data is stored. Formatting will be required for new media when installing the operating system, as well as reinstalling the OS on an already used SSD, or if the drive is sold.
For SSD, the same formatting methods are applicable as for HDD: using standard Windows tools or special software.
Ways to format HDD
Now let’s move on to instructions on how to format a disk in different ways using the built-in system tools and third-party software.
Formatting through “Explorer”
Using a standard tool is the easiest option for the procedure. The method is suitable in the case when the media does not have a working operating system, it can be used to format an external drive, a second drive connected to the system unit, or a partition of the main hard drive.
To format a drive using Explorer, follow these steps:
- go to Explorer (from the Start menu or in another convenient way);
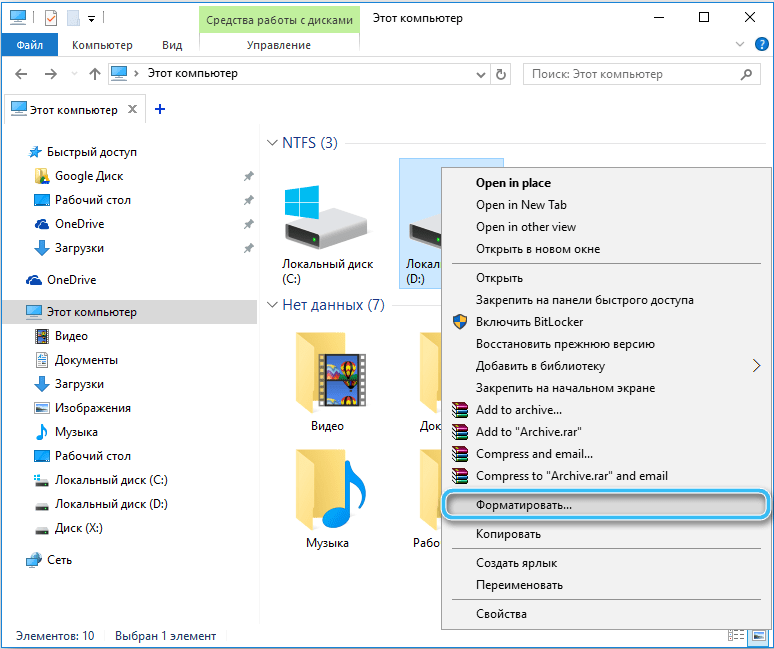
- select the HDD that will be subject to the procedure, press RMB to call the context menu – “Format”;
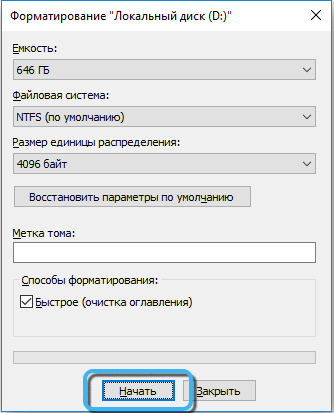
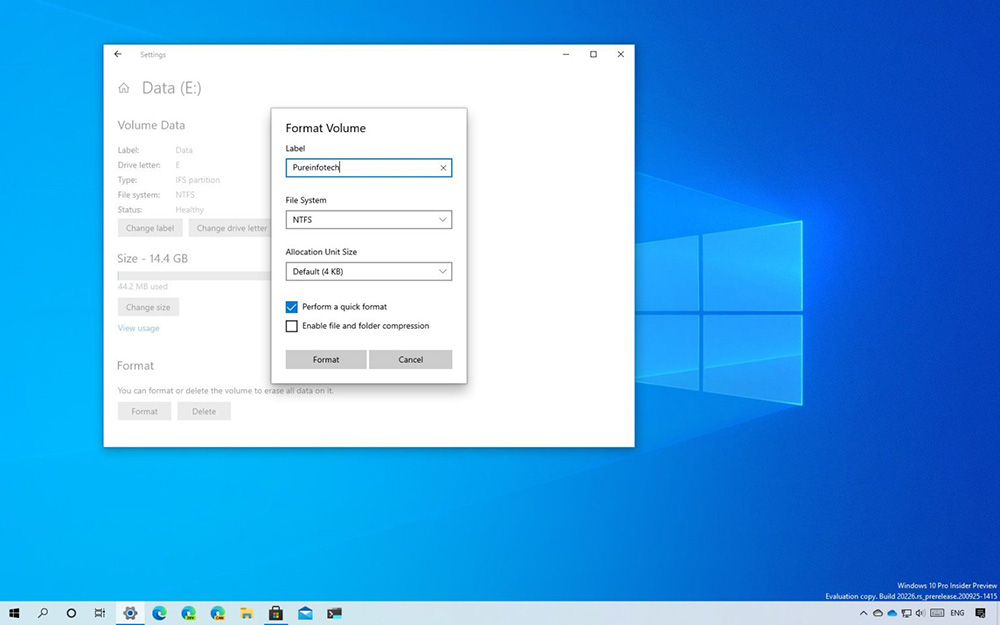
- in the new window, you will have to select the file system to complete the task, set the disk name in the “Volume Label” item and uncheck the “Quick Format” item if you intend to completely format the drive;
- below, click the “Start” button and confirm the action, which will start the process.
Formatting via Command Line
This option is also suitable for formatting partitions that do not have a system (see the method for the system disk below). By entering a special command, you can format the hard drive into the file system specified in the request text.
How to format a hard drive:
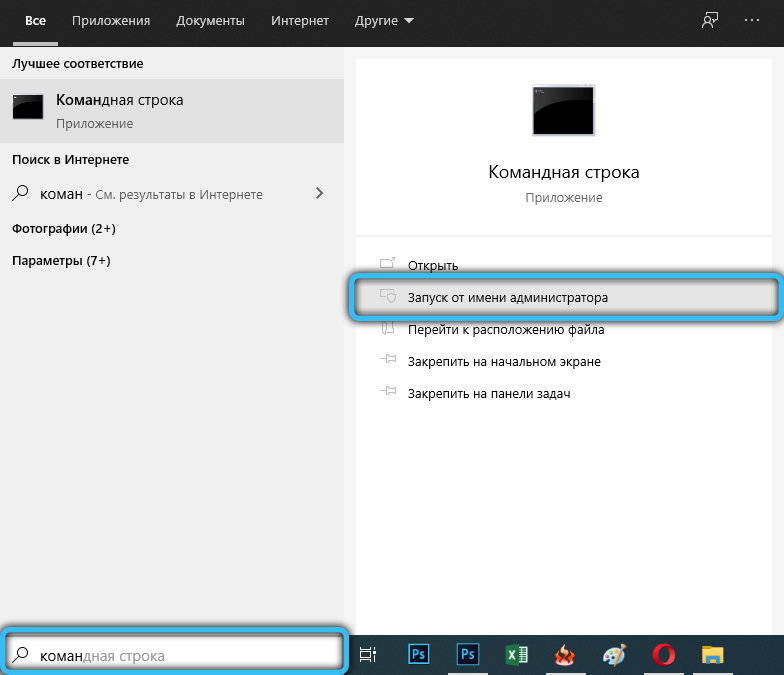
- run the Command Prompt as an administrator (through the Start menu or in another convenient way);
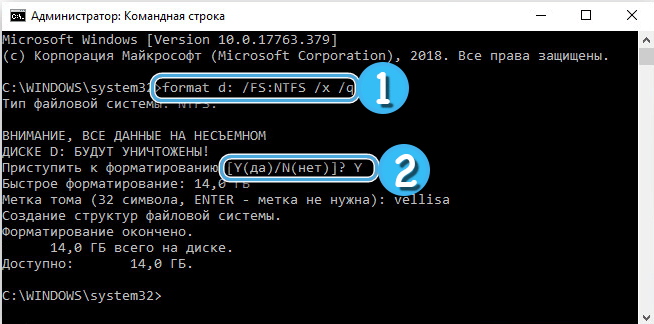
- in the terminal, enter the command format d: / FS: NTFS to format the drive in NTFS format and press the enter key (instead of “d” indicate the letter of your drive, instead of “NTFS” you can specify the desired file system);
- enter the volume label for the disk (in the future it will be possible to change it in the settings);
- after a warning appears about erasing all data from the specified partition, confirm the action by pressing the “Y” key;
- waiting for the end of the process.
How to format a Windows drive (system)
The method, unlike the previous one, is suitable for formatting disks with the system and involves the use of the BIOS and the Command Line. To carry out the procedure, you will also need a bootable USB flash drive with the OS (or other bootable media), so you need to prepare for the process in advance. Any files from the system partition or media, including the operating system, will be deleted.
How to format a disk through BIOS:
- We connect a bootable USB flash drive with Windows to the computer.
- We reboot and go to BIOS / UEFI (the method is different for each device, usually when you start the computer, you need to press the DEL, F1, F2, F8, F10 key or the combination Ctrl + Alt + Esc or Ctrl + Alt + S).
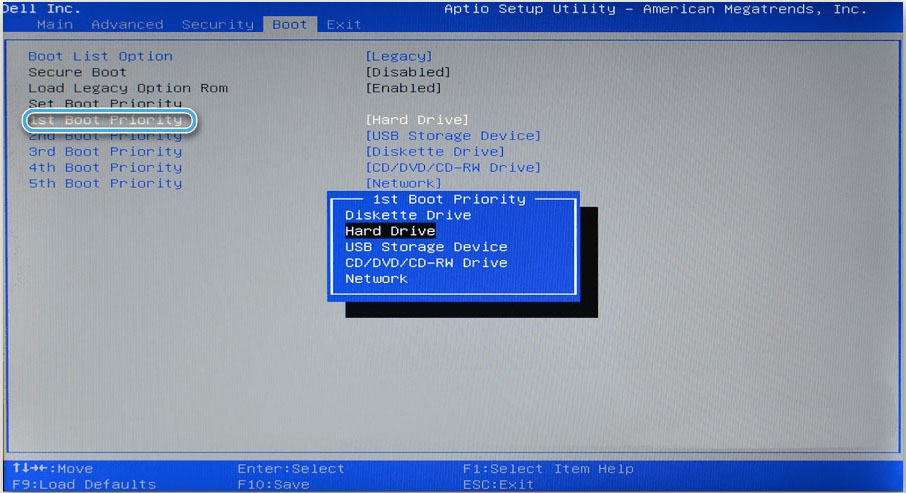
- Navigating through the menu using the keyboard, we change the boot priority to start from the plug-in media – go to the “Boot” tab (“Advanced BIOS Features”) and in the FirstBoot Device item (the line can also be called “First Boot Priority” or “1st Boot Priority”) we put the flash drive (or disk) in the first place.
ATTENTION. The names of menu items may differ in different BIOS versions, we are looking for the most similar names. - Save the changes and exit the BIOS (F10). The computer will now boot from the USB drive.
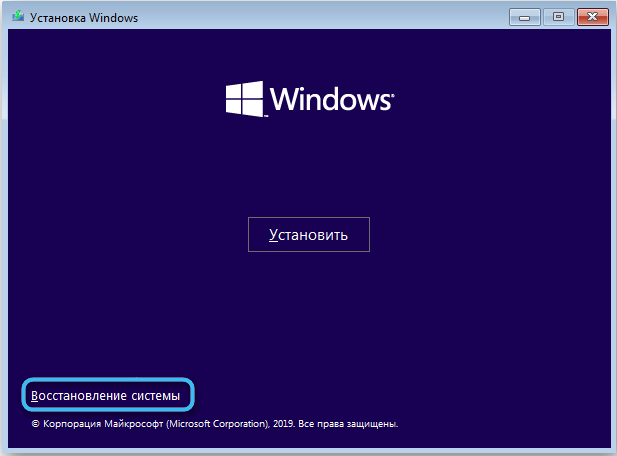
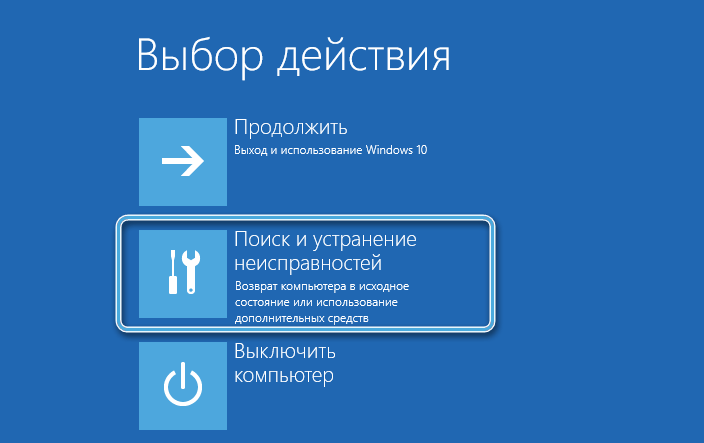
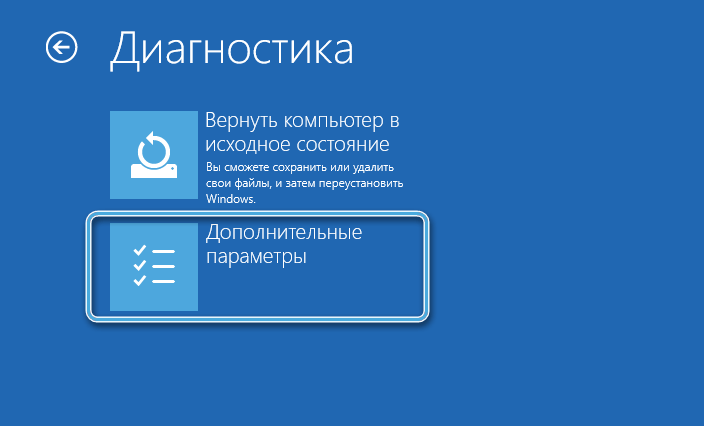
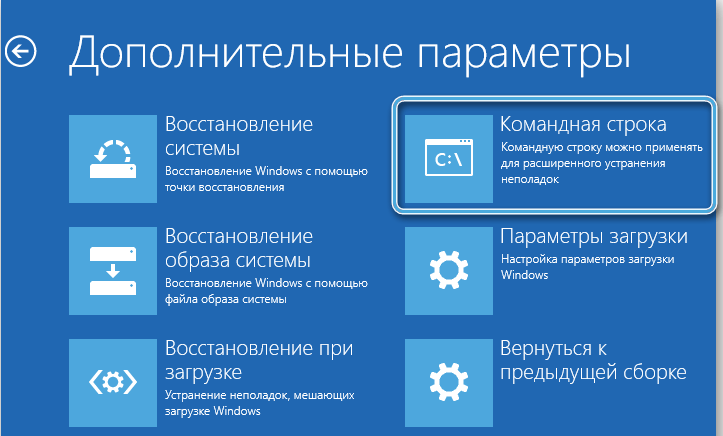
- There are two ways to follow. In order not to install a new system and at the same time format the disk, the Command Prompt is launched directly in the recovery environment. To do this, click at the bottom of the “System Restore” window and go to the “Diagnostics” – “Troubleshooting” – “Command Prompt” section.
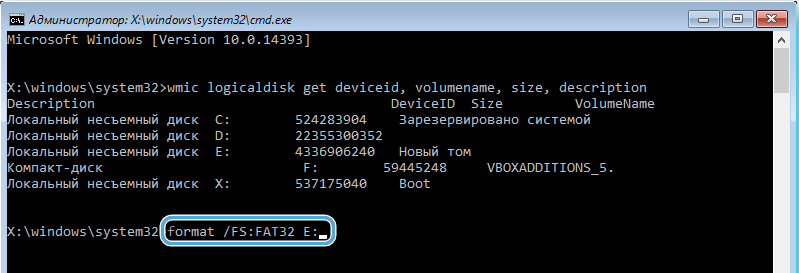
- We find out which disk needs to be formatted, for which we write the wmic logicaldisk get deviceid, volumename, size, description command. The required HDD is easy to determine by the volume indicated in bytes.
- To format the drive in NTFS format, enter format / FS: NTFS C: / q and press the enter key, for FAT32 we set the command format / FS: FAT32 C: / q, and for quick formatting without editing the file system, use the command format C: / q (instead of “C” in the commands, the letter of your drive is written). We are waiting for the end of the procedure.
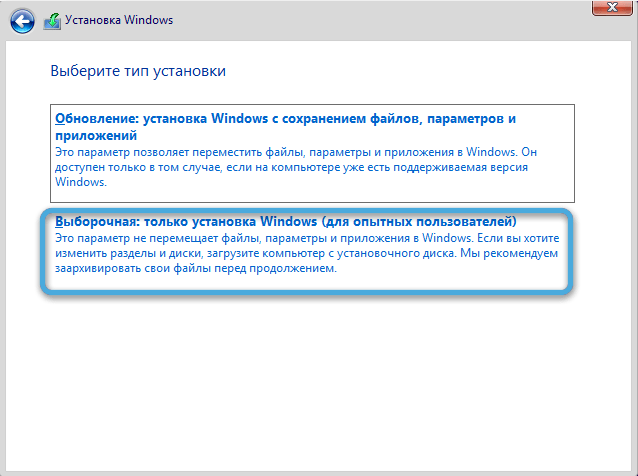
- To format the drive and install Windows, you need to follow the prompts of the Setup Wizard, at the step of choosing the type of installation, specify “Custom: Windows installation only”.
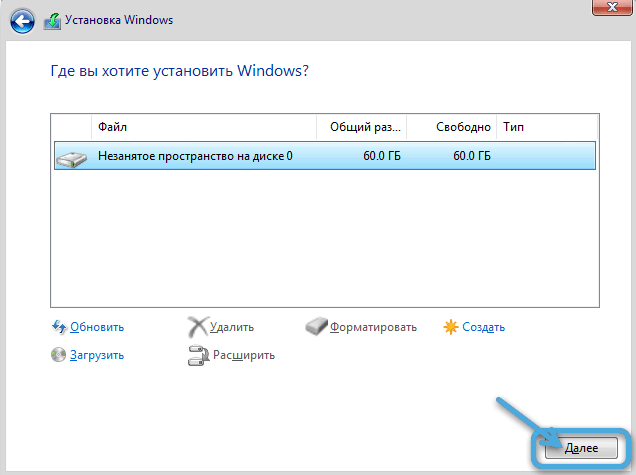
- In the new window, select the drive (or partition) where the OS should be installed, click “Disk Setup”, then select the “Format” option and confirm the action. Further installation proceeds automatically.
Using the regular tool “Disk Management”
You can format a disk partition or the entire drive, including an external device, in another way using the built-in Windows tool:
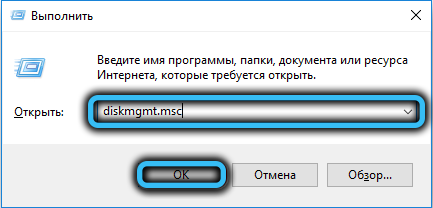
- using the Run console (Win + R) and the diskmgmt.msc command to the snap;
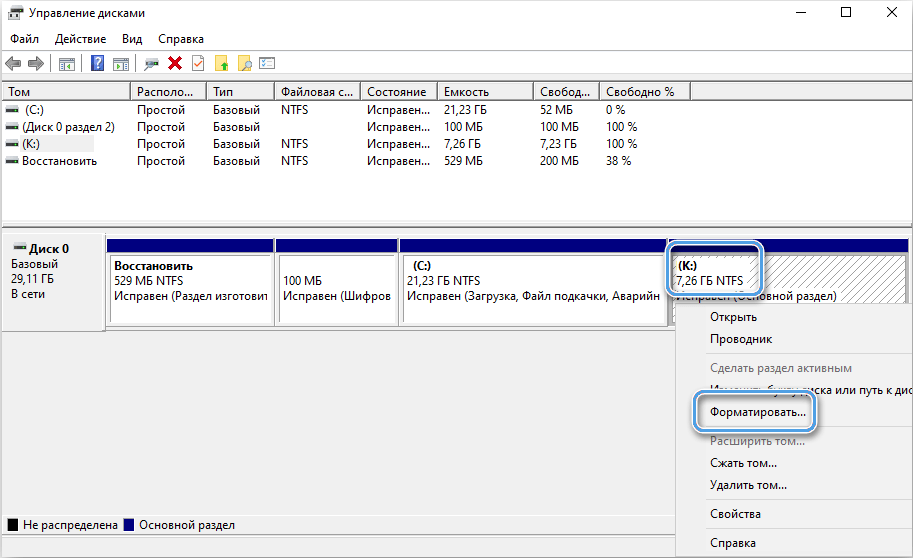
- select a volume or drive, press RMB – “Format”;
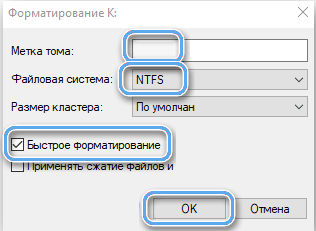
- name (string volume label), specify the file system and check (or uncheck) the “Quick Format” item;
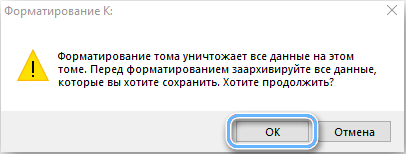
- click “OK” and confirm the intention, wait for the end of the procedure.
Third party software
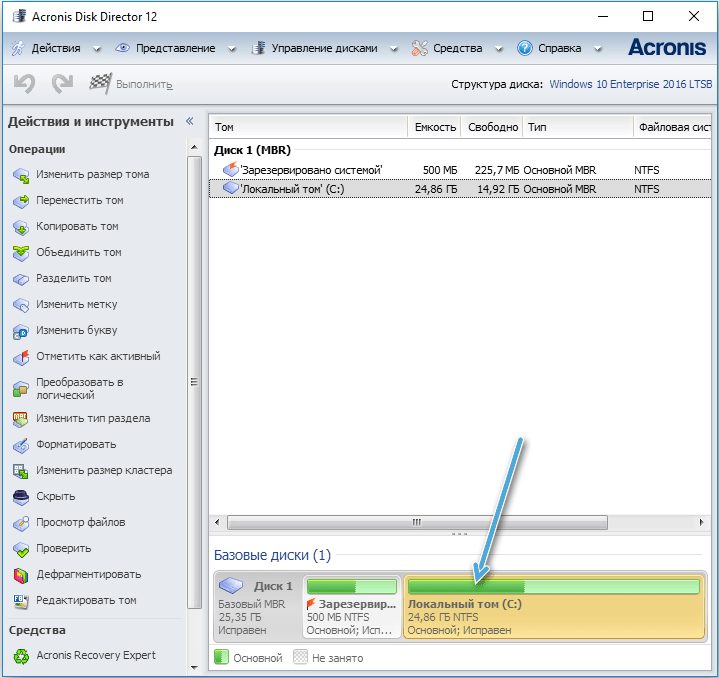
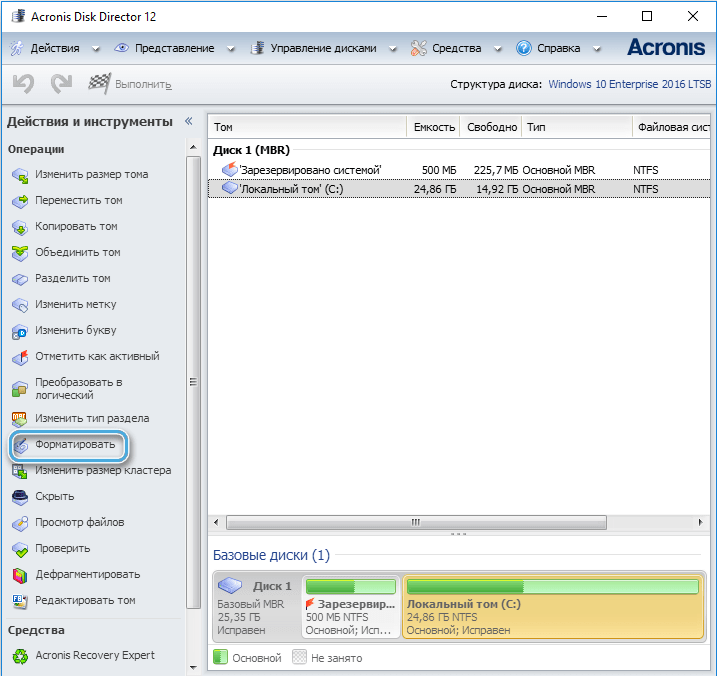
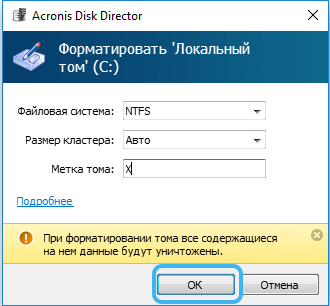
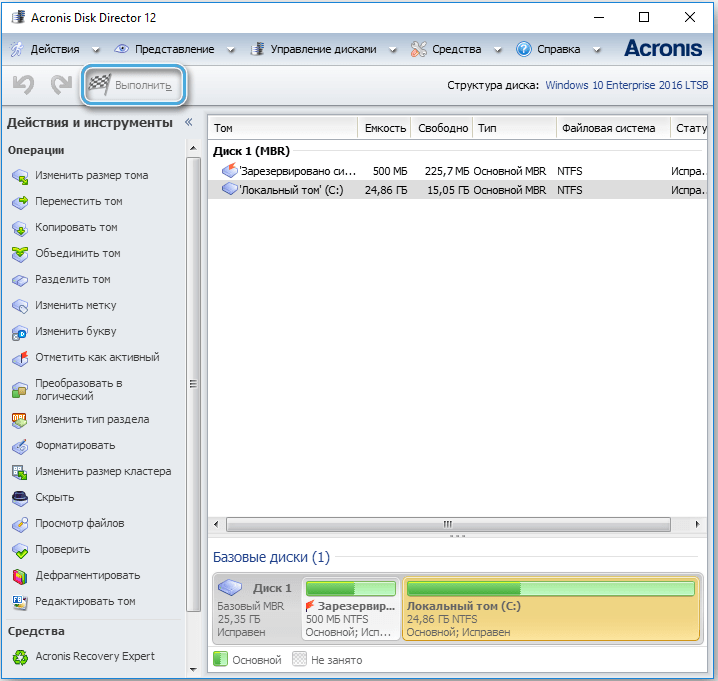
Special utilities or multifunctional programs that offer the ability to both completely format a disk and its individual partitions are found on the network in large numbers. The principle of using such software is the same, for example, in Acronis Disk Director, to complete the task, we do the following:
- select a disk;
- from the action menu, select the “Format” option;
- change or leave the same values, click “OK”;
- confirm the intention by pressing the appeared button “Apply scheduled operations”, then “Continue” and wait for the end of the procedure.
You can also complete the task using free utilities such as MiniTool Partition Wizard, HDD Low Level Format Tool, Paragon Partition Manager. Formatting actions differ little in each of them.
Choose any suitable method, but remember, before performing the operation, you need to make sure that the media does not contain important data that you have not copied to another drive or partition. Share in the comments which method you used.
