The release of a new version of the OS from Microsoft has never been accompanied by a stir. It is not worth looking for the reasons for such an attitude of users to the operating system that dominates the market, they are known to everyone. Firstly, this is the “dampness” of the software, and secondly, the increased requirements for hardware. Nevertheless, a significant part of users are always interested in trying the new product “in action”, at least out of sporting interest.
Windows 11 is no exception on this list: its compatibility requirements are really quite strict. A computer older than 2017 is unlikely to be able to satisfy them, and it must be assumed that most of them are currently. But what if you really want to?
We have good news for you: the chances of making the transition are by no means zero. But, most likely, you will have to use some tricks to fool the standard installer.
Contents
Does it make sense to install Windows 11 on such PCs
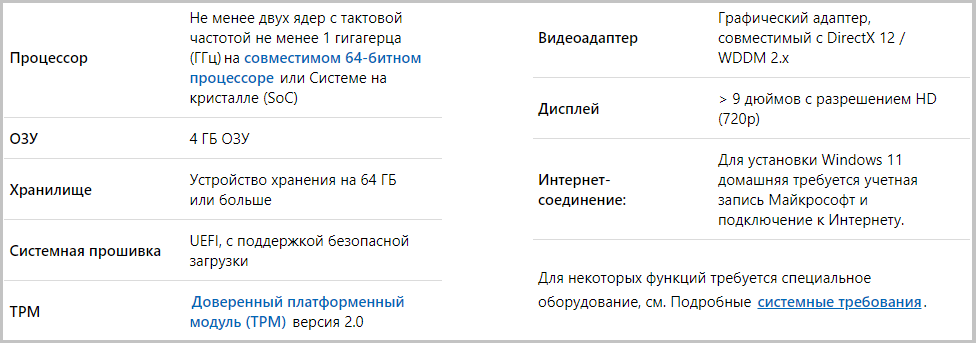
You may have already checked if your computer meets the requirements of the software developer. Let’s list them just in case:
- in terms of RAM, they are not so critical: problems are guaranteed if you have less than 4 GB of RAM;
- CPU: 1 GHz or faster clock speed, multi-core structure, support for 64-bit addressing and SoC;
- at least 64 GB of free space on the system drive;
- GPU: support API DirectX 12 and above;
- compatible with TPM security module version 1.2 or higher;
- presence of UEFI.
It is the last two points that can become the stumbling block that will not allow you to pass the compatibility test.
But then the question arises: is it necessary to carry out such a migration? Even if you can make the transition (technically possible), you need to understand the possible consequences of such a step. Moreover, Windows 11 is, in essence, a slightly redesigned “ten” without any major innovations, except for cosmetic changes.
Moreover, there is no need to rush, since Microsoft acted quite loyally in this regard: the transition from Windows 7 / 8.1 / 10 can be carried out with old keys, and support for the tenth version has been officially extended until 2025. The transition process itself, if the computer is incompatible on one of the listed points, according to the manufacturer, may fail with the risk of data loss. So, if you have already decided, be sure to make a backup copy so that you have something to restore from in case of anything.
Finally, we note those negative points that may appear when installing Windows 11 on an incompatible PC (laptop or desktop computer):
- lower security level (this is the strong point of the new system, but with a TPM module), the inability to complete the installation process;
- drop in the reliability of the OS (the possibility of a “rally” at the most inopportune moment);
- possible incompatibility with many third-party programs.
If this does not stop you, then you can try one of the following methods to upgrade to Windows 11.
Using the Universal Media Creation Tool script to bypass the compatibility check
Trying to install a new OS on an incompatible PC can be done in many ways: by editing the registry, or editing an ISO image, or even doing a clean installation from a flash drive, but they all involve a sequence of actions that are quite difficult to implement.
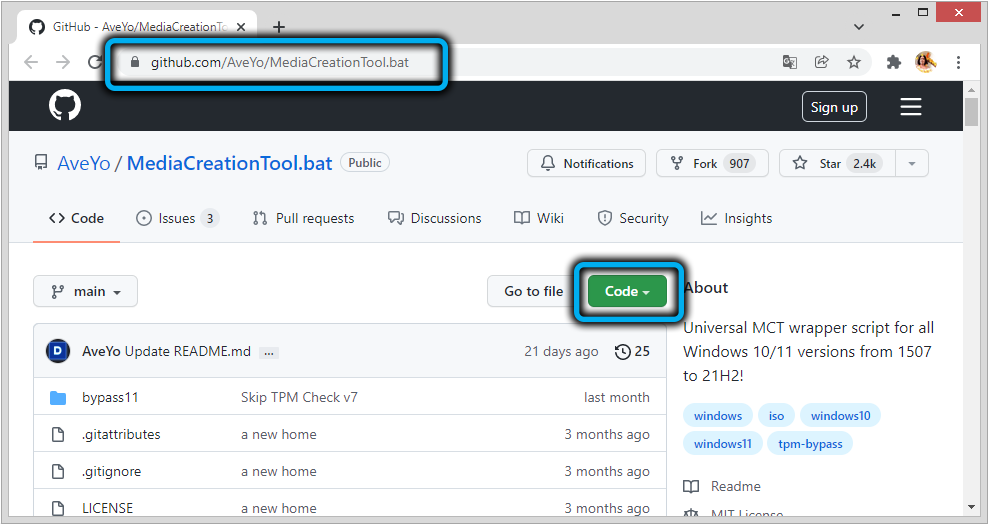
Meanwhile, we can recommend using one of the easiest methods on how to install Windows 11 on an old PC or laptop. Its essence is to use a small script with a long name – Universal Media Creation Tool from GitHub. He confidently copes with his main task – bypassing the compatibility check for all hardware components.
So, the sequence of actions is as follows:
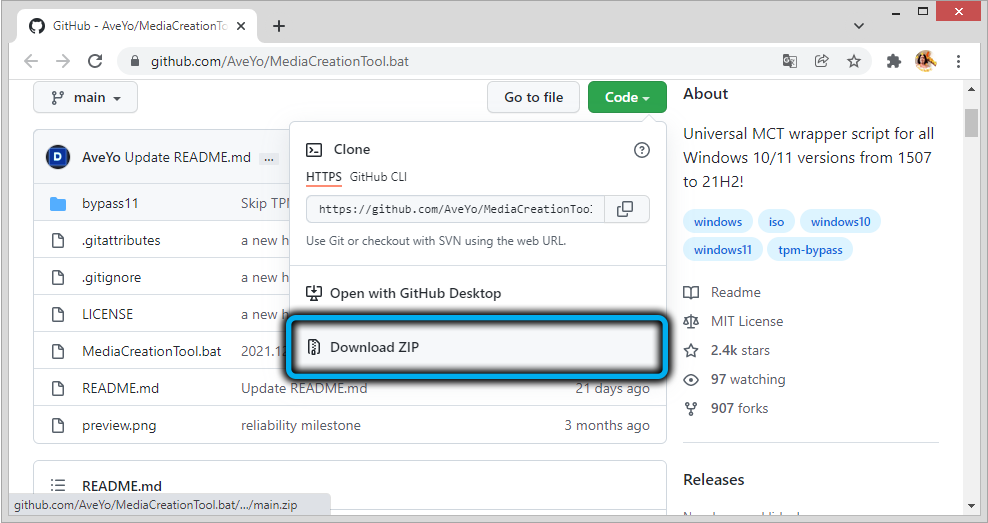
- download the script from the official site by clicking on the Download ZIP button;
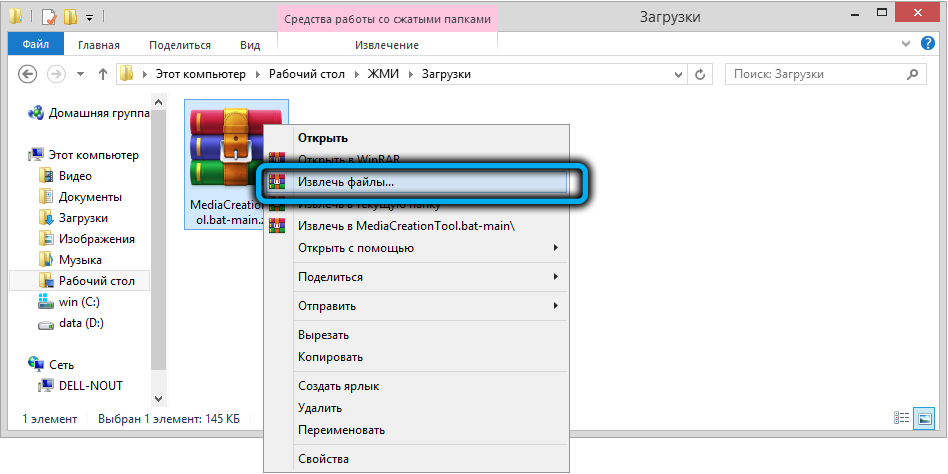
- unpack the contents of the archive;
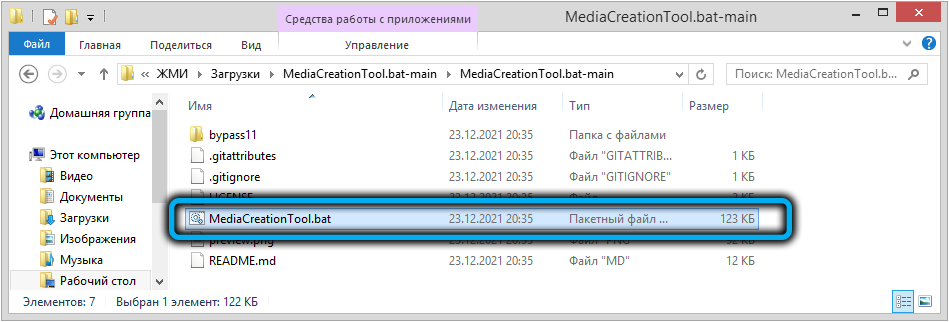
- go to this folder, run the batch file MediaCreationTool.bat;
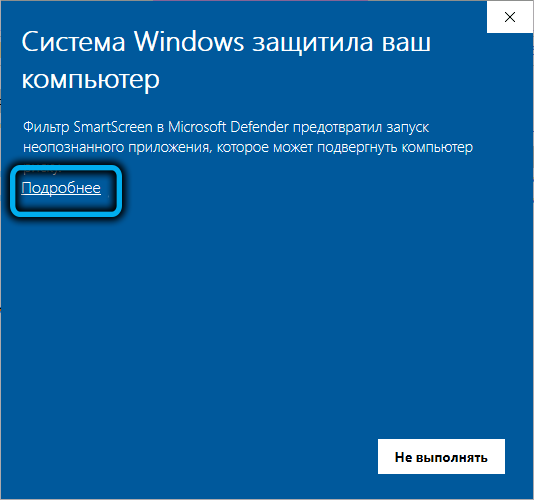
- if the SmartScreen filter works (and at the first start it will start with a probability close to 100%), click the “Details” button and instruct the script to be executed;
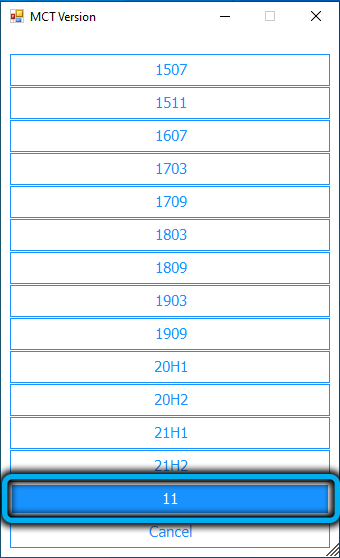
- as a result, a window will open asking you to select the OS version – scroll down and indicate 11;
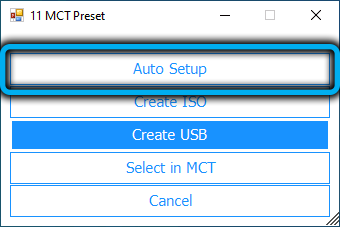
- in the next window, select the Auto Setup item, which means automatic installation of the system, for this the computer must be connected to the Internet;
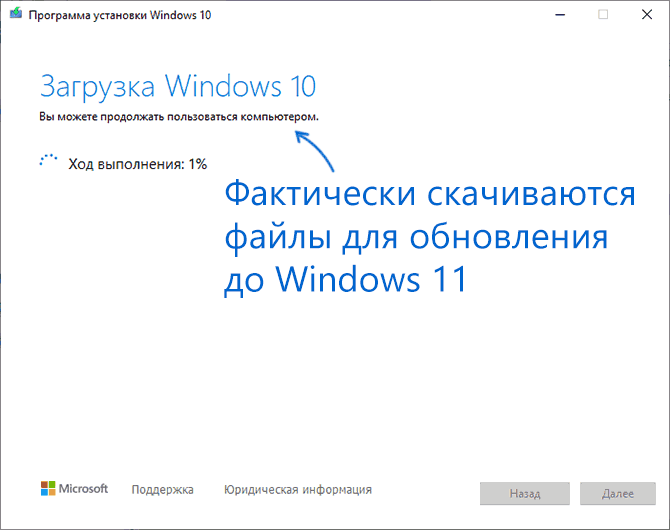
- the download of the files necessary for installation will begin from the Microsoft website, after which you need to confirm that you do not mind starting the Windows 11 installation procedure;
- you should not be embarrassed that the next window reports the download of Windows 10, in fact, updates for the eleventh version are downloading;
- then you need to be patient and wait for the Windows 11 login screen to appear, which will be preceded by several reboots. In this case, you do not need to take any action – everything will be done automatically;
- while preparing for the first launch of a new OS, do not turn off the computer, even if the process is slow or at some stage the percentage counter stalls.
There is a good chance that the installation will complete successfully, but a positive result is not guaranteed – a lot depends on how incompatible your computer is.
The official way from Microsoft with editing the registry
The developer offers his version of bypassing the check for the presence of the TPM security module version 2.0, while the old processors of your laptop or PC will not be checked. The only limitation of this method is the need for a TPM version of at least 1.2.
Step by step algorithm:
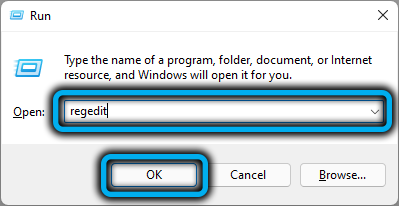
- press the Win + R combination, enter the regedit command in the Run console field, confirm by pressing Enter;
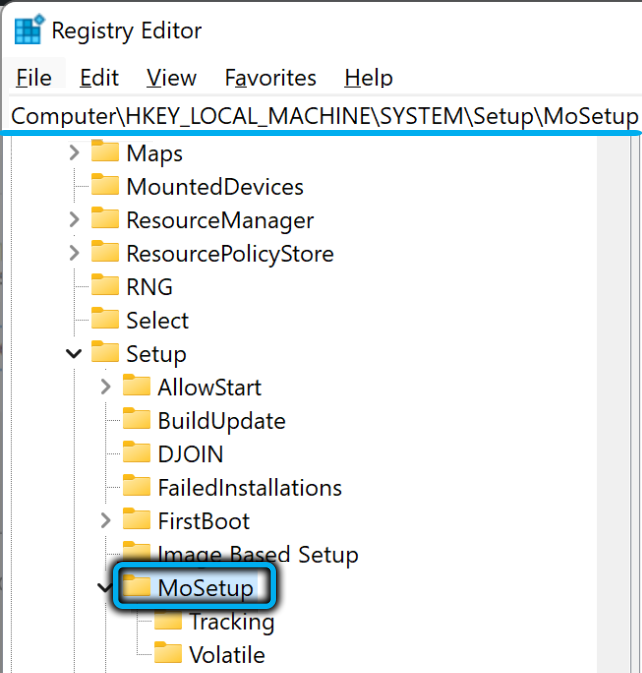
- go to the HKEY_LOCAL_MACHINESYSTEMSetupMoSetup branch;
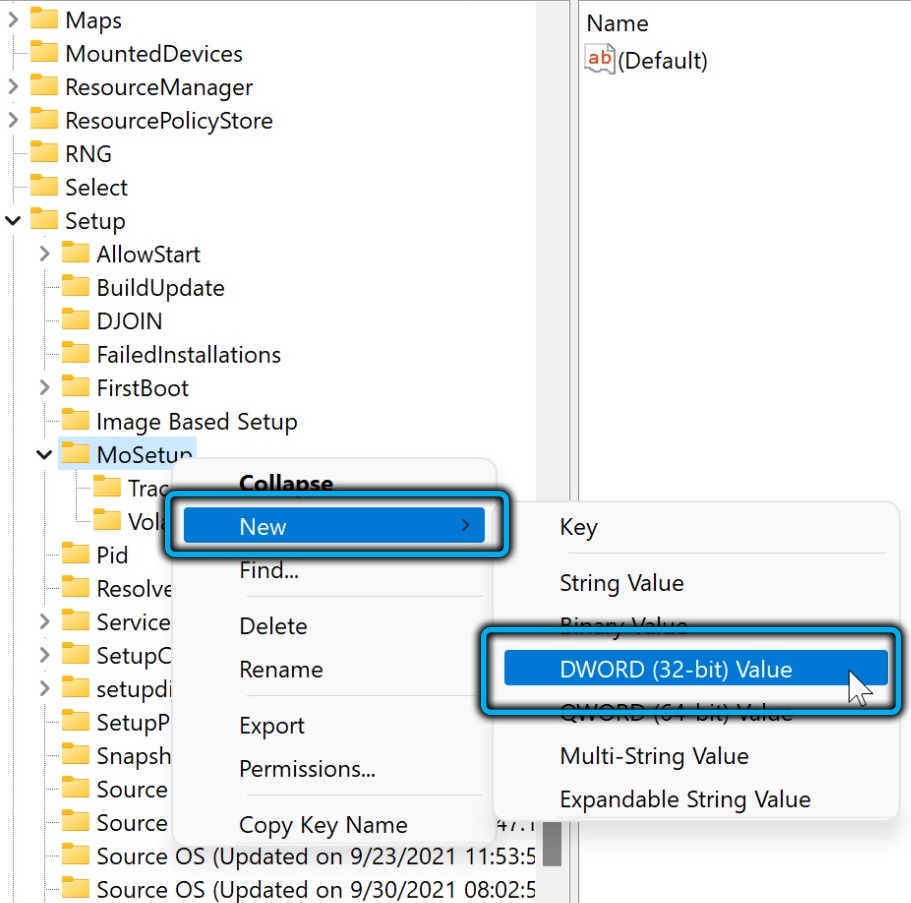
- right-click on an empty space in the right pane, select the “New” item in the context menu, and then – “DWORD Value”;
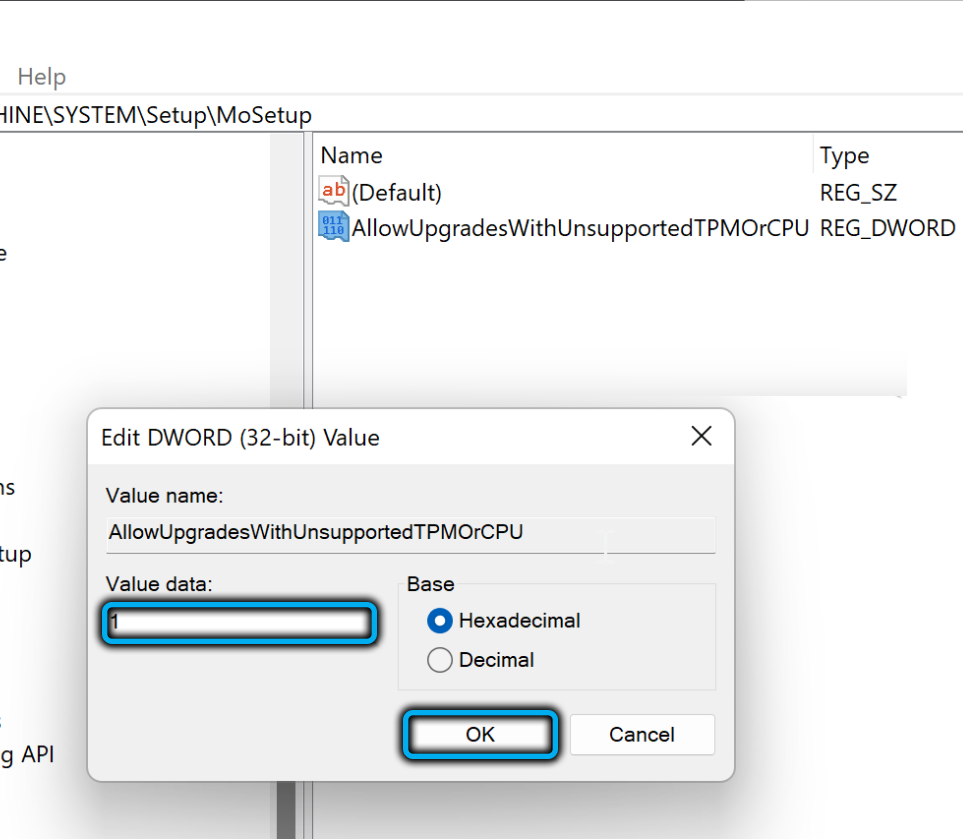
- assign the name AllowUpgradesWithUnsupportedTPMOrCPU to the new parameter;
- double-click on the created parameter and enter the value 1;
- close the registry editor;
- we launch the Windows 11 installation assistant from the Microsoft website to officially install this operating system on the computer.
In the absence of TPM support, the attempt will most likely fail.
Starting the Setup Assistant in Windows 7 Compatibility Mode
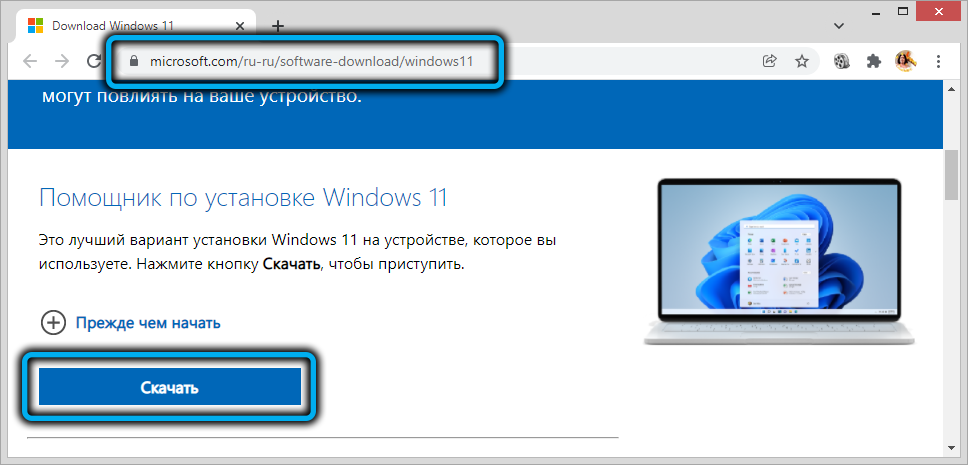
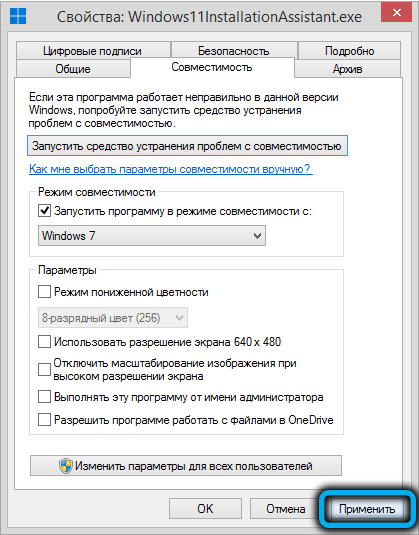
Yes, Microsoft, it turns out, provided for this possibility from the very beginning. That is, the procedure is standard, but when starting the assistant, you must specify that it should work in compatibility mode with the “seven”:
- download the assistant to your computer;
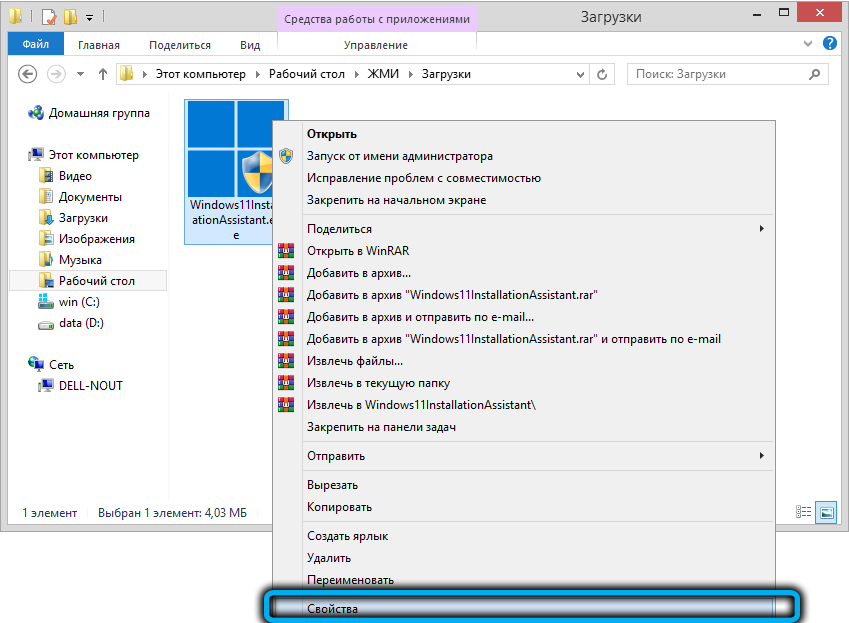
- find the downloaded file in a local folder, right-click on it and select “Properties”;
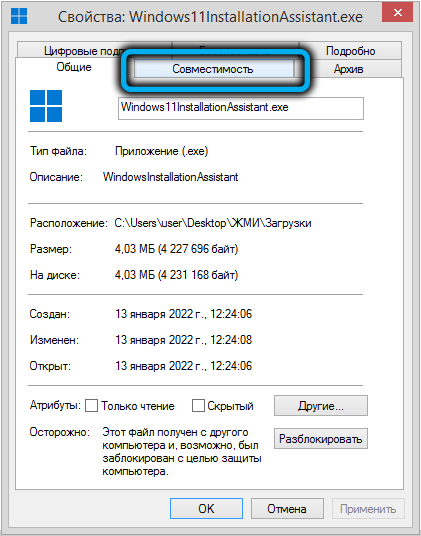
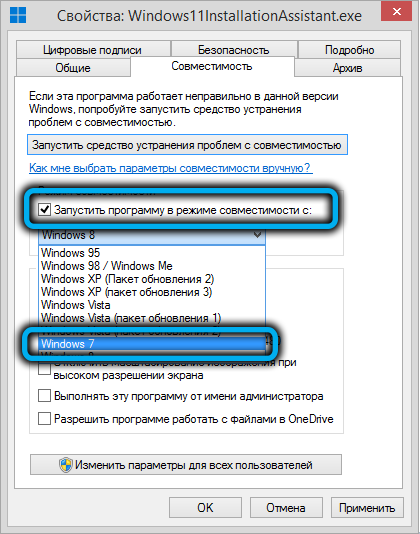
- in the window that opens, go to the “Compatibility” tab and in the “Run this program in compatibility mode for” field, select Windows 7;
- Click OK twice and start the assistant.
Until recently, this method of installing Windows on an old PC worked successfully. But, judging by the latest user reports, now, if the computer does not meet the minimum requirements, Windows may not be installed.
Adjusting the installation ISO image
The last method is the most time-consuming, so it is recommended to use it if the previous methods were unsuccessful. It consists in editing the system installation image in such a way as to replace some files with analogues from the Windows 10 ISO image.
This procedure must be carried out independently, that is, you will have to download both images, and for editing, you will also need the AnyBurn utility. The versatility of this method lies in the fact that the modified image can be used for a “clean” installation of Windows 11.
Sequencing:
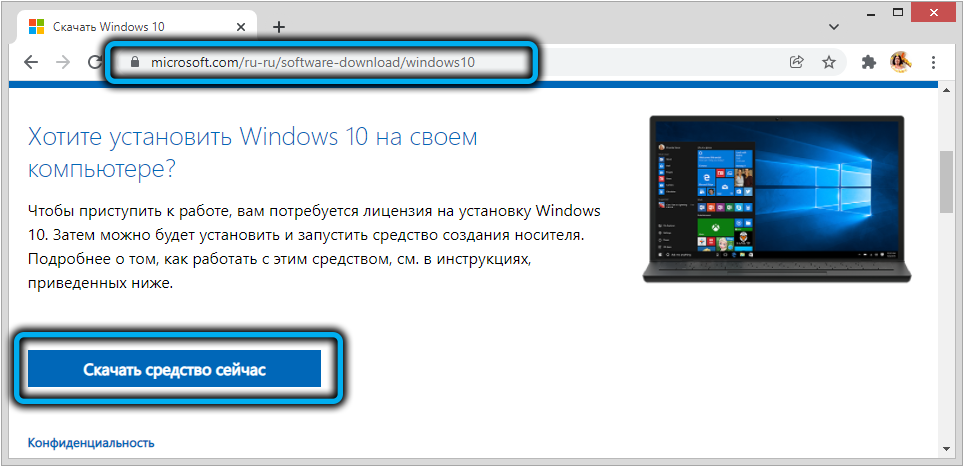
- download the installation image of Windows 10 from the official site ;
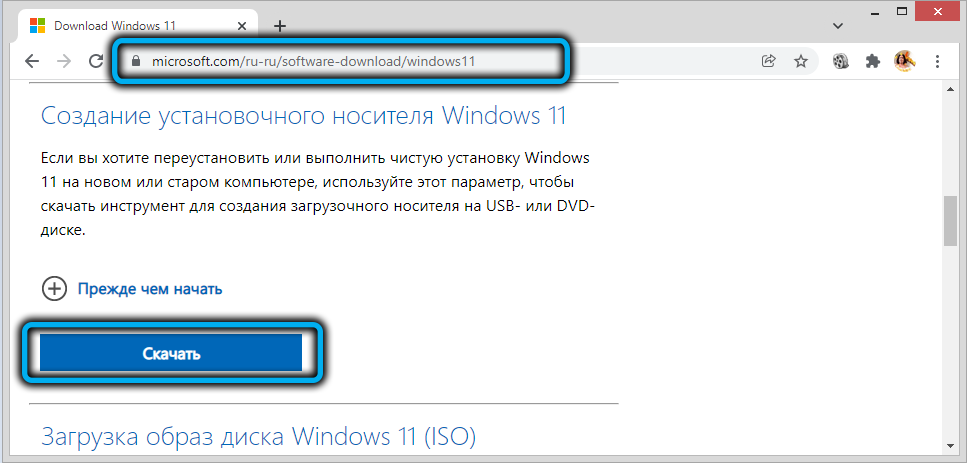
- we perform a similar operation for Windows 11: by clicking on the link , click the “Download” button in the “Creating installation media” block, the already mentioned MediaCreationTool utility will be used during download;
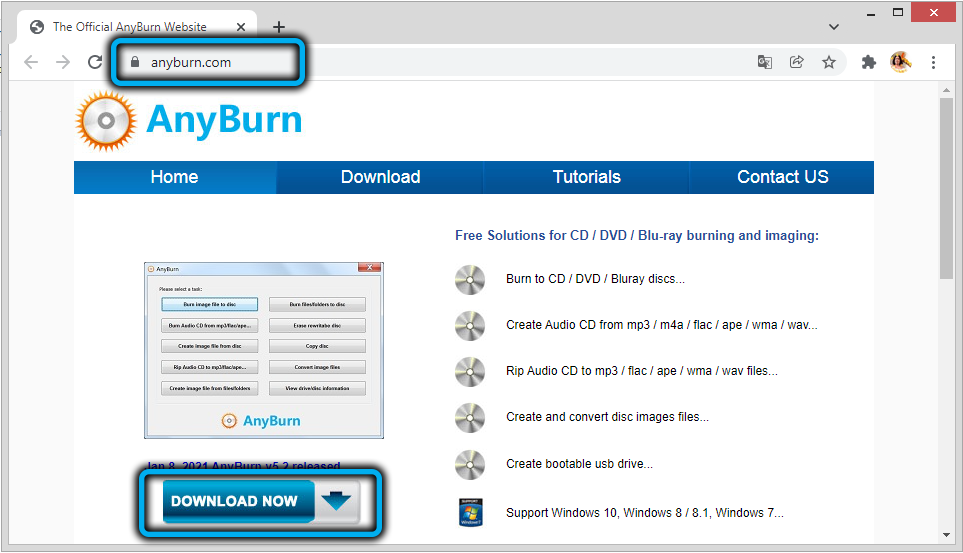
- download the AnyBurn utility from the official website , run it;
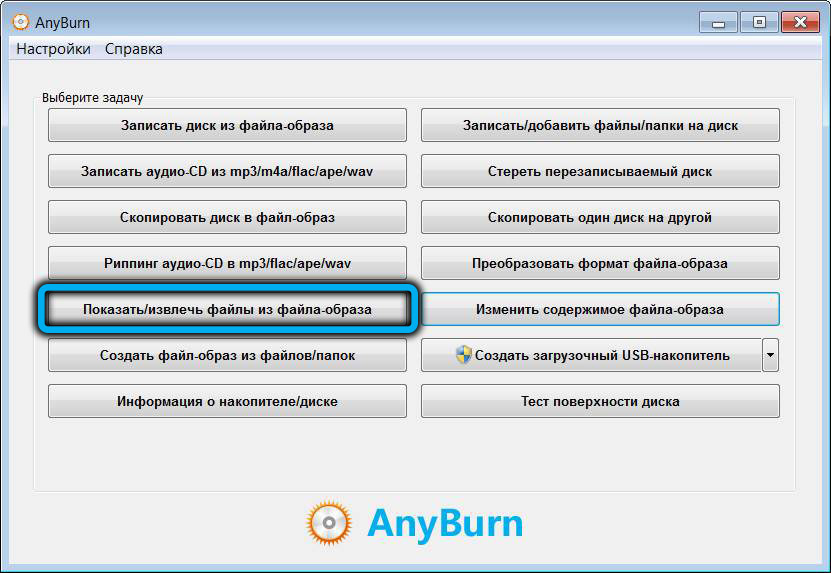
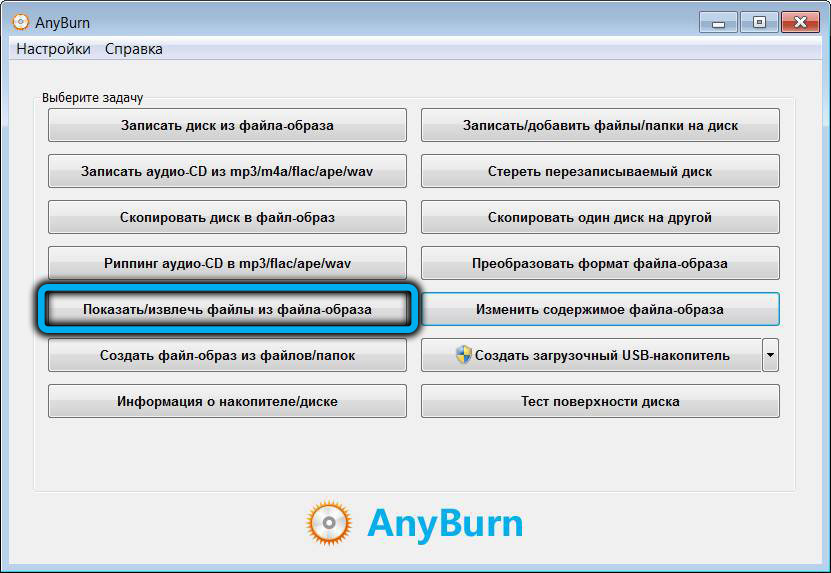
- on the main window, select the tab “Show / extract files from the image file”;
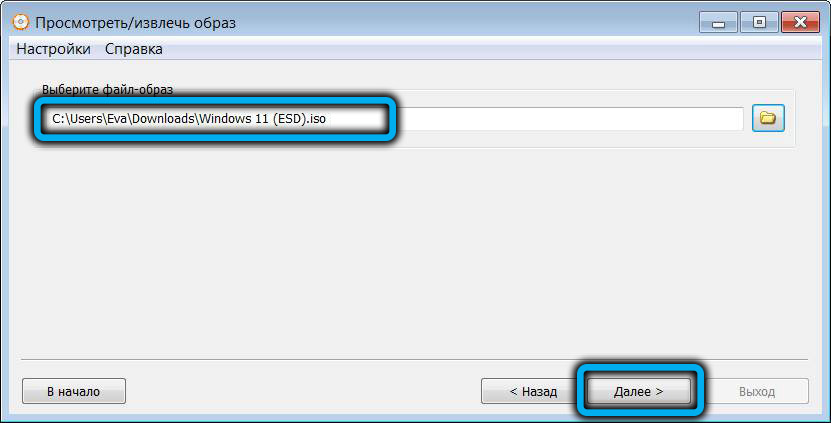
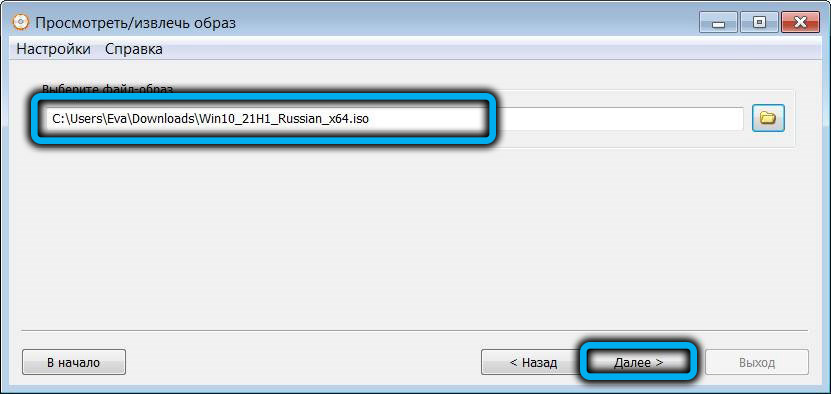
- through the explorer, specify the location of the Windows 11 installation image on the disk, click the “Next” button;
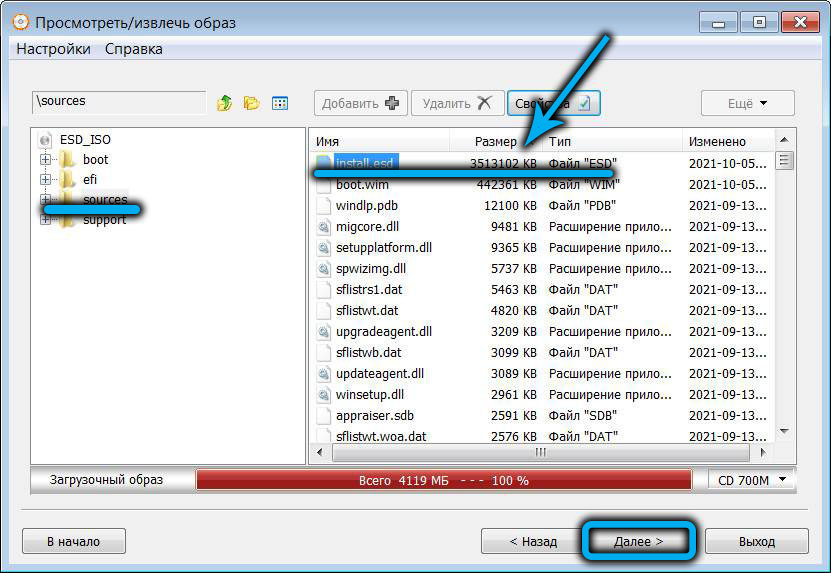
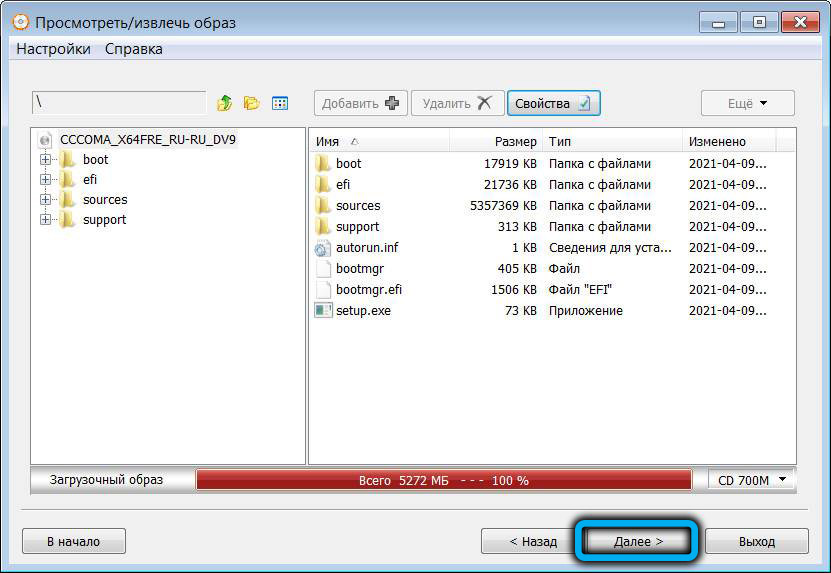
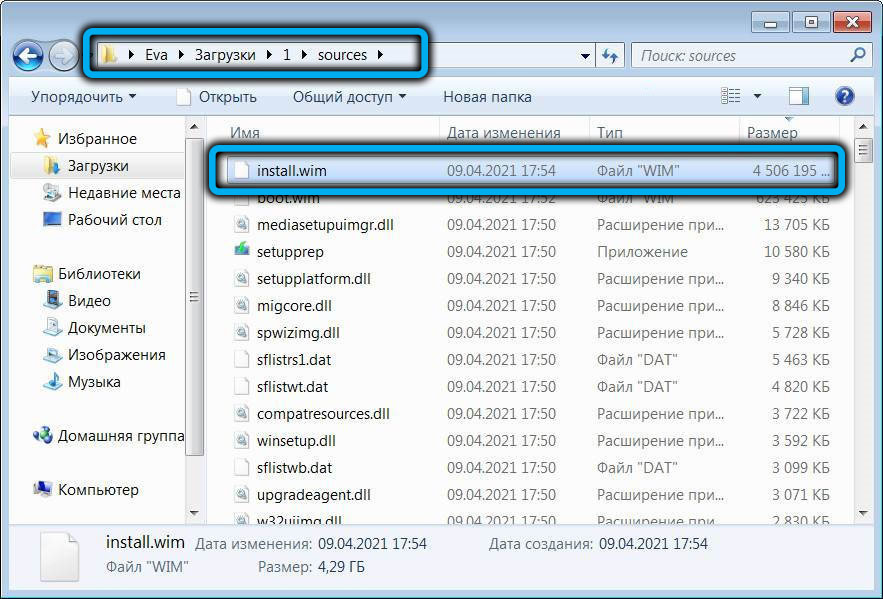
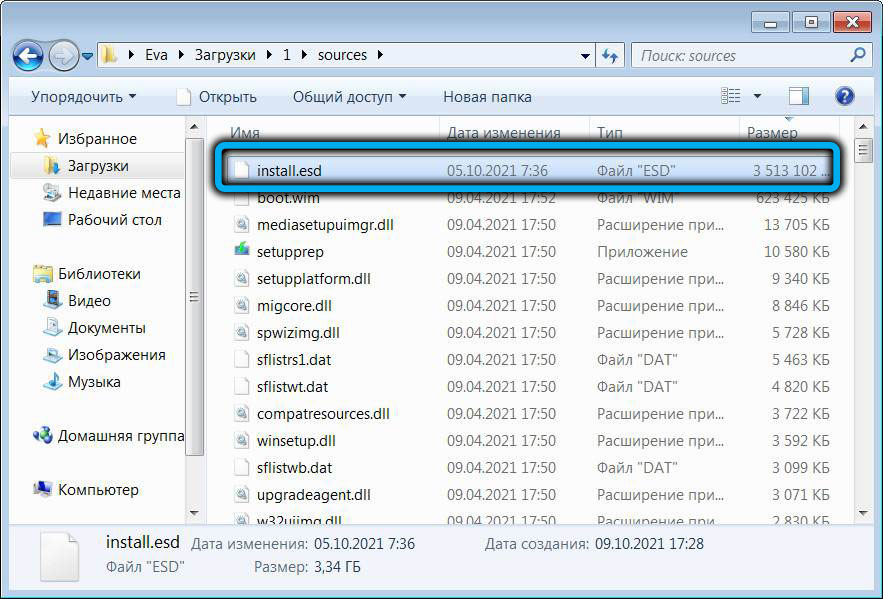
- the image viewing window will open, click on the “sources” folder, look for the install.esd file in the right block, click on it and click “Next” (if you sort the window by size, the file will be at the very top of the list);
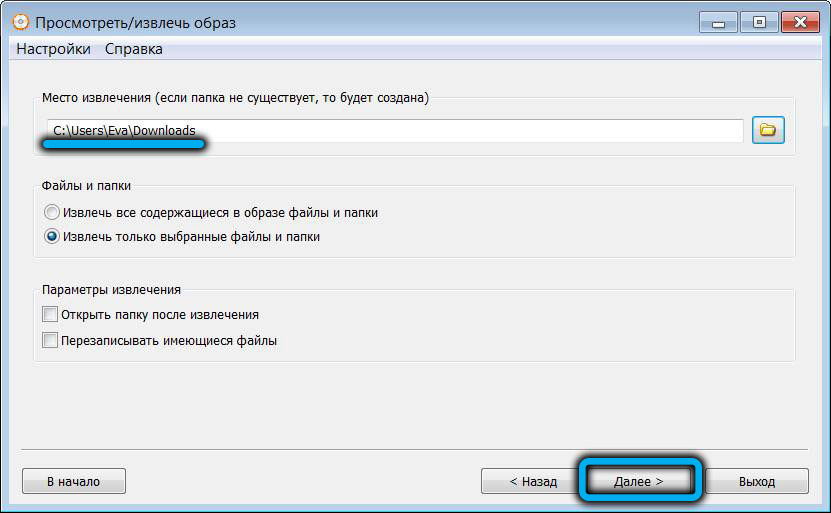
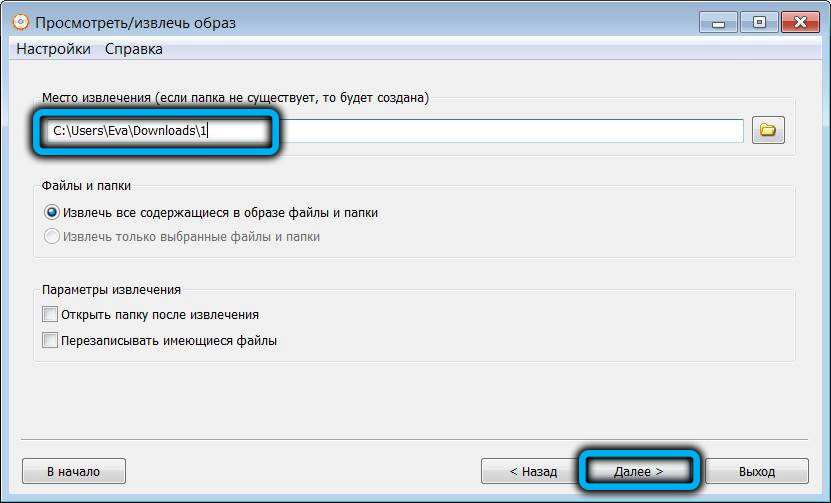
- specify the folder into which the selected file will be extracted, click “Next”;
- after the extraction procedure is completed, we get to the main screen of the utility and again go to the “Show / extract files from the image file” tab;
- now specify the path to the Windows 10 installation ISO file;
- on the image viewing page, simply click the “Next” button;
- select a folder to extract the image of “dozens” (it must be unique);
- go through the explorer to the folder with the extracted Windows 10 image, click on the sources subfolder, find and delete install.wim;
- copy the install.esd file from the extracted Windows 11 image to this folder.
We described the procedure for editing an ISO image to install Windows 11 bypassing the check for incompatibility with older computers.
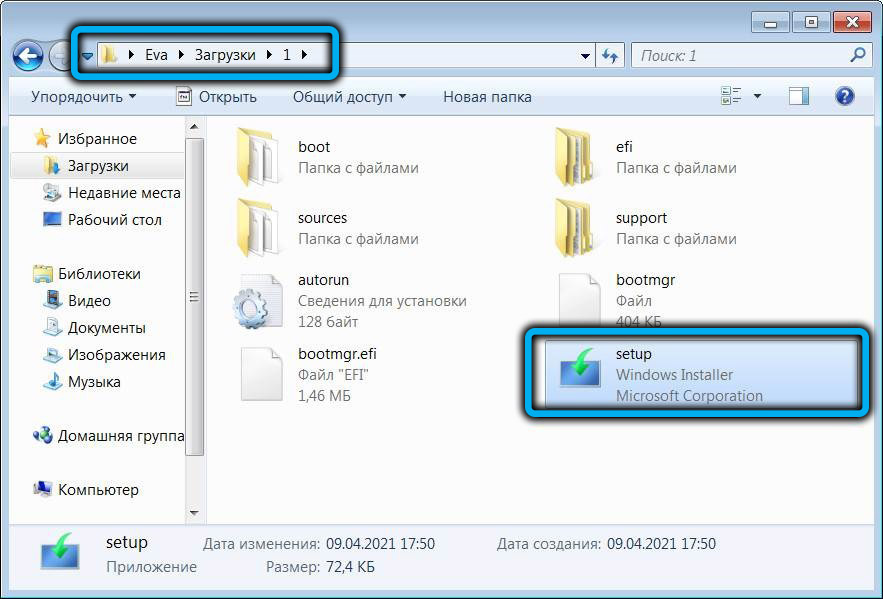
To actually install the new OS, you need to run the setup file from the folder where we extracted the “dozens” image. In this case, the installation procedure will work out with the inscription Windows 10, but this should not bother you, since the eleventh version will actually be installed.
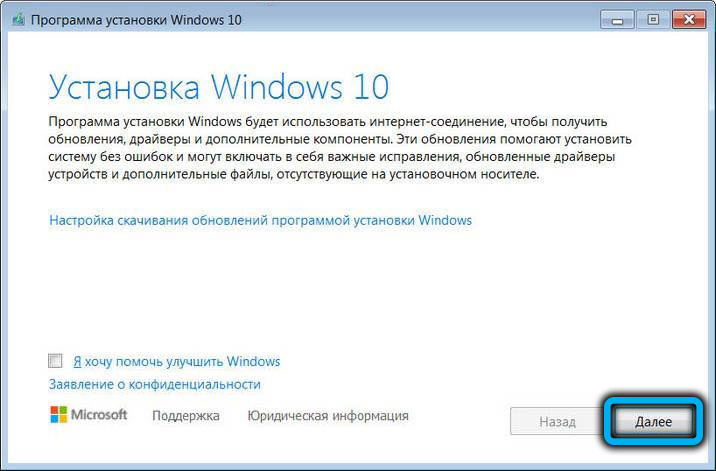
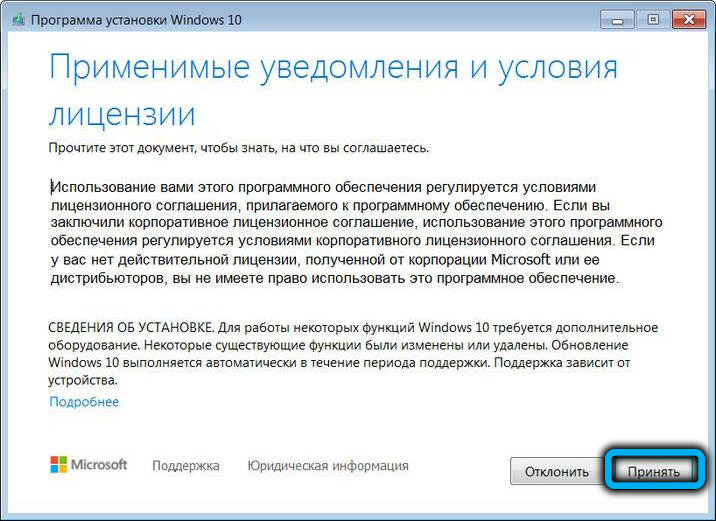
So, after starting the installer, a window with a license agreement will appear, we agree by clicking the “Apply” button. In the next window, check the box next to the “Keep only my files” option, click “next”, and on the next screen – “Install Windows 11 Pro”.
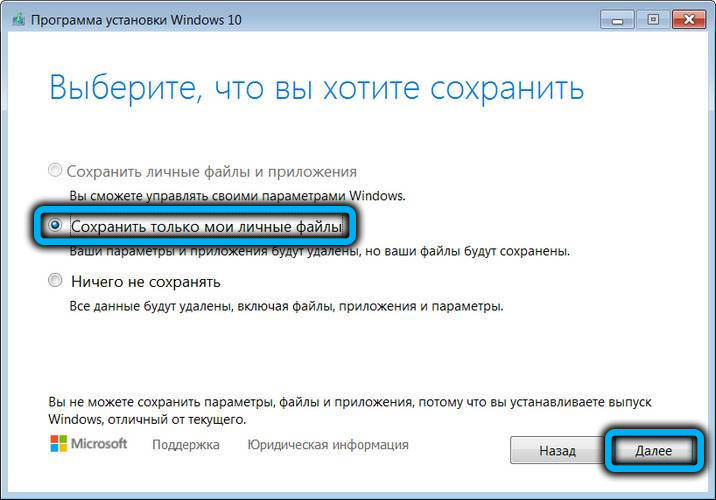
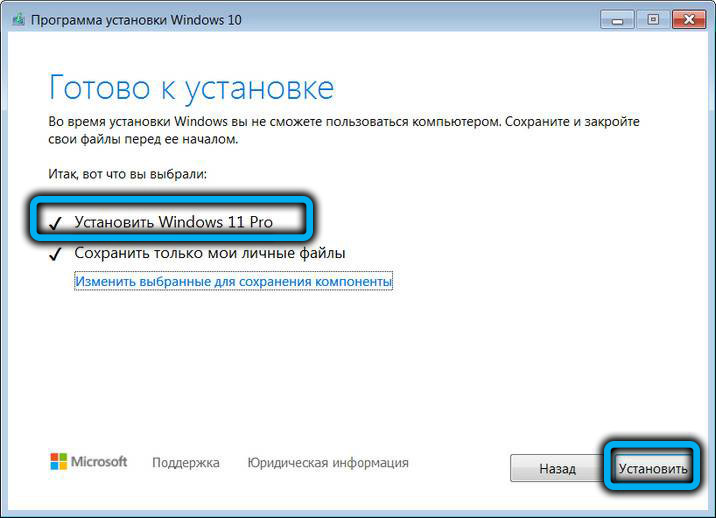
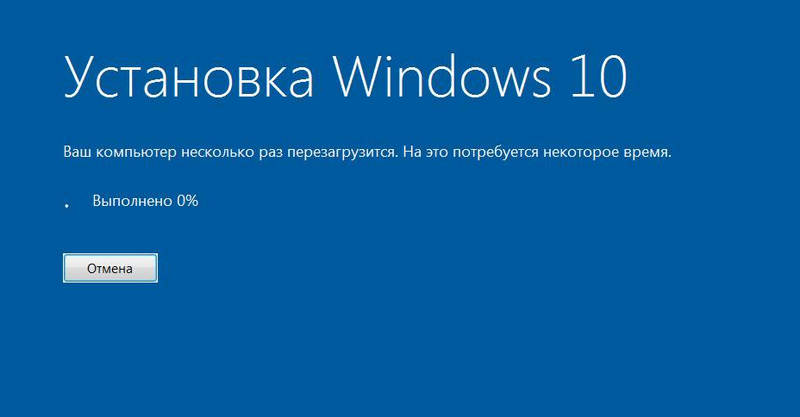
The Windows 10 installation blue screen will start, in fact, we know that we are installing the eleventh Pro version. The installation process will proceed automatically, and only at the end will the user’s participation be required – in order to agree with the default privacy settings.
We have described the main ways to bypass the compatibility check when installing the next new product from Microsoft, but none of them guarantees a 100% result. In the event of an error, only a clean installation of the operating system will remain without saving the license from the previous version of the OS and, of course, without saving our data.
