As has been said many times, there are a huge number of different types of files of varying degrees of importance and relation to the structure of the operating system and the computer as a whole. And quite often users are faced with a situation when they have to deal with formats that are rarely found in everyday life, and, therefore, there may simply not be a tool for working with it among the standard operating system tools. It is to level the gaps and difficulties in such situations that there are articles like this one. And within the framework of the above topic, the procedure for working and converting a file image from ESD format to IOS will be considered.
Contents
Solution options
So, the “ESD” format, aka “Electronic Software Download”, is a compressed and encrypted image of the Windows operating system in a certain way, which, in addition to the OS itself, can contain the most important components and update files. That is why the topic under consideration has a worthy degree of importance, since every user can face a similar situation. Despite the possible seeming complexity of the conversion procedure into the more familiar IOS format, with which most standard software can work, in fact, everything is quite simple.
Method 1
There are many types of software that are distributed free of charge, and among this majority, two options are most used: the first is “Dism ++”, the second is “Adguard Decrypt”. “Dism ++” is the best option for a novice user or for those who want to deal with ESD as quickly as possible and without any complicated manipulations, since you only need to do the following:
- You can download the program from the official website of the developers “https://www.chuyu.me/en/index.html”;
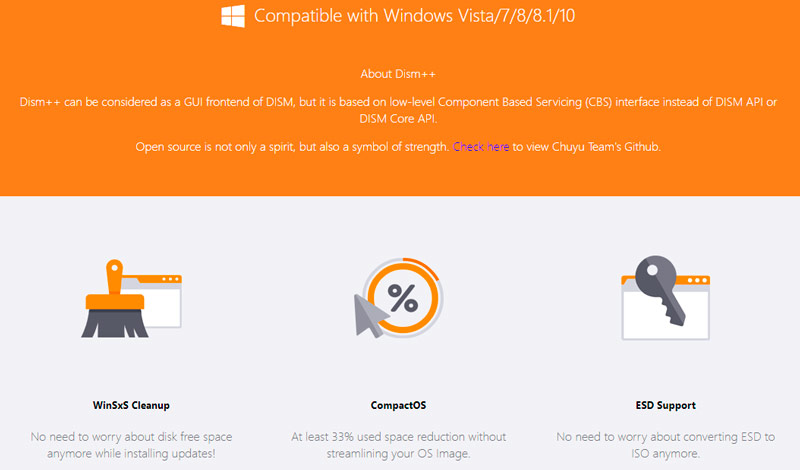
- After downloading, launch it by selecting the bitness corresponding to your operating system;
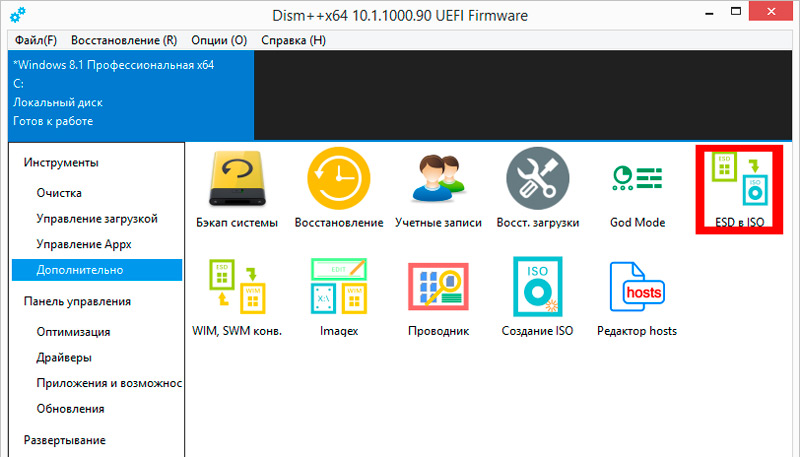
- In the window that opens, select the “Tools” section (it is located in the left part of the window) and go to the “Additional” sub-item;
- Select “ESD in IOS” from the available options;
- In the “Format Conversion Wizard” window, specify the path where the file in the considered “ESD” format is located;
- Click “Finish” and wait for the convector to finish working.
Method 2
The Adguard Decrypt program can also be downloaded free of charge from the official website https://rg-adguard.net/decrypt-multi-release/, but to run you need to unpack the archive first. Then:
- Open the file “decrypt-ESD.cmd”, which will be in the unpacked archive;

- As you can see, the familiar command line console is used for work, so there should be no problems getting used to the interface;
- Enter the full address of the location of the “ESD” file into the console, if the path contains spaces, you will additionally need to specify quotation marks;
- The program will automatically recognize the content and present a list of available editions;
- At this step, several options will be available that you can use:
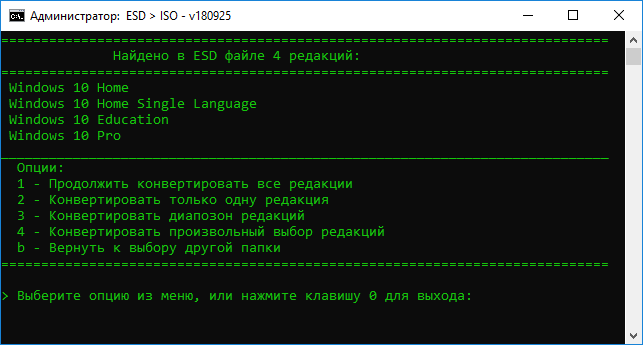
- Use all available editions.
- Only one.
- Range.
- Free choice.
- Choose another folder.
- Depending on the content of the image you have, select one of the scenarios presented.
- In the next step, the mandatory selection procedure will be repeated:
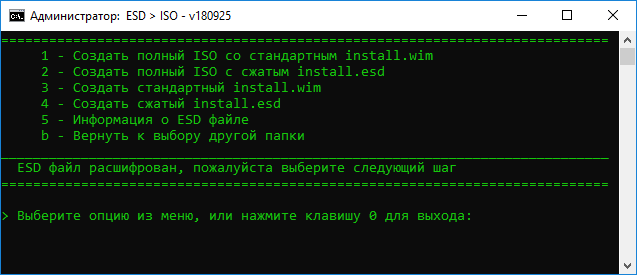
- Create a complete ISO image with standard install.wim.
- Create a complete ISO image with a compressed installer.
- Standard set.
- Compressed esd.
The rest of the items return the user to the previous step to the information about the contents of the image or return to the folder selection. This completes the direct user intervention and the entire main conversion process is carried out by the program itself. Therefore, it remains only to wait for the completion of the decryption. 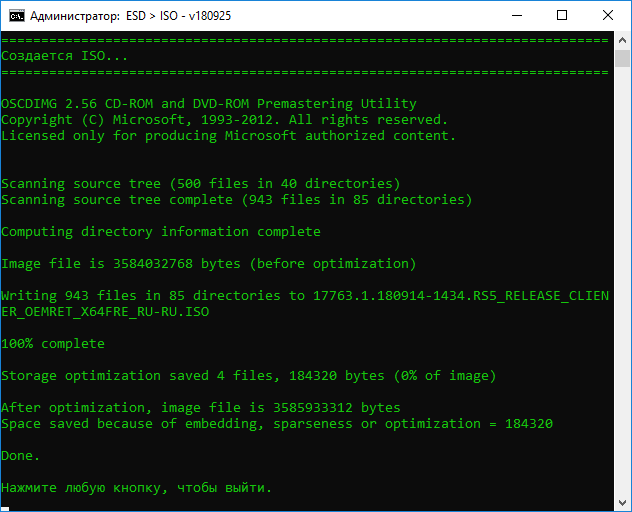
Conclusion
As you can see from the above points, there is nothing difficult in converting ESD to IOS, and after the conversion is completed, you only need to use the standard tools to work with the result.