Some drivers are placed on websites as INF files, so users often have difficulty installing them. In particular, an error appears when installing them in the standard way. Let’s see what INF files are and how they are installed.
Contents
What is an INF file
An .inf file is a text file containing information about devices and installation files. It consists of many sections designed for specific purposes. For example, to copy files to the desired directories or make changes to the system registry. In general, a file of this format contains everything that is required for installing drivers, system installation packages, and various applications.
How to force install the driver and get around the error
The INF file is installed as follows:
- The PC user right-clicks on the INF file.
- Then select the line “Install” in the new window.
- Then the driver installation process starts.
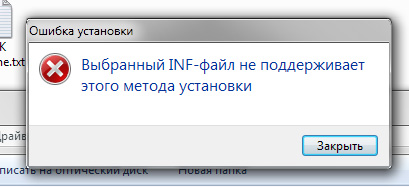
Often when installing such packages, the error “The selected INF file does not support this installation method” occurs, so you need to try installing it in other ways.
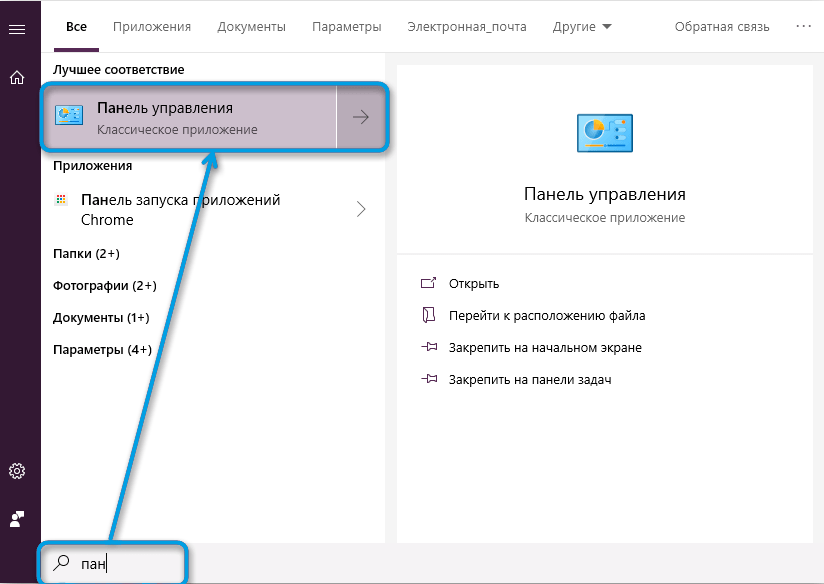
Sometimes such an error occurs due to the incompatibility of the file with the bitness of the system, since some are provided for 86-bit operating systems, and some for 64-bit ones. If the problem is related to this, then you need to download the file compatible with your version of Windows. The bitness of the system can be viewed in the “System” section in the Windows Control Panel.
This issue can also occur because the DefaultInstall or DefaultInstall.Service sections are missing from the .inf file. But that doesn’t mean it can’t be installed.
In this case, you can try to put it in two ways:
- Through the “Device Manager”.
- Using the command line.
When using the first method, you need to know for which device this driver is intended.
In the first way, the file with the INF extension is installed like this:
- The Start menu opens the Taskbar.
- The “System” section is selected,
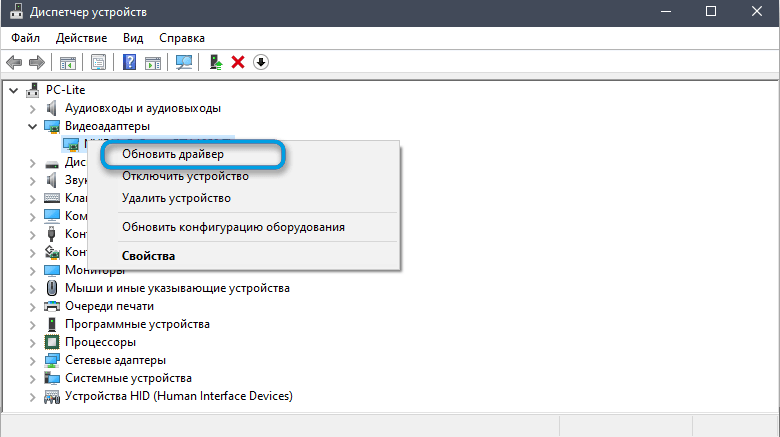
- Then “Device Manager” is selected from the tools menu.
- In the list of devices, click the desired one with the mouse and select the line “Update driver”.
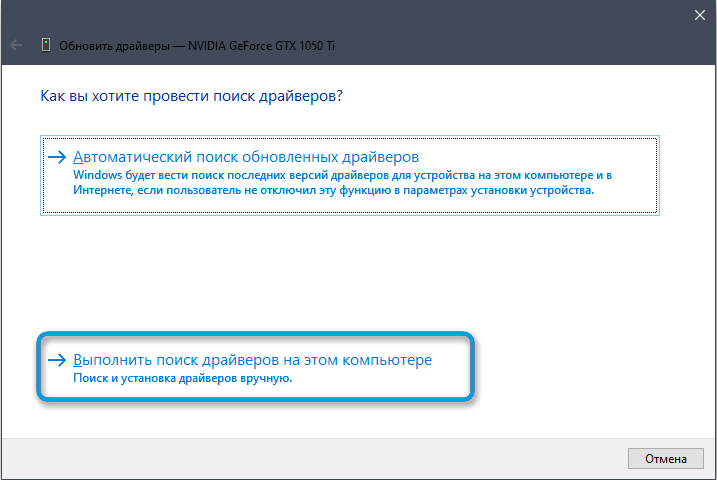
- Next, select the line “Search for drivers on this computer.”
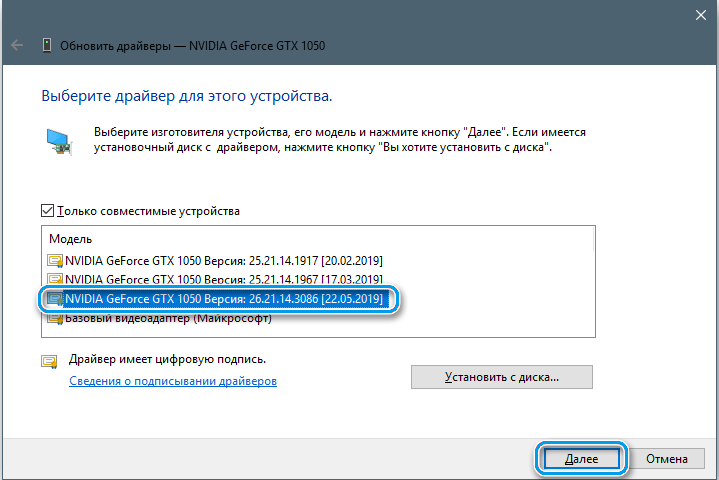
- Then a folder is selected on the hard disk in which the downloaded and unpacked driver is located. In this case, there should be a checkmark next to “Including subfolders.”
- Then click the “Next” button, after which the file installation process should start.
If you cannot install the driver in this way, then you can try installing it using the command line. To install drivers in INF format in Windows 7 using it, you need to do the following:
- First you need to run the command line with extended rights.
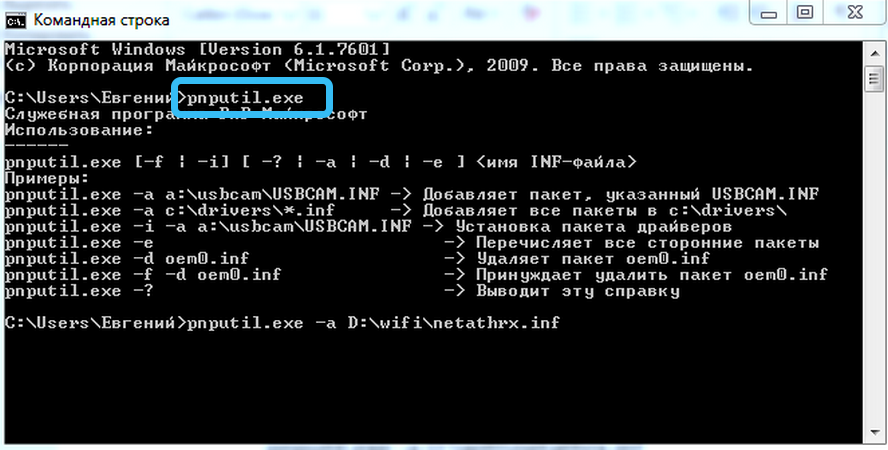
- Then you need to enter the pnputil command in it and press Enter.
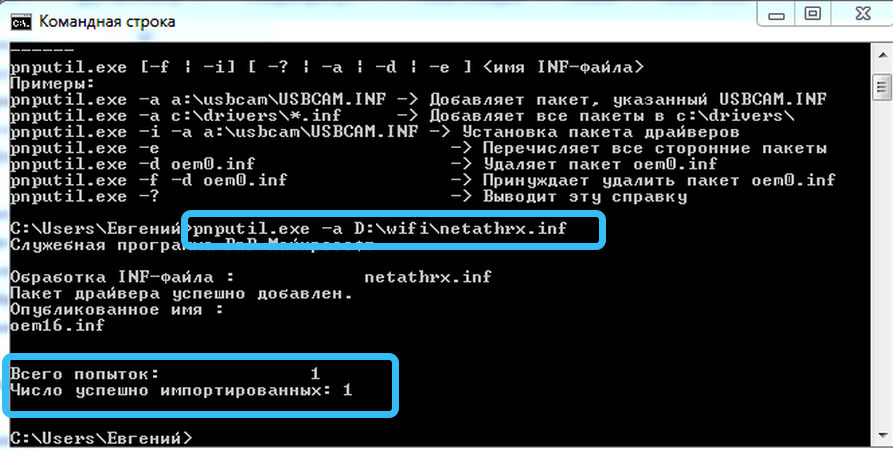
- Then enter pnputil.exe -a D:wifinetathrx.inf (the name of the hard disk partition, the folder with the driver, and the INF file itself must be changed).
- Then you also need to press Enter, after which the package will be added to the system and a window will appear as in the bottom picture.
- To make it work, you need to restart the PC or update the hardware configuration in the task manager. If a new version of the software is being installed, then you need to remove the old driver and perform the same steps.
In Windows 10, this is done in much the same way. To install the INF file you need:
- Run console as administrator.
- Enter the command pnputil.exe / add-driver * c:drivers (the disk partition and folder must be changed) and press Enter.
You can also type in a PowerShell script:
Get-ChildItem "C:Driver File Location" -Recurse -Filter "*inf" | ForEach-Object { PNPUtil.exe /add-driver $_.FullName /install }
and install all INF files from the desired directory (the script contains the Drivers folder on drive C, so you need to specify the path to your directory). In these ways, you can install almost all drivers, including those for the printer.
Difficulties installing unsigned drivers
Sometimes a problem occurs with the installation of unsigned drivers, so you need to disable verification of their signatures. This is done in two ways, so you need to parse each.
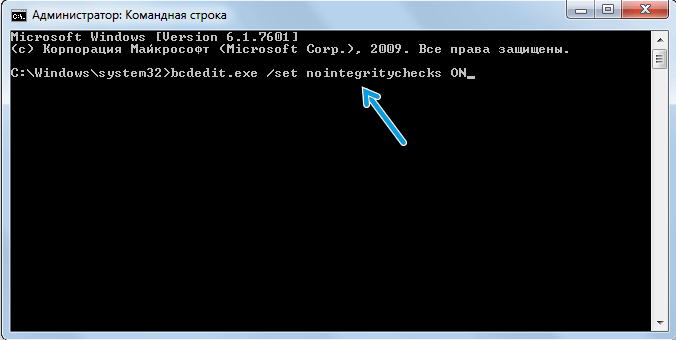
Disabling signature verification via the command line looks like this:
- Runs with elevated command prompt.
- The bcdedit.exe /set nointegritychecks ON command is entered into it and ENTER is pressed.
- Then the PC restarts for the changes to take effect.
To enable this feature, you must use the bcdedit.exe /set nointegritychecks OFF command, which must also be entered into this console and applied.
The second method involves disabling signature verification through boot options in Windows 10:
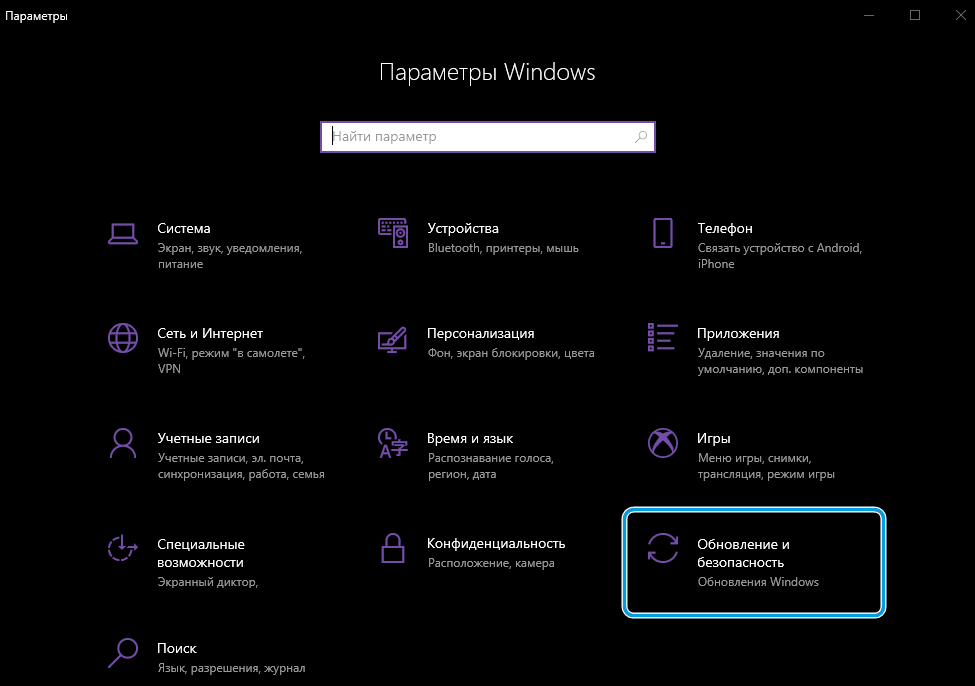
- First, the “Settings” of the system opens. To do this, press Win + i at the same time.
- Then select the “Update and security” section.
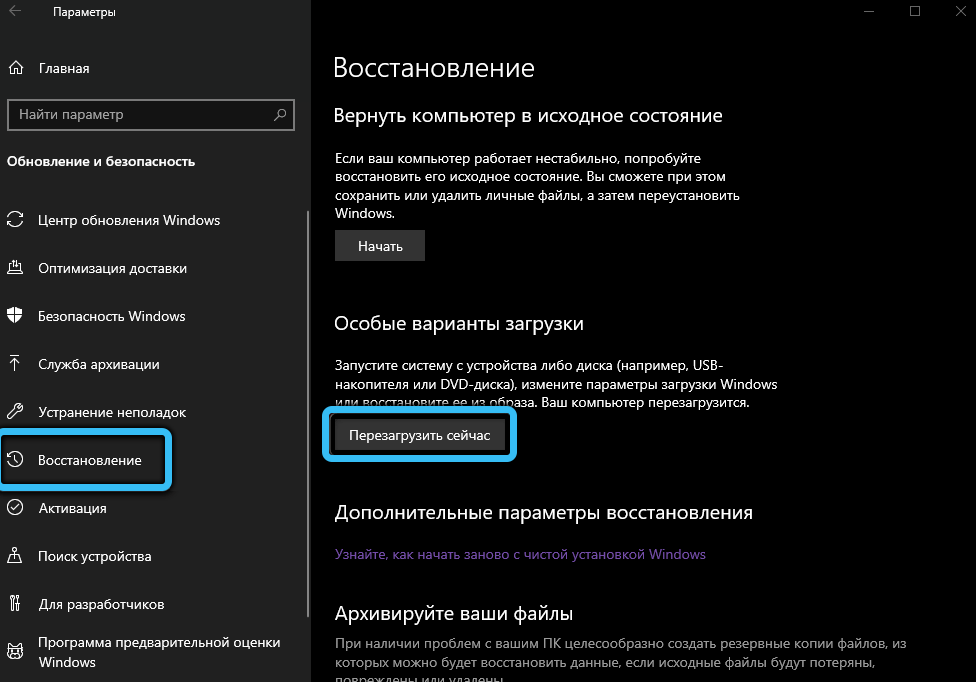
- Then the “Recovery” tab opens, and then in the “Special boot options” section, the “Restart” button is pressed.
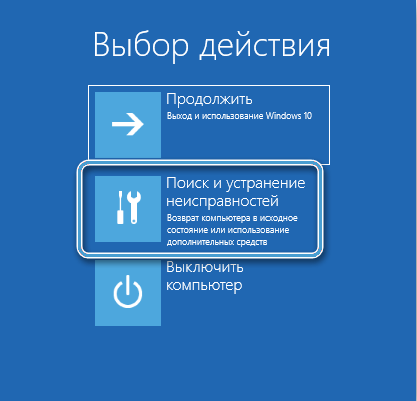
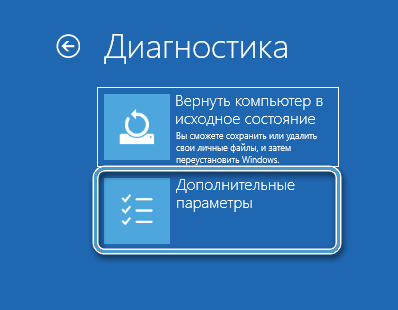
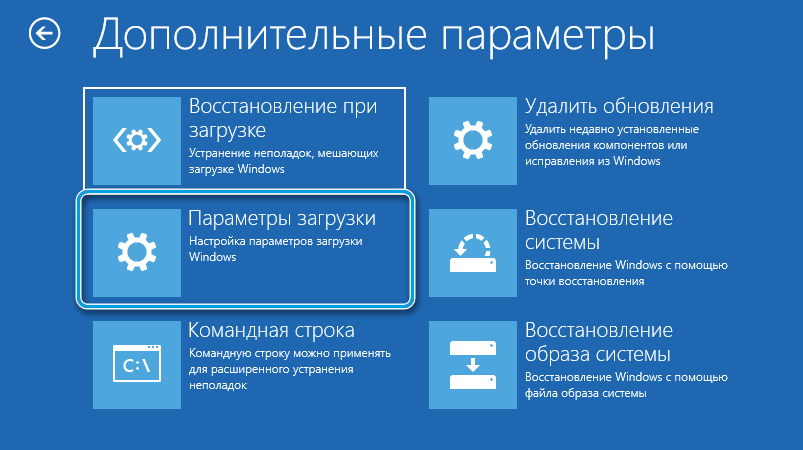
- Further, after restarting the PC, a window with various tools will appear on the display, in which you need to select the “Search and elimination” item, then in the new window click the “Other options” tab, and then select “Boot options” and click “Restart”.
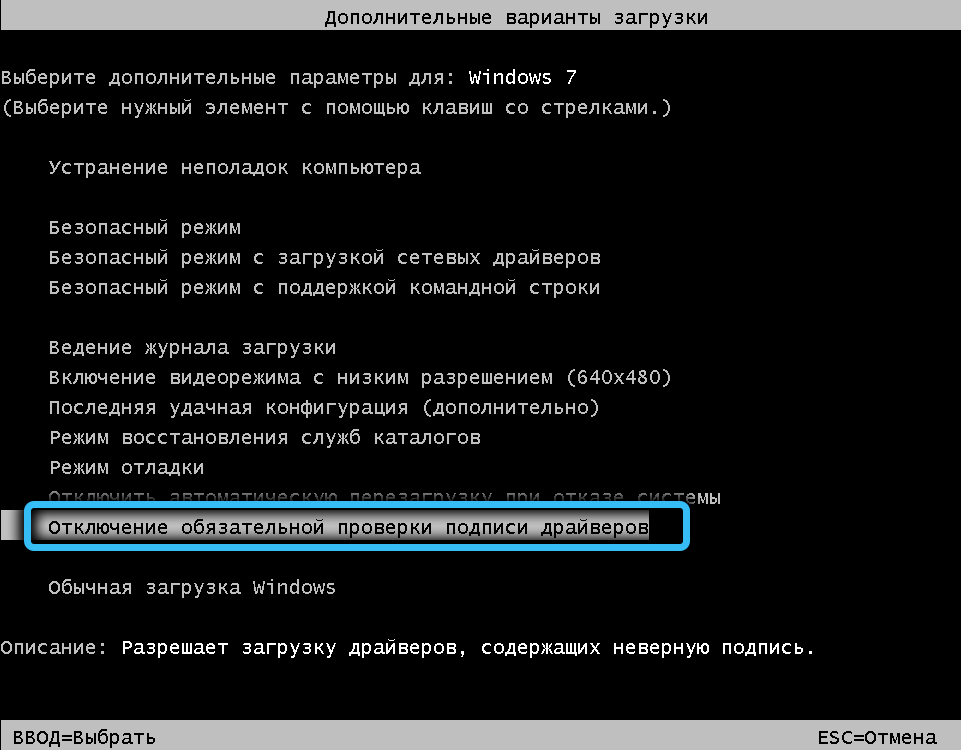
- After restarting, the display will offer all possible options for booting the system, in this list you need to select the line “Disable mandatory driver signature verification” with the F7 button.
- Then the system will be loaded in this mode and before shutting down or restarting it will be possible to install unsigned drivers.
On Windows 7, to boot in this mode, you need to press F8 after starting the PC, and then select the same line.
Repairing corrupted system files
If system files are damaged, they can be restored quite quickly with a standard Windows tool.
This is done as follows:
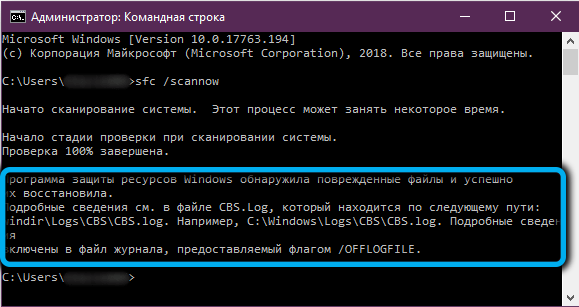
- The command line is launched with extended rights, after which the sfc /scannow command is entered into it and Enter is pressed.
- Then all system files will be scanned and, if damaged, the utility will replace them with serviceable ones. This sometimes takes a long time, so you need to be patient and wait.
If no problems are detected during the scanning process, a message will appear on the command line as in the bottom picture.

Today we have analyzed what INF files are, what they serve for and how to properly install drivers through them. We hope that in our article you have found answers to your questions and remain our regular reader!

