Microsoft Word can be used to solve a variety of tasks, including those that are not entirely trivial, like for a regular text editor. In Word, you can not only work with documents, write scientific papers, articles or reports, but, for example, create your own business card yourself. Although in our time they are no longer used as often as before, they are still convenient and have not completely outlived their usefulness. There are more advanced graphic editors that allow you to draw a card of much better quality, but such programs are not cheap, and to work in them you need to have special knowledge. In Word, you can make a pretty decent business card in a few minutes. In this article, we’ll take a closer look at how to make a business card in Word. Let’s figure it out. Go!
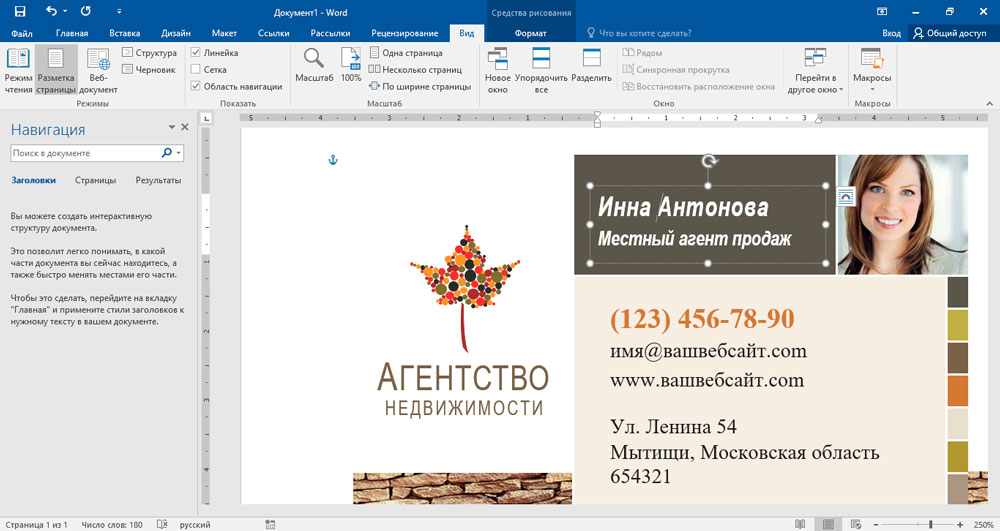
Useful Tips
Creating a business card with the Microsoft Word tool is not the most difficult task. But it should also be approached responsibly.
The purpose of a business card is to convey to customers the basic and most important information. It should be easy to read and understandable for everyone.
One of the main mistakes is trying to fit a huge amount of information on a small piece of paper or cardboard. In practice, it is not needed.
Here are some more practical tips:
- it is better to make a business card in a single color and in the colors of the products offered;
- the full name or company name is always indicated;
- do not forget about the company logo to increase awareness;
- write down contact information;
- advertising is applied only when necessary and only on the back of the product;
- use no more than 2 fonts within one business card;
- the font must be in the same color as the background shade or logo;
- maximum deviation by 1 tone;
- font size ranging from 10 to 14.
Such a business card will be easy to read and easy to perceive with human eyes.
Microsoft Word allows you to use several tools to create your business cards. One of them is ready-made templates.
Create business cards using tables
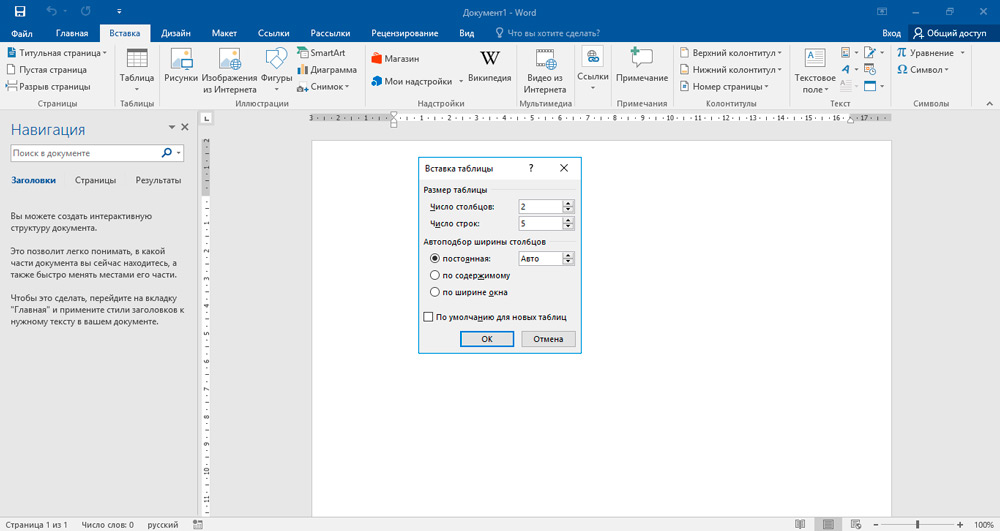
You need to start by setting the page parameters. To do this, go to the Layout tab and set the margins to 1 cm or slightly less. Next, you need to create a table. Open the “Insert” tab and create a 2×5 table, that is, 2 columns and 5 lines.
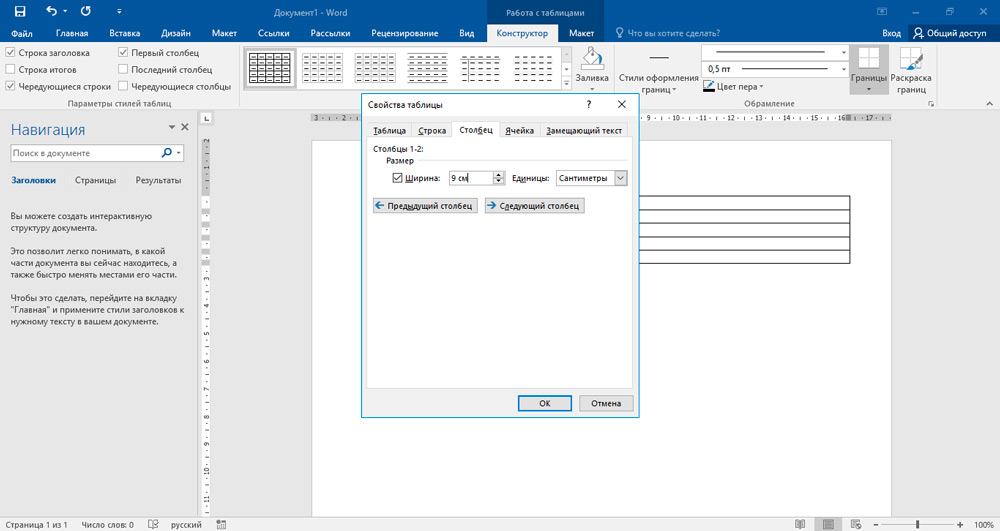
The next step is to set the height and width parameters for the card. Values of 9 cm in width and 5 cm in height are taken as the standard. You can neglect this by making your business card the size you want. Just keep in mind that all business card holders and special compartments in other accessories are designed for exactly this format. Let’s set the required values. Select the table and open its properties. Going to the “Line” tab, check the “Height” box with the checkbox and enter the height value (in our case, it is 5 cm). Then, in the “Column” tab, check the “Width” checkbox and enter the appropriate number (for example, 9 cm). Do not forget to confirm the entered parameters.
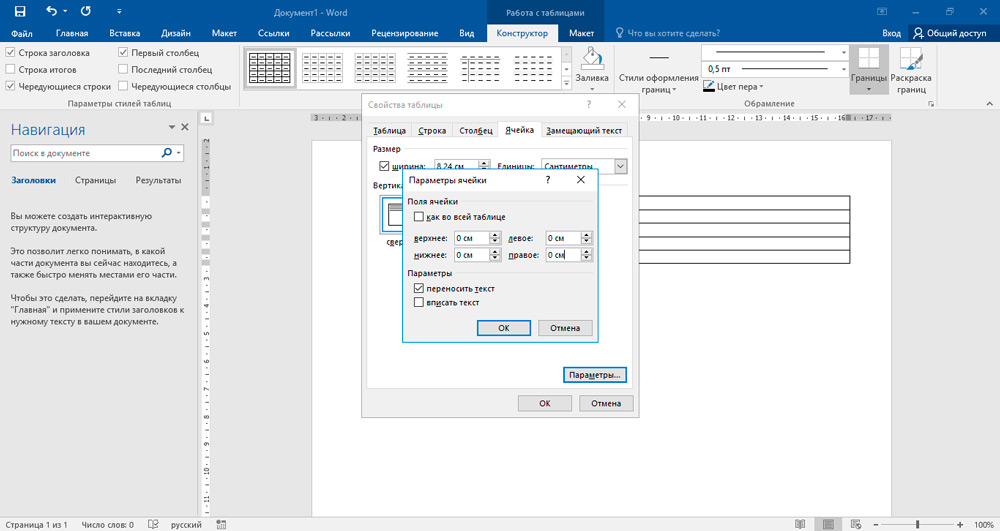
After that, all in the same table properties window, click on the “Parameters” button. There you need to set the margins of all cells by default to 0 cm. Next, remove unnecessary dividing lines, leaving only those along which you will cut business cards.
You can make the borders light so that they are visible when you cut out the cards, but will be much less noticeable on an already made business card. To do this, select Borders and Fill under Format and select All for Type. Set any color, light tones. Set the width to a quarter centimeter.
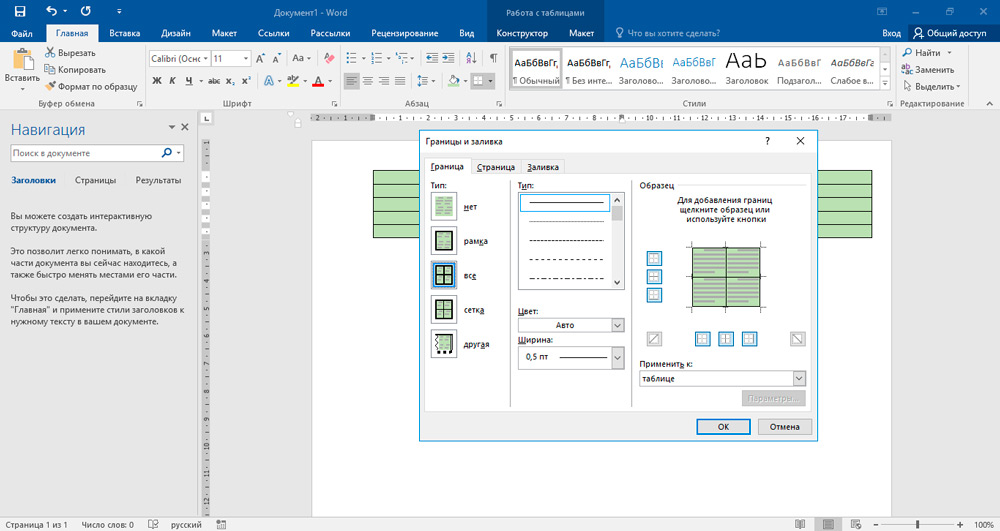
Now that the base is done, let’s move on to the text. Enter the full name, company name, position and contacts that you think are necessary to indicate. The text must be readable, so do not use fancy fonts that can make it difficult to recognize letters. Also, remember to indent so that all information is not located right next to the borders.
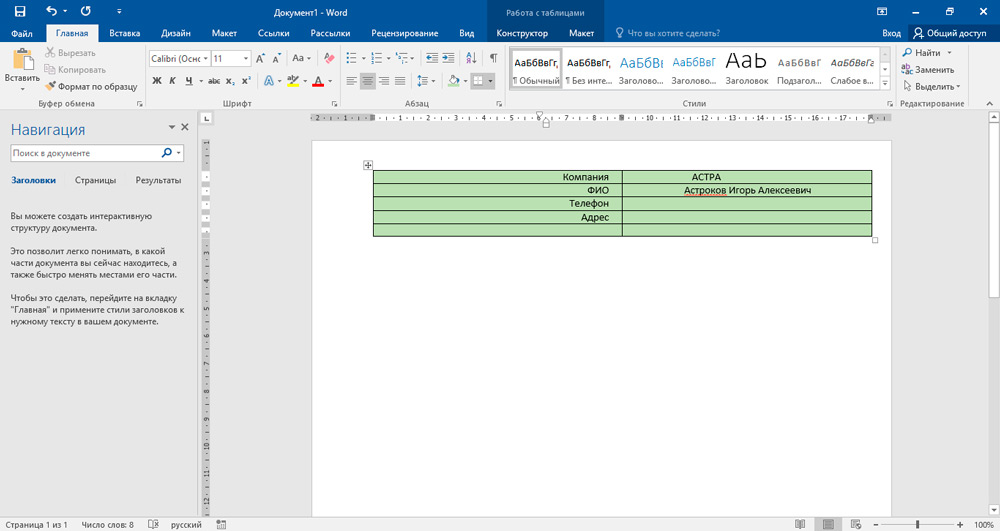
After you have entered the text in the cell, you need to fill in all the rest. This task is solved by simple copying. To speed up the process, three times click on the cell with the text, placing the cursor on the last line, and hold down Ctrl while holding down the key, you can drag the selected text into the cell, then select two, four, six, and so on. This approach will greatly speed up the process if you are going to print a large number of cards. Note that thick paper should be used for printing. It should be understood that it will not work to create a really beautiful and serious business card in Word, and in this case it is better to contact the printing house.
How to make a business card using a ready-made template
Any version of Microsoft’s Word office program offers many ready-made business card templates.
With their help, everyone can create their own advertising business card. First you need to do the following:
- open a new text document in the program;
- click on the “File” menu button, then on “Create”;
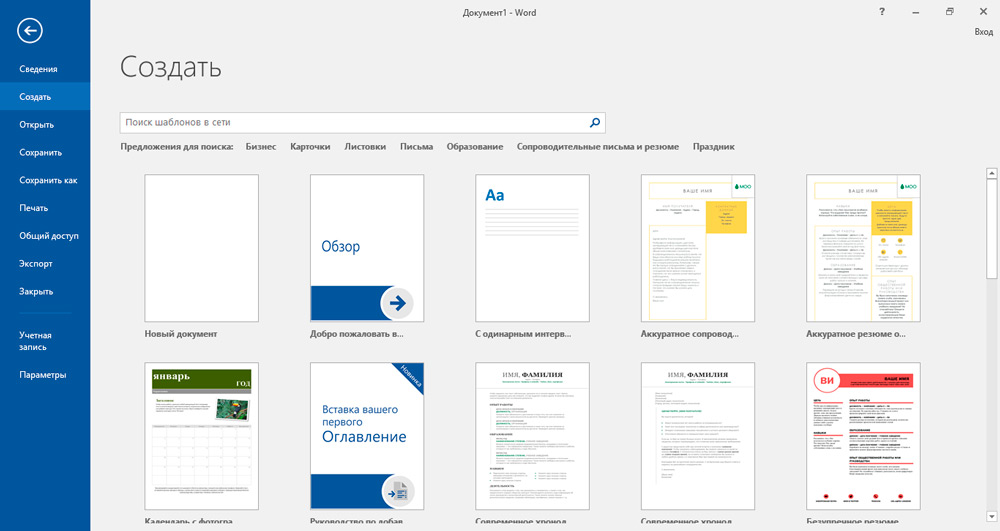
- in the list that opens, select the “Business cards” option;
- go to the category called “Sample templates”;
- here to review the examples by which you can design your new business card.
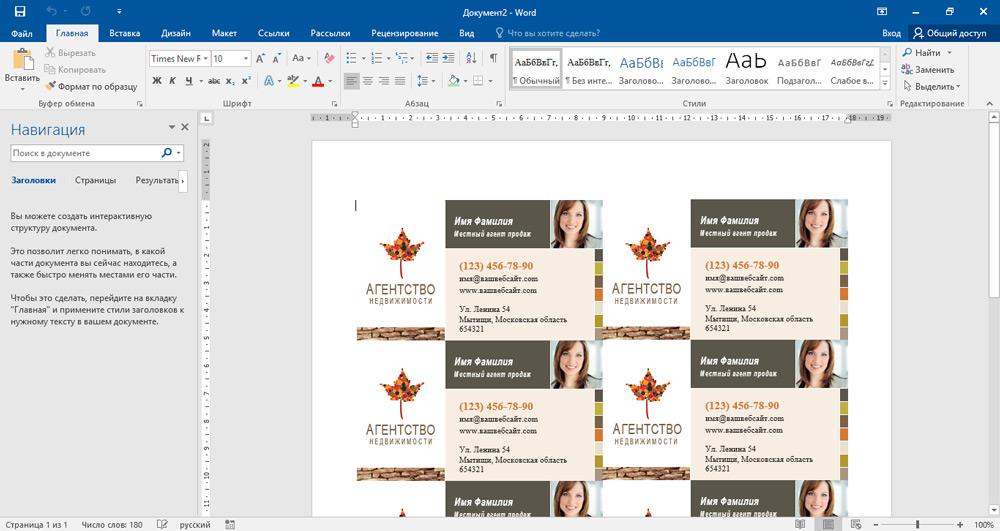
Explore the options available and choose the one that suits you best.
The finished template can be edited at your own discretion and get an original result in the form of a business card. It will only have to be printed in the required quantity.
If you decide to use ready-made templates to create your own business card, start from the following instructions.
- Follow the steps in the previous section. Choose the category that suits you. Let’s say you settled on a heading called “Cards”.
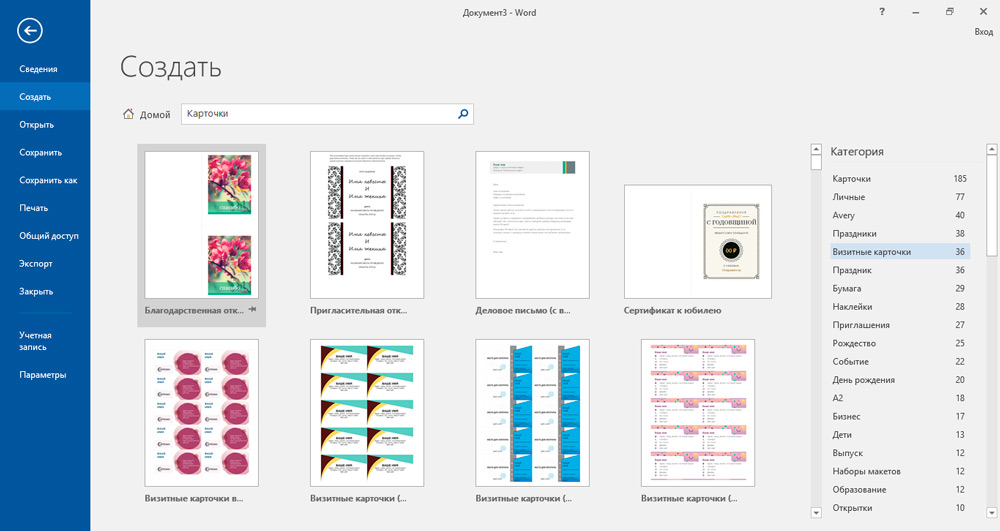
- Find the layouts that suit you in this section. You will have to opt for only one option.
- If none of the above list satisfies your requests, then open the official Microsoft website and download new templates from there.
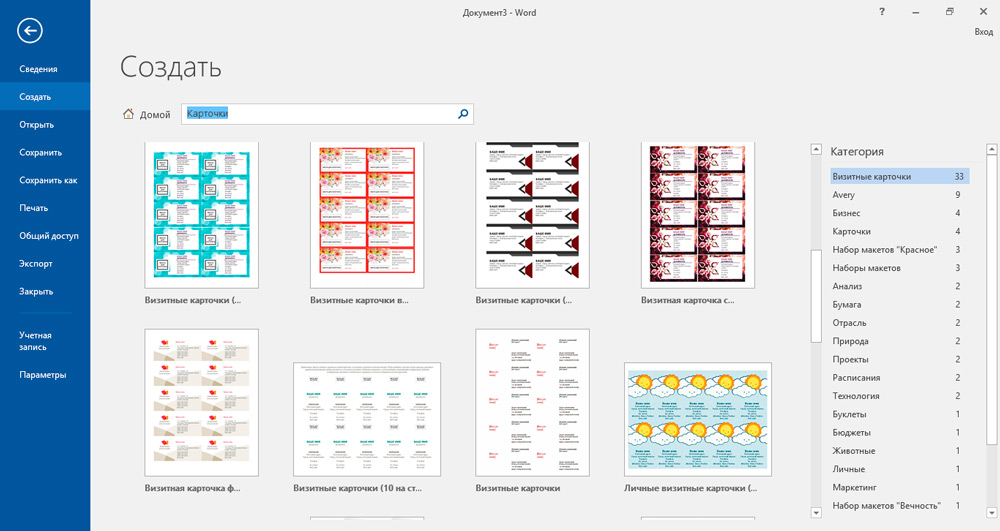
- Click on the “Download” button and double-click to run the document.
- A set with the same templates will appear in the document, which you can edit at your discretion.
- By clicking on each element, the boundaries of the blocks are displayed.
- Fill in your required details to form a business card.
- To avoid manually entering the same information each time, use the copy and paste function.
As a result, you get a whole sheet of ready-made business cards. They can be multiplied, depending on the required number of cards.
Printing is done on a regular printer, or the Word file is copied to a USB flash drive and taken to a copy center. There they will already be able to print a sheet on thicker paper or even cardboard.
You can also cut business cards yourself. Although such a service can be offered in the copy center. In addition, many centers have equipment for cutting business cards evenly. The choice is yours. Sitting for an hour with scissors is not a problem for some people.
That’s how quickly and easily you can make your own business card in Word. Write in the comments if this article helped you and ask any questions of interest on the topic considered.