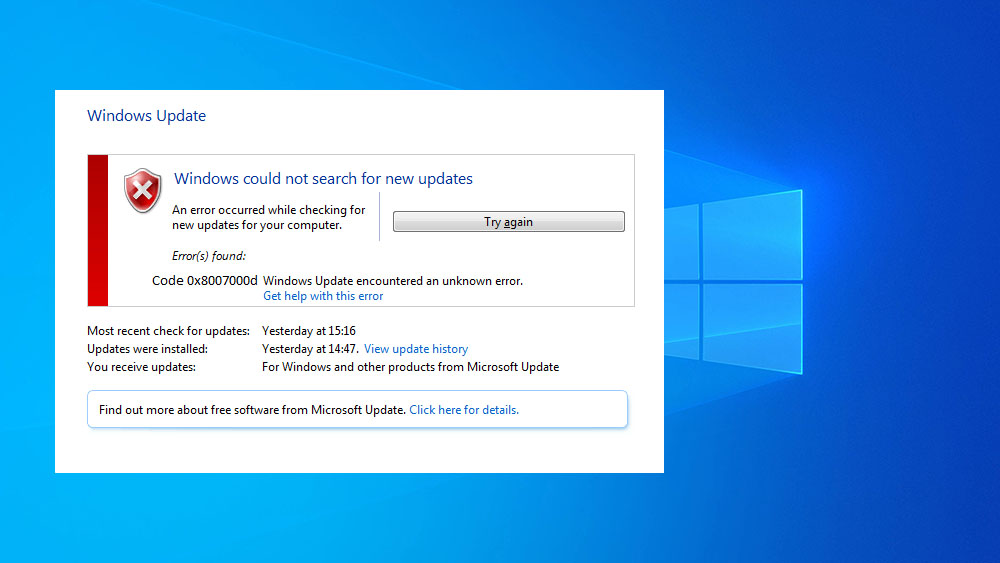
Windows device users encounter error messages that prevent them from performing an action quite often. Among the common failures that occur in various conditions (during the installation, updating or activation of Windows), the code 0x8007000d may also occur. Depending on the scenario and the source of the malfunction, it can be solved in different ways.
Contents
Reasons for the error
The presence of error 0x8007000d is usually due to such factors:
- violation of integrity, lack of installation files, inability to read correctly (failure during OS installation), which provokes a number of different reasons;
- hard disk damage, bad sectors (when updating the OS);
- the failure is caused by the lack of access to the registry key (during OS activation);
- driver incompatibility (when loading drivers, updating).
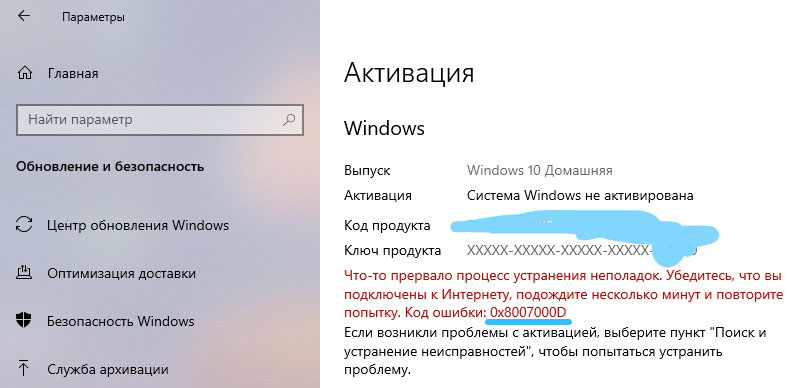
Error 0x8007000d when installing Windows 10
If the operating system was being installed and at some point the process was interrupted by a message with such a code, this means that either the boot drive from which the installation was performed or the data on it is damaged. Then the failure is easy to fix, but the user will need certain skills.
To fix the 0x8007000d failure that occurs when installing Windows 10, apply the following measures:
- Creating a new boot drive – a flash drive or optical media (it is preferable to use a different drive to avoid a repeat of the failure). The installation process should complete correctly.
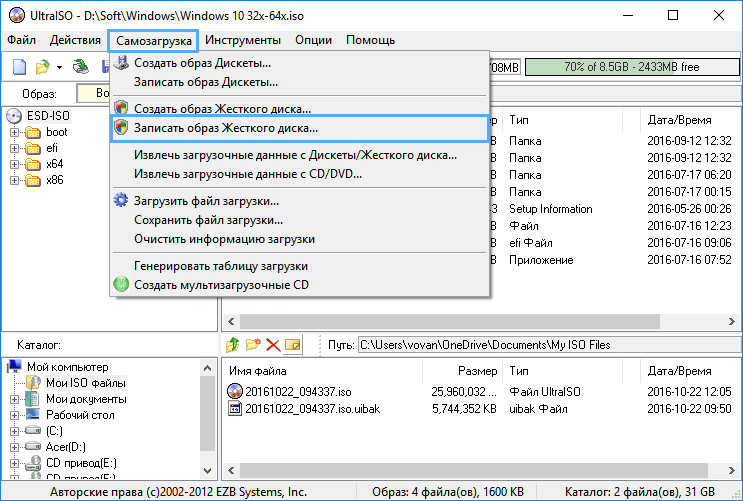
ADVICE. To write bootable media, you can use utilities such as Rufus, UltraISO, or other specialized software. - Overwriting data on the same media. If the image was damaged initially, you will need to find a new, serviceable distribution kit and, having written it to a USB flash drive, try to install the system again.
Error 0x8007000d when updating Windows 10
Most often, a failure occurs during the installation of Windows updates and is the result of various factors. An update error occurs when the integrity of the components of the Update Center snap-in is violated or system data is corrupted. There are many reasons for its appearance, and therefore various solutions are applicable that are effective under certain conditions. Let’s analyze in detail how you can remove the error that occurred during the Windows 10 update and interfered with the procedure.
Running the troubleshooter
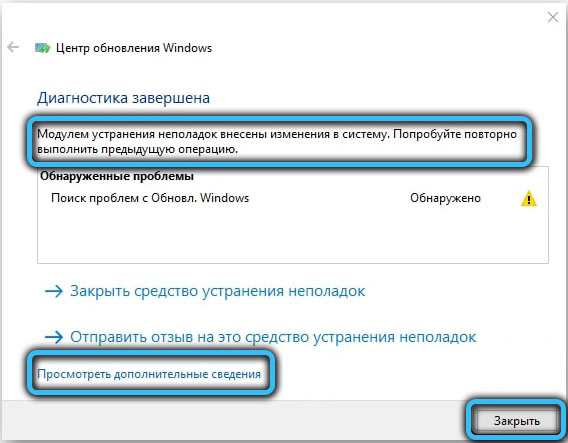
Infrequently, but still in some circumstances, a regular utility will come to the rescue. The solution is to check and correct the identified faults. You can run the tool like this:
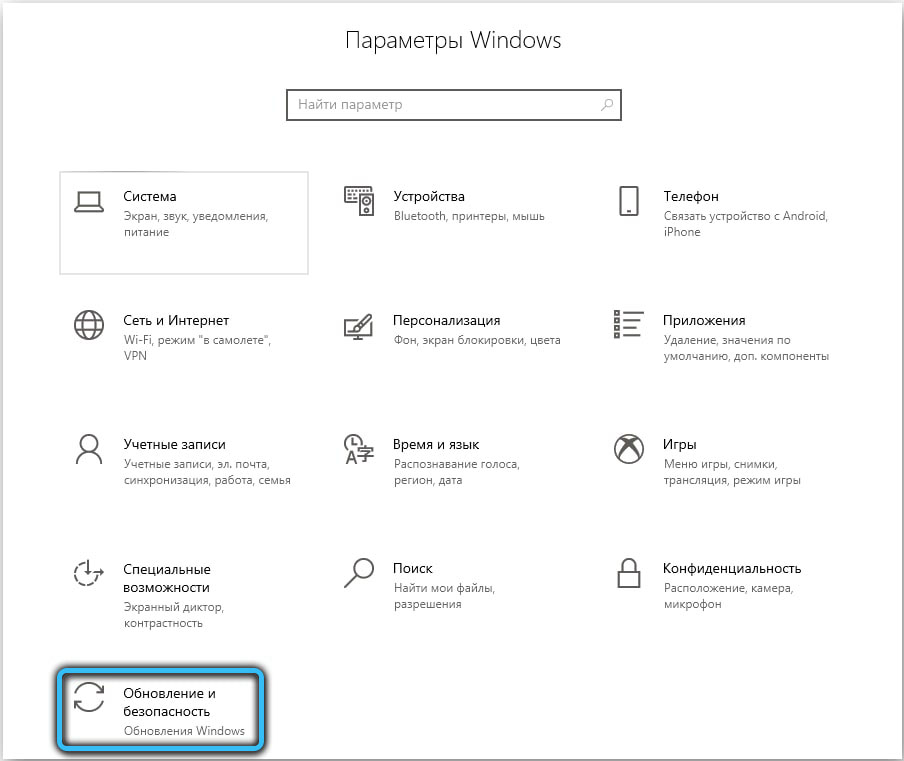
- open “Settings” (Win + I) and go to “Update and Security”;
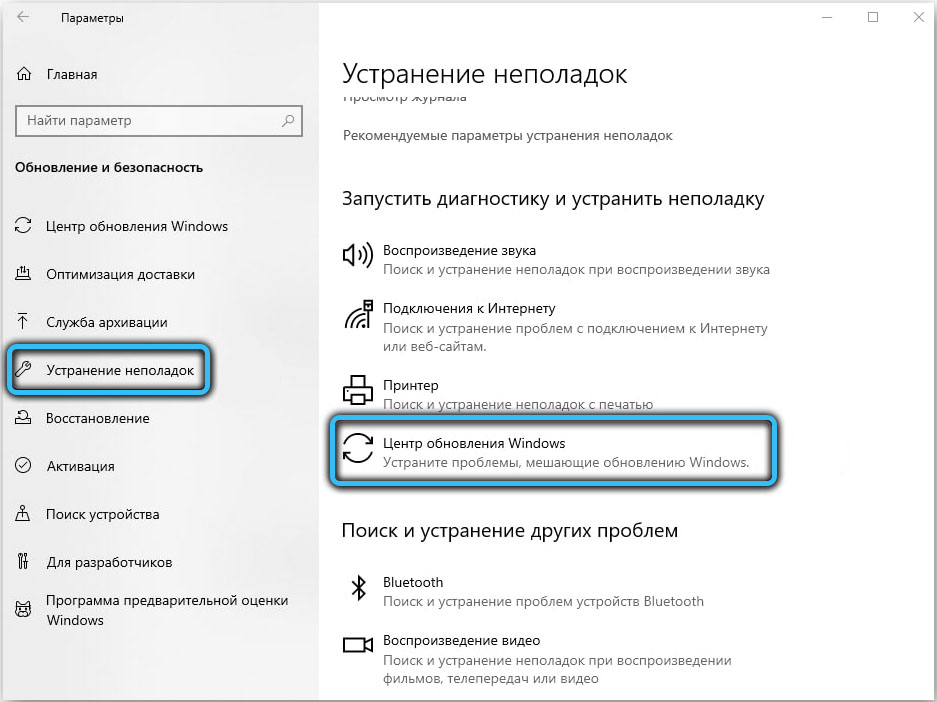
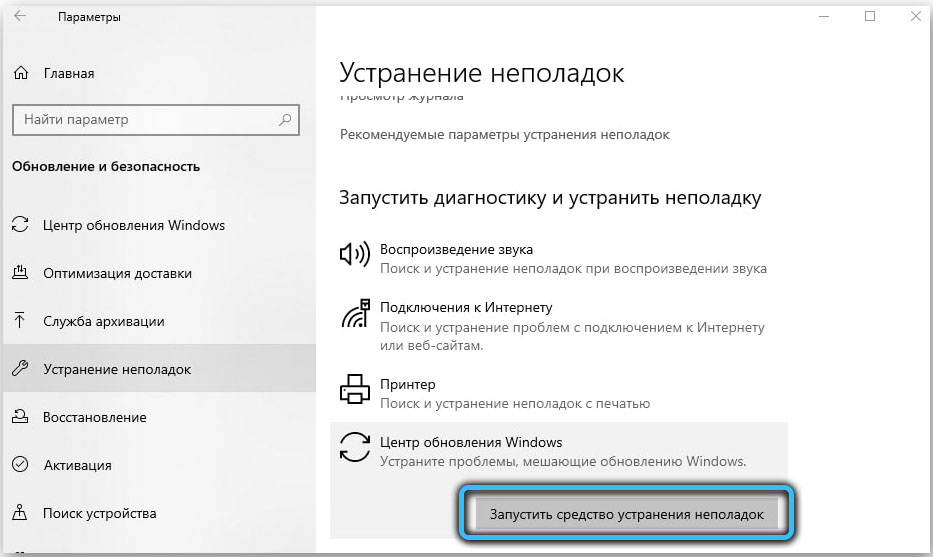
- go to the “Troubleshooting” section and open the tool for Windows Update by pressing the appropriate button, the check will start automatically;
- At the end of the process, reboot the device.
Running SFC and DISM
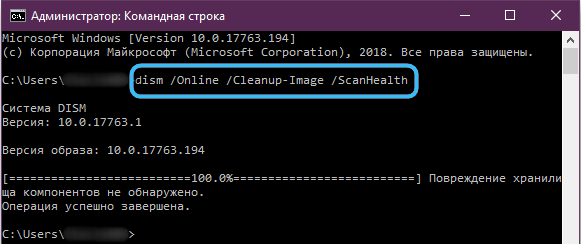
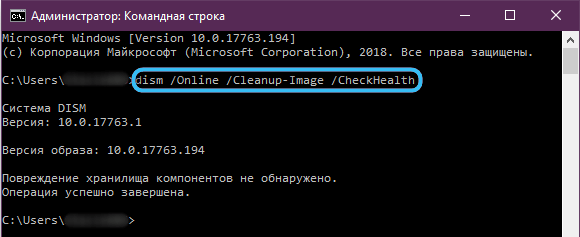
Often the failure is caused by damage to the system files, so it is advisable to check them with the standard SFC (System File Checker) utility. Another built-in tool that will be useful in fixing corrupted data is DISM (Deployment Image Servicing and Management). During the scanning process, the erroneous element will be identified and corrected.
To perform a search and repair task, you must complete the following steps:
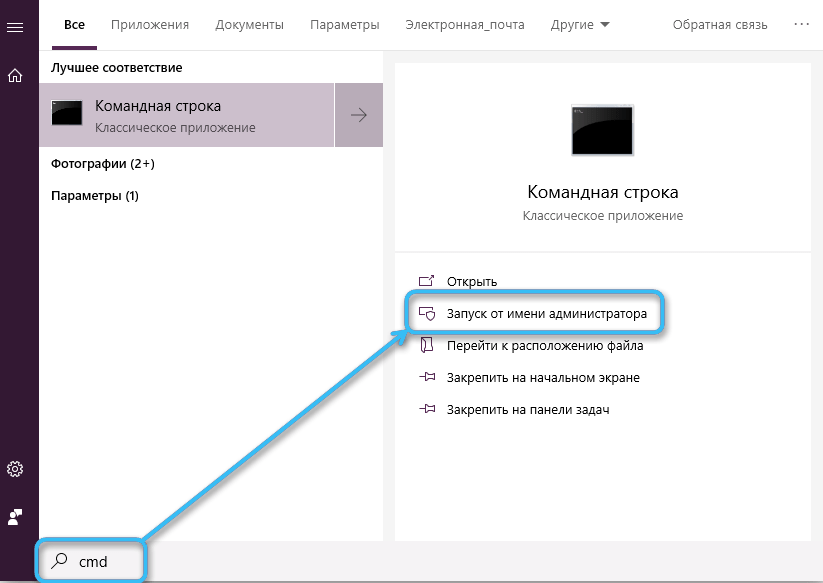
- launch the Command Prompt (administrator) by selecting the appropriate item from the context menu “Start”;
- Type sfc /scannow and press enter. The action will start the scanning process, which will take some time;
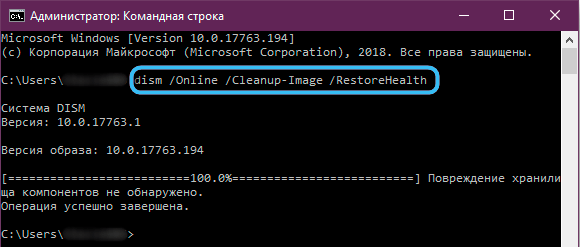
- after the scan is completed in the terminal, we set the commands one by one (press Enter after each request):
dism.exe /online /cleanup-image ScanHealthdism.exe /online /cleanup-image /CheckHealthdism.exe /online /cleanup-image /RestoreHealth - close the terminal, reboot the device, and then try to update the system.
Applying the Group Policy Editor
If the method above did not help and the system continues to give an error, you can use the Group Policy Editor snap-in to fix it:
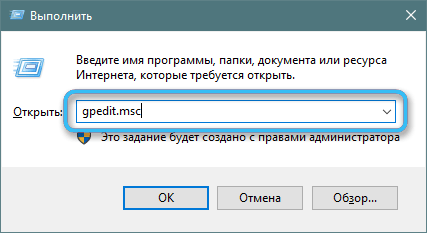
- we start the service using the standard Run console (Win + R) and the gpedit.msc request;
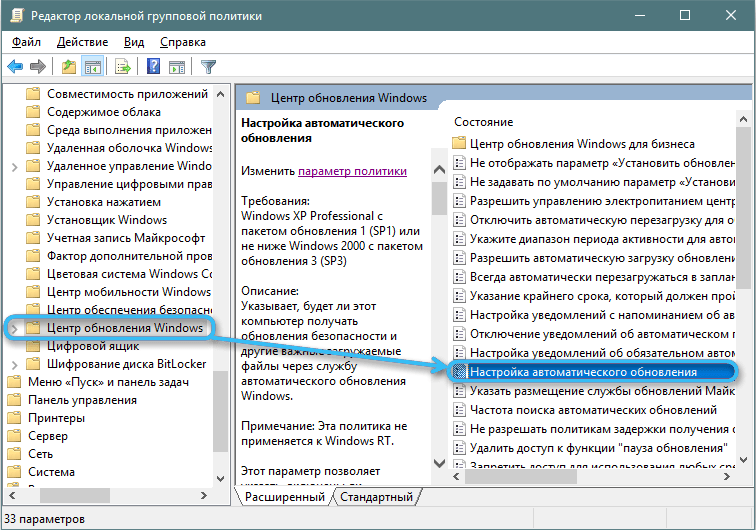
- go along the path “Computer Configuration” – “Administrative Templates” – “Windows Components” – “Windows Update”;
- we are looking for “Setting automatic updates”, we press RMB – “Change”;
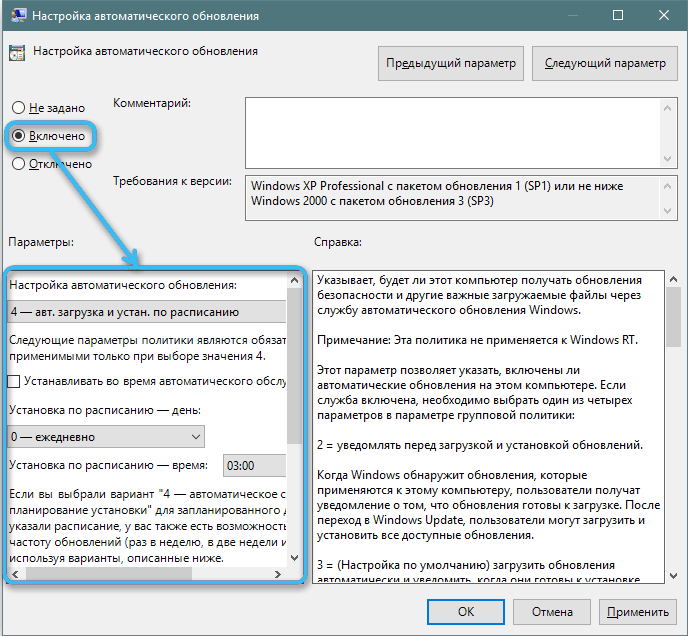
- in the editing window, change the position of the marker to “Enabled”, below we change the necessary settings and apply the changes.
Cleaning up the update folder
Sometimes you can fix the crash by clearing the directory that includes the accumulated data:
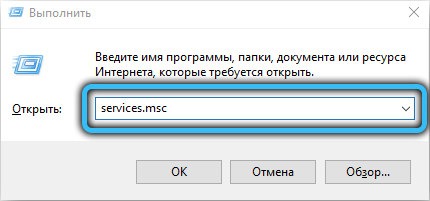
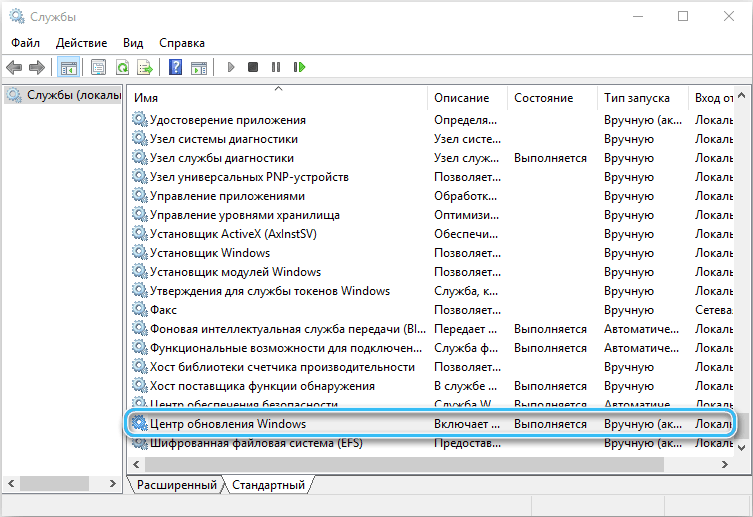
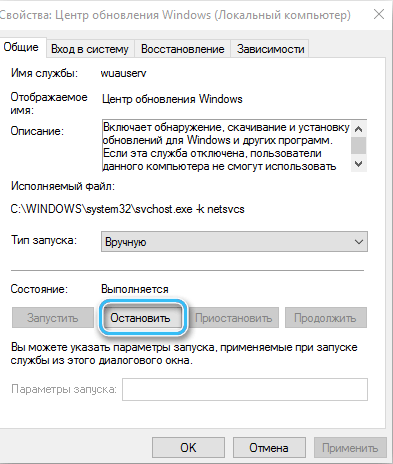
- to complete the task, first stop the service. Open the window using the Run console (Win + R) and the services.msc request, look for “Windows Update” in the list, click PMK – “Stop”;
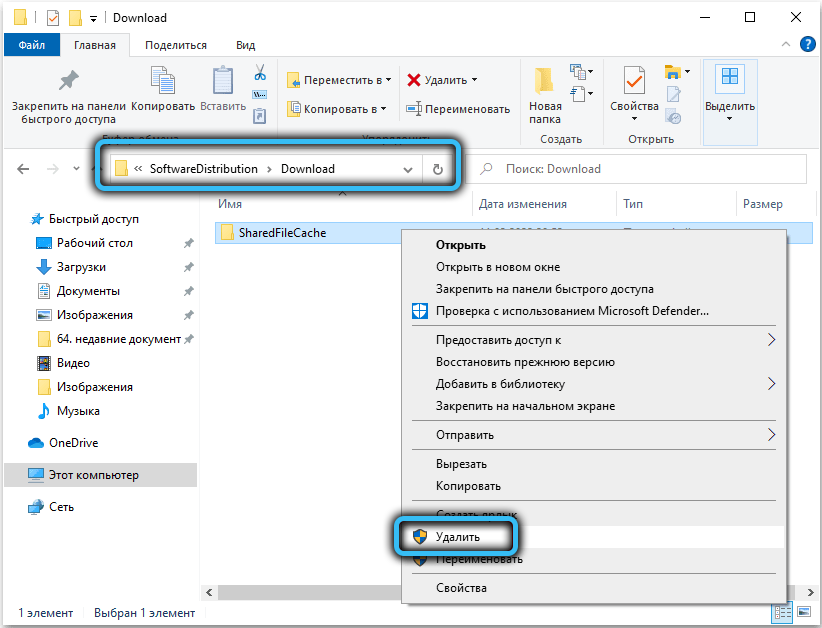
- delete the contents of the directory at C:WindowsSoftwareDistributionDownload;
- reboot and try to update the system.
Reset WU components
This method is effective in many cases in fixing 0x8007000d and some other update issues.
Resetting Windows components to their original state is done by entering commands in the terminal. In addition to the Update Center, you will need to deactivate other related services – BITS and cryptographic services. We perform the following steps:
- open the Command Prompt as an administrator (for example, from the Start menu);
- one by one we set the commands (each request is sent with the Enter key):
 net stop bits
 net stop wuauserv
 net stop appidsvc
net stop cryptsvc - you also need to delete qmgr*.dat by entering the query Del “%ALLUSERSPROFILE%Application DataMicrosoftNetworkDownloaderqmgr*.dat”;
- change the names of the directories where the update data is saved by running the commands one by one:
Ren %systemroot%SoftwareDistribution SoftwareDistribution.bakRen %systemroot%system32catroot2 catroot2.bak - reset Winsock by typing netsh winsock reset;
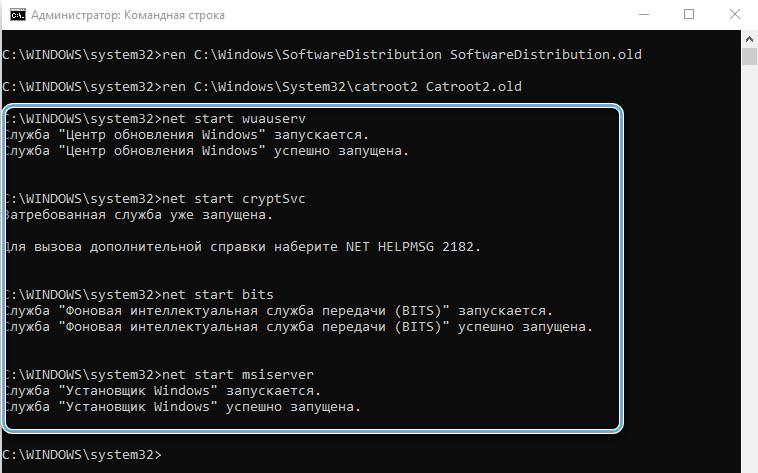
- start previously stopped services:
 net start bits
 net start wuauserv
 net start appidsvc
net start cryptsvc - reboot the device and try to update the OS. Let’s see if the manipulations brought results or not.
Manually install KB
If a malfunction occurred during installation of a cumulative patch through Windows Update, you can resolve the issue by downloading it from the Microsoft resource and then installing it.
To download packages, you will need to follow the steps:
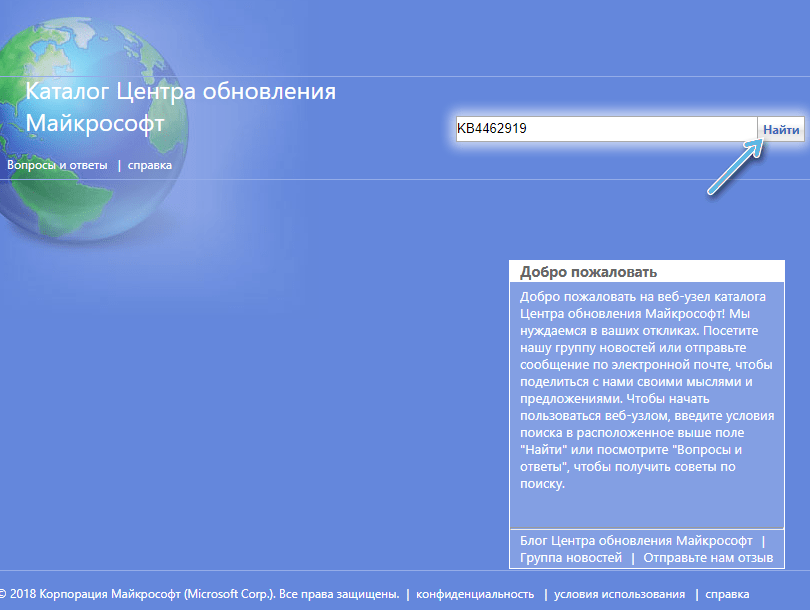
- go to the Microsoft Update Catalog;
- through the search bar we are looking for a suitable patch (it is better to know which update you need, then it is easy to find it by name). Enter the name in the line and click “Find”;
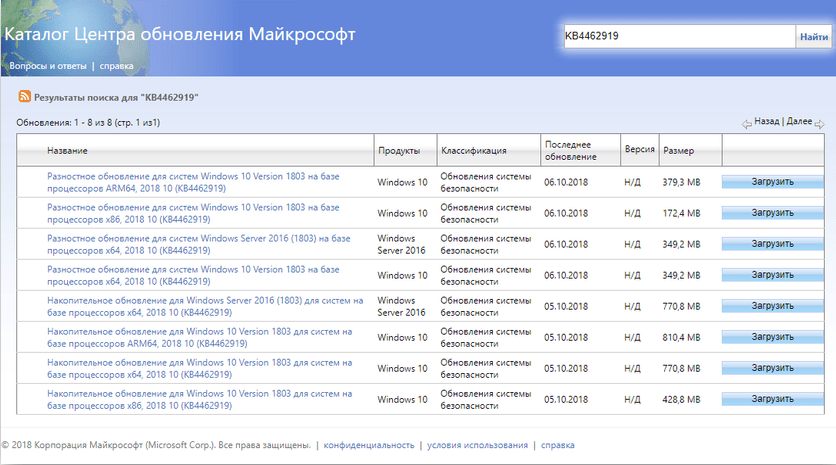
- as a result, the update will be found (by clicking on it, you can see an overview and information), download it to your computer by pressing the appropriate button;
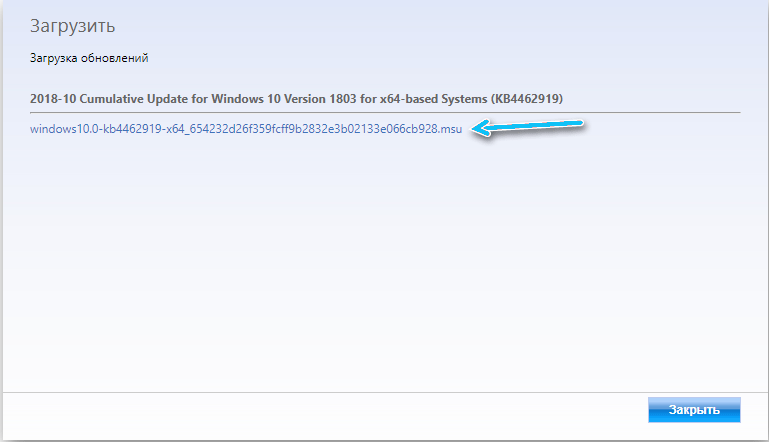
- we confirm the intention on the next page, for which we click on the link.
If the name of the patch is unknown, you can enter the OS version in the search, for example, Windows 10, so that you can then select the desired option from the results.
Update with Media Creation Tool
For component updates, the method of using a fresh Windows 10 ISO image directly or using the Media Creation Tool is applicable, which will require downloading it from the Microsoft resource, and after starting the utility, you should apply the option “Upgrade this PC now”. Then it remains to act according to the prompts on the screen.
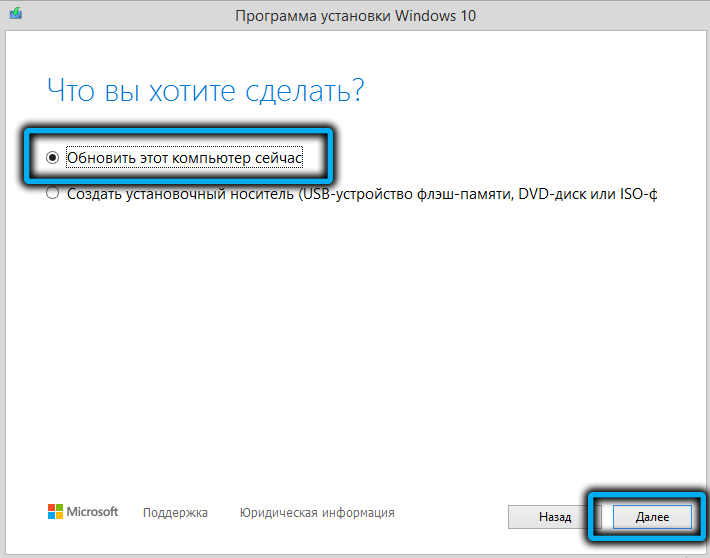
An alternative way is to use the Windows 10 Upgrade Assistant.
Clean Boot Windows
Code 0x8007000d is often the result of a conflict between Windows components and user-loaded security software or other software. To find out, you can use the clean boot feature of Windows (only with integrated apps and snap-ins):
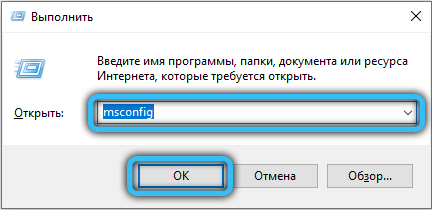
- open the system configuration window through the Run console (Win + R) and the msconfig request;
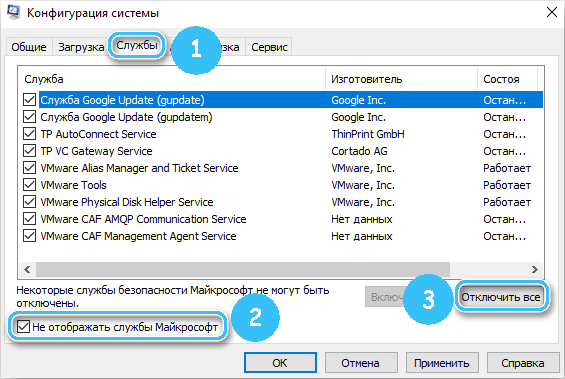
- on the “Services” tab, check the “Do not display Microsoft services” item;
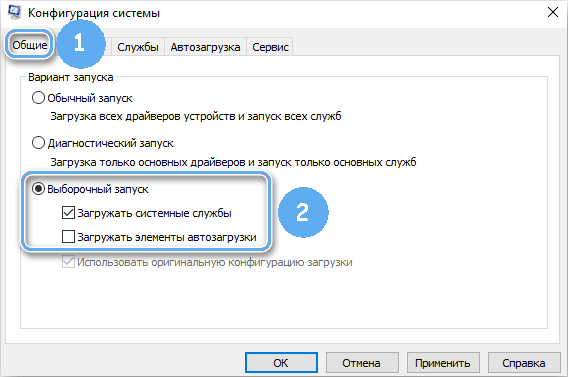
- on the “General” tab in the “Selective startup” block, only the item “Load system services” should be checked;
- apply the changes and restart the computer. Let’s try to update.
To return Windows to normal boot mode, perform the reverse steps.
Error 0x8007000d when activating Windows 10
The activation of the system does not always go smoothly. Failure 0x8007000d, interrupting the update process, may also appear when trying to activate the OS (including through SLMGR – the slmgr / dlv commands) or the MS Office package application. The error appears when the activation files could not be found.
How to fix error code 0x8007000d that prevents you from activating Windows 10:
- the first step is to apply a regular troubleshooting tool;
- the method of clean booting the system is also relevant (described above);
- manually assign permissions to the system account partition.
Since error 0x8007000d during the Windows 10 activation procedure is often caused by incorrectly set permissions in the registry, the setting should be corrected to fix it.
To fix the error, do the following:
- open the registry through the Run console (Win + R) and the regedit query;
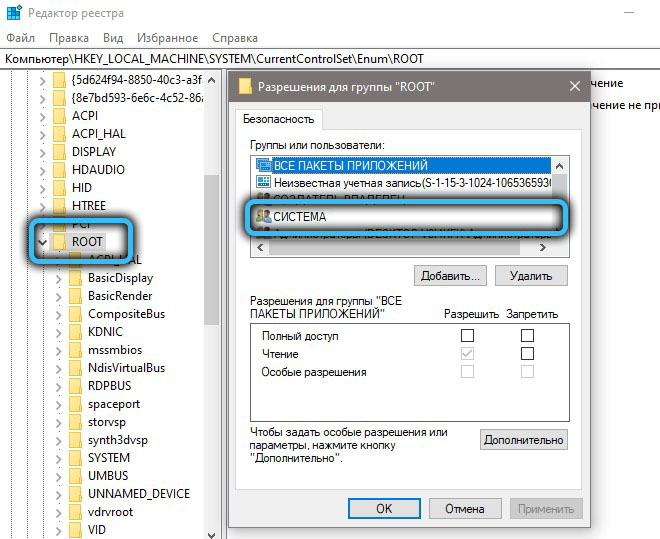
- go to the branch HKEY_LOCAL_MACHINESYSTEMCurrentControlSetEnumROOT;
- press RMB on ROOT and select “Permissions …”;
- we mark in the “SYSTEM” groups and in the permissions block we give full access by marking the appropriate item;
- apply the edits, reboot and try to activate Windows again.
Microsoft products, in particular Windows and Office programs, can also be activated by phone, which can be used if the above steps do not work.
The presented methods for solving error 0x8007000d, which occurs under various conditions, usually work in one case or another. Regardless of whether the source of the problem is known, try different solutions according to the failure scenario.
