The main task of the user is to investigate the causes of the error and take certain steps to be able to load the operating system. We will analyze the causes of the problem and options for its elimination in more detail.
Causes of the problem
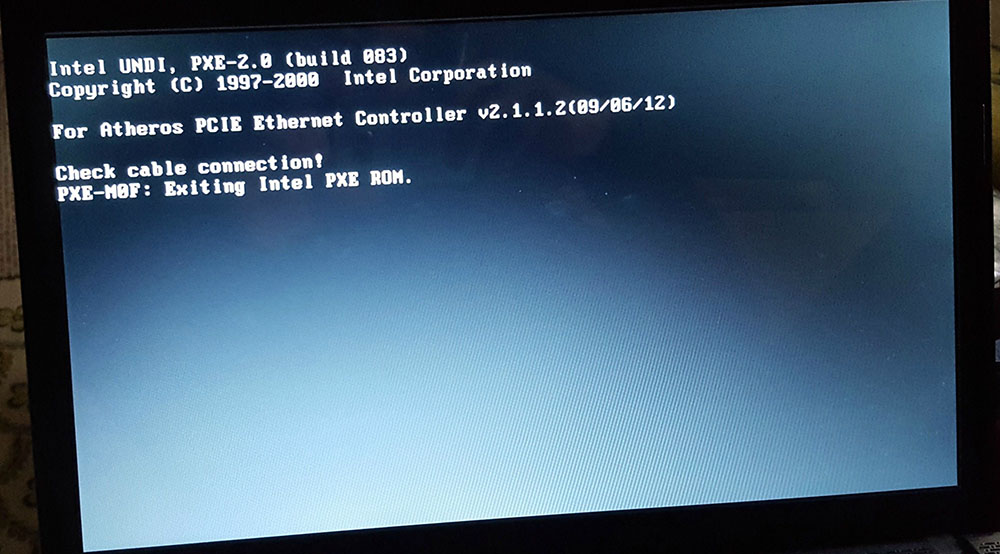
The literal translation of the “Check cable connection” notification that appears on a laptop or PC when the operating system is interrupted is: “check the cable connection.” Therefore, to begin with, we will present all possible sources of interrupting the start of Windows on a computer.
| Cause | Brief explanation |
| OS boot parameter failure in BIOS I/O system (basic input/output system) | The parameter controls how the OS is loaded from a server over a local network or from removable media |
| HDD/SSD Disk Problems | The boot disk may not be detected due to damage or incorrect media connection. After checking other OS boot options (from a removable disk or a remote server via LAN), the system will give an error |
| No communication with the requested equipment | Display, disk, RAM, video card, network card may not respond to bootloader requests. This happens after the device has been dropped, dusty or wet. |
| Bootloader failure | Forgotten inserted CD, connected USB flash drive in some cases can have a negative impact on the system bootloader |
Troubleshooting “Check cable connection” error
The “Check cable connection” notification on a laptop should not be a cause for panic. And so that you know what to do in such a situation, we will consider ways to resolve the error for each specific reason.
Upgrading or repairing a computer involves a number of works related to the replacement of parts and assemblies:
- RAM upgrade;
- network board installation:
- hard drive replacement;
- installation of the controller and other components in place of the failed ones.
In this case, changes in the I / O parameters are possible. Such delicate work is not always done correctly. Incorrect values of the OS boot parameter in the BIOS settings may be erroneously set. To check the correctness of the set values, do the following:
- You need to go into the BIOS. To do this, when you turn on the computer before the OS starts loading, perform the action Press Del (F2, F8) to enter Setup (depending on the device model, press the key indicated in the text).
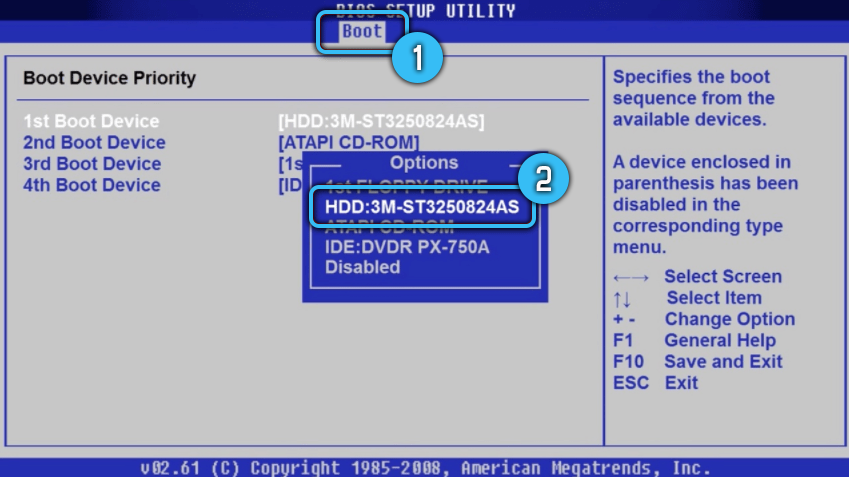
- HDD must be selected as the main boot device. On an Acer laptop, the priority setting is configured in the Boot tab through the Boot Priority menu.
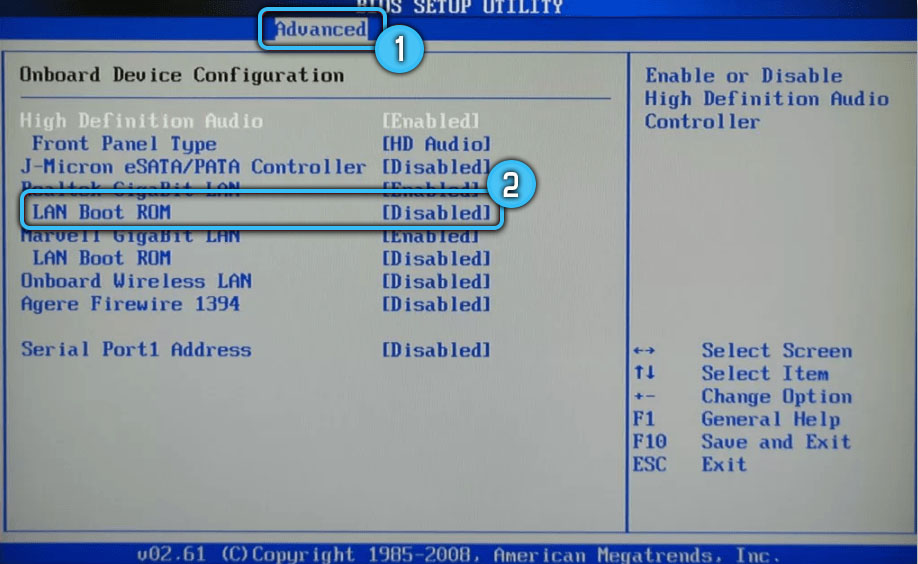
- The LAN Boot setting must be in the Disable state.
It is important to understand that the structure of tabs, menu names, and BIOS options on different models and versions of Windows is slightly different. To find the parameters you need, you will have to go through the tabs.
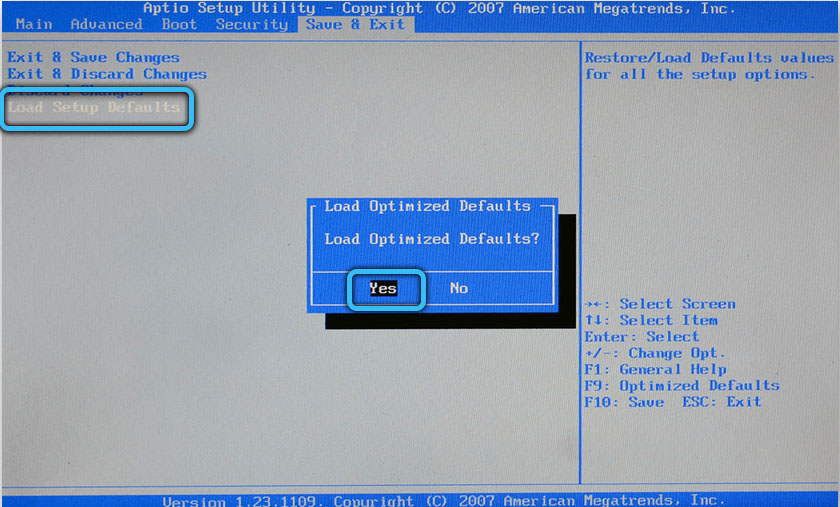
It is easier to correct the settings by rolling back the I / O system to the factory state. The reset can be done in the following ways:
- through the menu item BIOS Load Setup Defaults (default settings);
- by disconnecting the battery / battery for a couple of hours.
Having dealt with the correct settings in the BIOS, try rebooting the device.
If the OS does not boot, you should check the HDD / SSD disk for problems. To do this, disconnect the equipment from the mains supply. Disassemble the case, disconnect the drive cables from the power supply and the motherboard for a minute. Put the connections back. It is possible that these actions will correct the situation with a bad connection, due to which the disk is not detected by the bootloader and falls out of the Boot Priority list.
OS loading may be interrupted if there is no connection with other important elements of the computer. It makes sense to check the cable connection on the monitor, carefully clean the inside of the device from dust deposits.
A corrupted bootloader also causes the system to fail to boot. The following notifications may appear on the display screen:
- An operating system wasn’t found;
- No bootable device found;
- Insert boot disk and press any key”.
These alerts indicate that the boot record has been corrupted. To restore it in Windows, automatic and manual modes are provided.
Automatic recovery involves the following steps:
- Boot the system from an existing Windows recovery disk or a bootable system flash drive in the same bit depth as the laptop. First, select the appropriate drive through the Boot Menu.
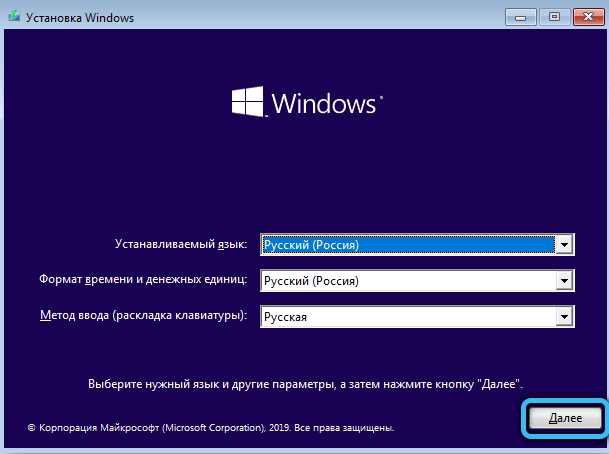
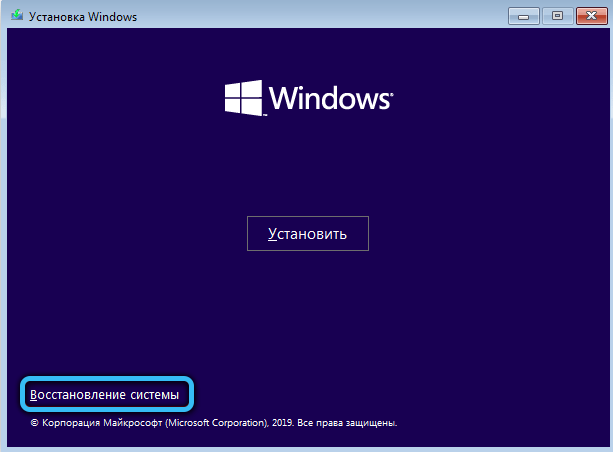
- If you are using an installation disc, after selecting the language, a window will open, at the bottom of which there is a link “System Restore”. Take advantage of it.
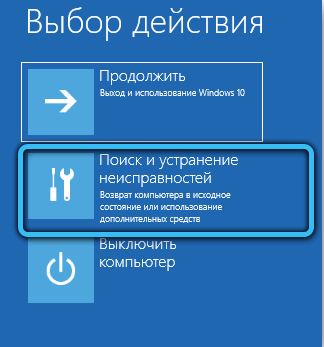
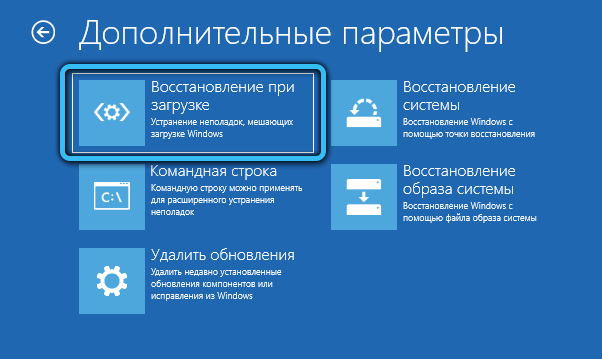
- After booting the system from a disk or flash drive, go through the Windows menu items “Troubleshooting”, “Startup Repair”. Select the target OS. The process will run automatically.
To manually restore the system software, you will also need to boot the OS from the installation disk or bootable USB flash drive. Next, perform the following manipulations:
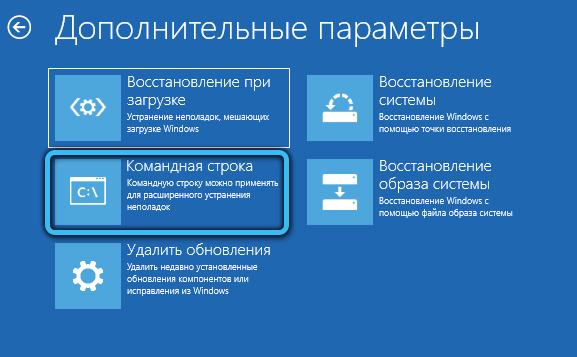
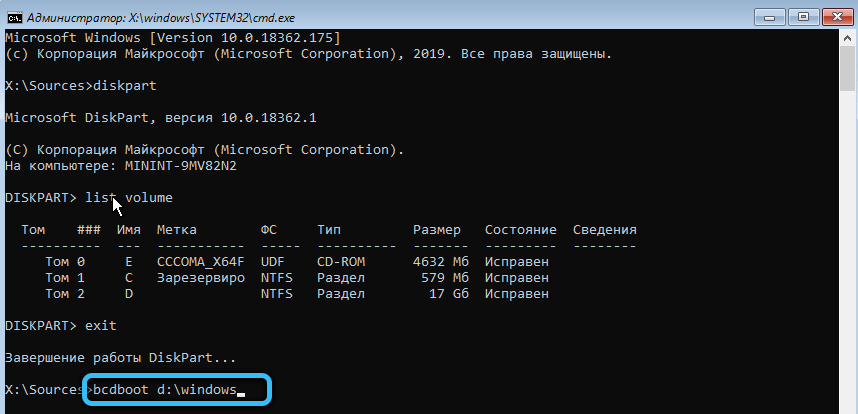
- If you booted from a disk, go through the menu items, select “Diagnostics” – “Advanced options” – Command line. When booting from a flash drive, open the Command Prompt tool.
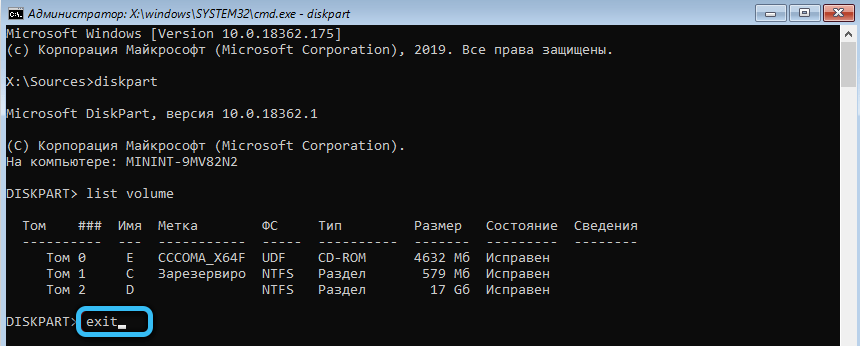
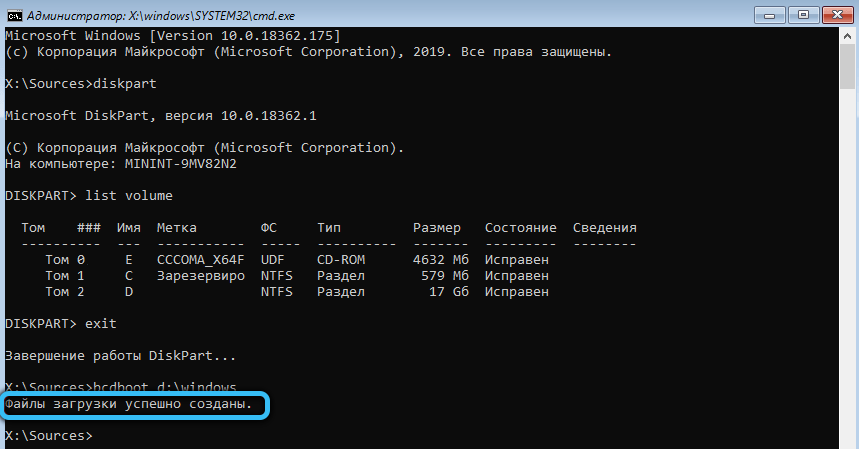
- In the input line, type diskpart, list volume, exit in sequence. In issuing a list of mounted volumes, you need to remember the name of the one on which the system files are located. Most often it is under the letter C, but there may be another designation if switching between several systems is used.
- Run bcdboot C:windows. Where C is the name of the volume containing the Windows boot files.
- Try restarting your computer in normal mode by removing the bootable USB flash drive or disk.
If the proposed options for fixing the operating system boot failure do not solve the problem, then there is a high probability of hardware failures. Diagnosis and troubleshooting should be entrusted to specialists in the repair of computer equipment.
After getting acquainted with the information on resolving the “Check cable connection” error, readers can leave a comment. Tell us in the comments which of the presented cases is yours and whether you managed to solve the problem yourself.
