No matter how much the speed characteristics of the element base of modern computers improve, there will always be those who want to “squeeze” everything out of iron that is possible. And such overclocking concerns not only the CPU / GPU, but also the RAM. If you have it implemented on the AMD platform, you will need to use several utilities, including the Ryzen Dram Calculator. It is worth noting that most of the latest generation BIOSes allow overclocking even without special knowledge in this matter, thanks to XMR profiles. All you need to know is the correct timings and frequencies for your motherboard.
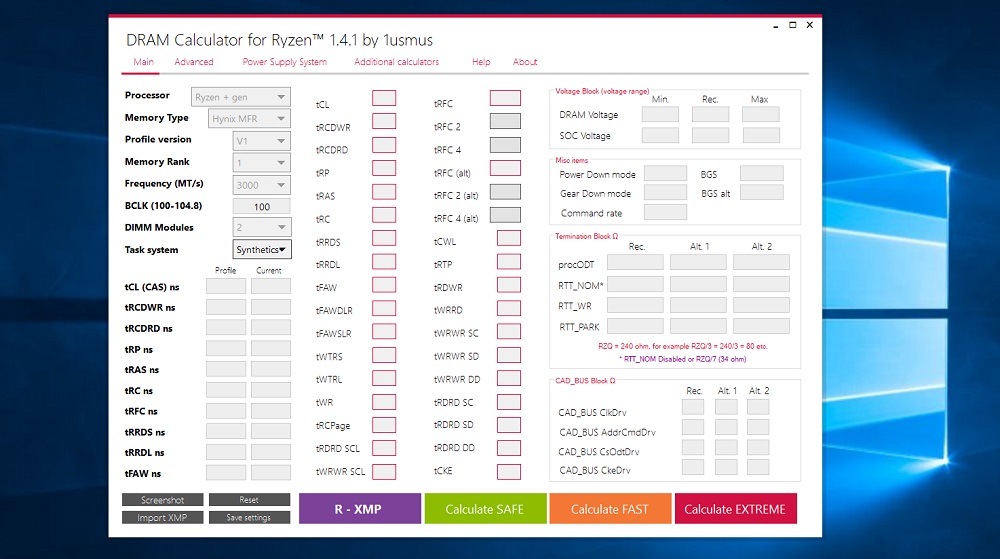
But in order to get the highest memory speeds, profiles alone are not enough. More fine tuning is possible with specialized utilities, the best of which is the Ryzen Dram Calculator today. It is his work and the subtleties of the settings that we will now consider.
Contents
Installing Ryzen Dram Calculator
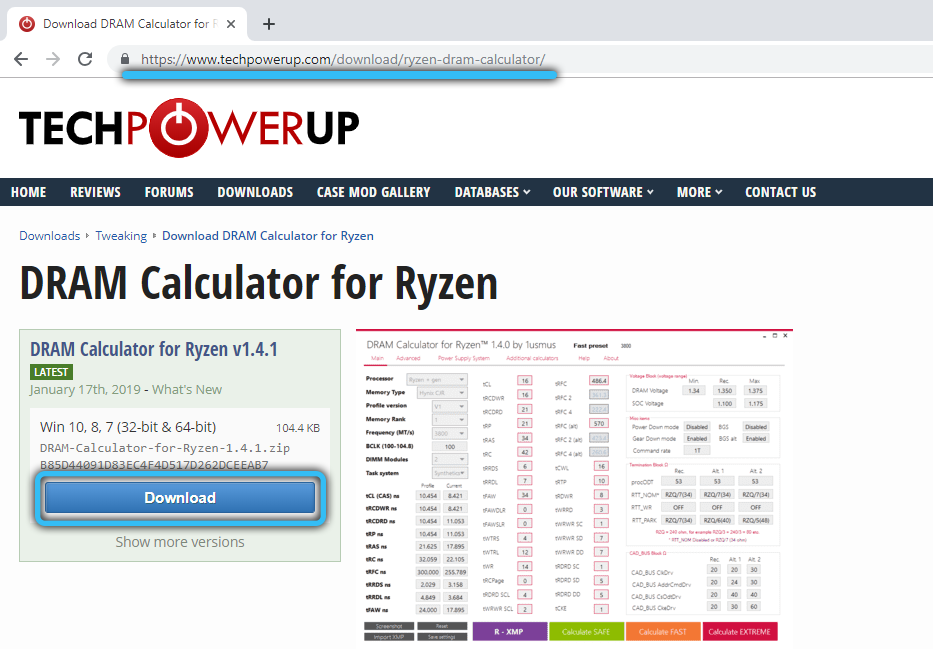
If you ignore the rule of downloading programs only from the official websites of software manufacturers, then you are at great risk and someday you will definitely regret it. For those who comply with the norms of computer ethics and safety, I give the address of the utility developer’s site – techpowerup.com/download/ryzen-dram-calculator/. As of May 2021, the last stable version of the program was number 1.4.3, which will be analyzed in this article.
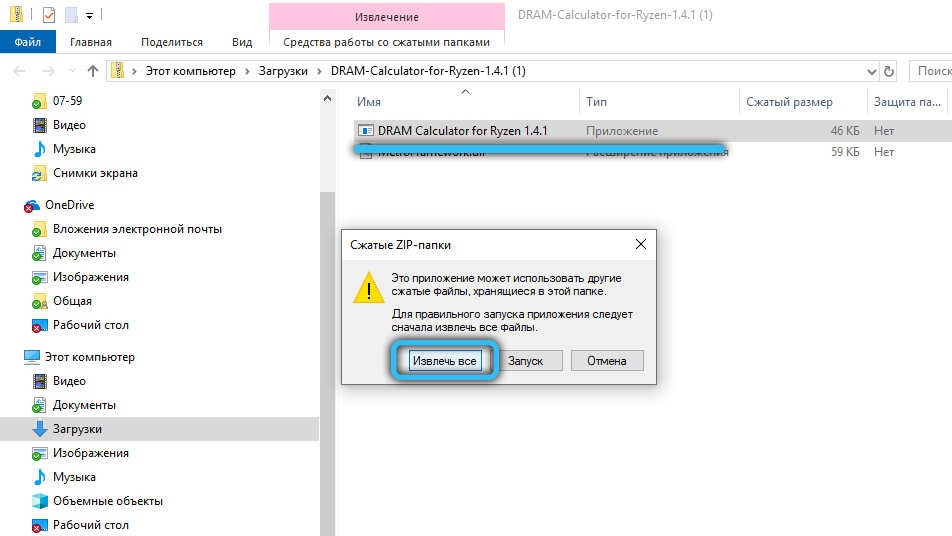
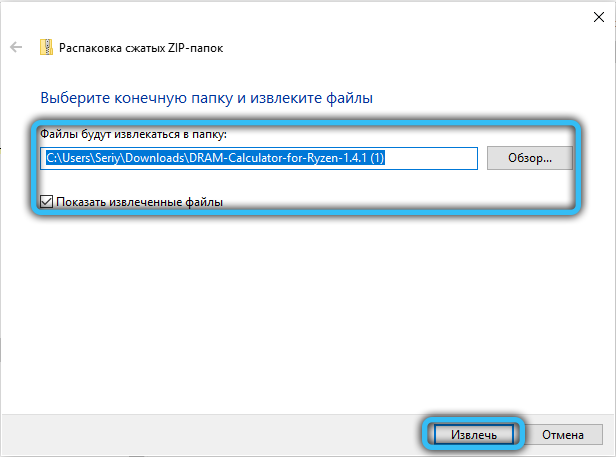
The utility is zipped, so after downloading, you need to unpack the file and run the installer (Ryzen DRAM Calculator 1.7.3.exe).
During the installation of the program, it is better to create a shortcut for it on the desktop, which will simplify its launch.
How to use the Dram Calculator for Ryzen utility
We bring to your attention detailed instructions that allow you to quickly master and configure the program to get the maximum memory speed (unfortunately, the developer’s site is not Russified).
Program interface
So, the program has been successfully installed. Click on its icon and get the following window:
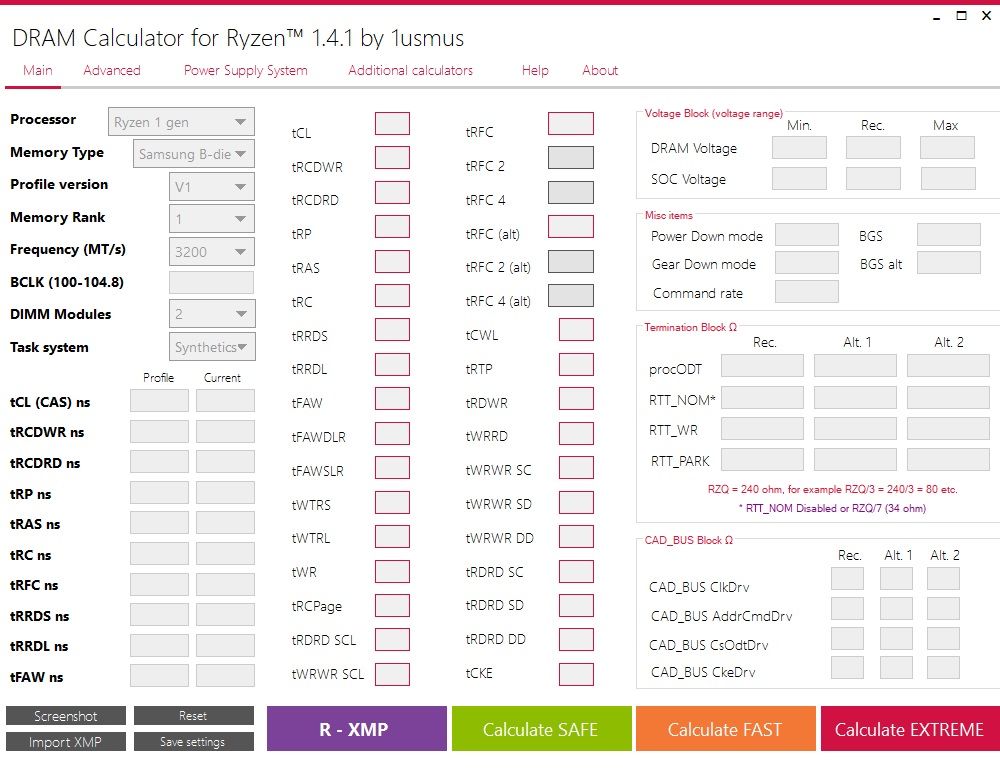
There is a menu at the top of the utility.
Below is a table consisting of the fields into which the initial data are entered, and the output fields of the calculated quantitative indicators, which will need to be transferred to the BIOS by means of manual input.
At the bottom there are buttons that start the calculation of the required memory overclocking mode.
Filling in the data
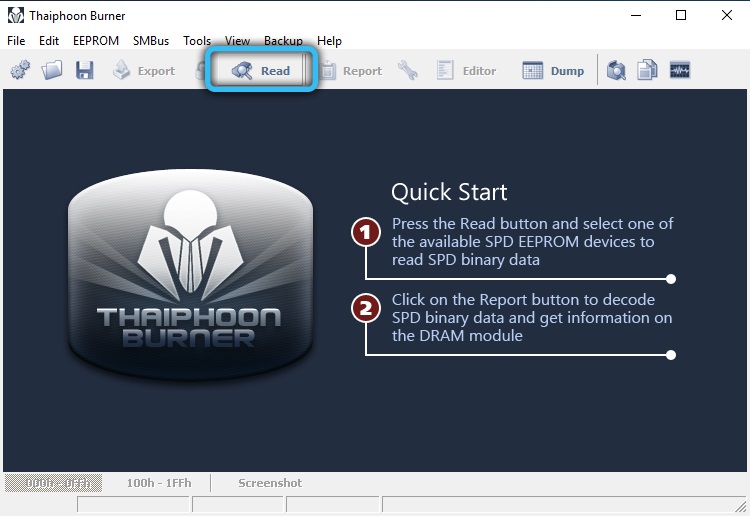
Where to get the source data? The best way to get them is by using another utility, Thaiphoon Burner. It needs to be downloaded from the official website (www.softnology.biz), installed and launched.
After the splash screen appears, find the Read button in the main menu and click on it.
A window will appear with the parameters of the RAM chip installed in your computer (manufacturer, RAM version, its rating).
So, the manufacturer is indicated in the Manufacturer field, the version – in the Part Number field, and the rating – in the Die Density field.
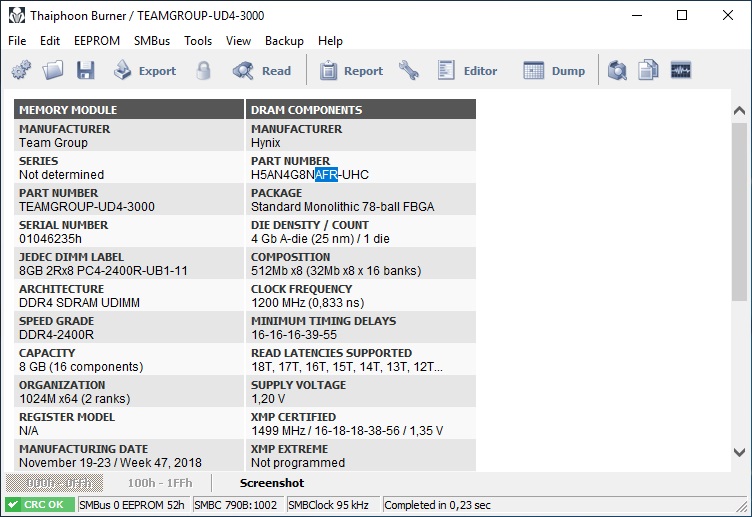
All this data needs to be transferred to the Ryzen Dram Calculator utility:
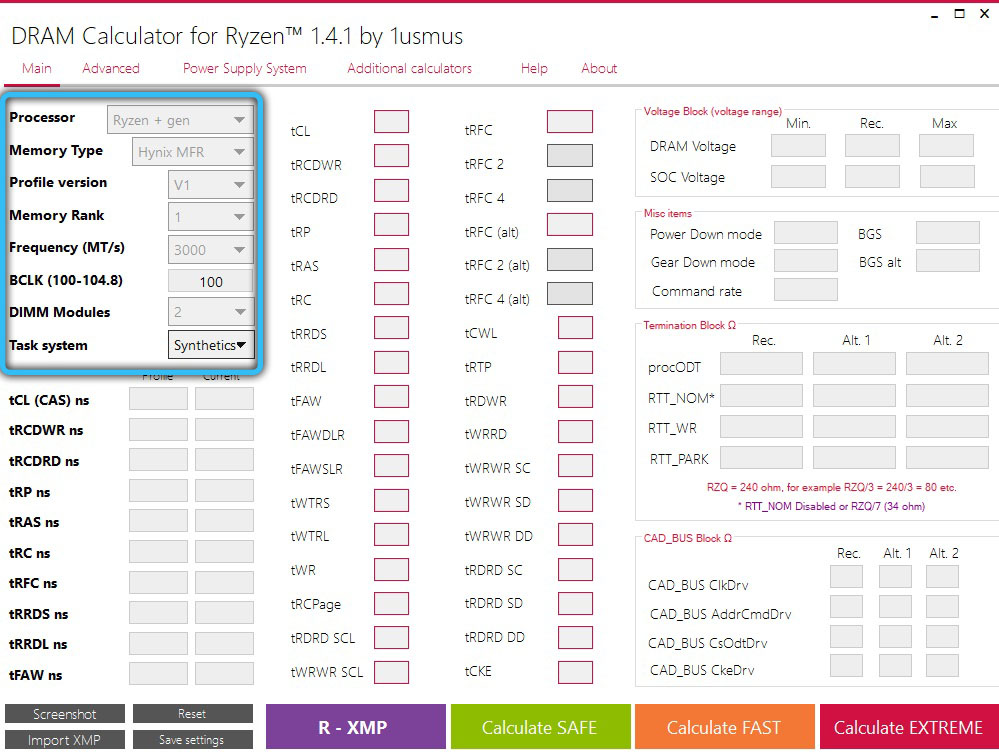
- in the Proccessor field, select the Ryzen 1 gen value for the Ryzen 1000 chip, or Ryzen + gen for the next generation chip, Ryzen 2000;
- in the Memory type field, you need to insert the value obtained in the Thaiphoon Burner utility (memory manufacturer and its version);
- into the Profile version regiment we enter the version of the XMR profile from the BIOS, it is from there that the program will load the missing parameters when calculating;
- in the Memory rank field, you must specify the rank of the memory stick. In most cases, we indicate one (peer-to-peer RAM);
- in the Frequency field, enter the frequency to which we intend to overclock the memory of our computer;
- in the BCLK field, you must specify the base frequency of the Motherboard (by default – 100 MHz, if you did not overclock it, we leave it as it is);
- in the DIMM Modules field, specify the number of RAM strips.
We get something like the following:
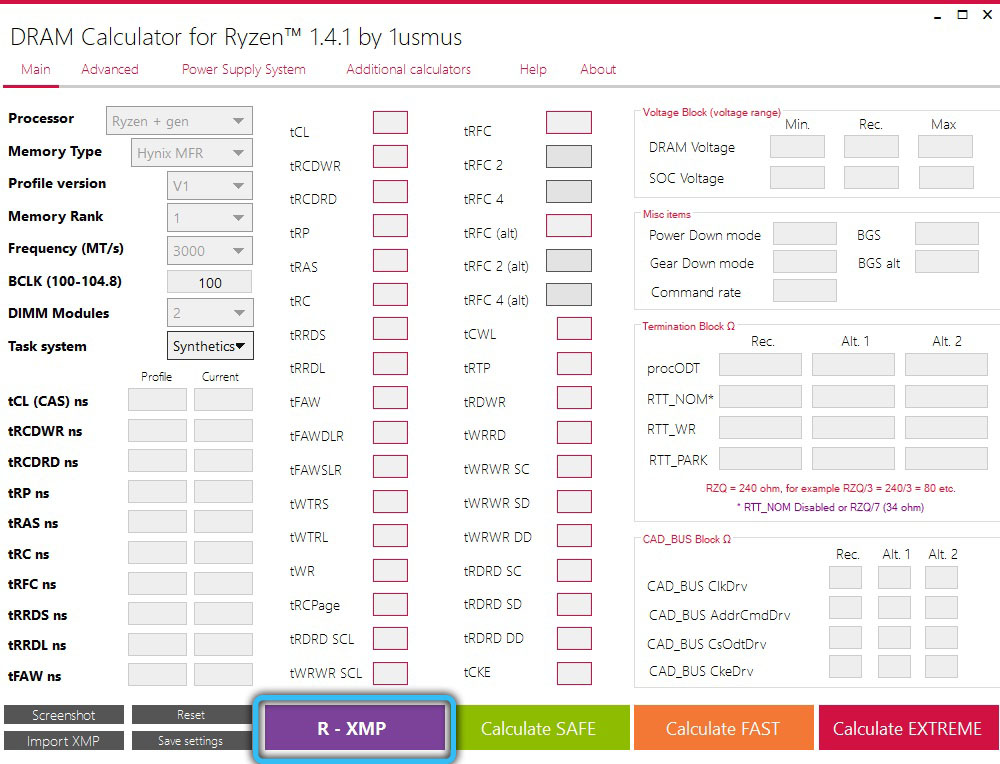
Loading data from BIOS XMP profile
You do not need to enter the BIOS to fill in the missing data. They will be loaded automatically after pressing the R-XMP button:
Calculation of overclocking parameters
When all the initial data has been entered, you can start calculating the parameters that are necessary for overclocking your computer’s memory. To do this, you need to click on any of the three Calculate buttons.
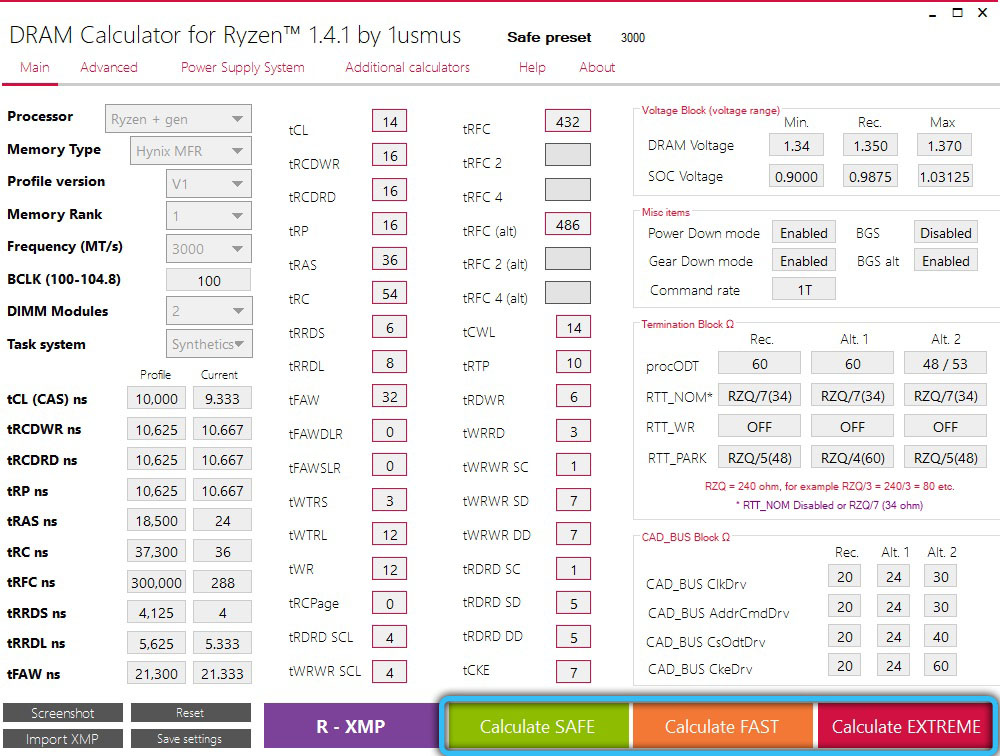
The results obtained for the three modes of RAM overclocking will differ only in voltage. All you have to do is take screenshots and transfer the calculated data to the BIOS, with special attention should be paid to filling in the timings and voltage parameters (the strips themselves and the chipset).
Calculation of additional voltage parameters
It is enough to indicate the calculated parameters in the BIOS, calculated in the Ryzen Dram Calculator, to ensure stable memory operation at higher speeds. But there are times when you have non-standard RAM installed or you want to overclock the memory to maximum frequencies. Then you have to change a couple more parameters, which can be obtained in the Advanced tab:
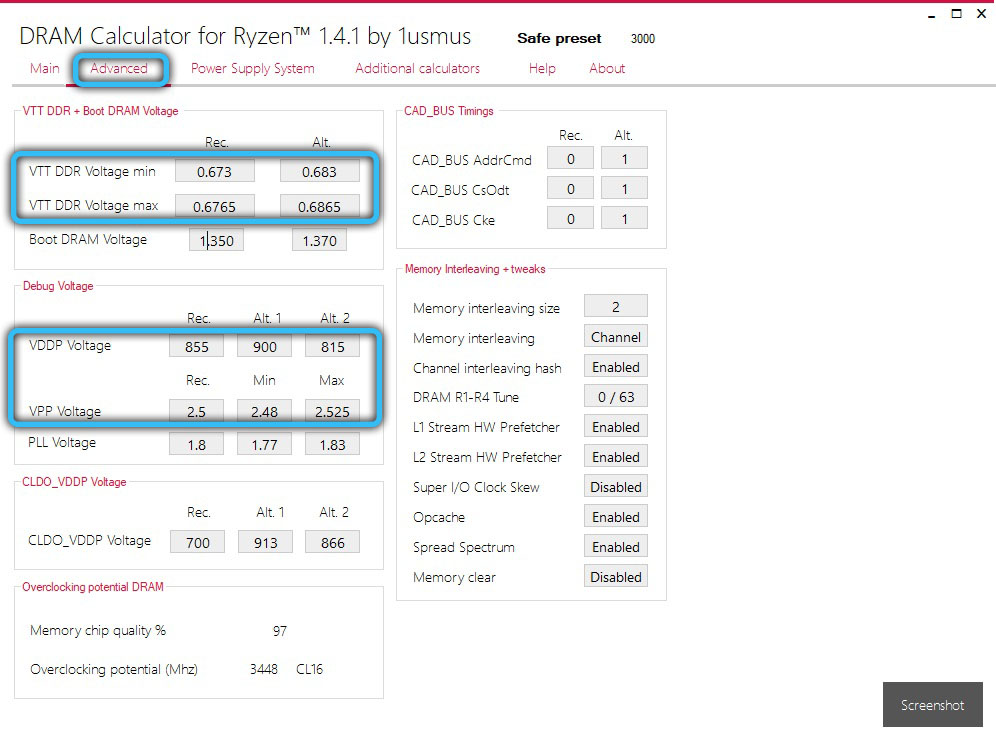
These are the following parameters:
- VTT DDR Voltage – a characteristic that determines the stability of the RAM bus;
- VDDP Voltage – a parameter that determines the stabilization of the functioning of the memory itself;
- VPP Voltage – Recommended, minimum and maximum bus voltage.
Additional calculators
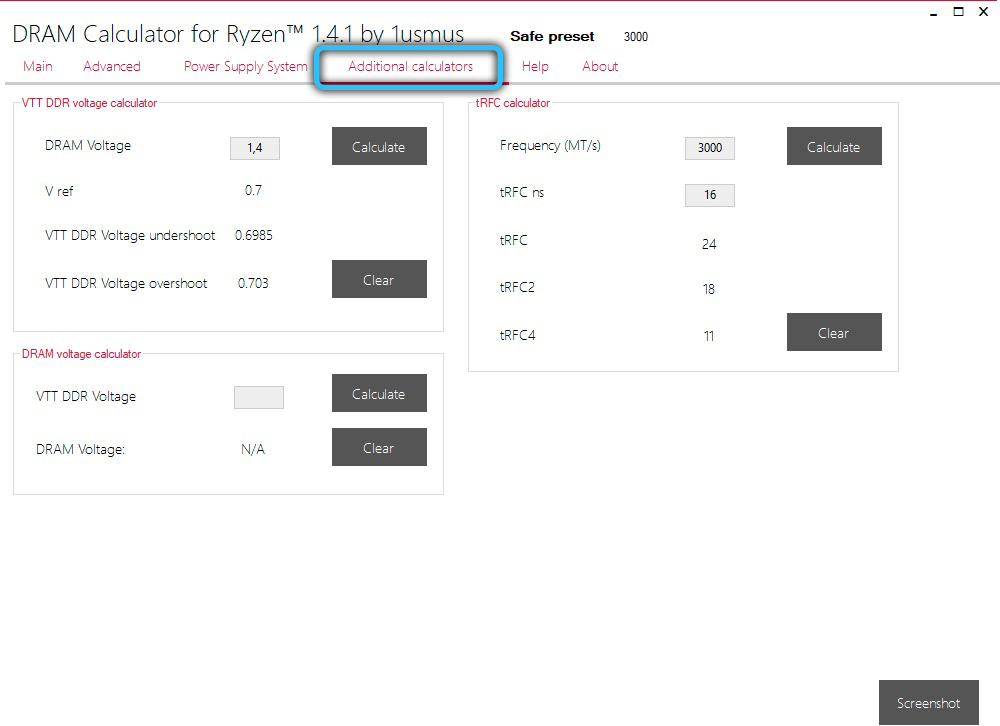
Finally, using the Additional Calculators tab in the top menu of the utility, you can try to get the calculated VTT DDR Voltage data by specifying the voltages of the RAM strips in the Dram Voltage field:
Epilogue
As you can see, there is nothing particularly complicated in the RAM overclocking settings. And we believe that many readers will immediately want to jump into battle to overclock their RAM. Take your time, we want to warn you against hasty steps and offer some tips to help you avoid common mistakes:
- RyzenDram Calculator is just a tool that allows you to improve the OP timings if you have already used the XMP profile;
- the second important point: there are no guarantees that after using the utility you will get a working system or work without errors. Although the developer of the utility claims that it has been thoroughly tested, it should not be forgotten that it is unlikely that all memory chips from all manufacturers were used in these tests. Meanwhile, the quality of these products varies greatly. It is possible that you will not be able to get results with better timings than when using the XMP profile;
- for best results, you should be familiar with your motherboard’s BIOS. The fact is that the RyzenDram Calculator calculates the parameters of voltages, timings, characteristics of the termination of the RAM bus and the memory itself, and the knowledge of these parameters determines how well the memory will work after an additional overclocking attempt;
- if there is only one bar, it will be much easier for you. If there are two of them, carefully read the Motherboard user manual, there should be a section indicating where to put the planks. Most often these are slots A2 / B2, if you look from the CPU side, that is, the second and fourth slots, if there are 4. If there are two, then no problems are expected;
- and one more important recommendation: before using the utility, you should learn how to reset the BIOS to factory settings. This will come in handy if the system will not start as a result of overclocking. It happens, but you don’t need to be afraid of failure.
As for resetting BIOS to default settings, in motherboards of the latest generations, a separate button is placed on the rear panel for this purpose. True, these are mainly MVs of the upper price segment, flagship products of leading manufacturers, but they can also be found on some models of the middle price segment.
If you do not find such a button, you can reset the BIOS using a jumper that clears the CMOS. Where this jumper is located, you can find out from the user manual or simply by carefully examining the motherboard itself.
The reset must be done with the computer turned off. Use a suitable object such as a thin-blade screwdriver to remove the jumper. Advanced users who love experimenting with overclocking bring the jumper outputs to a button on the front of the computer, making it easier to reset the BIOS to factory settings.
If you could not find this jumper, there is no need to despair either. The desired result can be obtained simply by removing the CMOS battery for a few seconds.
And finally, we note that sometimes, as a result of unsuccessful memory overclocking, resetting the BIOS does not help to start the system. This means that due to your games with frequency and voltage, some component of the memory system was damaged, and it’s good if it’s just the bar itself, not the bus … So experiment, but be careful and prudent!