The use of computer hard drives is not possible without proper configuration, which may be required immediately after purchase or on drives already in use. At the same time, not all users understand how to properly implement this setting and what tools are used for this. Let’s look at the issue in more detail.
Contents
Hard disk initialization
As soon as the hard drive is connected to the computer at the physical level, you can immediately start the system in standard mode. If you have an old hard drive with an OS already installed, there will be no problems with starting at all. However, the new default hard drive may not appear in Explorer. To access the drive, you must initialize it.
To fully initialize almost any disk, there are enough tools already built into the Windows 10 operating system.
Sequencing:
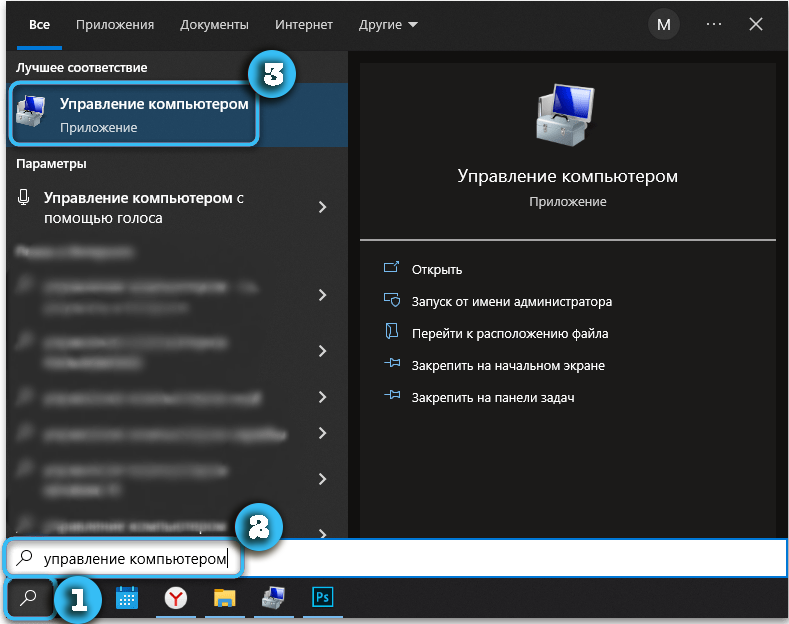
- Find the search function and enter the query “Computer Management” in the appropriate line.
- Open the found link by clicking on it with the left mouse button.
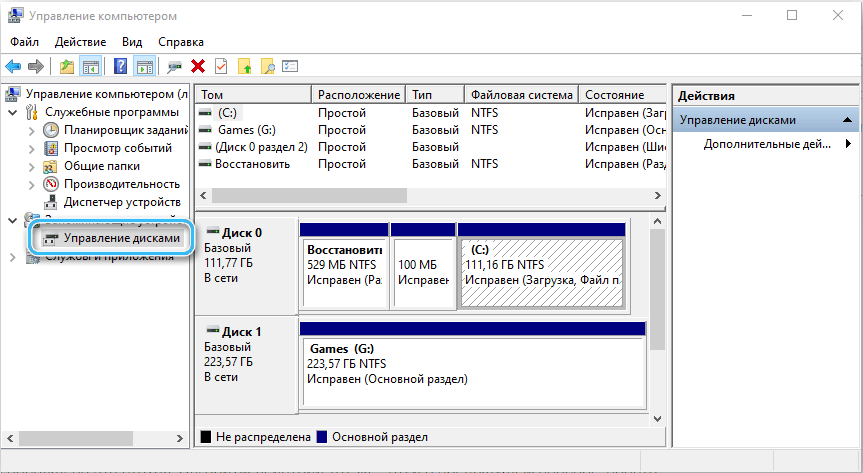
- Go to the “Disk Management” section.
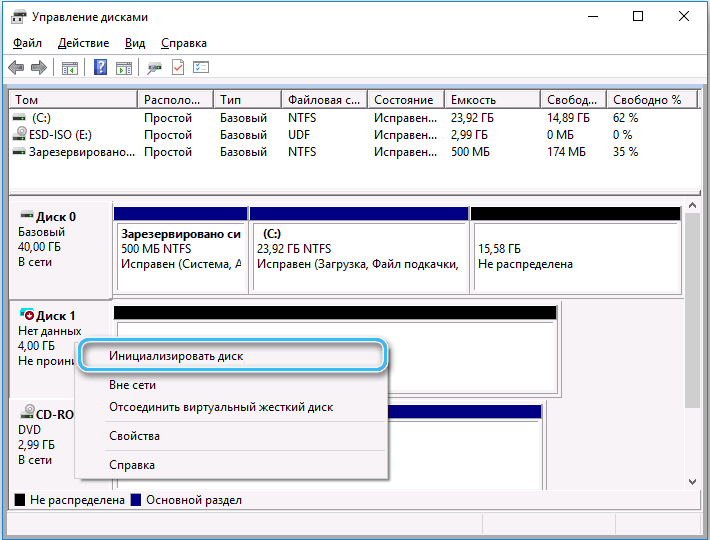
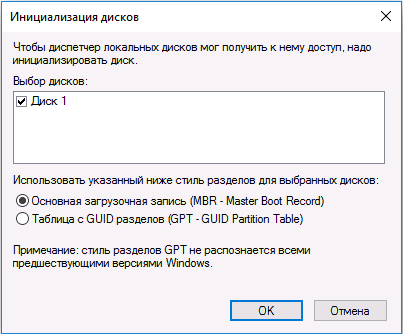
- If a new drive is already connected to the computer, a window will appear prompting you to initialize. At this stage, you need to select the partition type: MBR or GPT.
- Click on the “OK” button and wait until the initialization is completed.
When setting up drives with a capacity of less than 2 TB, you can stop at the MBR layout. Larger disks use GPT, since choosing the MBR format will limit the size of any hard disk.
At the same time, it should be borne in mind that you will not be able to fully use Windows XP and older versions of operating systems on GPT drives.
Drive layout
Immediately after initialization, the disk may also be inaccessible, since it must be properly partitioned for full use. So far, the drive is just empty space with no file system.
To partition a disk, do the following:
- Open the “Computer Management” program and find the “Disk Management” section in it.
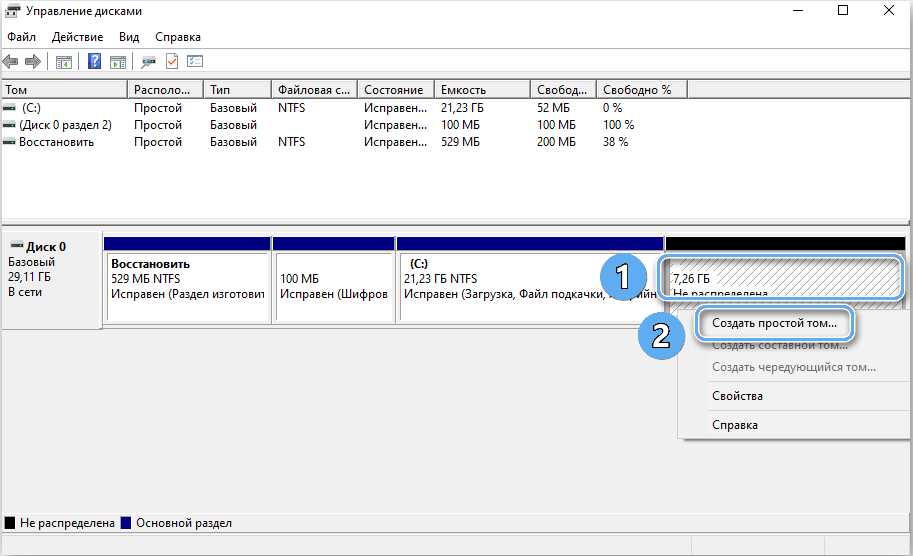
- Find the drive in the list opposite which there is an inscription “not allocated”.
- Right-click on the position of interest, and then select “Create a simple volume”.
- Wait until a special utility for creating volumes opens. Click on the “Next” button.
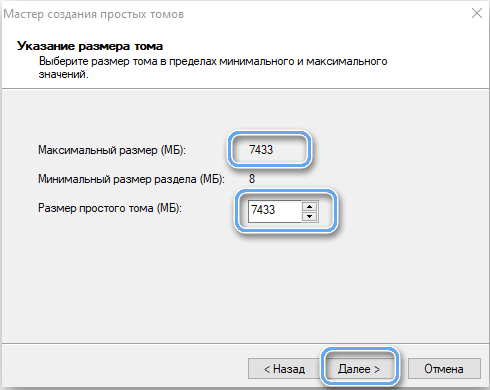
- Specify the size of the volume to be created. It all depends on the preferences of the user and whether the disk will be used to install the operating system. If so, then its volume must meet the requirements of a particular assembly and allow you to install all the necessary updates and programs.
- Confirm the specified size by clicking on the “Next” button. Sometimes you can simply specify the maximum size of the disk, thereby creating one large partition.
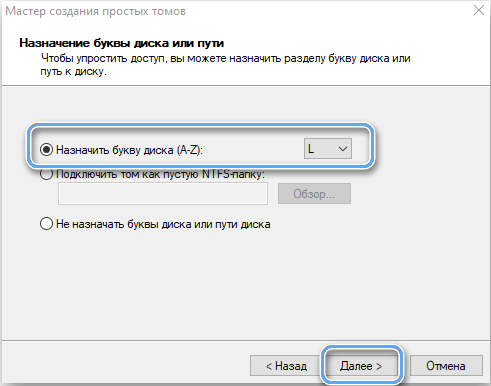
- Specify a letter designation for the created disk partition. The letter must not coincide with the names of partitions already in the systems.
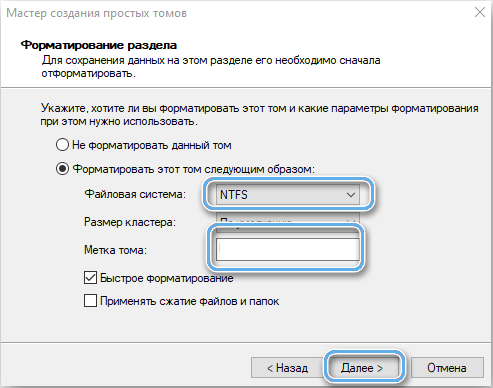
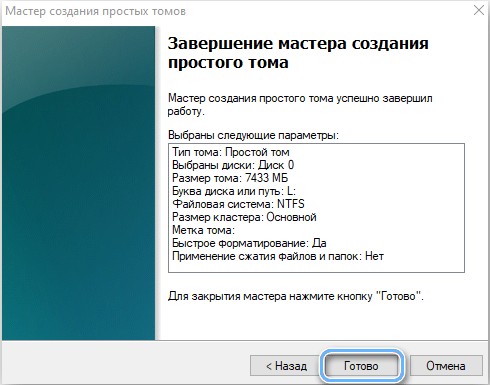
- Format the partition by selecting the file system, cluster size, and volume label. It’s often best to leave these default values. At this stage, it is recommended to use quick formatting, which will not take much time.
- Wait for the wizard to complete and exit the program.
During disk setup, it is not at all necessary to immediately format the newly created partition. The operation can be carried out after the operating system has loaded using the corresponding item in the context menu. But this is only available if the operating system is already installed on another drive.
Formatting a disk is a rather radical procedure that erases all data on it. Therefore, in the case of already used drives, you need to carefully examine your files and, if necessary, save the desired positions elsewhere.
On this, the creation of a new section can be considered completed. It remains only to check its performance after loading the operating system.
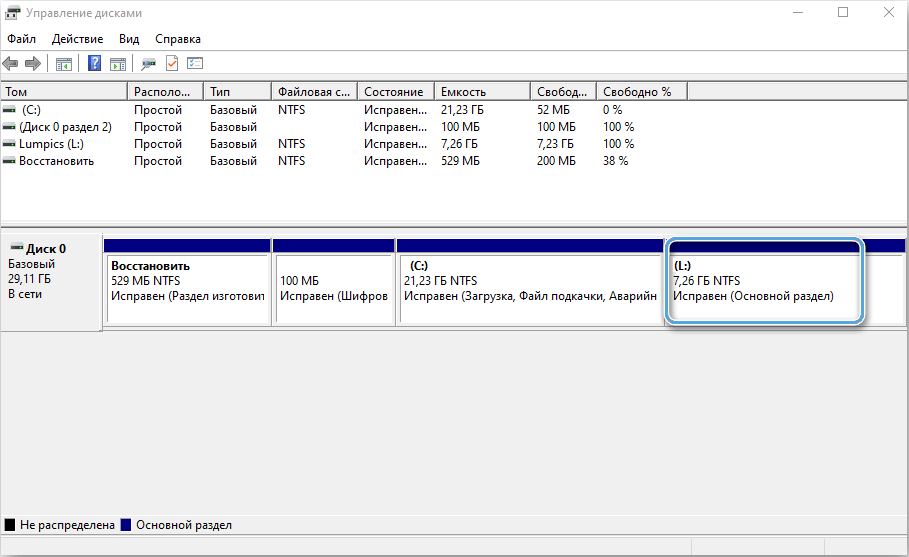
In the event that the created partition occupies only part of the volume of the drive, you can continue to work and create one or more volumes of different sizes.
Transferring the operating system to a new drive
The most important aspect when working with new disks or partitions is the installation of the operating system. On modern versions, such an option as transferring the OS from one drive to another is also available. This helps to get rid of a lot of problems and avoid tedious system setup from scratch.
Before performing the operation, it is advisable to create a backup copy of the operating system and all necessary data in advance. Files can be saved on external media.
The next step is to install a new drive to which the data will be transferred.
Specialized programs with impressive functionality for working with files will help carry out the transfer process. One of the most popular is the EaseUS Partition Master utility with the “OS transfer” function. The program supports copying files between drives of different formats, so it is ideal for working with HDD and SSD.
Work algorithm:
- Download the EaseUSPartition Master program and install it on your computer.
- Run the utility, then select the “Move OS” option located at the top of the window.
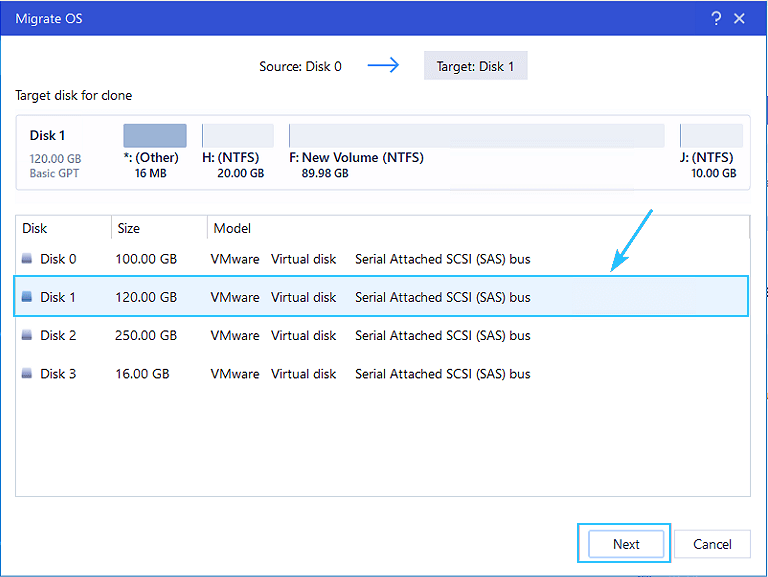
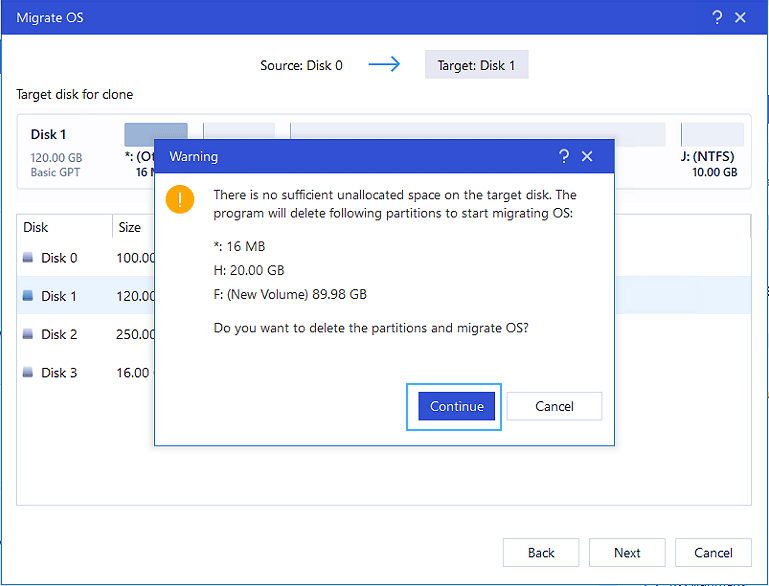
- Specify which drive the data will be migrated to, and then click the “Next” button. It is important to remember that all partitions and files on the selected drive will be erased.
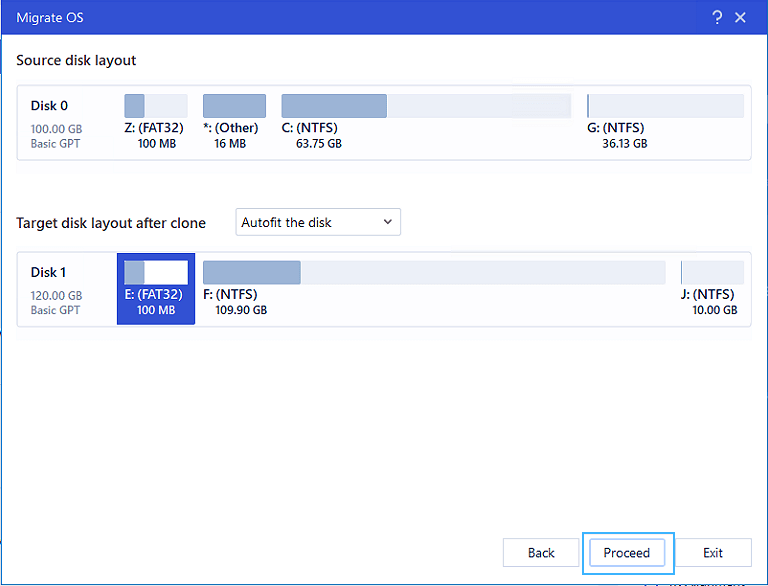
- Familiarize yourself with the preliminary layout of the hard disk and, if necessary, make changes to the distribution of volume between volumes. Press the “Continue” button.
- Wait until the end of the operation and close the program.
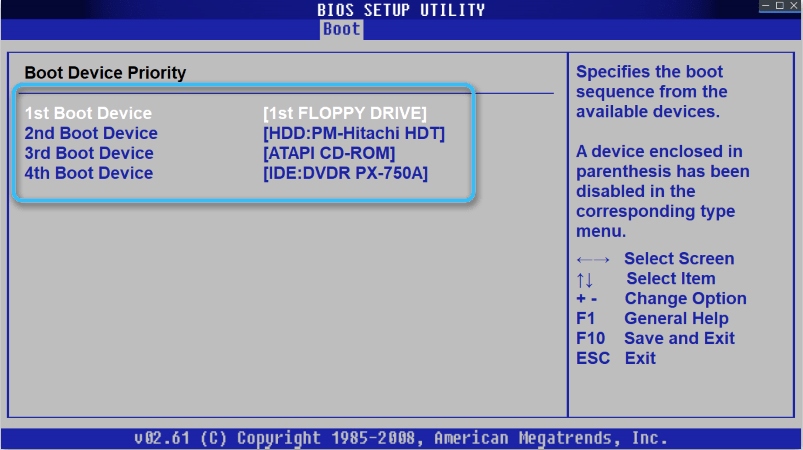
Now, in order for the computer to boot the operating system correctly, you need to change the boot order through the BIOS. The priority should be the drive to which the transfer was made. Usually, the necessary parameters are located in the “Boot menu”, “Boot Priority or Boot Order section” sections. The procedure for entering the BIOS depends on the manufacturer of the motherboard, but most often the F2, F8 or Del buttons are responsible for this.
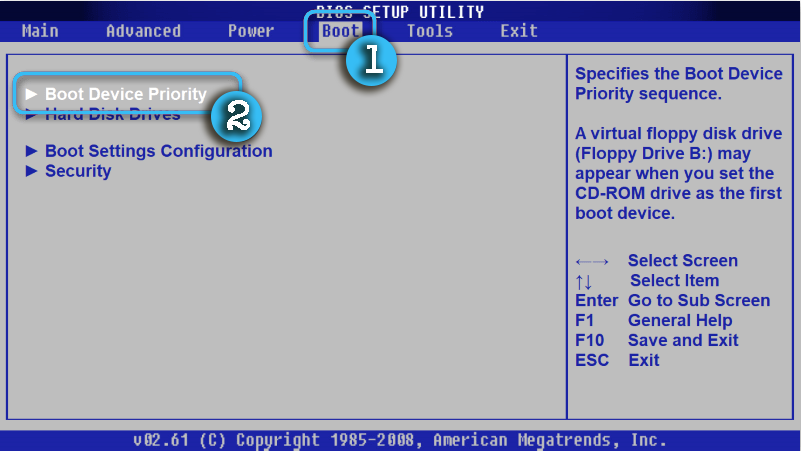
Now the computer will automatically start the operating system from the new drive. If no errors or problems have arisen, you can format the old disk with the operating system and turn it into a regular data storage.
The described method is extremely useful for those who use a licensed version of the operating system and do not want to reactivate it. If everything is done according to the instructions, then there should be no need for activation. The system will simply be transferred in the same form as it was on the old disk.
Working with disk volumes in Windows 10
The Windows 10 operating system provides a rich set of features for working with the drives installed on your computer. They work effectively with both traditional HDDs and high-speed SSDs.
Through the built-in system search, you can easily find the Disk Management utility, which contains all the necessary functionality. Using the available tools, the user can perform the following operations:
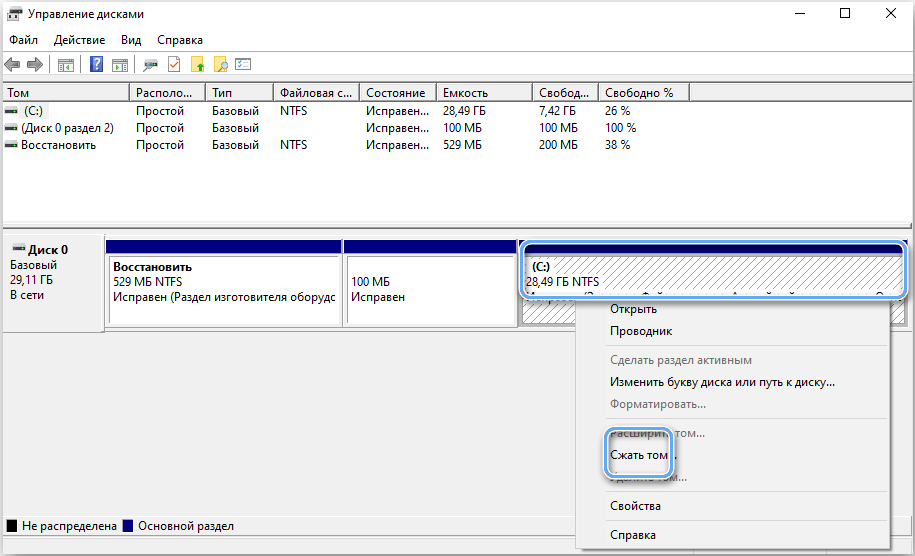
- volume compression;
- creating a new volume from an empty disk or free space;
- changing the letter designation for specific sections;
- formatting partitions with complete deletion of data;
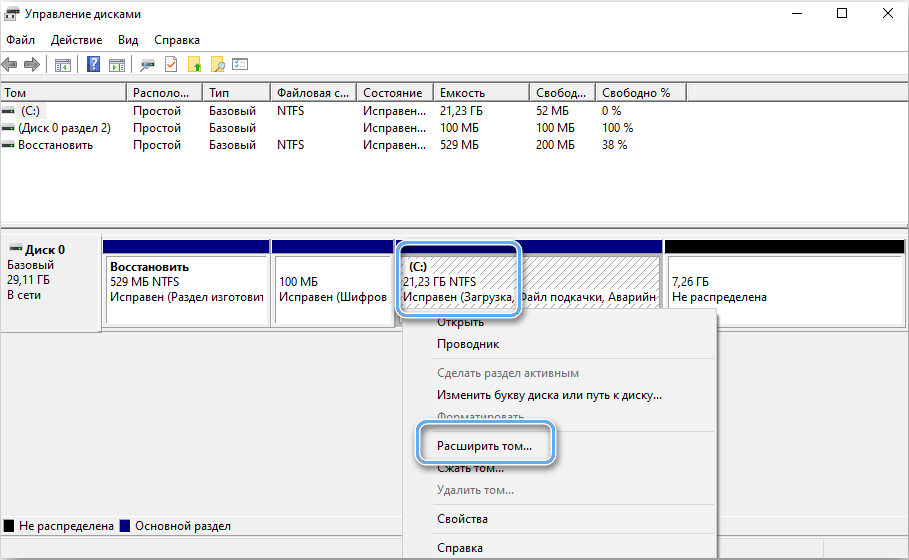
- expanding the volume due to free disk space;
- deleting a partition or volume;
- initialization of a new disk connected to the computer;
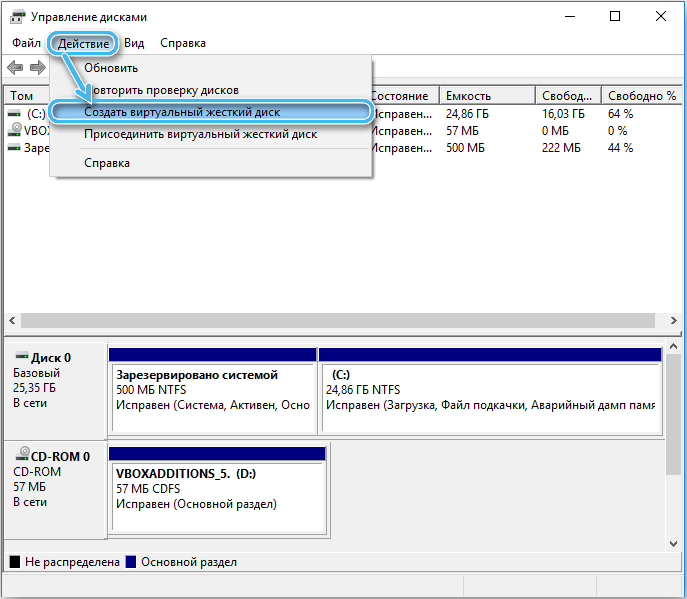
- creating and managing virtual disks.
Usually, this set of features is more than enough to take full control of your computer’s drives and create the ultimate user-friendly system for work or play.
Proper configuration of hard drives or other drives will provide the most comfortable conditions for working at your computer and avoid many unpleasant problems in the future. With basic knowledge, there are no problems with the available tools, however, in order to avoid all sorts of difficulties, all actions must be performed very carefully in strict accordance with the instructions.
