Those who are engaged in sound recording in a professional mode and use a MIDI keyboard or synthesizer, often face the need to adjust the processing of sound so that it is immediately fed to the sound card, bypassing the Windows system.
Usually, special software is used for this – Audio Stream Input / Output or ASIO for short. But if the audio card is incompatible with it, problems begin, and then ASIO4ALL comes into play.

What is the ASIO4ALL program
Nowadays, musicians often prefer to process sound in real time. For this, the already mentioned Audio Stream Input / Output (ASIO) technology is used, visualized as an application. She knows how to do the following:
- organize multi-channel input and output;
- speed up the processing of information from musical instruments (synthesizer, MIDI keyboard, etc.).
ASIO4ALL is a connecting link between a sound card and ASIO in cases when the latter cannot work with a certain audio card – that’s what this program is. It allows you to set up immediate sound transmission, as well as combine two audio cards or several devices (for example, a microphone – card) in operation. Such software is needed only for professionals of the music world or advanced amateurs. It is of no value to the average user.
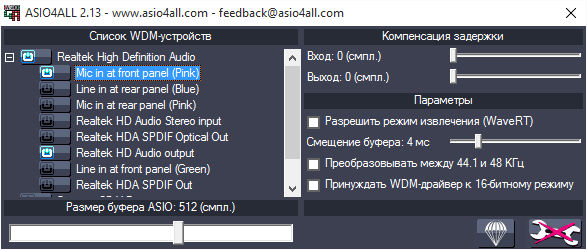
Thus, through the intermediary of ASIO4ALL, you get the opportunity to conveniently use a MIDI keyboard. By pressing the key, you will hear the sound almost instantly – in 5-10 milliseconds. This value is sufficient for comfortable work.
Note that ASIO4ALL also has an analogue – Sound Driver, but it heavily loads the audio card, initiates many processes. If your track is voluminous, with various special effects and overlays, crackling, extraneous noise and other sound distortions may appear. Such software is suitable only for very powerful computers and equipment. If you have the slightest doubt about the capabilities of a PC or sound card, it is better to opt for ASIO4ALL.
How to install
Now let’s see how to install ASIO4ALL:
- Download the installation file from the official website.
- Unpack the archive and run the setup file.
- First of all, the installation wizard will prompt you to accept the license agreement – check the box and click Next.
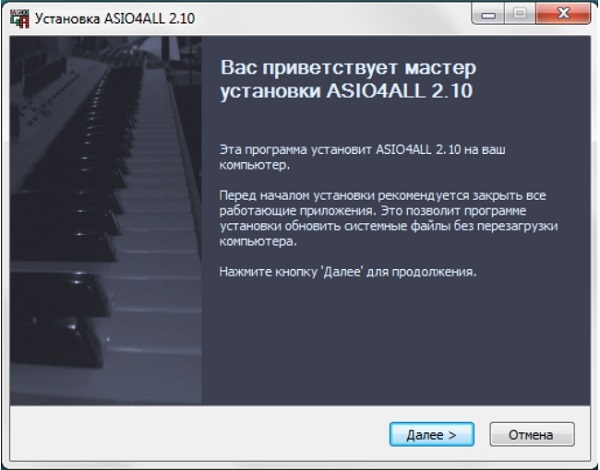
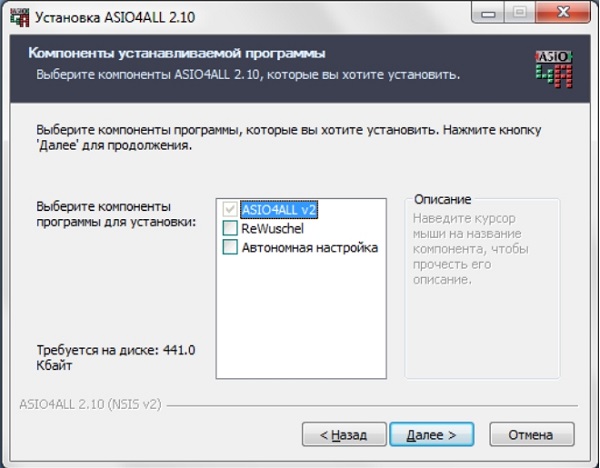
- In the next window, you do not need to edit anything, unless you want to install additional software in the appendix. Just click Next again.
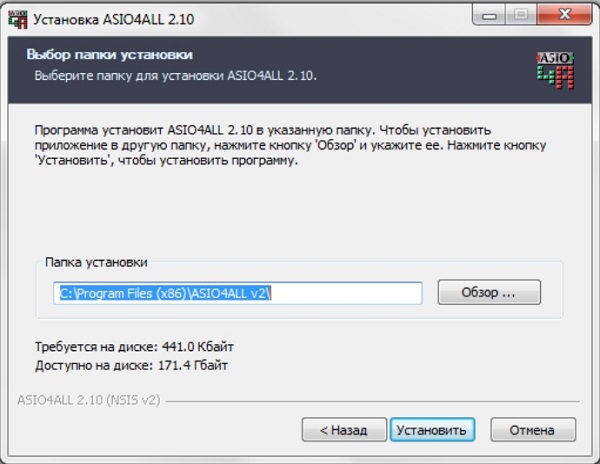
- Now specify the folder where the program files will be stored. In principle, you can leave the default one. Click Install.
- The ASIO4ALL installation will begin, wait for the installation completion notification.
How to set up ASIO4ALL
Correct setting of ASIO4ALL is the key to comfortable work. To adjust the necessary parameters, you need to open the audio configuration settings and specify ASIO – ASIO4ALL. You will see a plate labeled ASIO4ALL Control Panel – click on it.
Here you will find both basic and advanced options. First, let’s take a closer look at the first ones:
- Device List – a list of all devices working with the wavelength division multiplexing technology is stored here. To change the default settings, you need to select the device of interest – it will immediately be indicated by a denser typeface. Below you will find information about its performance:
- Running – is running at the moment.
- Available – available and can be started.
- Unavailable – not available because it is already being used for some other purpose.
- Beyond Logic – cannot be launched due to an error or physical absence (for example, you have disabled your microphone).
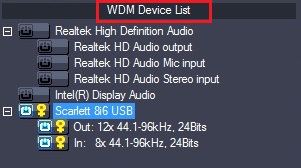
- Action – updates the desired device with which you plan to work. It is impossible to choose several at once.
- ASIO Buffer Size – allows you to configure the ASIO Buffer Size for the specified device. The lower the value, the less latency. If audio distortion is found, it is best to allow for a slightly longer delay.

- Done – close the settings section.
- Advanced – opens advanced options.
- Load Default Settings – resets all presets to the default ones.
- ASIO4ALL Web Site – Launches the official software website.
If you click Advanced, you will see a few more buttons for additional personalization, namely:
- Latency Compensation – Corrects unexpected audio delays.
- Use Hardware Buffer – activates the hardware buffer for devices with WavePCI technology, which allows to reduce the consumption of CPU resources.
- Kernel Buffers / Buffer Offset – configures buffering of devices for which the option above is not available.
- Always Resample 44.1 <-> 48 kHz – Resamples 44.1 kHz to 48 kHz.
- Force WDM driver to 16 Bit – allows you to compensate for inconsistencies in the declared parameters of devices (for example, when a device theoretically should support a frequency of 20 bits, but in practice only works at 16).
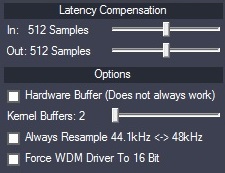
Settings in difficult cases can be selected by trial and error. If you get confused, you can reset them and refer to the instructions that come with the ASIO4ALL installation package.