Cache is a generalized concept, equally referring to hardware (processor cache, for example) and software components. A cache is a collection of stored data that speeds up the performance of a wide variety of operations, from opening files to launching applications. Its essence lies in the use of information that does not need to be repeatedly searched on a disk or on the Internet, which can significantly reduce the time required to launch programs. Of course, this solution is a compromise between the speed of the computer and the volume occupied by the cached data on the disk. Since the cache files can be large and the available disk space is often problematic, the cache needs to be cleared from time to time. How to do this in Windows 11, you will learn today.
Contents
When to Clear the System Cache
In Windows, the cache is stored in several places, and this is only the data required to speed up the operating system. Many important applications such as Internet browsers have their own cached data, so the task of clearing the cache itself is not trivial. But why do it if caching is good?
It turns out that everything is not so simple, and instead of speeding up, we can get the exact opposite result in the form of a drop in PC performance, sometimes quite noticeable. Consider the main reasons for deleting cache files:
- cached data can be different, including media data (pictures, videos). In any case, if they are not removed, they gradually accumulate, leading to a shortage of disk space. If there is a lot of free space on the drive, this problem may not make itself felt for a long time, but this is not always the case;
- the lack of space on the system drive often leads to a decrease in computer performance, if only because the drive forms a shortage of disk space to store the paging file. And without it, the system will slow down, and the stronger, the more applications you run;
- caching is not always a blessing: if the cache is corrupted or out of date, system or user applications will run into errors that can only be fixed by clearing the cache.
All of the above does not mean that this procedure should be performed daily, but periodic cleaning can prevent many software problems.
Ways to clear the cache in Windows 11
In most cases, cached data is temporary and should be deleted automatically after the corresponding application terminates. Unfortunately, this is not always the case, which is why manual cleaning is required, which can be done in different ways.
Deleting temporary cache files
To be precise, temporary files that have the tmp extension, or folders containing them, may not contain cached data, but in any case, they grow over time, filling up the free space on your disk.
Cleaning the computer from temporary files and directories is done as follows:
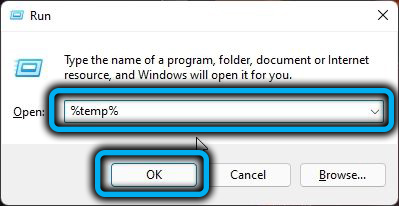
- launch the Run console using the Win + R combination;
- enter the command “%temp%”, confirm by pressing Enter or OK;
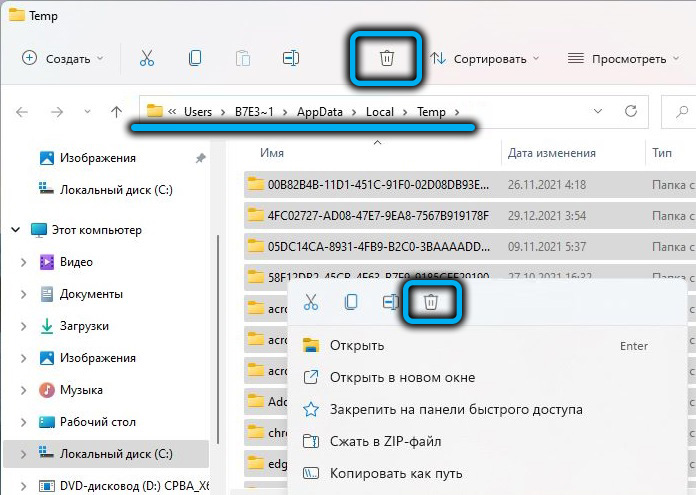
- An alternative way to open a folder with temporary Windows 11 system files is to use Explorer, in which you need to go to the address
C:Users%USERPROFILE%AppDataLocalTemp - press the combination Win + A to select the contents of this folder;
- right-click on any of the selected files and select the “Delete” item in the context menu (or click the corresponding button with the image of the basket).
Some files may require separate confirmation for deletion.
Clearing the cache by system tools
Some cached data can be removed using built-in utilities. Let’s see how to clear the cache in Windows 11 through the Settings app:
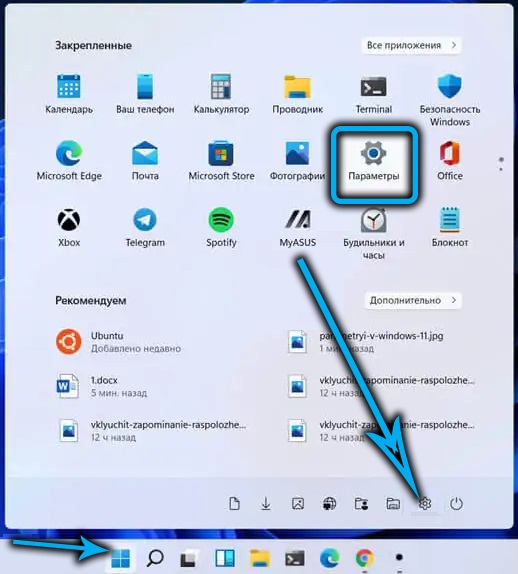
- we launch the quick access menu with the Win + X combination or by right-clicking on the Start icon;
- select the “Parameters” tab;
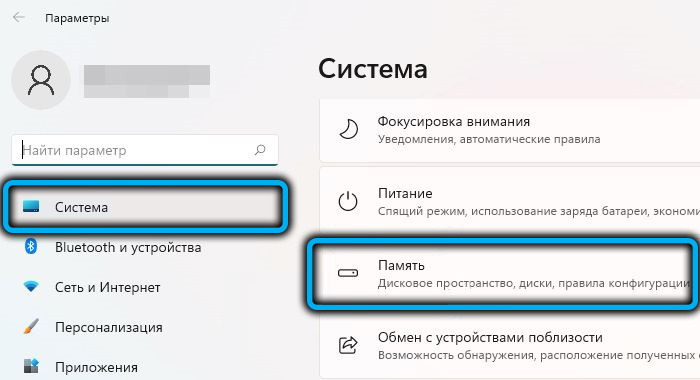
- in the left menu of the “Parameters” tab, select the “System” item;
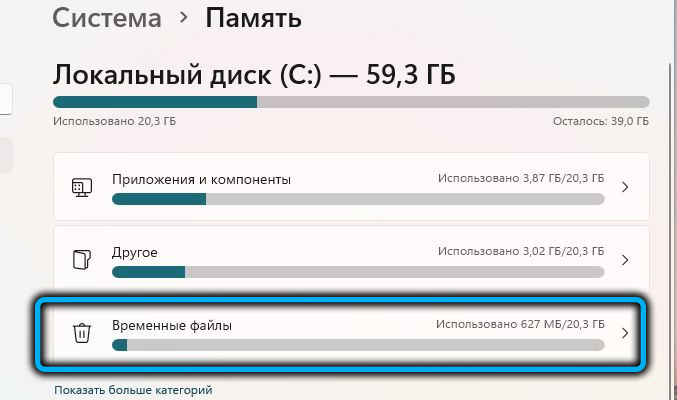
- on the right in the list of available parameters we look for the section “Memory”;
- when you click on it, the utility will start scanning the disk subsystem and highlight the space occupied by applications and separately by temporary files;
- select “Temporary files” by clicking on this option;
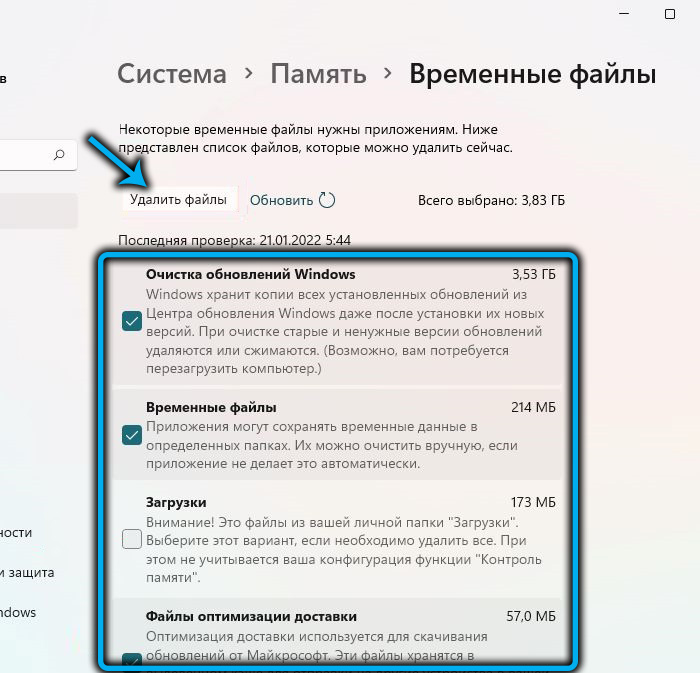
- a new window will open in which all temporary files will be categorized, and you can select by ticking which ones to delete and which not to touch;
- after clicking the “Delete Files” button, all the marked categories will be cleared.
Clearing the Windows 11 cache with Disk Cleanup
The latest version of the OS also has a special utility that allows you to quickly and automatically delete accumulated file garbage, including cache and temporary files.
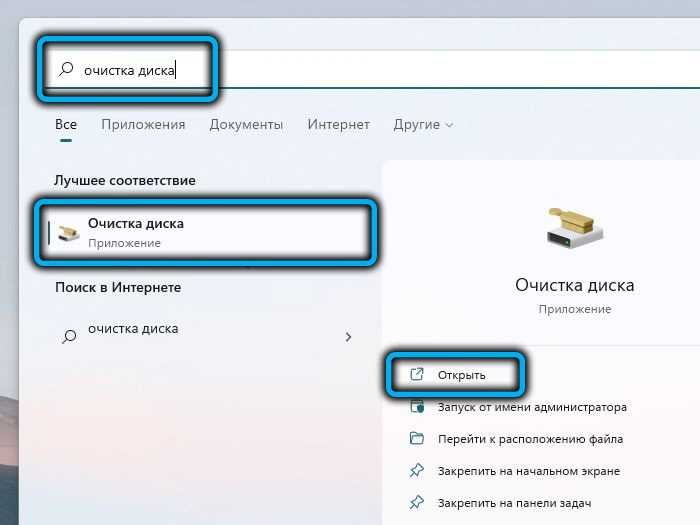
The easiest way to launch the application is through the search menu by starting to type the appropriate query. Further actions:
- when the search result appears, click on the “Disk Cleanup” application and on the “Open” menu item;
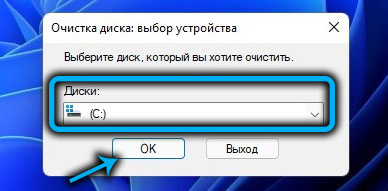
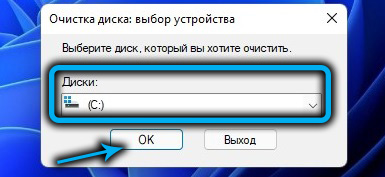
- if there are several physical disks on your computer, in the window on the right, select the one you want to clean up and click OK;
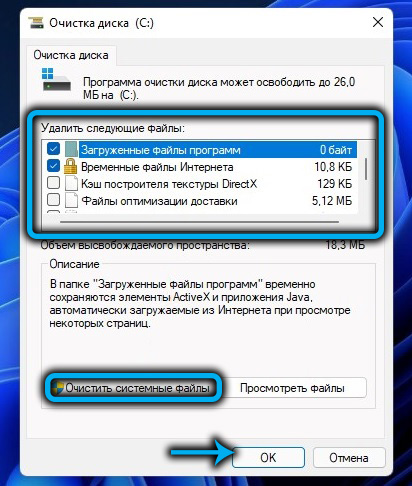
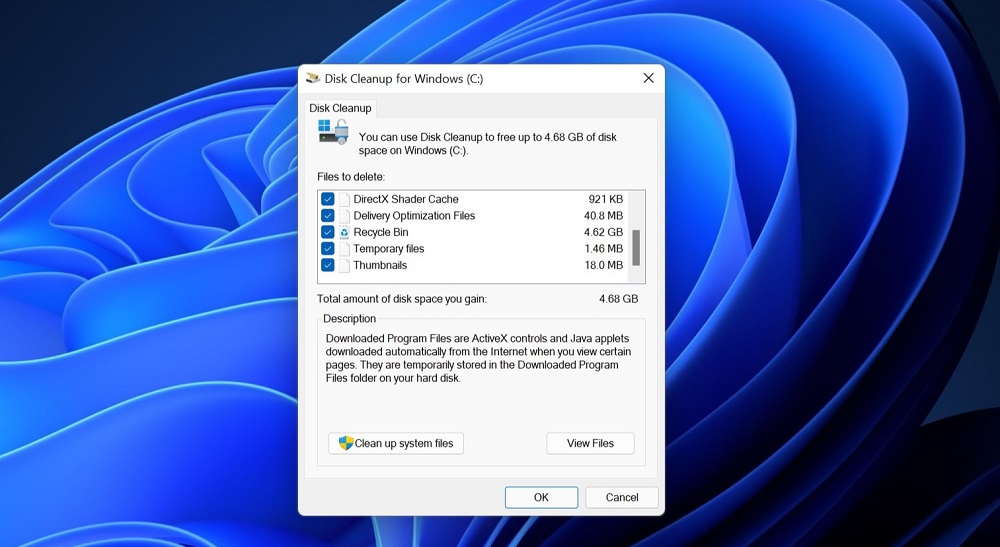
- the media scan will start again, as a result of which a list of categories will appear that can be ticked as selected for deletion;
- after clicking OK, the selected drive will be cleared, but don’t rush just yet. Below there is a button “Clear system files” – click it;
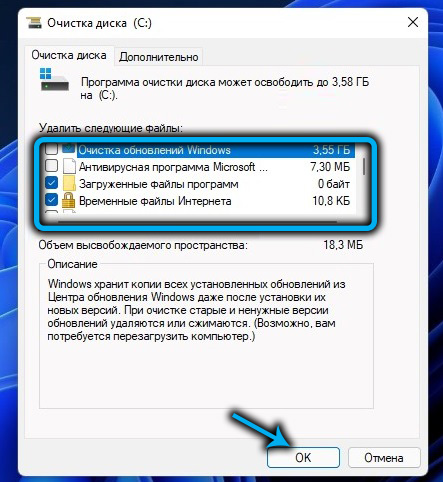
- again you will need to select the drive, this time the system drive, usually it is denoted by the letter “C”. As a result, new components will be added to the previous list, which can also be checked or unchecked;
- Click OK to clean up the disk.
If desired, before clicking OK, you can view the files selected for deletion by clicking on the appropriate button. If you are not sure about your choice, it is better to take this opportunity. You can also estimate how much disk space will be freed up – if the previous cleaning was done a long time ago, we can talk about several gigabytes.
Flushing the DNS Cache
To speed up access to network resources (primarily websites), the domain name server creates its own cache, which really helps to load them faster, but in case of any changes on the remote server, the sites will not be loaded, since the data will be taken from the cache, not from the actual DNS table.
Such situations are rare, but if the desired site does not load, the situation can be corrected by performing the DNS cache flush procedure:
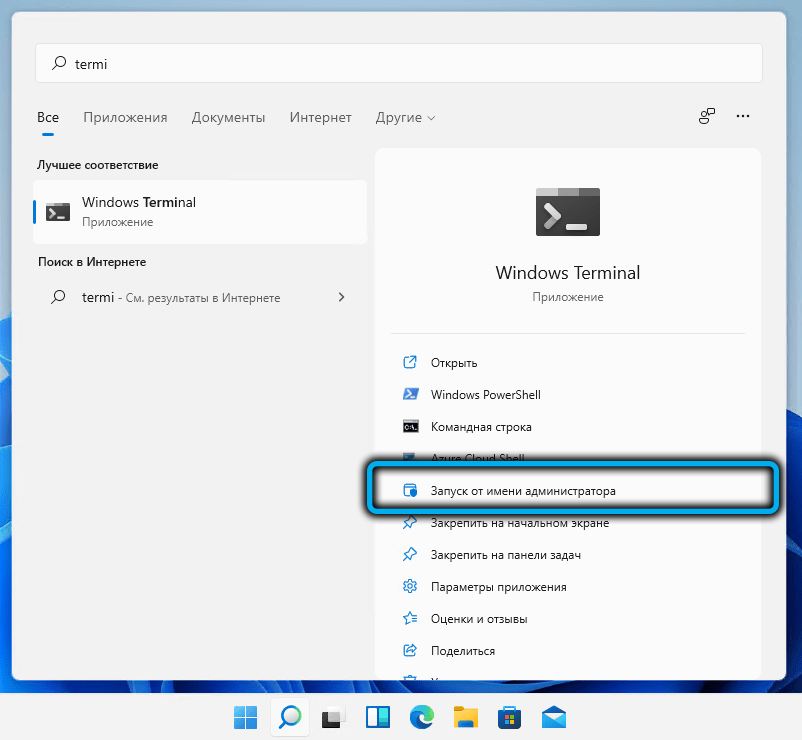
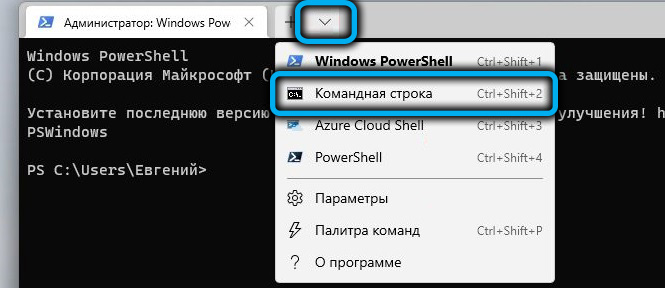
- in the search bar, start typing the word “Terminal”;
- as soon as the result appears, click on it;
- in Windows Terminal, select the command line profile or PowerShell;
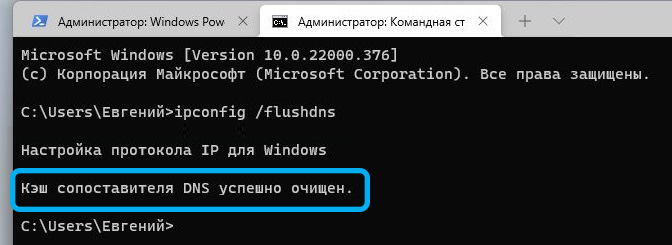
- in the console, type the command ipconfig / flushdns, confirm by pressing Enter;
- close the Terminal.
As a result, the DNS cache will be cleared, and each new site load will be slightly slower.
Clearing the location cache
In older versions of the operating system, there is a location function, which in some cases is very useful. This data is also subject to caching, and periodically this cache also needs to be cleared:
- launch the “Settings” application;
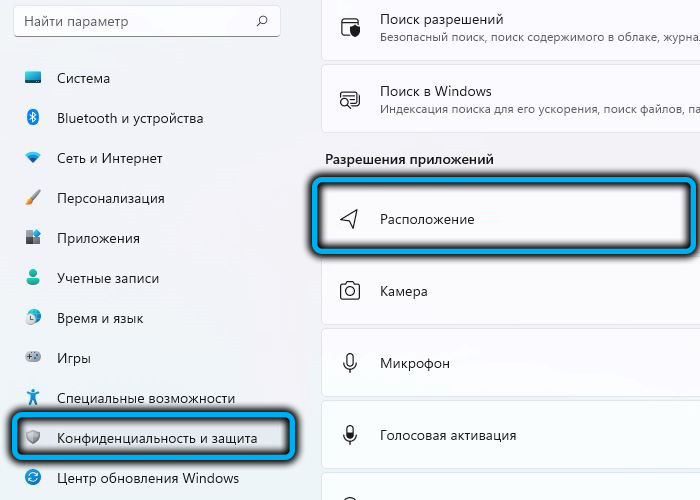
- select the “Privacy and Security” section in the left panel;
- in the right block, scroll the list to the “Application Permissions” section and click on the “Location” parameter;
- click on the “Clear” button for the “Location Information Log” option.
All location related data will be cleared.
Clearing the Microsoft Store Cache
Every time you visit the app store, you’ve probably noticed that the app remembers all your previous searches. Yes, this is also a cache, when you clear it, you will also reset your search history.
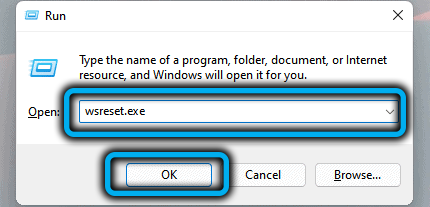
Although this feature is useful, there are situations when you need to hide what you were looking for from prying eyes. This is done quite simply: in the Run console window (launched by the Win + R combination), you need to type the wsreset.exe command and press OK or Enter. As a result, a black window will appear, which will disappear as soon as the contents of the Microsoft Store cache are cleared.
Clearing the browser cache
In a time when the speed of the Internet was quite slow, the ability to quickly load previously visited sites by storing their elements (pictures, videos, code snippets) in the cache was a great boon.
Now this is much less of a problem, so the caching of web pages by browsers is largely a redundant operation, and the file folders themselves can become huge. But the need to free up disk space is not the only benefit of clearing the cache: it sometimes causes pages to load incorrectly, which can be a big problem.
You just need to take into account that the browser cache is stored in different places and the way to reset it also depends on the specific Internet browser. Let’s look at how to reset the cache using several common browsers as an example.
Microsoft Edge
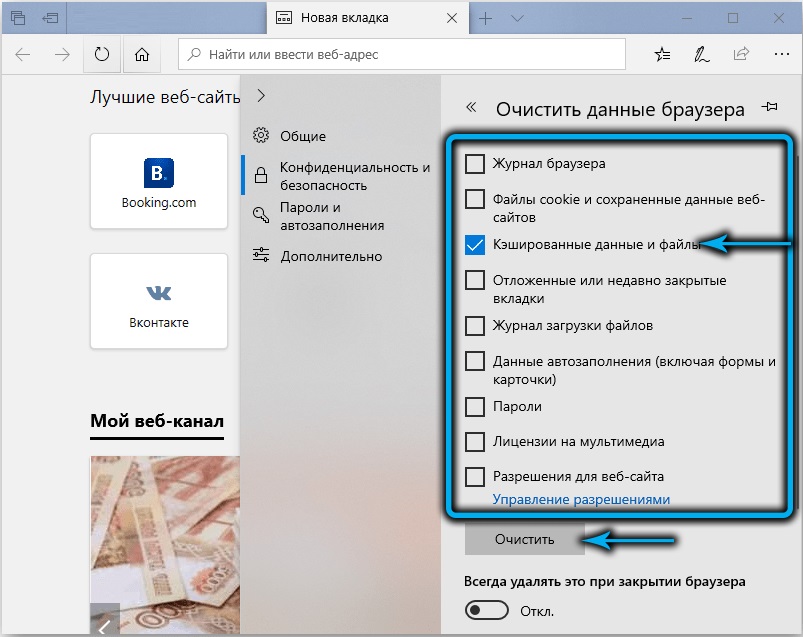
Open a new tab and enter the following address: edge://history/all. After pressing Enter in the window that opens, click the “Delete web browsing data” button. In the parameters window, you can specify the time range for deletion, as well as tick the necessary categories for deletion. In our case, this is the Cached Images and Files option. It remains to click on the “Delete now” button, and the cache of the Microsoft Edge web browser will be reset.
Google Chrome
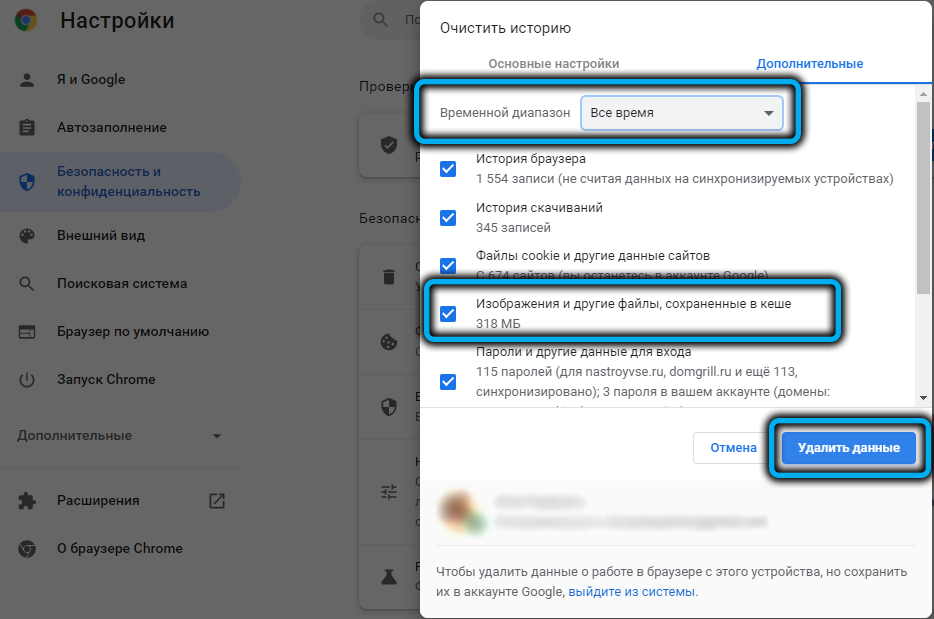
In this no less popular browser, clearing the cache is also quite simple: click on the three vertical dots in the upper right corner of the browser, select the “History” menu item. The same result can be achieved using the keyboard shortcut Ctrl+H or by typing chrome://history/ into the address bar. It remains in the left panel to click on the “Clear History” button. Approximately the same window will open as when deleting in Microsoft Edge, with the ability to select the time range for deletion and check the boxes for the desired positions. Note that it is not advisable to delete cookies – they do not take up much space and make it easier to load sites that require authentication. As for the browser history, everything is individual here – many people actively use this feature to search for previously visited web resources.
Conclusion
As you can see, in order to clear the cache on a computer running Windows 11, you will have to tinker a bit, but in any case, this procedure is considered useful and even necessary. As for the regularity of its execution, in the absence of problems associated with the growth of cache files, you can clean up about once every six months, sometimes more often, sometimes less often. And remember: the cache always accumulates, and the longer you do nothing, the more space it will take up on the disk, slowing down the computer.
